©2024 Teri Hanson – The Covered Chipboard
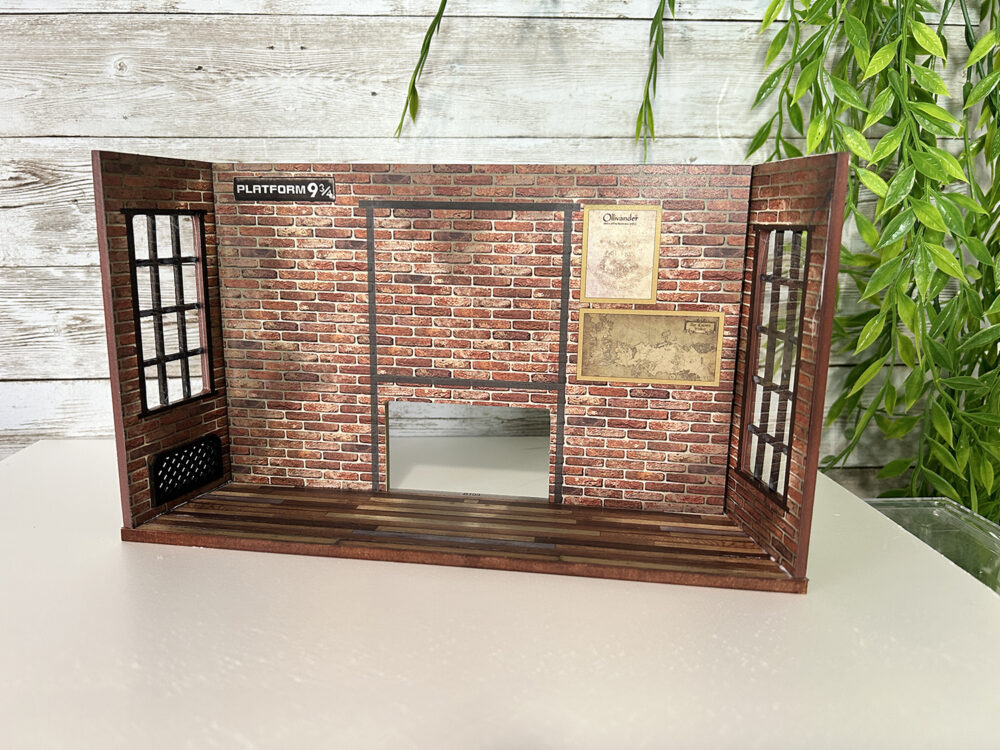
We ended part 1 with the inside back section being finished. Let’s finish up the backside and the windows on the left and right sides while making them look a bit nicer.
I’ve included the YouTube video below for those who prefer a visual reference.
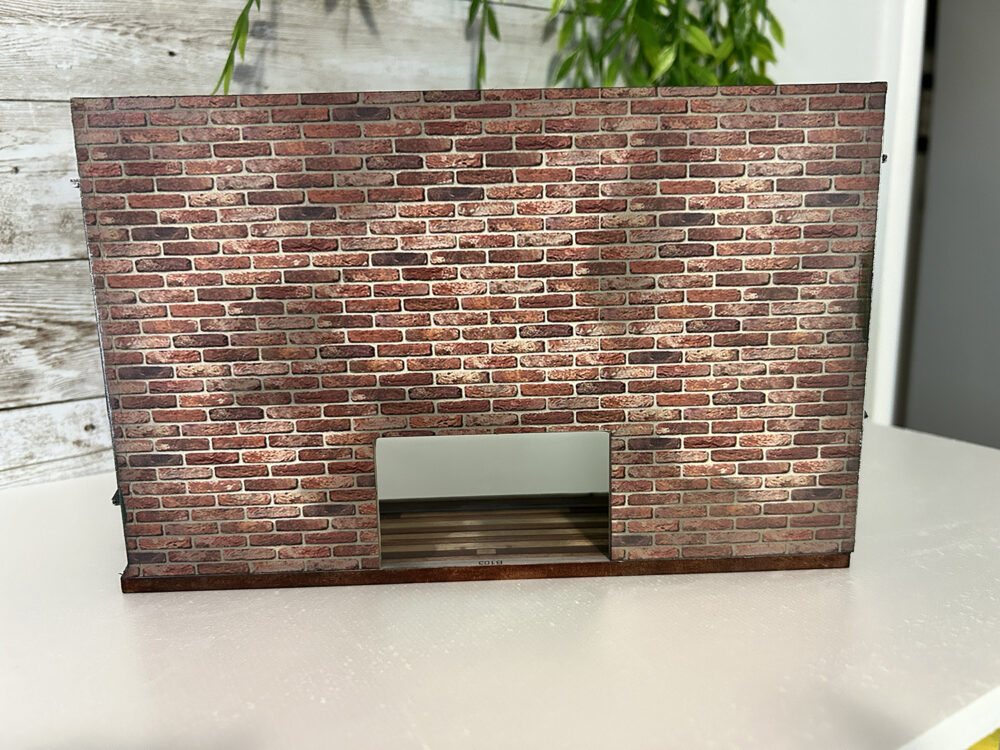
I did decide later on to add the brick paper to the back of this section and distress it with the Black Soot distress ink. I’ve used a #96 Mahogany alcohol ink pen to color the bottom and side edges as you can see above.
This way if the back shows it looks nice and I didn’t spend hours on it making a ton of tiny bricks!
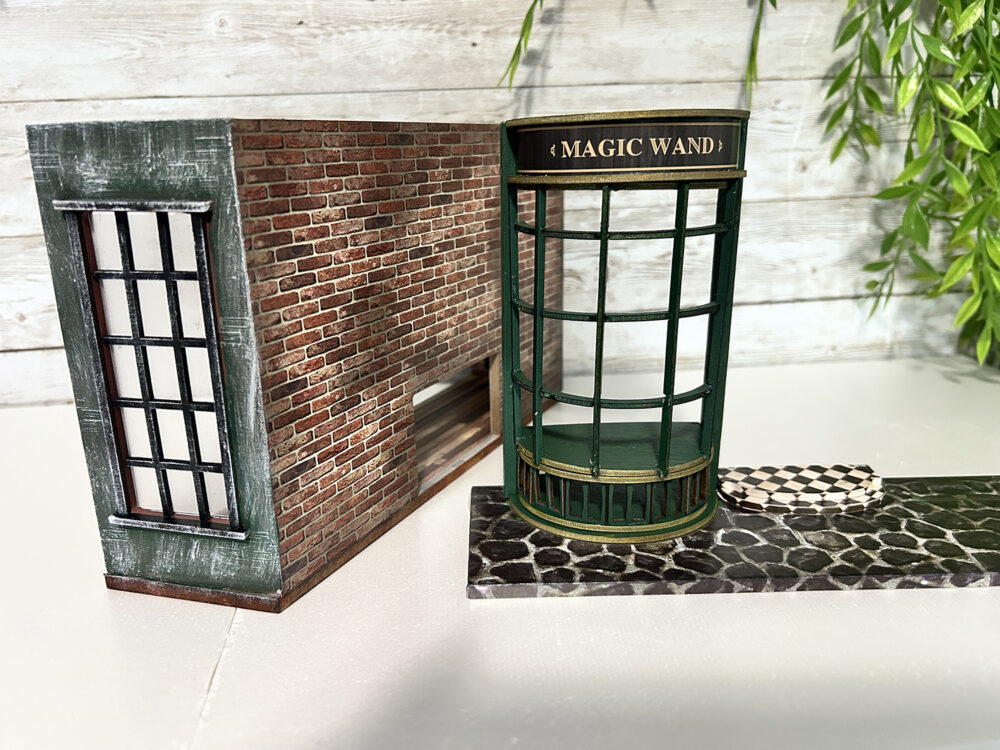
I was not crazy about the red color, with fake bricks, on both the left and right sides so I decided to paint them green to match the front section. This just made more sense to me visually.
You can see here that I’ve also added the window trim pieces. Note that the top and bottom pieces were left with a raw edge. I’ve colored those with a black Sharpie marker.
I’ve painted two coats of FolkArt 924 Thicket paint which is pretty darn close! Next, I used white acrylic paint and dry brushed both the green areas as well as the black window trim.

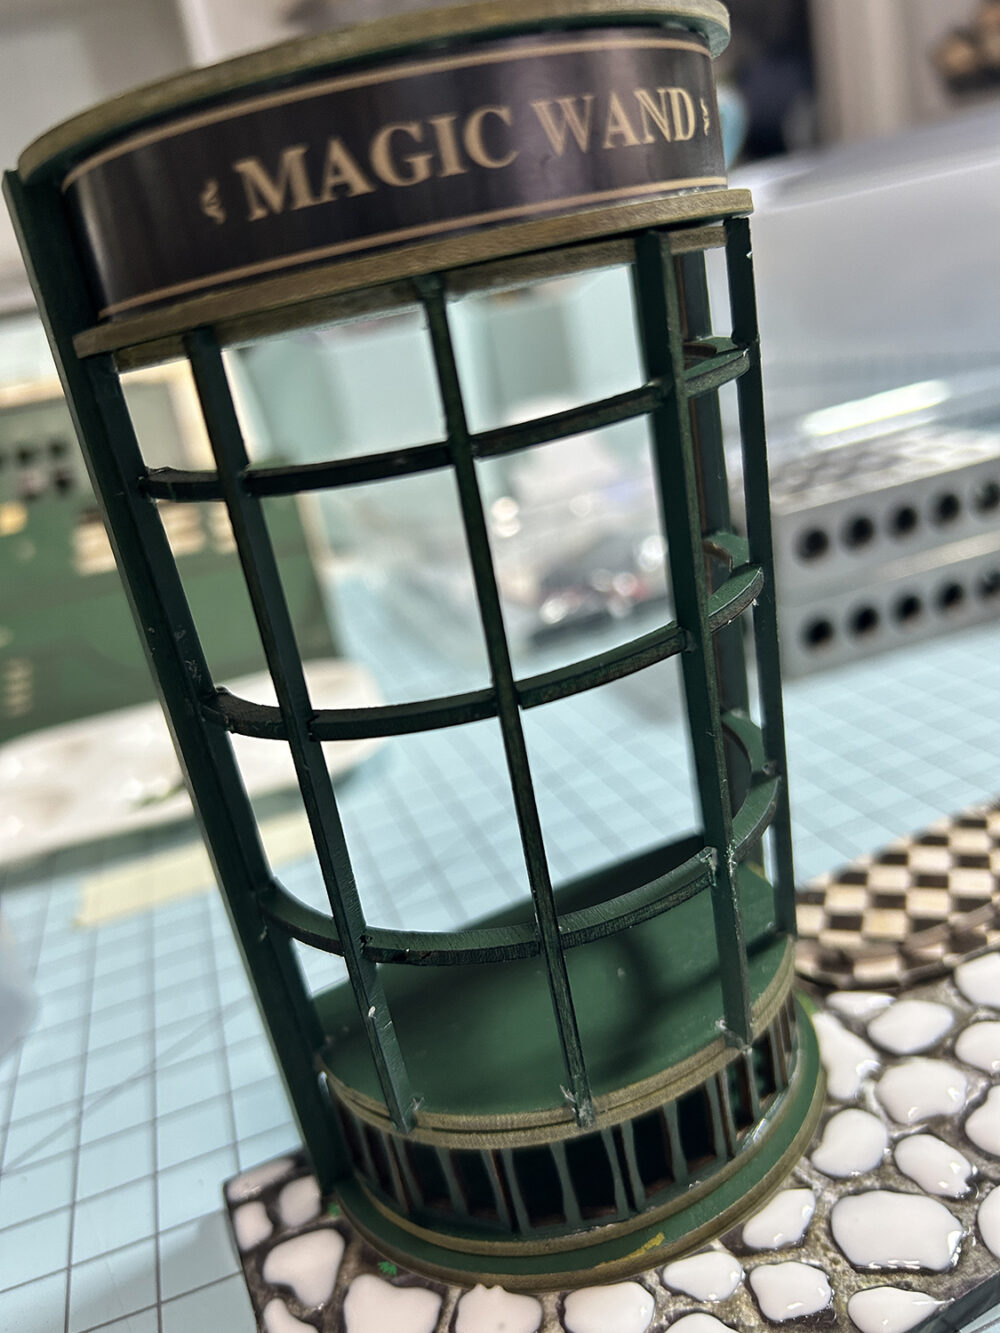
This curved shop window will most likely be the hardest part of the build. It’s very fiddly and after two attempts to build it standing up, I found that it’s much easier if you lay it down on the table!
VIP TIP: You need to build the bottom section and add the thick posts on the left and right sides then stop and let these DRY. You also need to be sure that those posts are STRAIGHT! If not, you will have trouble getting the notched posts and curved sections all put together!!!
Once the first part is dry, glue the notched curved sections in place and let them dry. Keep these as evenly spaced and straight as possible. When these are dry you can glue the thin posts in place. Let this section dry before moving on to the top section.
Lastly, glue the top section together, add the paper sign, glue the final top pieces on, and let this all dry well.
Now we will work on the base. As you can see, I’ve decided to use the base cobblestone paper from the kit but we will be enhancing it in part 3.
Glue the paper onto the base now and let it dry. Next, you can add the curved shop window onto the base in case you have not done so at this point.
The next step will be to build the steps and add them to the base. Simply glue the paper pieces onto each step, glue the two steps together, add the edge stickers to the steps, and glue the entire piece to the base. Lightly distress the steps with the Black Soot distress ink.
We will be distressing the shop window like the back side windows after we get the next two sections added. That will be in the next part. I’ve also found a fun way to add more dimension to the cobblestone paper but that’s for next time as well.
So I hope you are having fun with the project and I will see you next time!
Teri


Leave a Reply
You must be logged in to post a comment.