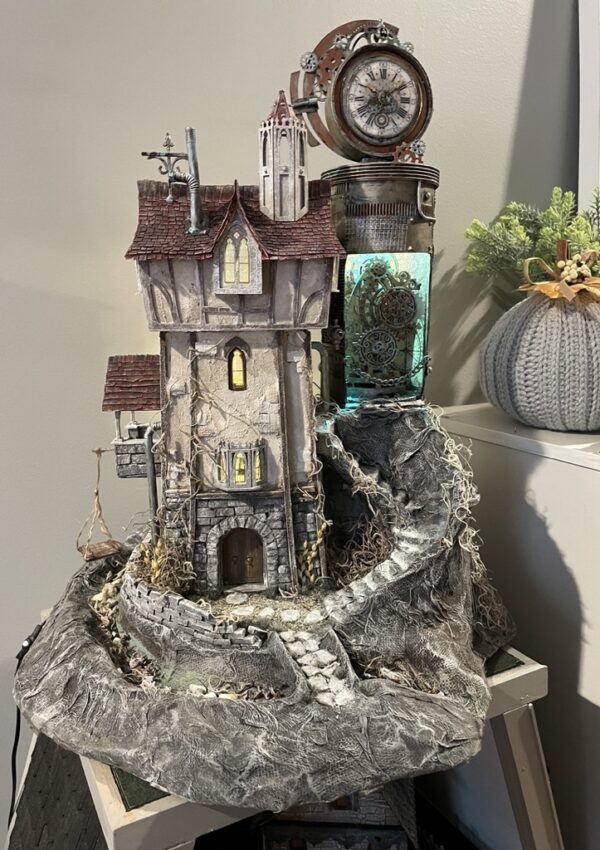
I’ve always loved Grandfather clocks but have never had the pleasure of owning one so I decided it was time to create my own! If you follow me you have noticed that my most recent larger project was the Steampunk Clock Tower. Still in the mood for the steampunk vibe, I decided to use it on the grandfather clock as well. I hope you find the project interesting and are inspired to create your own!
NOTICE …… THERE IS A FILE UPDATE FOR THIS PROJECT AS OF 6/24/23. PLEASE DOWNLOAD YOUR FILES AGAIN AND REPLACE FILE 03 WITH FILE 3B. CONTACT ME SHOULD YOU RUN INTO AN ISSUE DOWNLOADING THE FILES AGAIN.
You can find my Grandfather Clock SVG pattern in the store if you’re so inclined to make your own.
Materials . . . below is a list of the materials I’ve used. You can substitute cardboard for the chipboard if you like or any other sturdy material. To cut this chipboard on your Cricut Maker machine, use the (Chipboard 1.5mm) setting with a new blade.
***Disclosure: Some of the links below are affiliate links. This means that, at zero cost to you, I will earn an affiliate commission if you click through the link and finalize a purchase.
- Graffix Medium Weight Chipboard – Black
- Working Clock
- Glass vials
- Tiny miniature magnets
- Clear plastic
- Wood Beads
- Plastic Bendy Straws (optional for pipes)
- Wood Dowels (optional for decoration)
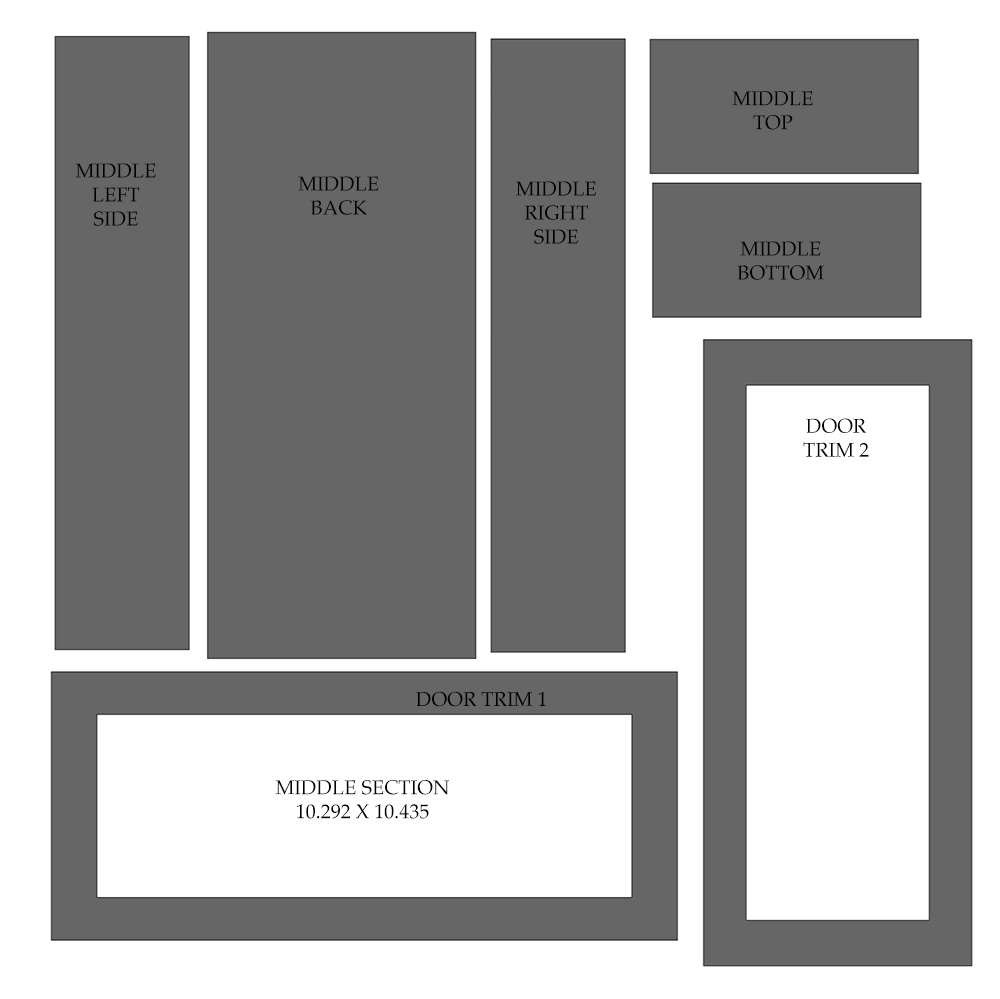
Notes . . .The clock is built in three sections: top, middle, and bottom. Use the key below (also included in the download as a PDF) to help you identify the pieces along with measurements for when you upload the SVG files to Cricut Design Space. I’ve also included a single 1″ by 1″ red square on each file to help you size the file. You can delete the red square once you have the correct size if you like.
NOTE: There are three files inside the download. They will upload as a single file. If you wish to manipulate single elements you will simply need to use the “Contour” button within design space, and turn off the elements you do not want to use leaving the single element you want. You can do this as many times as you like to separate all the elements. I would advise you to keep an unaltered copy of the SVG files someplace safe just in case you want to use the files as is.
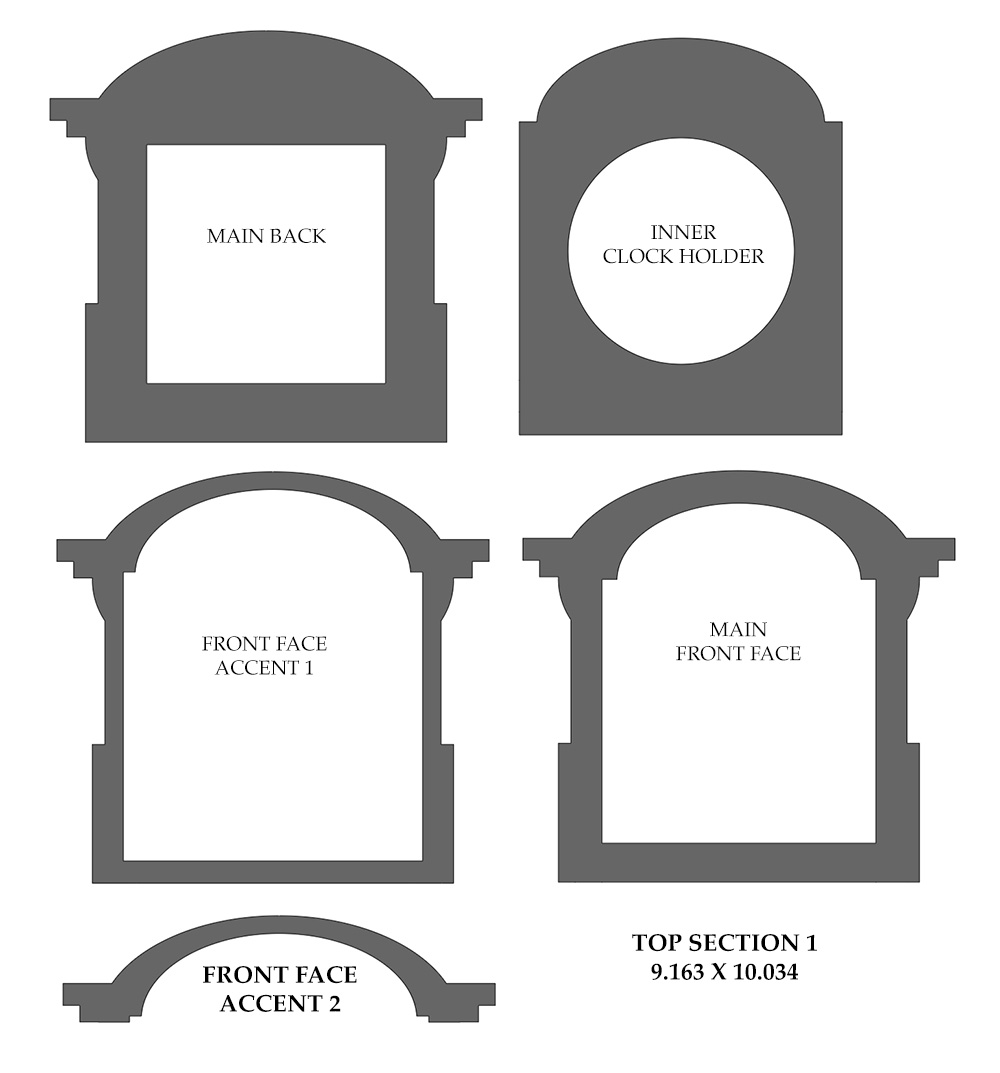
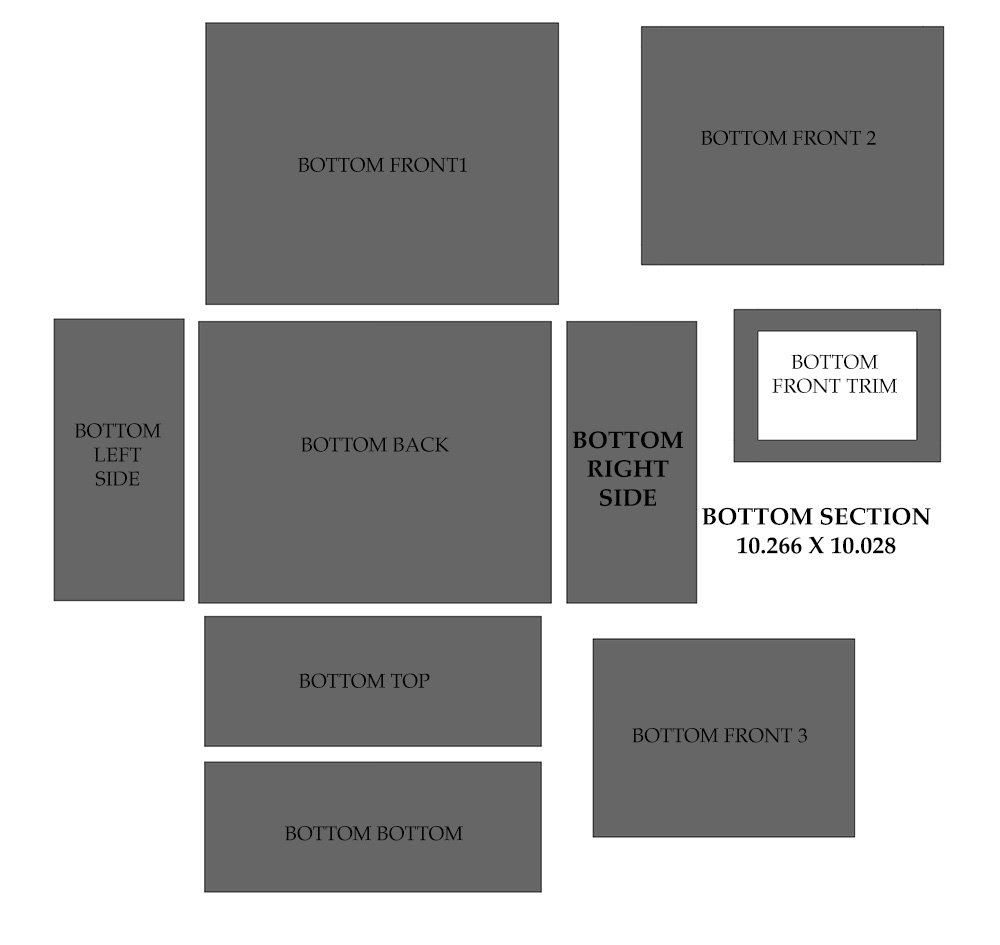
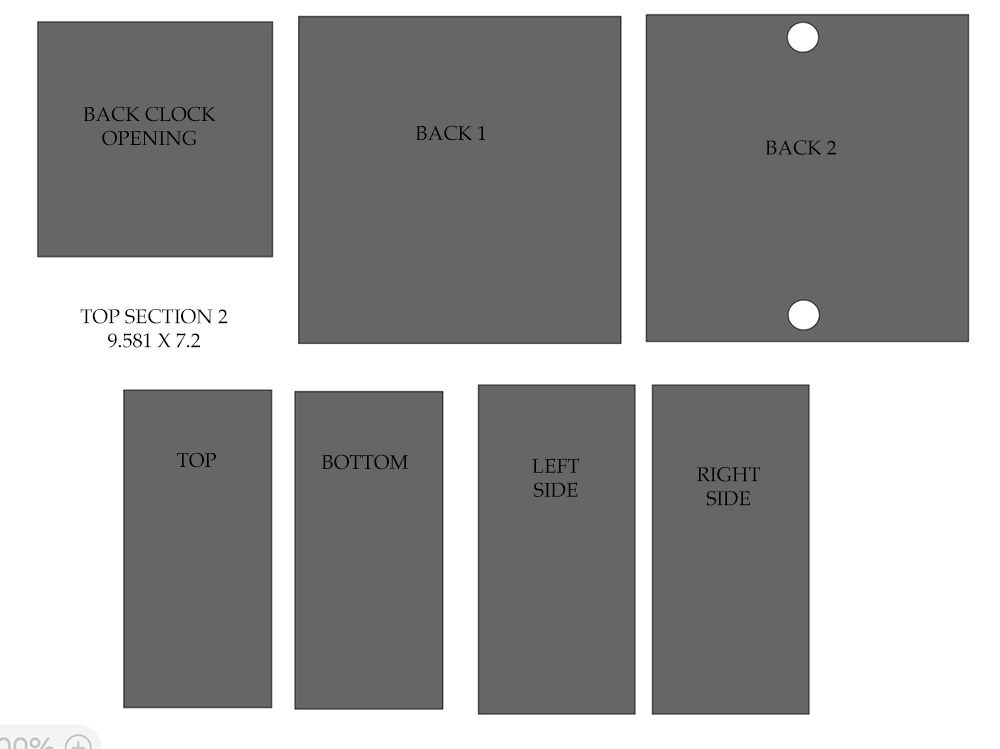
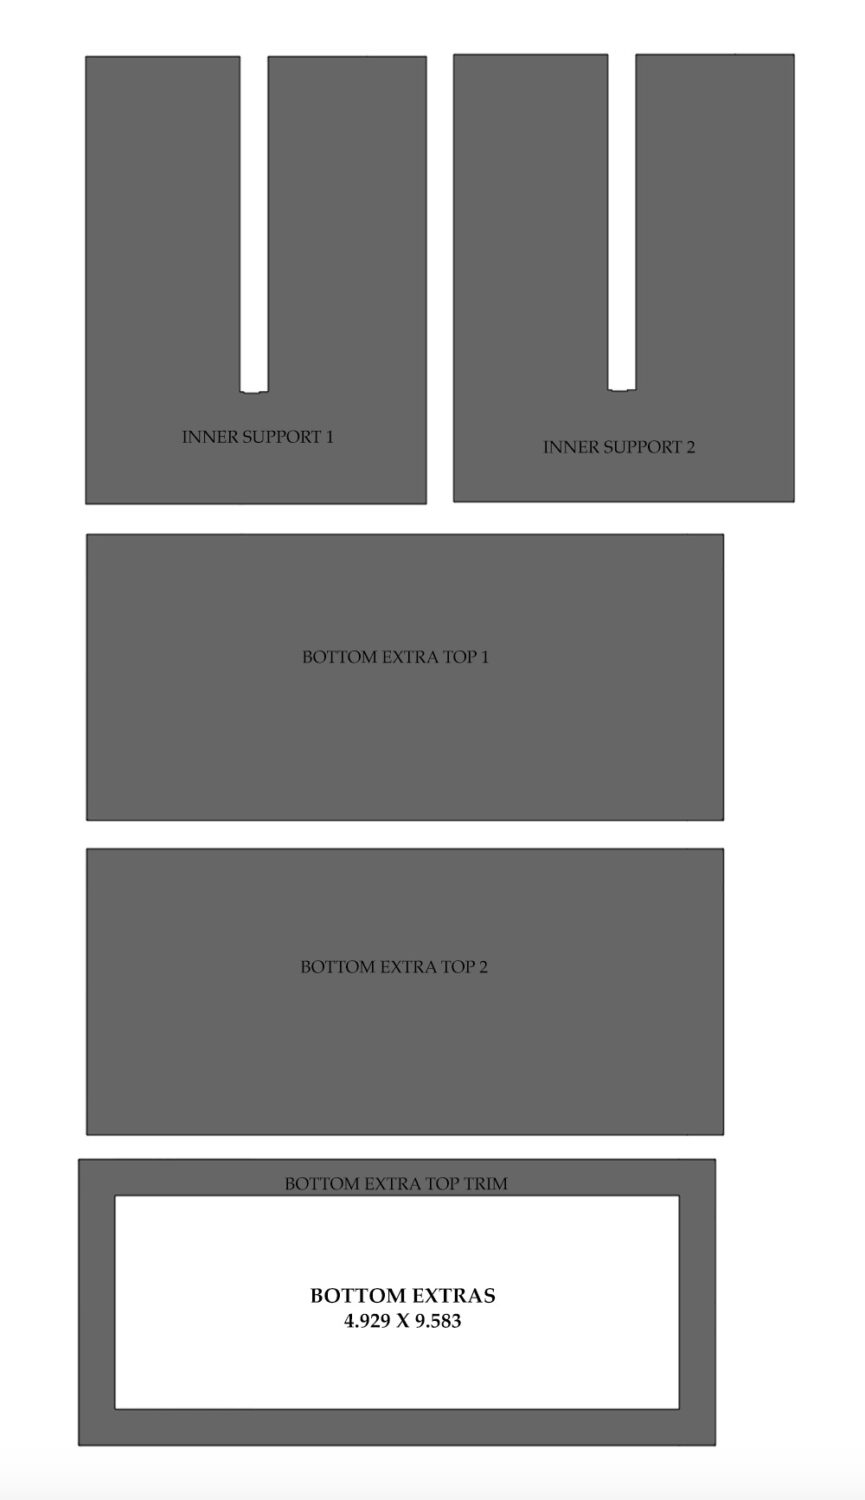
NOTE: If you plan to paint the clock and have used the black chipboard, you should spray seal the piece before painting or gluing the clock in as the black dye of the chipboard can bleed into the paint!
Putting it together . . .
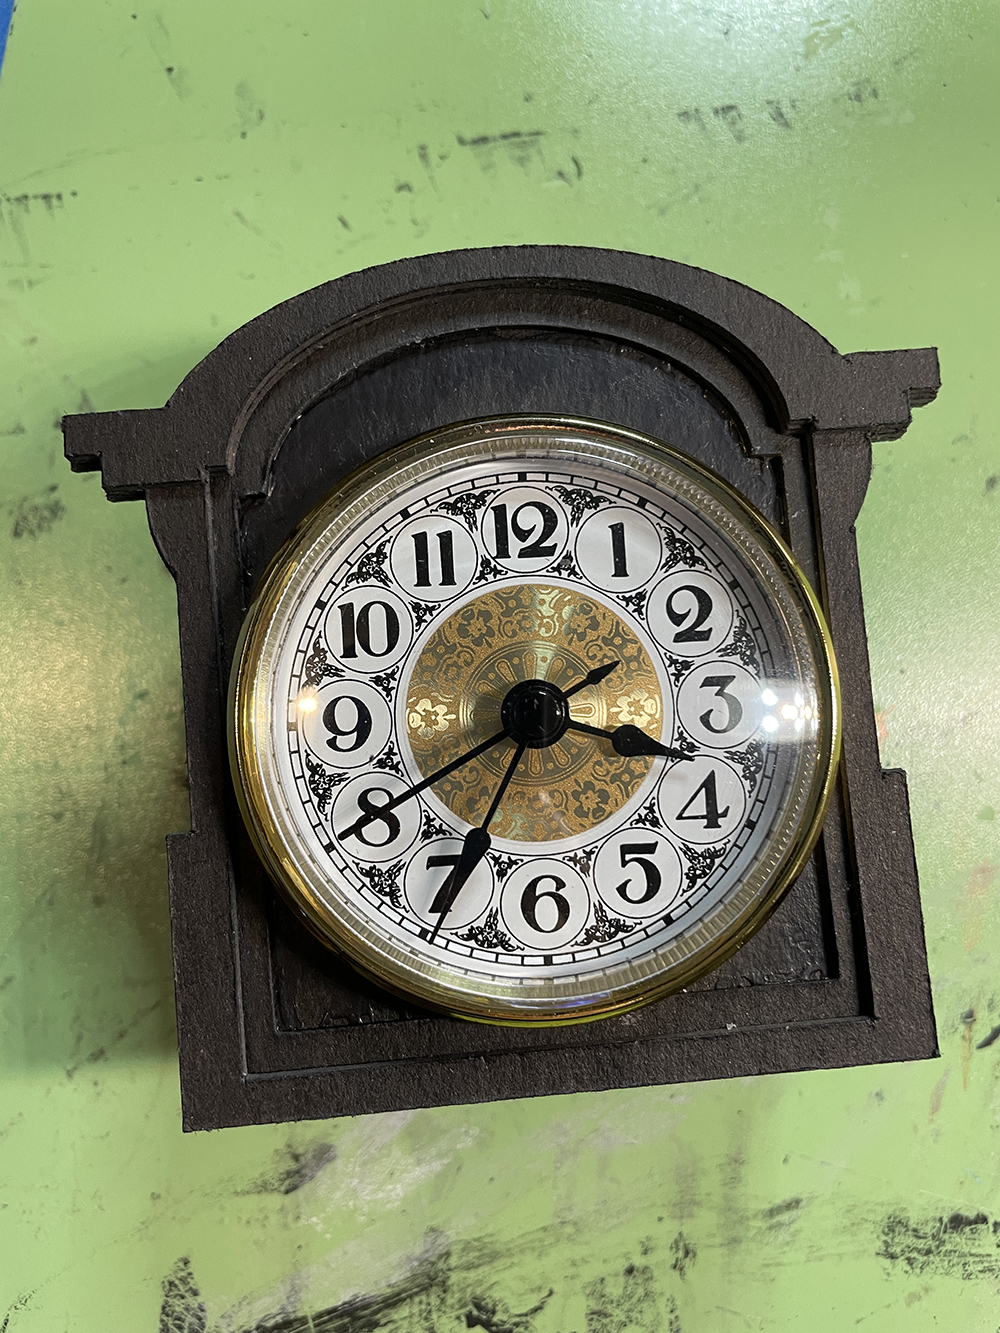
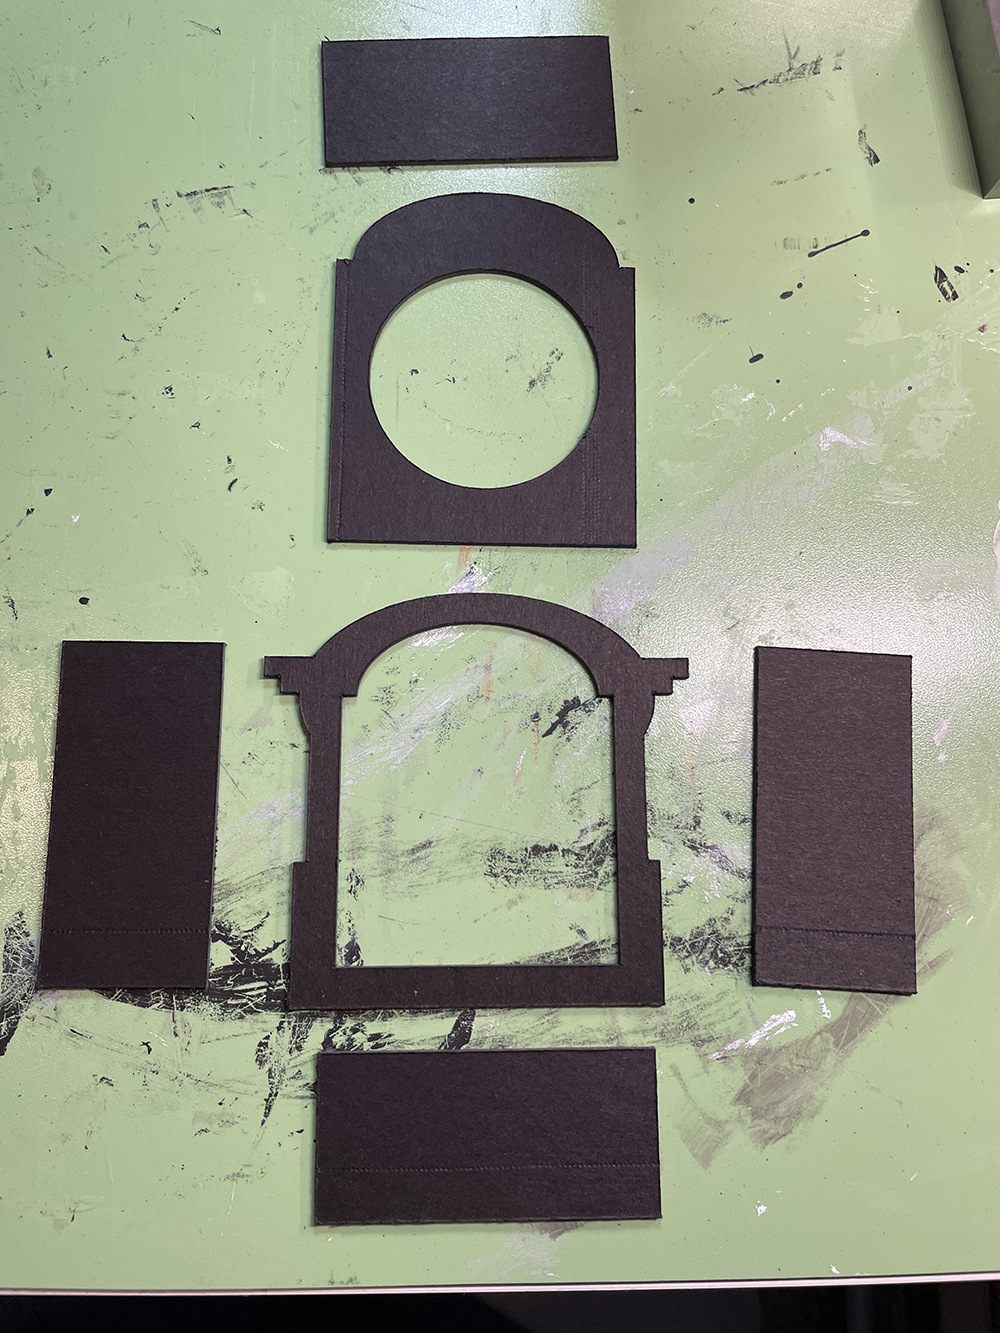
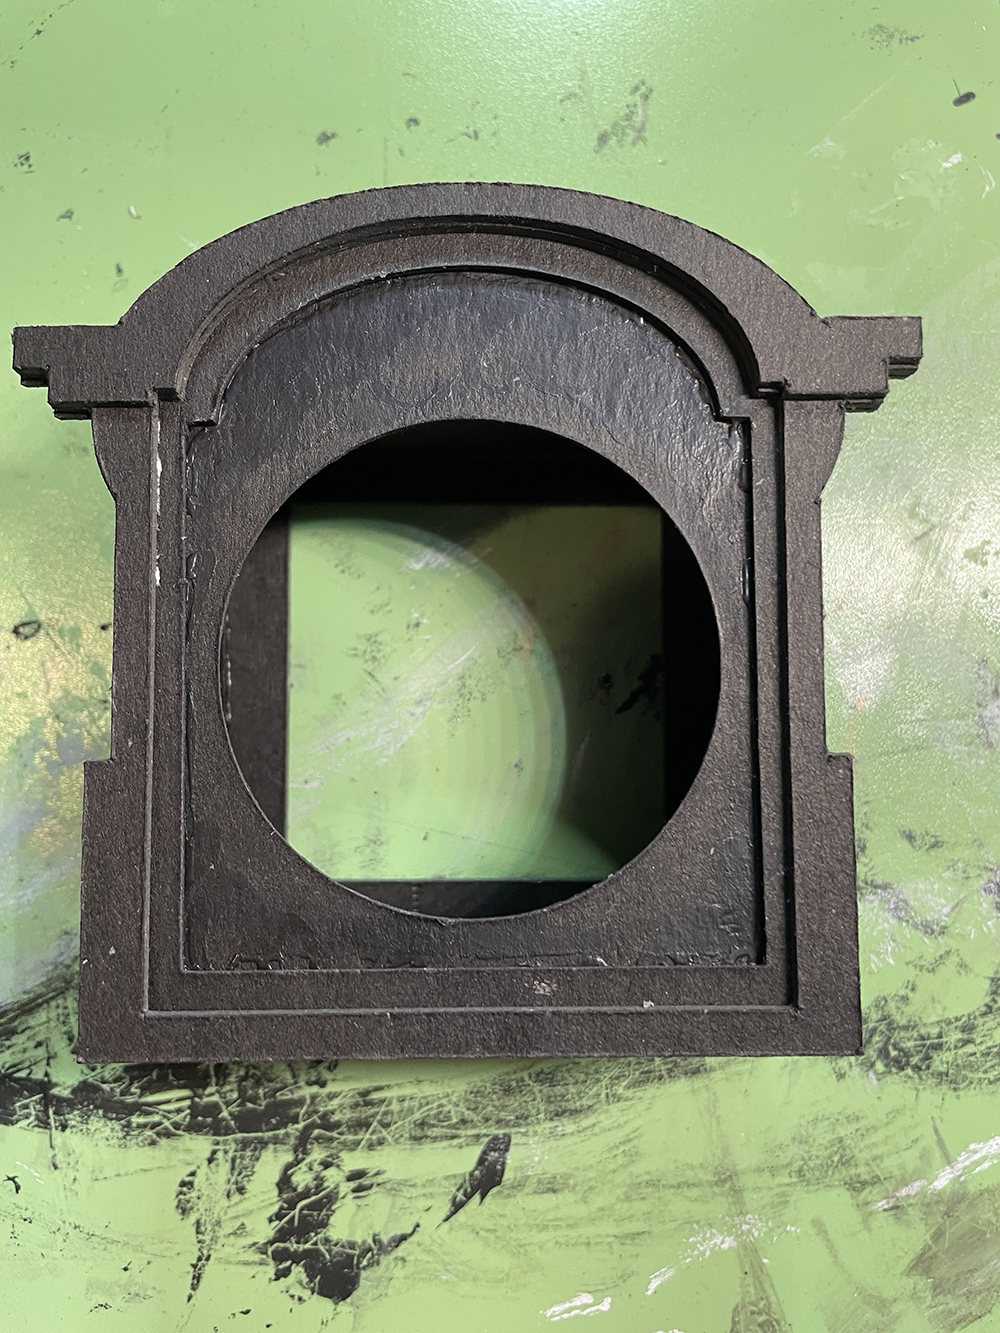
Starting with the top section, glue the inner clock circle piece to the back of the main front face piece making sure the circle piece is flush at the bottom and centered on the left and right sides.
Locate the four rectangles. The longer rectangles are for the sides. The shorter rectangles are for the top and bottom. Glue the two longer rectangles on the left and right sides butting them up to the edge of the inner clock circle and flush with the bottom.
Now you can glue the top and bottom rectangles in place. These are placed inside the side pieces as seen in the third image below.
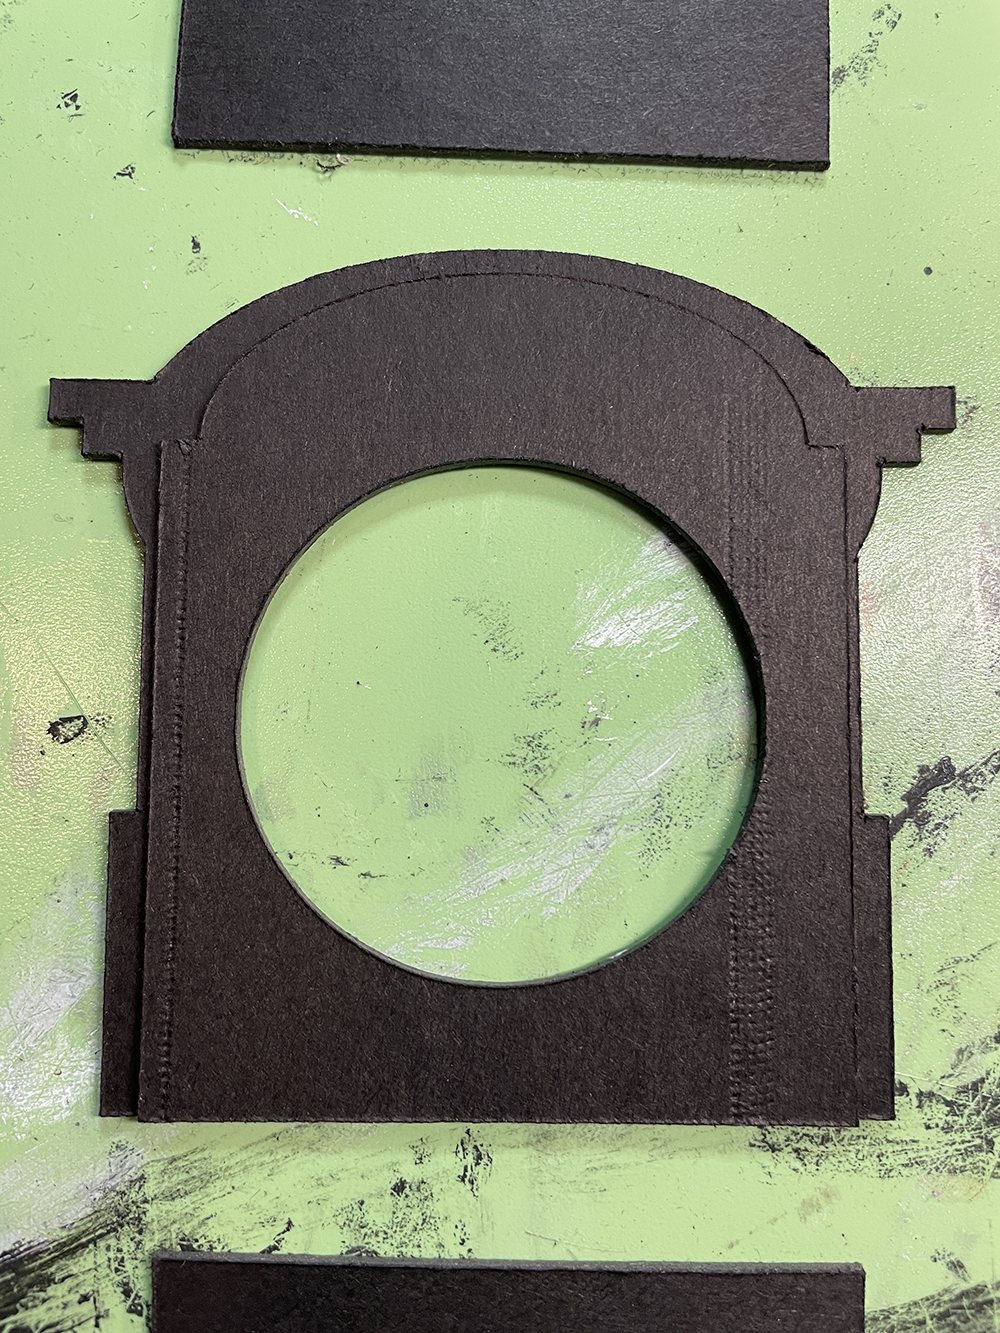
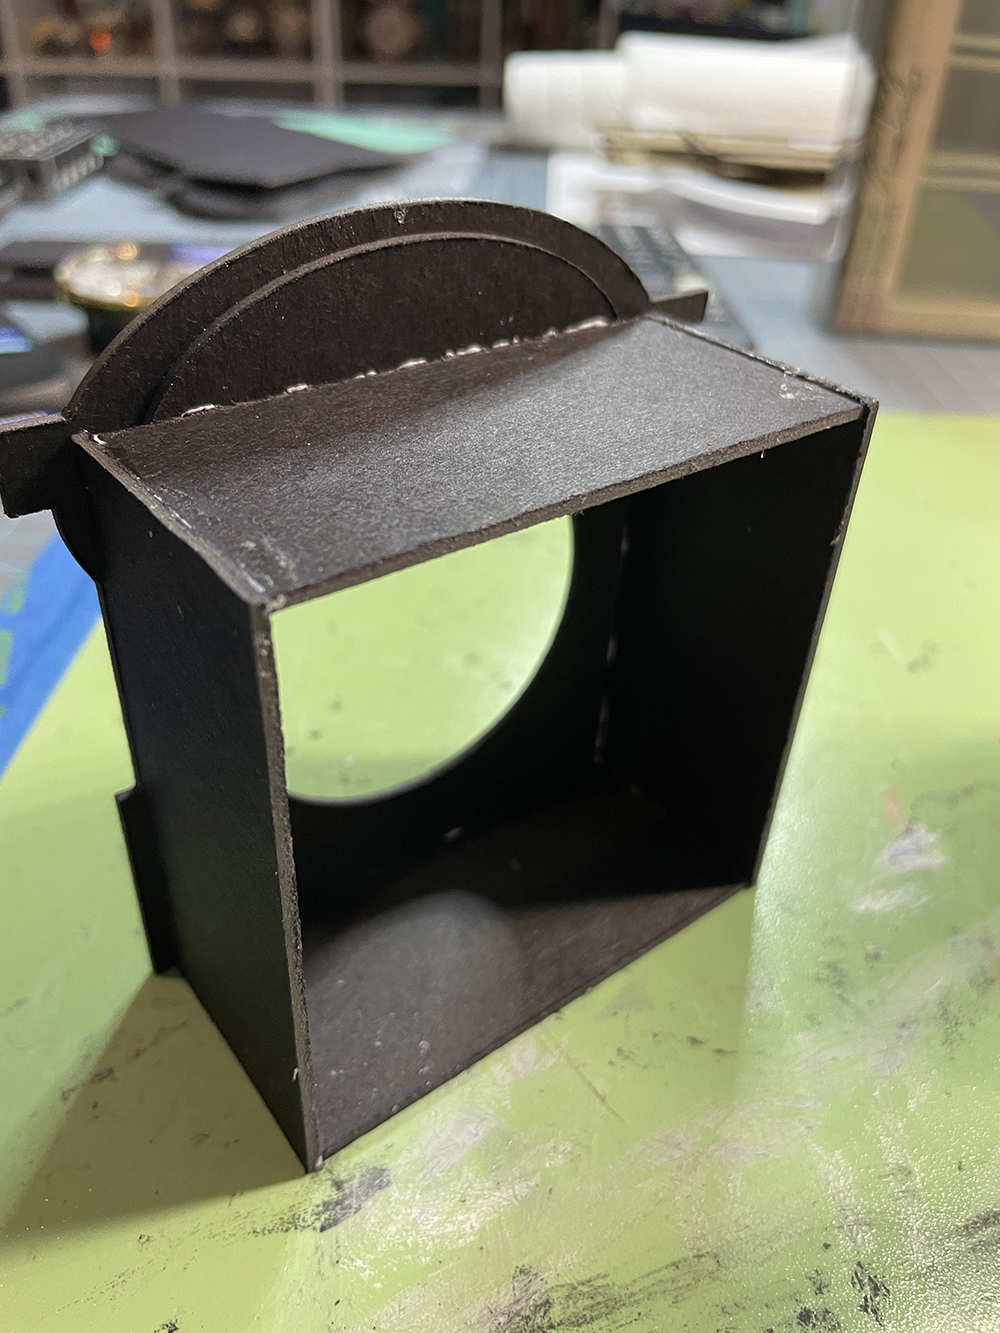
Now you need to build the back and attach it to the previous part we just built. I’ve used tiny magnets to hold the back in place and keep it removable. This will allow you to access the clock to set it or change batteries as needed.
First, glue the main back piece on making sure it’s flush on the bottom and center sides.
Now glue the small square to the back square making sure it’s aligned with the cut-out and the very back is flush with the bottom.
Glue a small magnet into each of the two holes. Let dry!
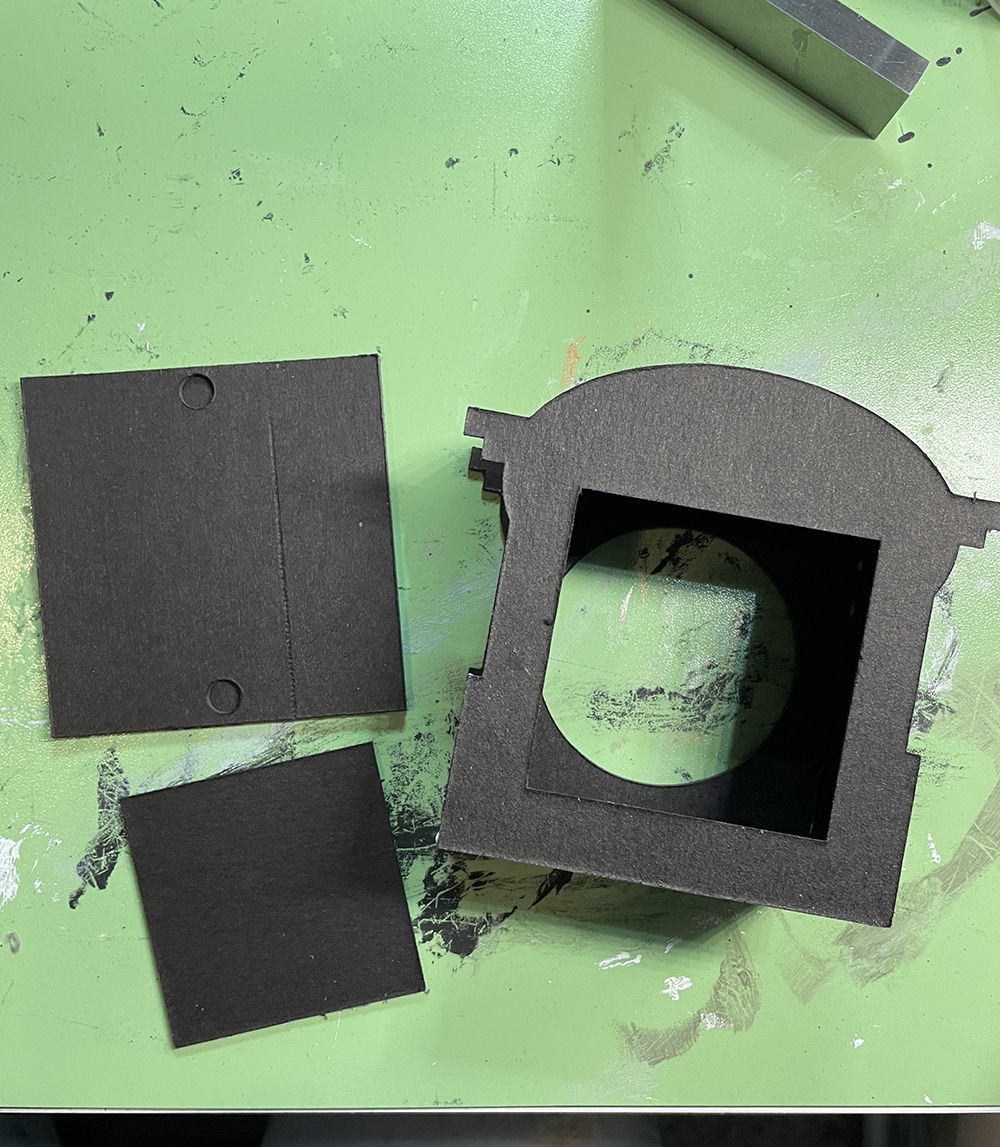
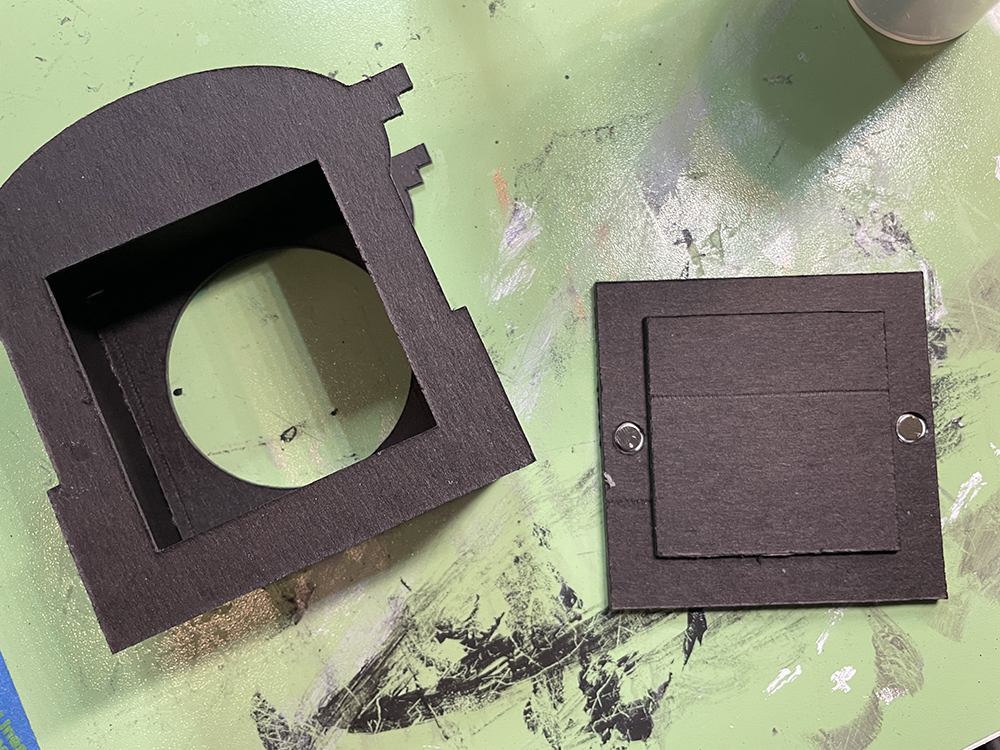
Add one more magnet to each you glued into the hole, apply glue to the back then place onto the main section. The glue will mark where you need to glue the other two magnets on the main section so that they match up with the ones inside the holes. Let dry!!!
Glue the small upper main face piece to the remaining main face piece then glue these to the main face front side. The clock should slip right into the front hole and remain secure. I’ll leave it up to you should you want to glue the clock in place or just slide it in.
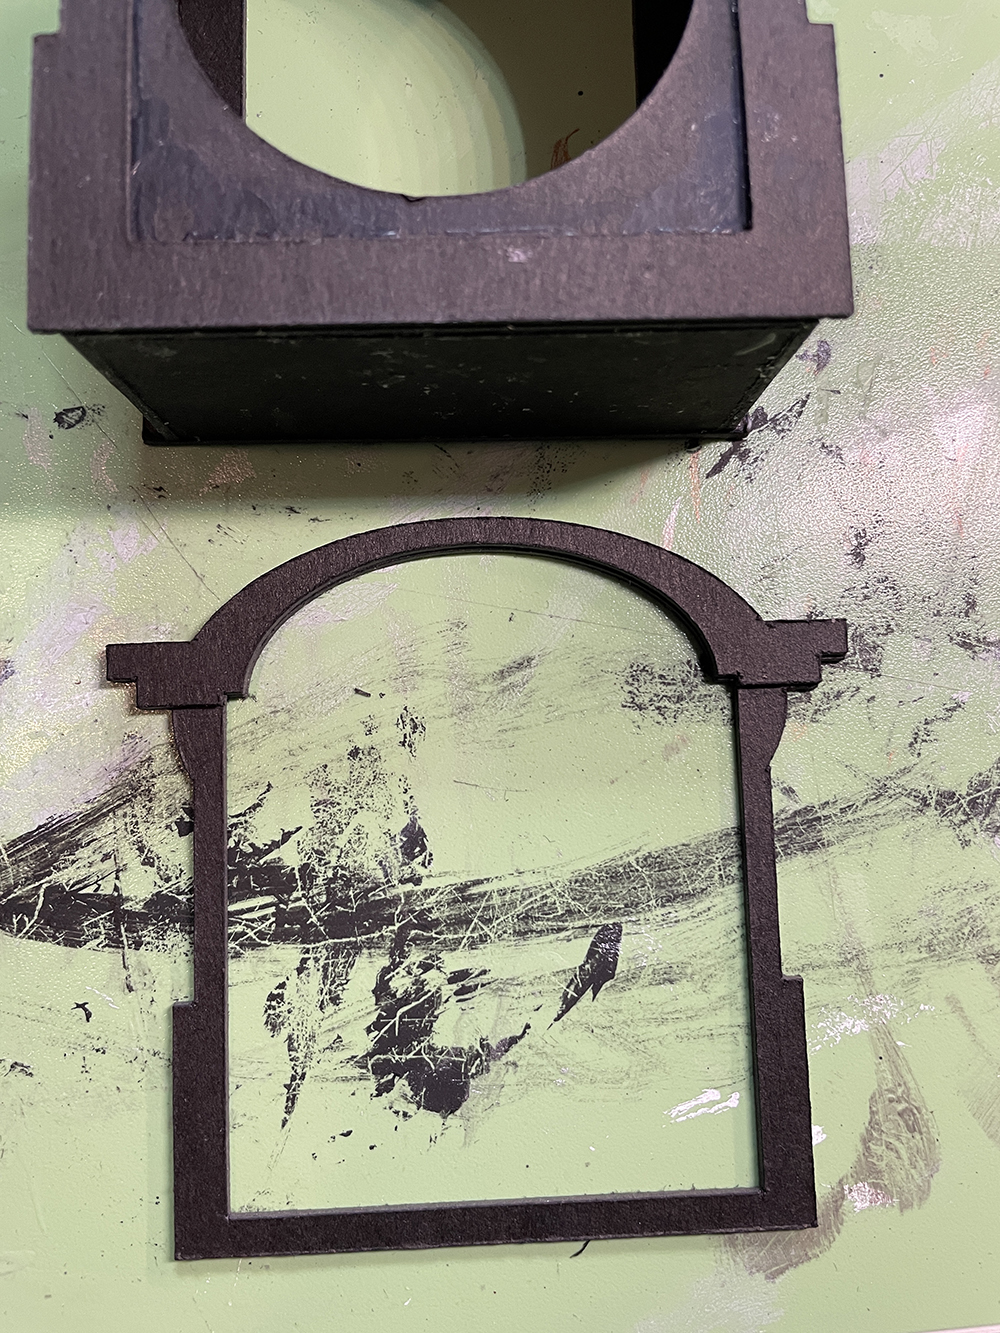
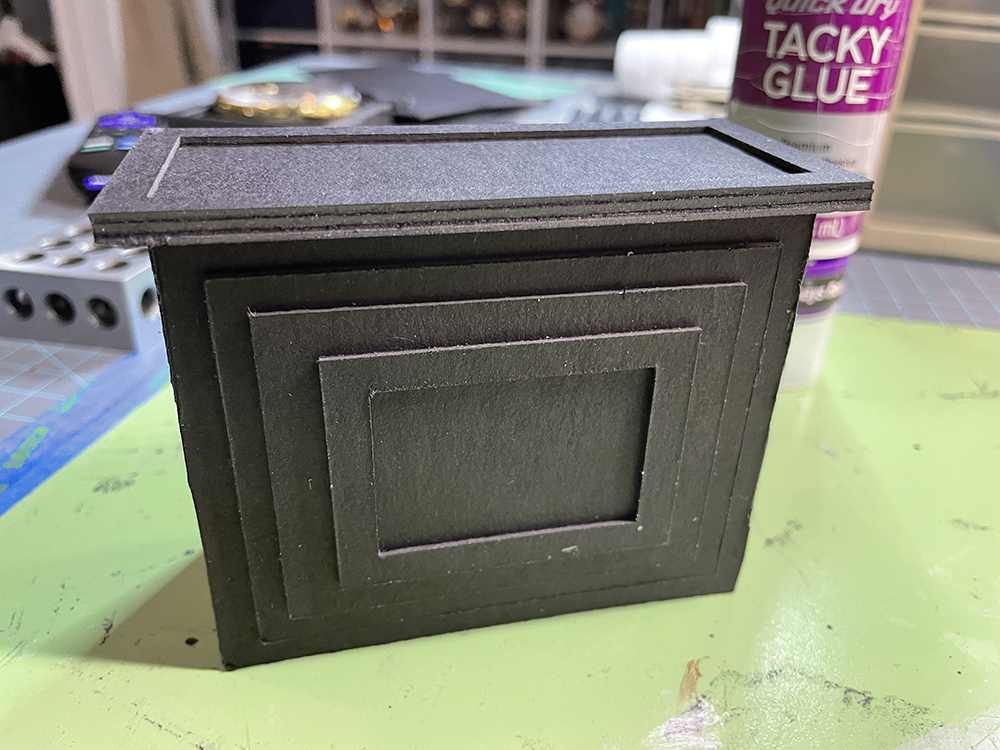
Next, we will build the bottom section. I’ve created the bottom to be completely closed in but you could easily add a hole in the center top piece, add a door, or a shelf inside.

If you make the clock bottom as designed, the two U-shaped pieces are to be slipped together and placed inside as support for the upper sections. This is probably not needed but, better safe than sorry in case you get the upper sections heavy with embellishments.
Glue the clock bottom front pieces as seen below.
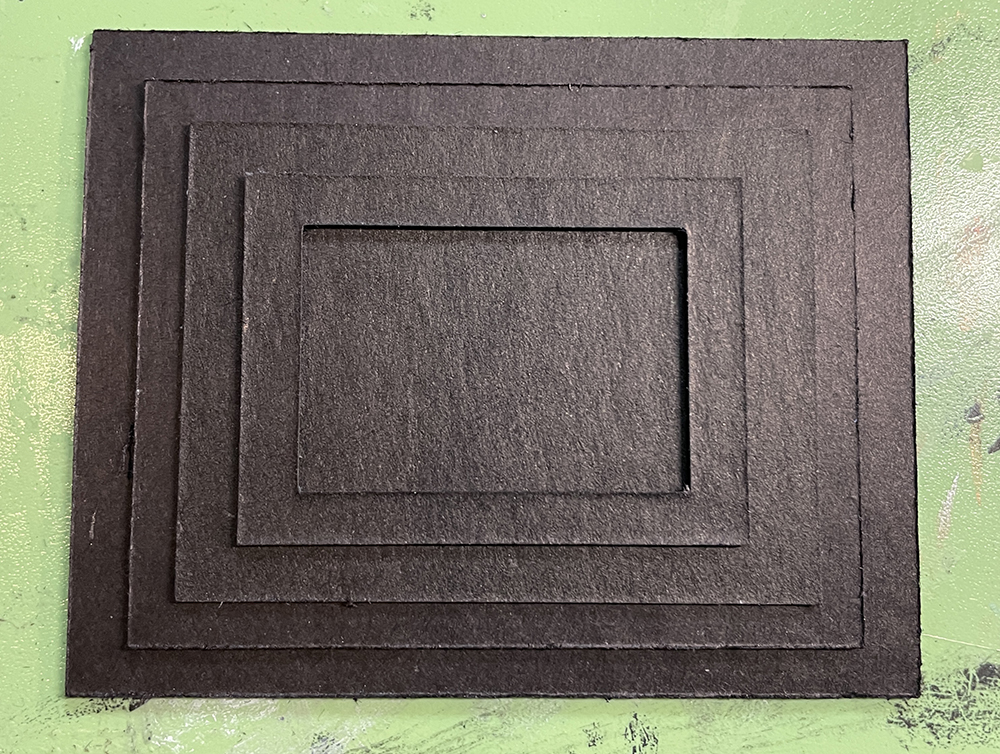
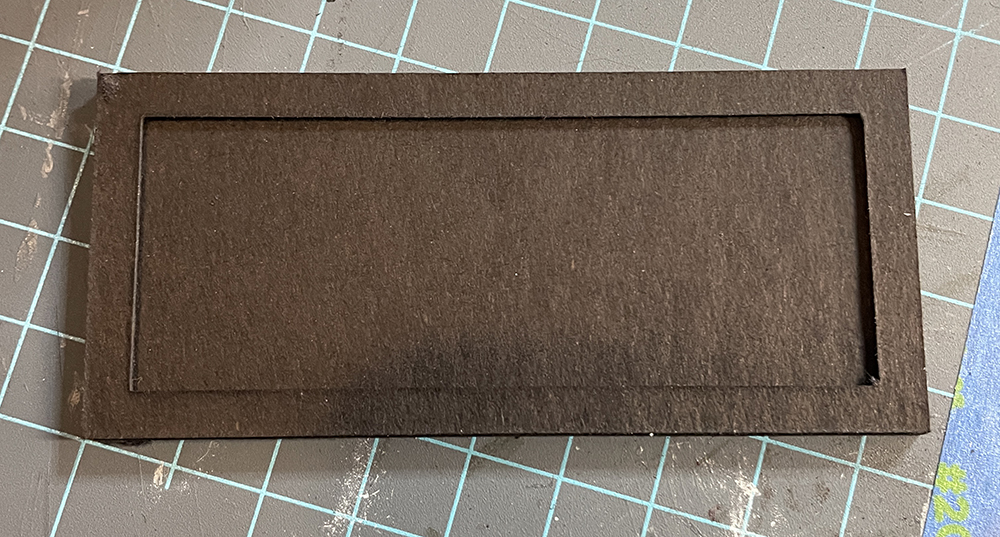
Build the bottom top section next by gluing the window trim piece onto one of the top rectangles and then on top of the remaining top rectangle.
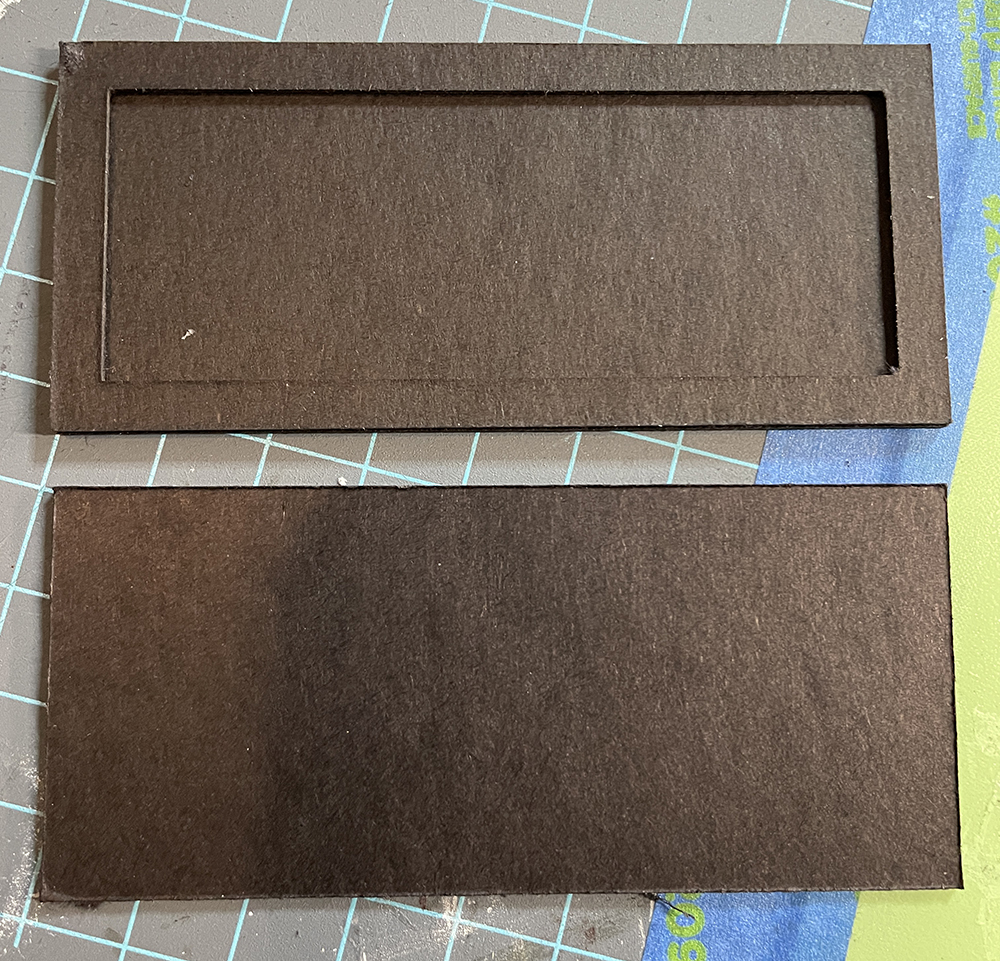
The remaining bottom section is simply the back half of a box with the front we just built attached. The top, bottom, and side pieces are all glued on top of the back piece inside. Once again, the U pieces can be glued inside for additional support if you like.
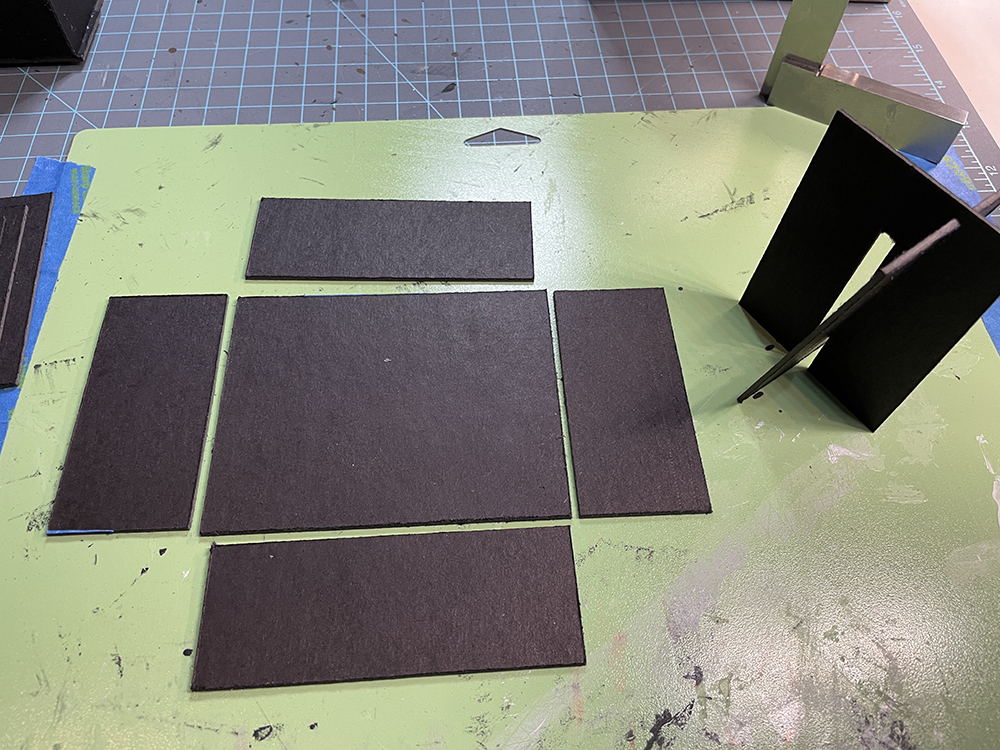
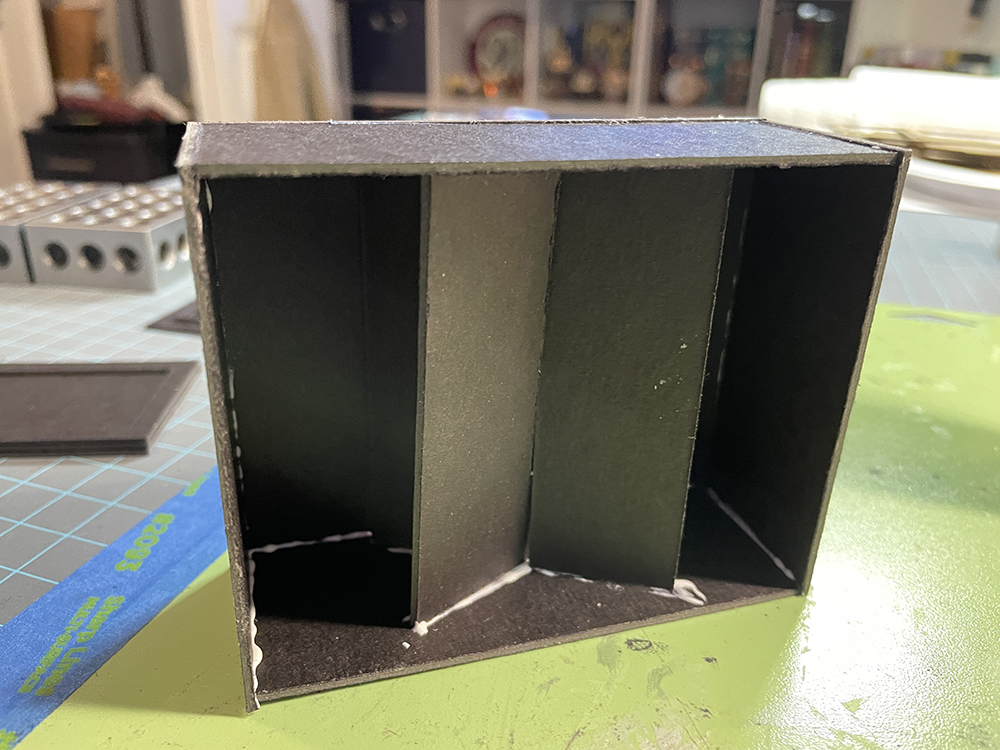

Lastly, glue the front to the bottom section we just built and glue the top on. I’ll be using metal feet on the bottom of the clock. You could do the same or add another flat bottom or maybe use large beads for feet.
MIDDLE SECTION . . .
The middle section can be changed to suit your own taste. It can be open, it can have a door, a door with glass (plastic) in the center, shelves, or with a door and chimes inside. It’s basically built like the bottom back section was built with sides, top, and bottom rectangles glued inside and on top of the back solid piece. If you make a door that opens on the front you will need to add hinges for the door.
All four pieces should be glued on top of the back piece. First glue the top, then the left side, then the right side, and lastly the bottom. Note that the side pieces are glued inside of the top and bottom pieces. Test fit before gluing so that you get it right.
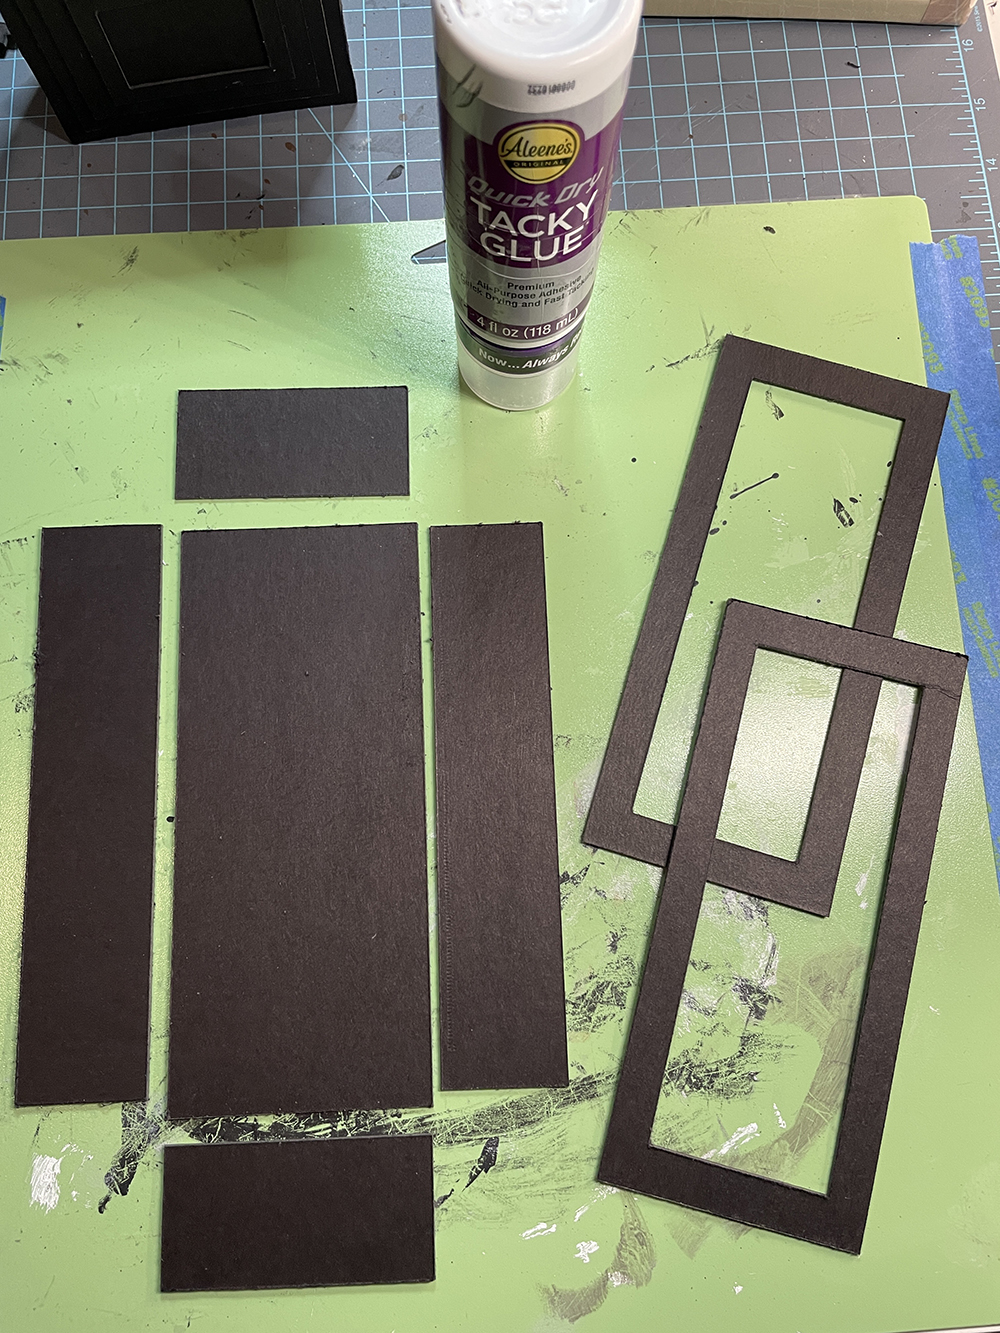
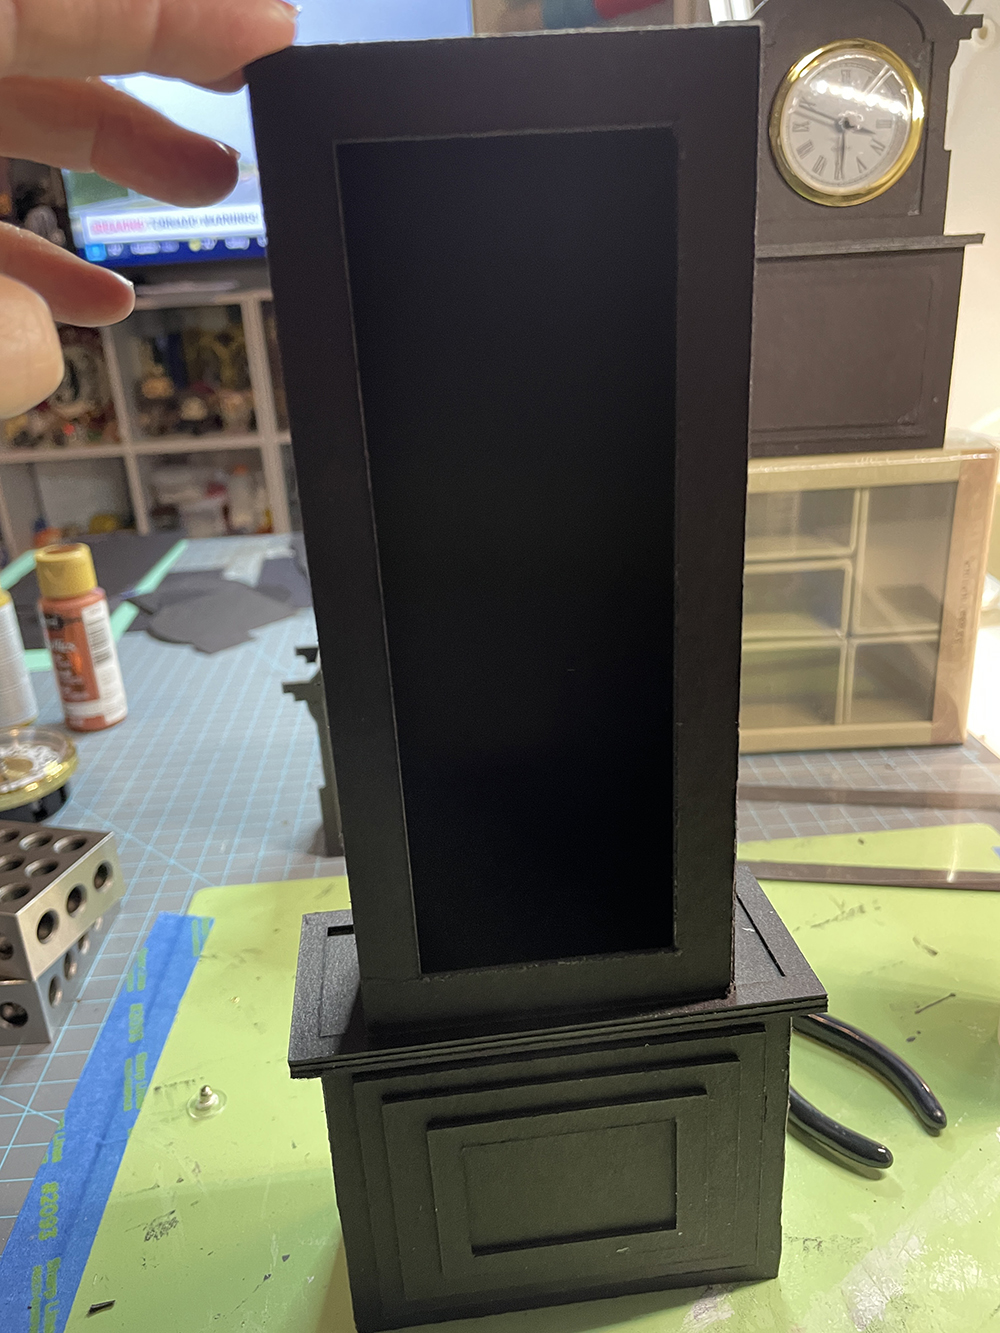
NOTE: You will need to finish the inside of the middle section prior to adding the pendulum and chimes! These can be added at the very end just before gluing the finished door on.
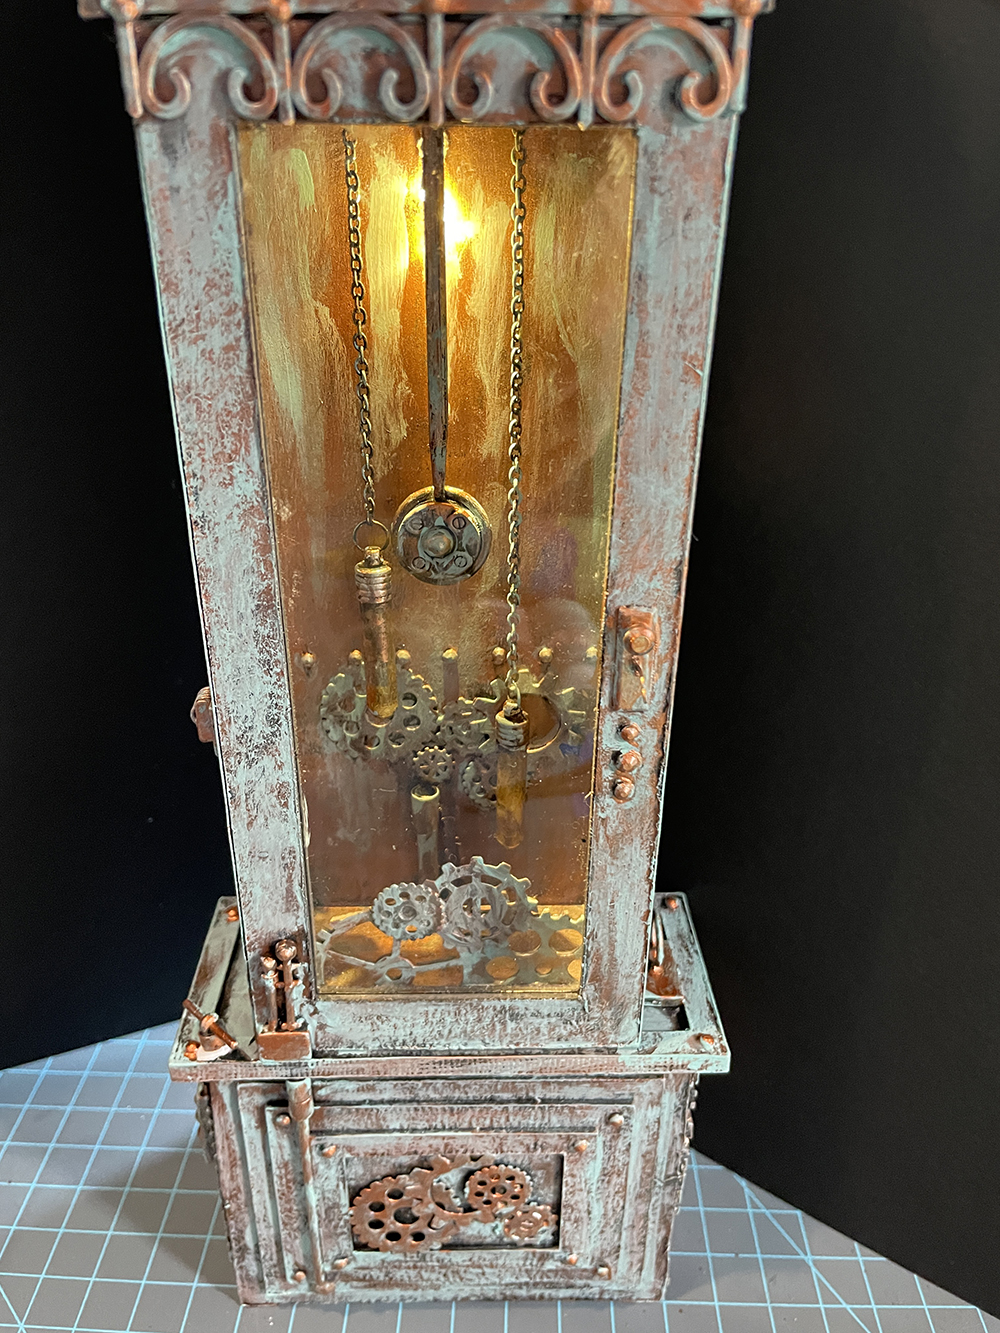
For the chimes, I’ve used some small glass vials made for jewelry making. I’ve filled them with acrylic paint to match my steampunk finishing theme and used a tiny gold chain to hang them. To add the chimes you will need to build the back section and then add a shelf piece inside. Poke holes in this shelf to hang the chimes from, add the chimes, then glue the shelf in place to the back top piece. I’ve made the pendulum from a wood skewer, two buttons, and a flat-back pearl. All were painted to match my Steampunk theme.
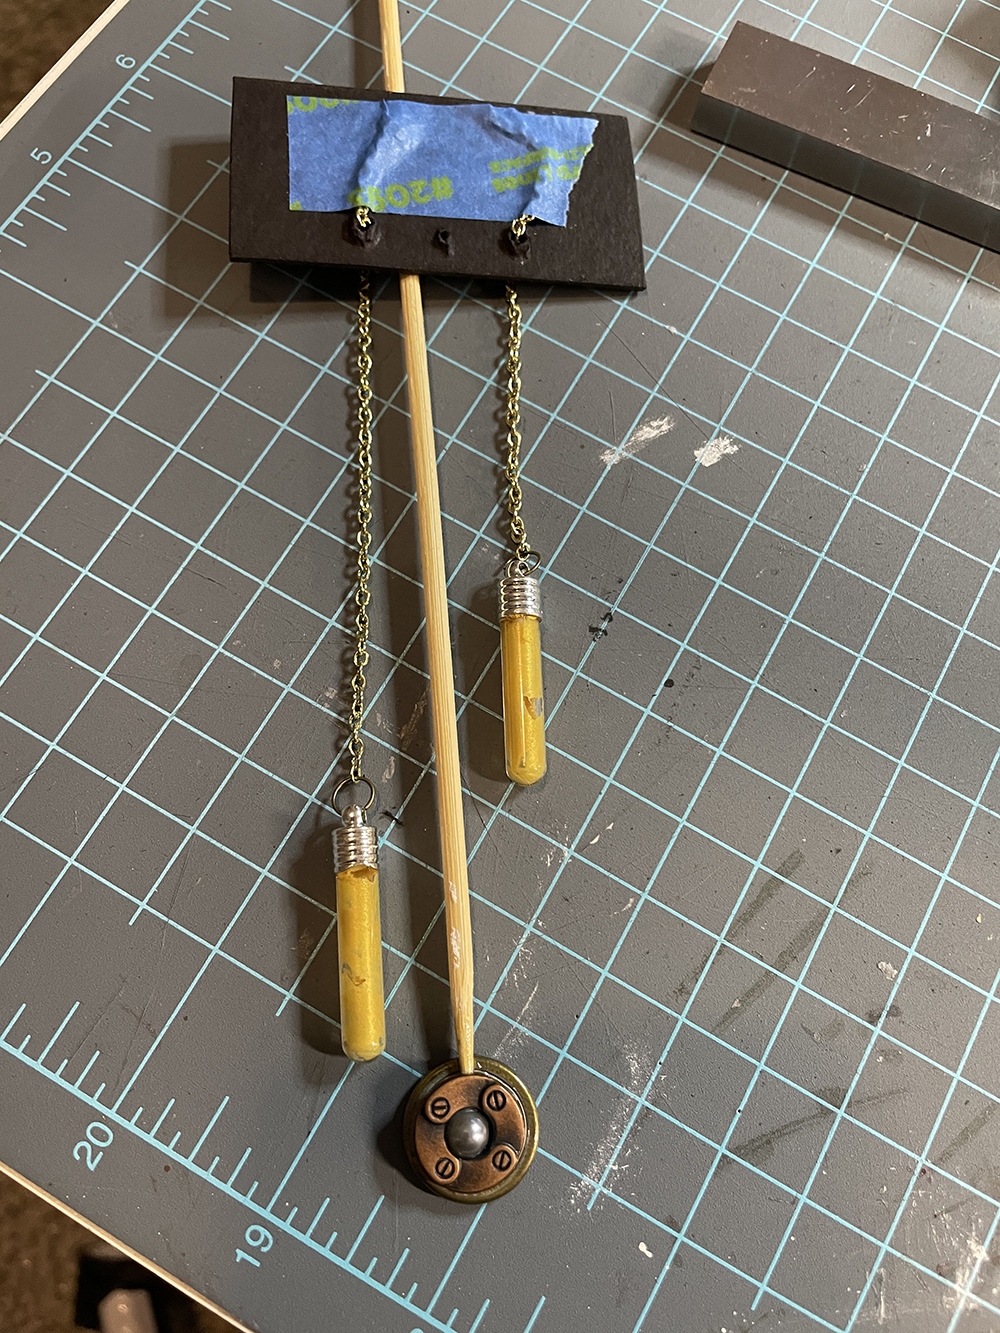
These pieces will all be painted and/or aged to match the Steampunk theme.
At this point, no further construction can be done until the clock inside has been finished and the doors are finished and then attached.
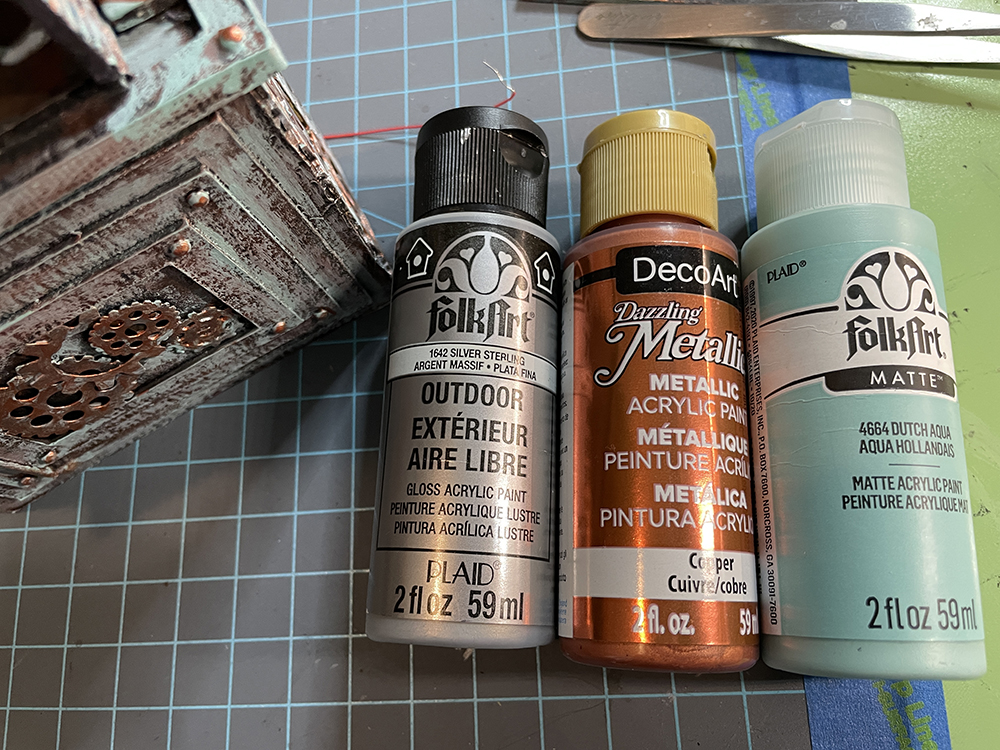
To achieve an aged effect I’ve used the paints shown on the left. The entire piece was first painted black followed by a coat of silver over most of the piece. Next a dry brush coat of copper that covers most of the piece and finally a fairly heavy coat of Dutch Aqua in a dry brush.
And here’s a look at the finished clock . . .


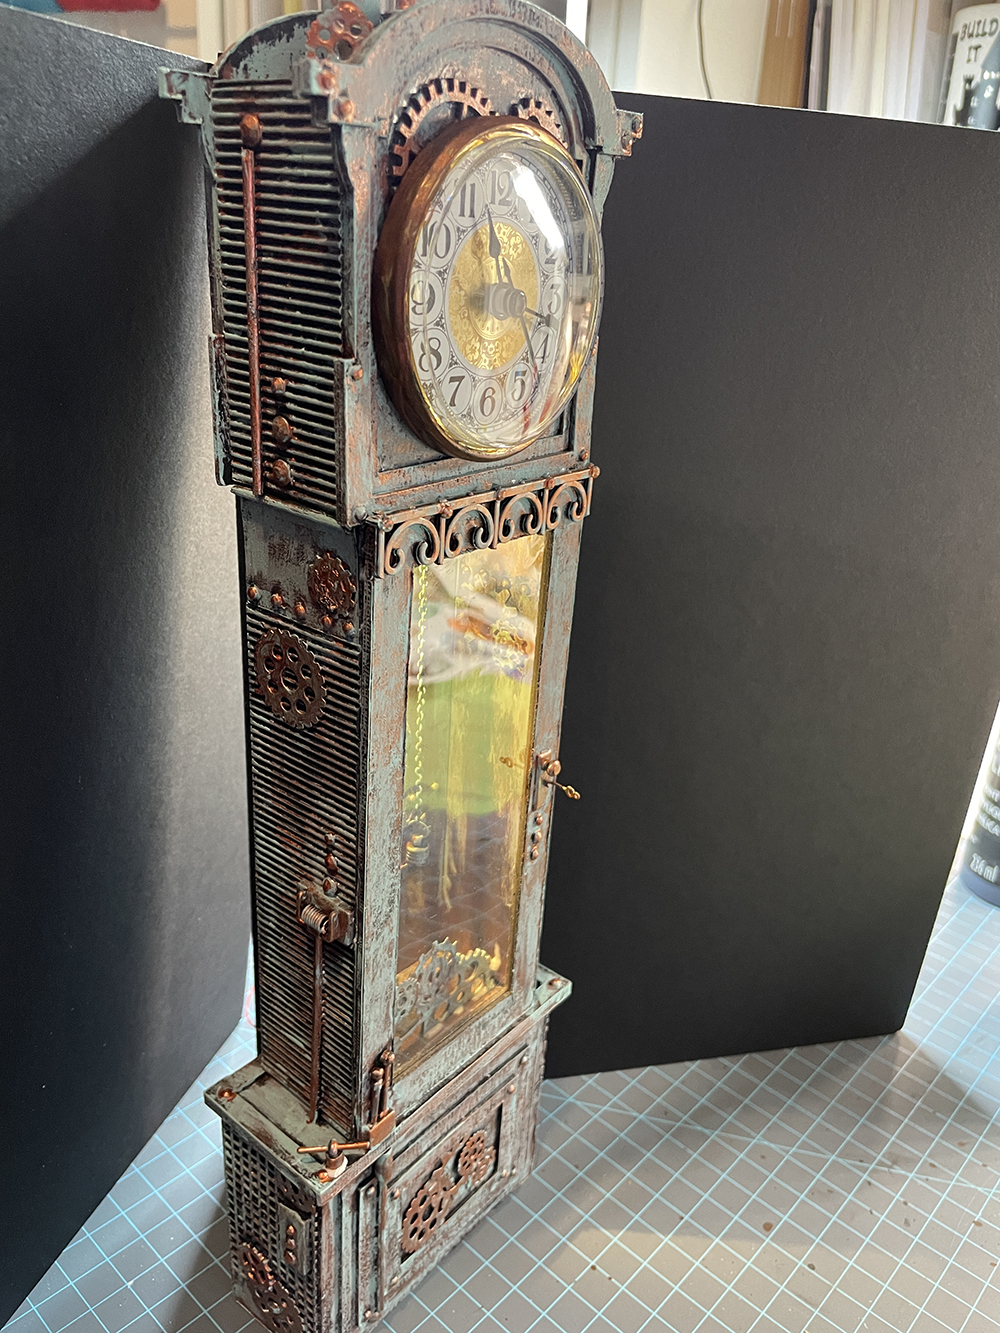
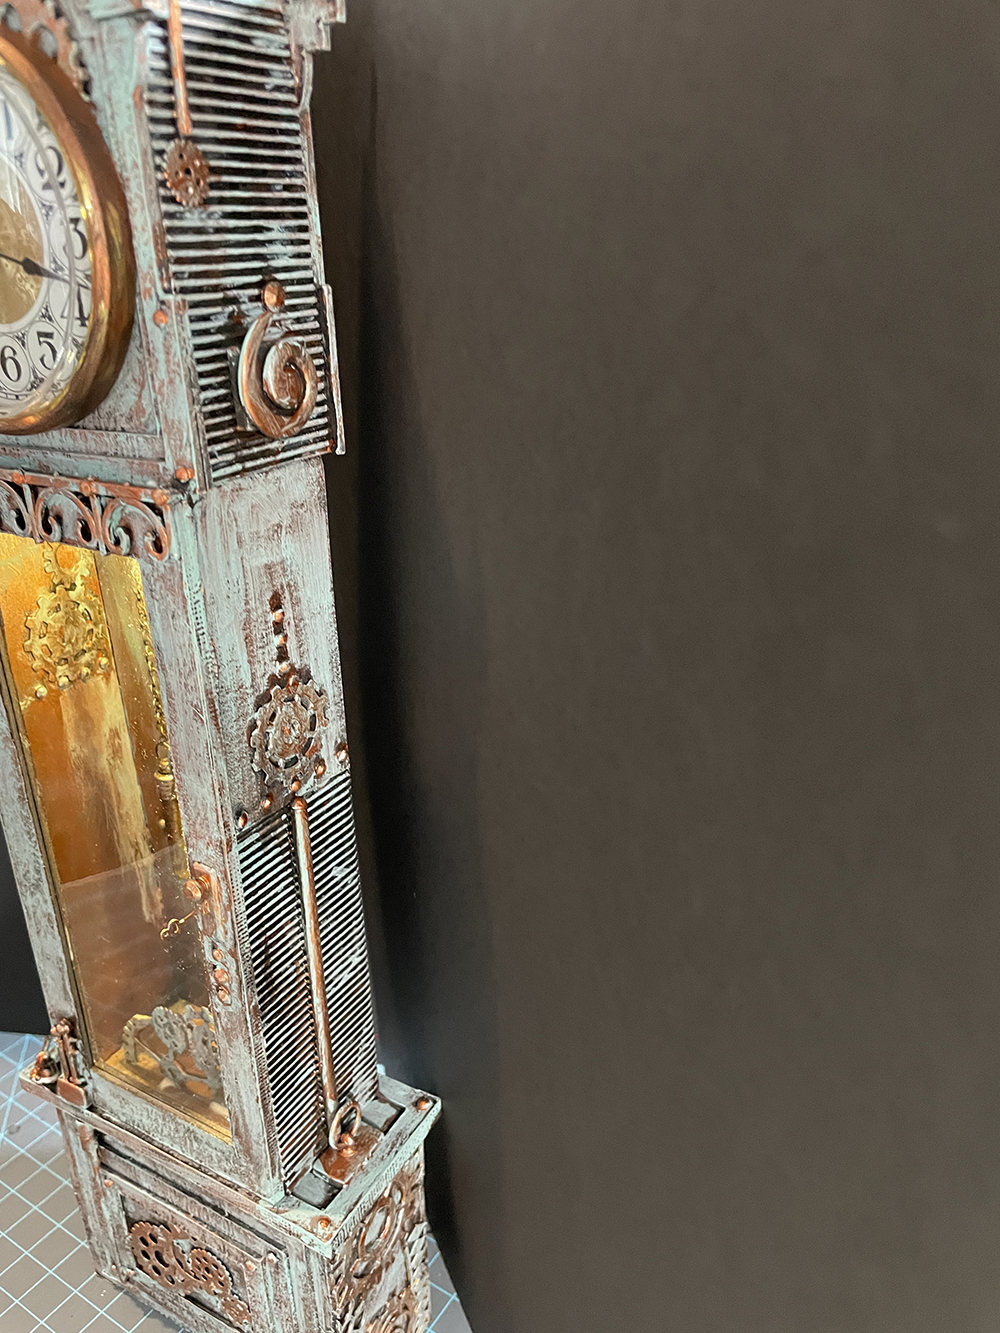
The last thing I added was some medium-sized wood round beads to the bottom for the legs.
Thanks for stopping by and have a very crafty day!!!
Teri



Leave a Reply
You must be logged in to post a comment.