Kit from Cornel Creations (Cornel73) on Etsy
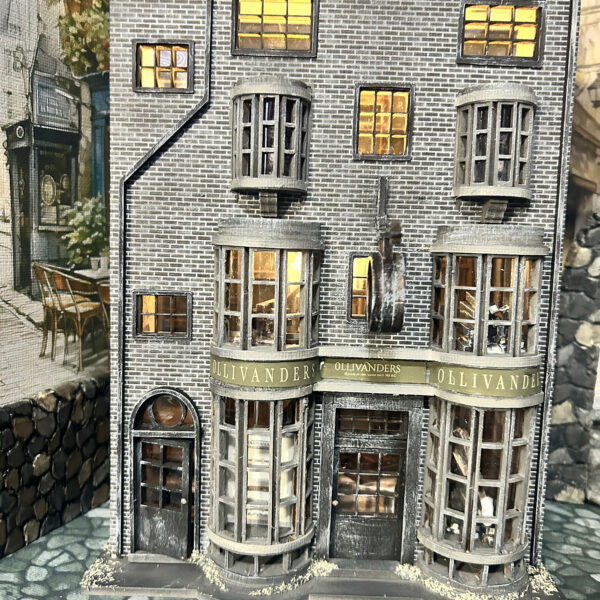
I was thrilled to find this wand shop recently on Etsy and purchased it immediately! This is one of the more accurate versions of that well-known wand shop many of us love. It’s made from 3mm Birch plywood and cut very well and cleanly.
After opening the kit and browsing through the instructions, I decided to make a post on the build as I went along. While I love the kit, I found the instructions a bit vague and a tad confusing in some areas (mainly the lower windows). Hopefully, this post might help others and beginners, who have purchased the kit. Please take what I say about the instructions with a grain of salt. Not everyone reads or interprets instructions the same so what may have been confusing to me might not be to others. I’ve also created some 1:48 grey brick paper to use on the structure and will have a link to a free download on down the post page, in case you would like to use it.
TIP: Be sure to read through all of the instructions paying close attention to any tips and notes before starting your project!
So let’s get started . . .
*Step one says to Group together and mount to the wall – ground floor. The photo across from this shows a different section and the diagram makes it appear that you should glue all parts together in the order of the images. I found it best to glue each section together and then test fit each after painting. The fit on most of the kit is very snug so a bit of sanding was needed here and there due to finishings.
Bottom Front Windows – Step 1
NOTE: be careful! These pieces are very fragile!!! The gluing order is the same on both the left and right windows.
Refer to the included kit instruction diagrams for part numbers
- Glue part 2 to base 1 keeping backs – not tabs – flush
- Glue the 5 tall window sections into part 3 with the thin spikes pointing downward
- Glue part 4 onto the tops of the 5 tall window sections – be careful as it might take some wiggling to get the tabs to set in place
- Glue the window section you just built – tiny spikes at the bottom – into the holes in part 2 – be careful and let it dry
- Glue pieces 5, 6, and 7 together then glue to the top of part 4 keeping backsides flush (step 3 in instructions)
- Set this section aside for now
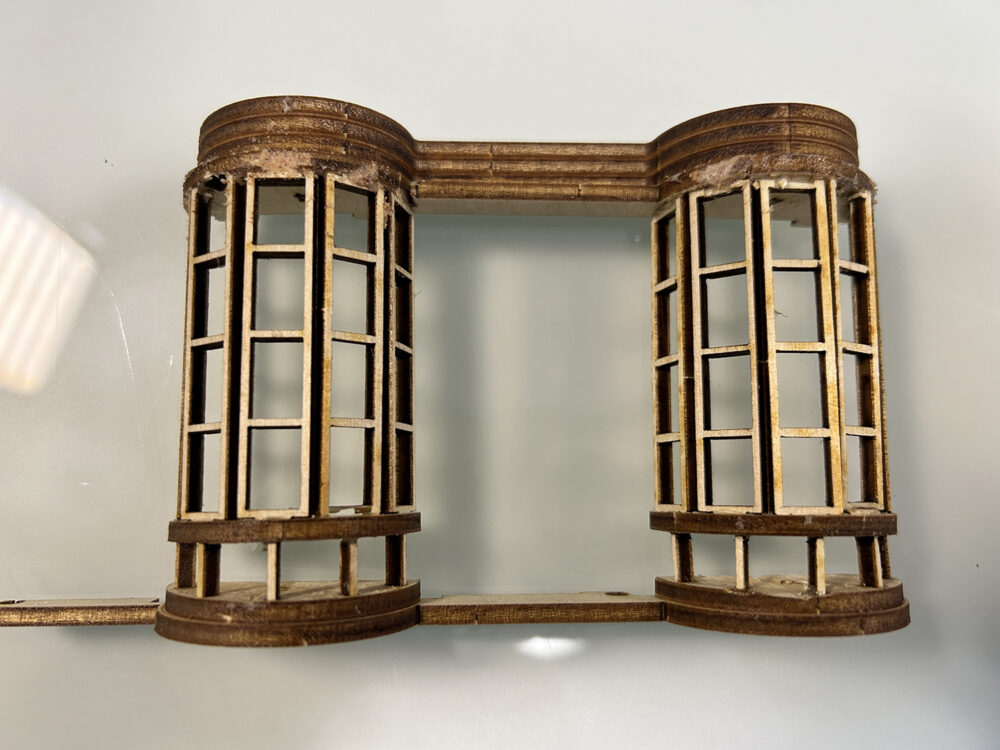
Middle Front Windows – Step 2
Note: when gluing all of these sections together I had to sand the bottom of this section so it fit the tab holes and would sit on top of the lower section. I’m not sure if the wood swelled due to temperature or what but just be aware that you might also need to do a bit of sanding here. This is why these sections should be built separately and test-fitted before you glue! As an afterthought, it might be wise to spray seal all wood parts before painting which might help.
- Glue the 5 tall window sections to part 8 on both sides
- Glue part 9 on top of the five window parts you added to part 8 working carefully
- Glue the part 10 piece on top of part 9
- Glue the part 11 piece on top of part 10
- Set aside for now
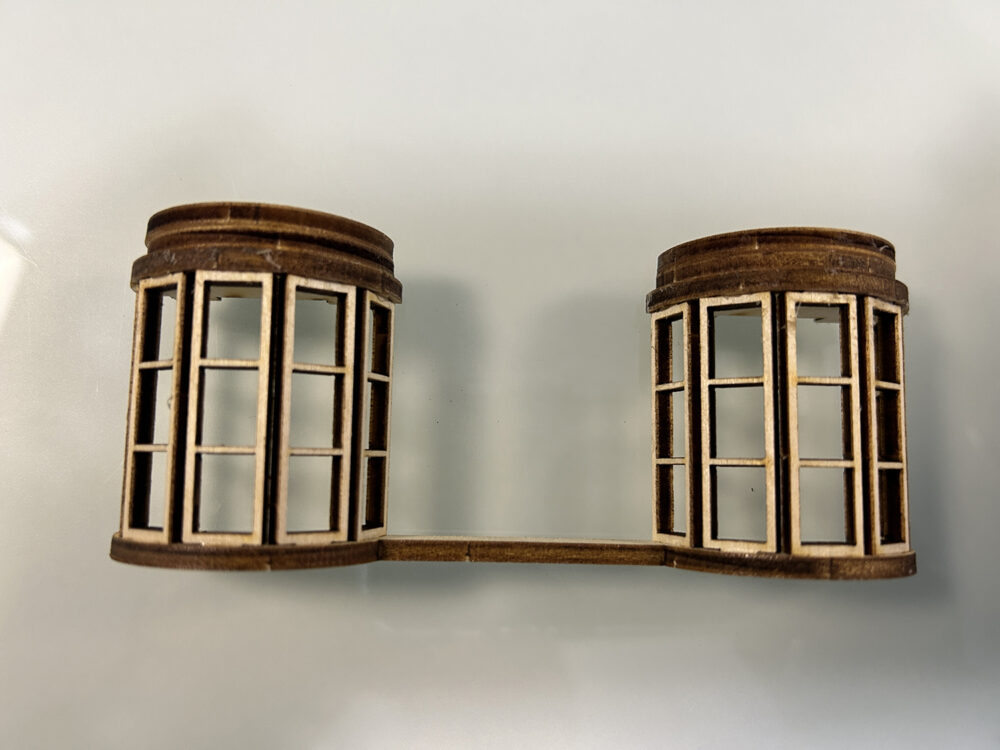
Top Front Windows – Step 4
- Follow the diagram in the instructions – BUT – I suggest that you leave the two small ornate lower pieces off until you glue the windows in place to the front. Exact placement is very important with these pieces and they are easily added afterwards.

The instructions will tell you to glue the lower and middle window sections together but I suggest waiting on this until you are ready to glue them to the front in case the fit is off. I will be painting my window sections at this time and adding clear plastic as the window glass. When finished, test fit the windows but do not glue them until you have painted or finished the front wall section.
While waiting for the window paint to dry, I will glue my brick paper to the front wall. To make it easy on myself, I scanned the front wall into my computer and then used Photoshop to create a template that could be uploaded into Cricut Design Space. After uploading the brick paper, I used the wall template to slice the shape out of the brick paper image. From there I was able to use the Print-N-Cut feature to get a nice wall covering. I suggest using textured cardstock to print the brick paper on and that you seal the paper before you glue it down to the wall. I like to use the Krylon Matte Spray Sealer.
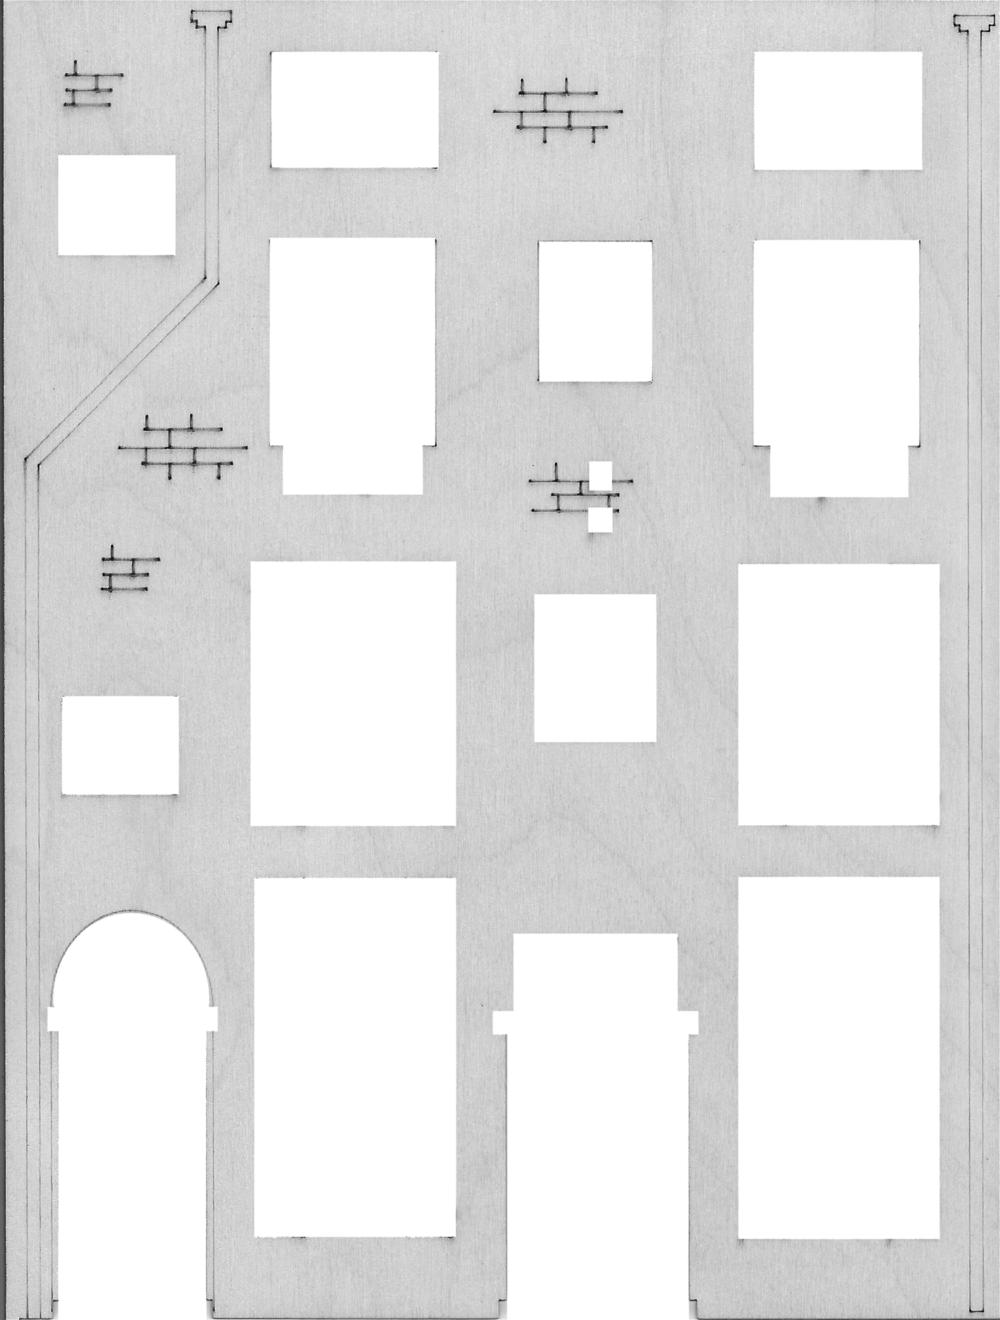
Repeat this same process for the side and back walls.
TIP: The front of the structure is created to swing open. You might want to wrap the brick paper around the left and right side edges of the front wall so they are covered.
You might also want to make a second set of papers to cover the inside of the walls.
If you would like to use my brick paper you can download a free PRINTABLE FILE below.
Window Installations

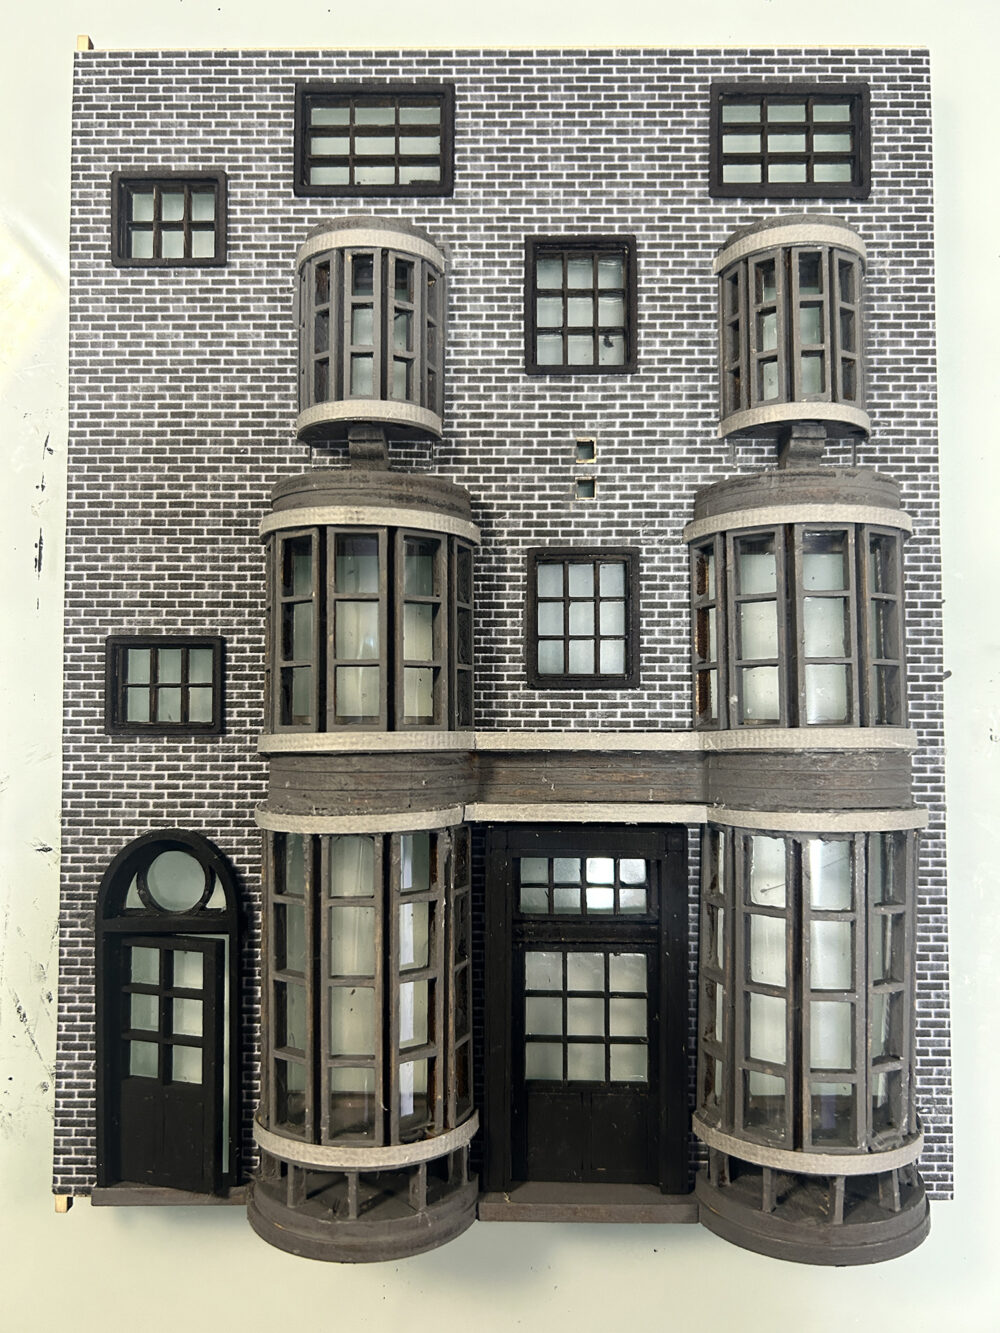
Here’s what my front wall looks like after I’ve covered it with brick paper and then installed the three sets of windows.
Note: I had a lot of trouble with the lower windows and wound up gluing them incorrectly then having to cut them apart and piece them back together. I also had to add some wood filler in several areas. When done and not happy with the finished look, I cut some strips of lighter grey cardstock and trimmed out areas of the windows. This hid all or most of the imperfections. I was planning to paint the strips of cardstock the medium grey but once attached I found that I liked the contrast and will leave them as is. They will get a bit of distressing as you will see later on.
Next, I’ve added the doors, door frames, and window frames as well as the clear acrylic for the flat windows. The window frames were created with Cricut Kraft Board in two layers. (I made my own because I broke several of the kit ones trying to get them out of the sheet – extremely fragile pieces).
The last thing I will add is the drain pipes. The signs will not be added until the very end so that I won’t have to worry about breaking them while continuing to work on the project.
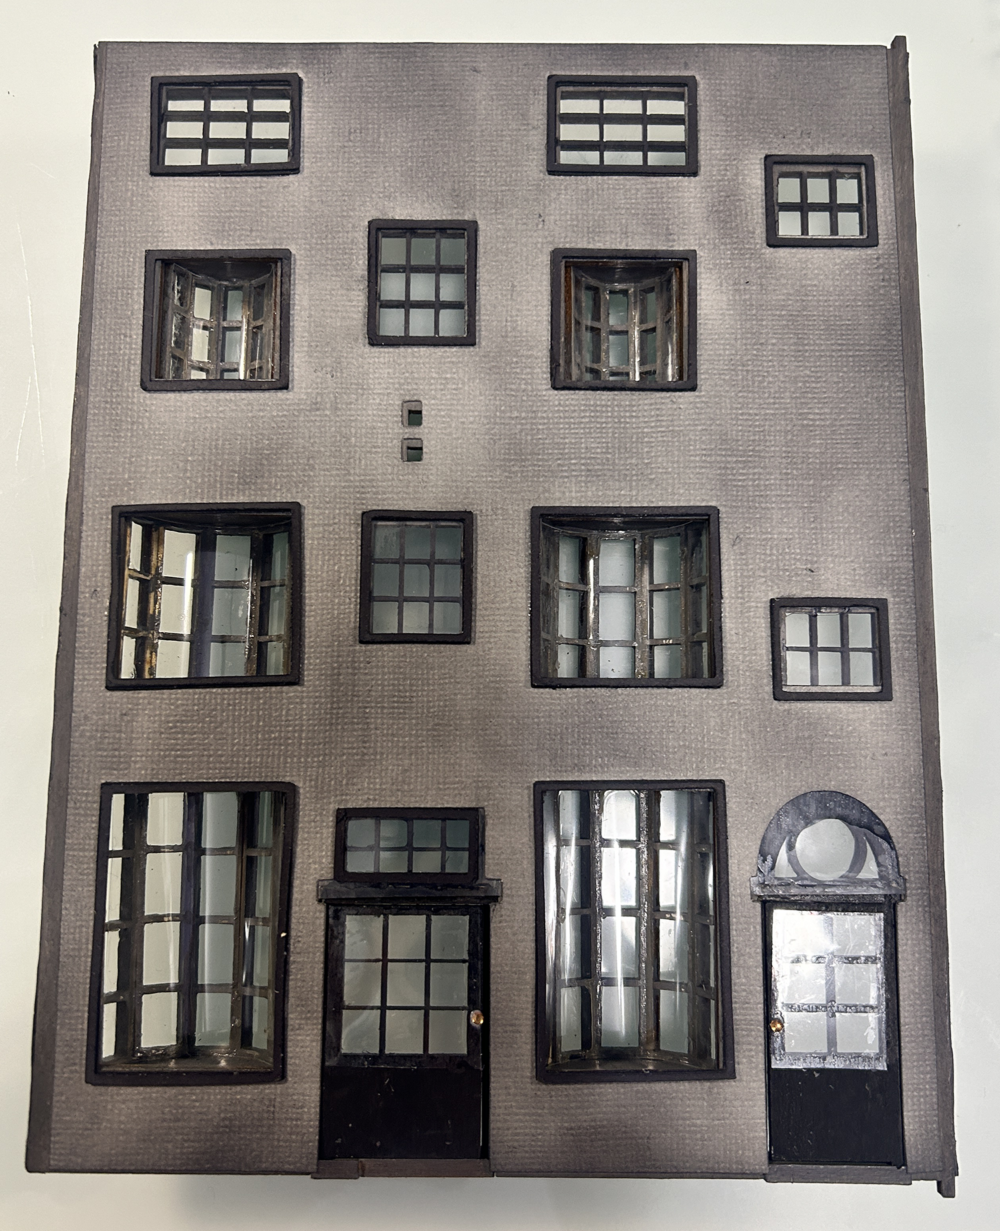
Inside Finishing – Front Wall
To cover the notches on the inside of the walls, I’ve cut cardstock and glued it down. The windows were cut from black Cricut Kraft Board using two pieces stacked for each window. I then aged the walls a bit using Black Soot Distressing Ink.
TIP: Don’t forget to leave a bit of uncovered areas on the left and right side of the inside front wall so that it will close properly. This will sort of add the look of trim to the wall.
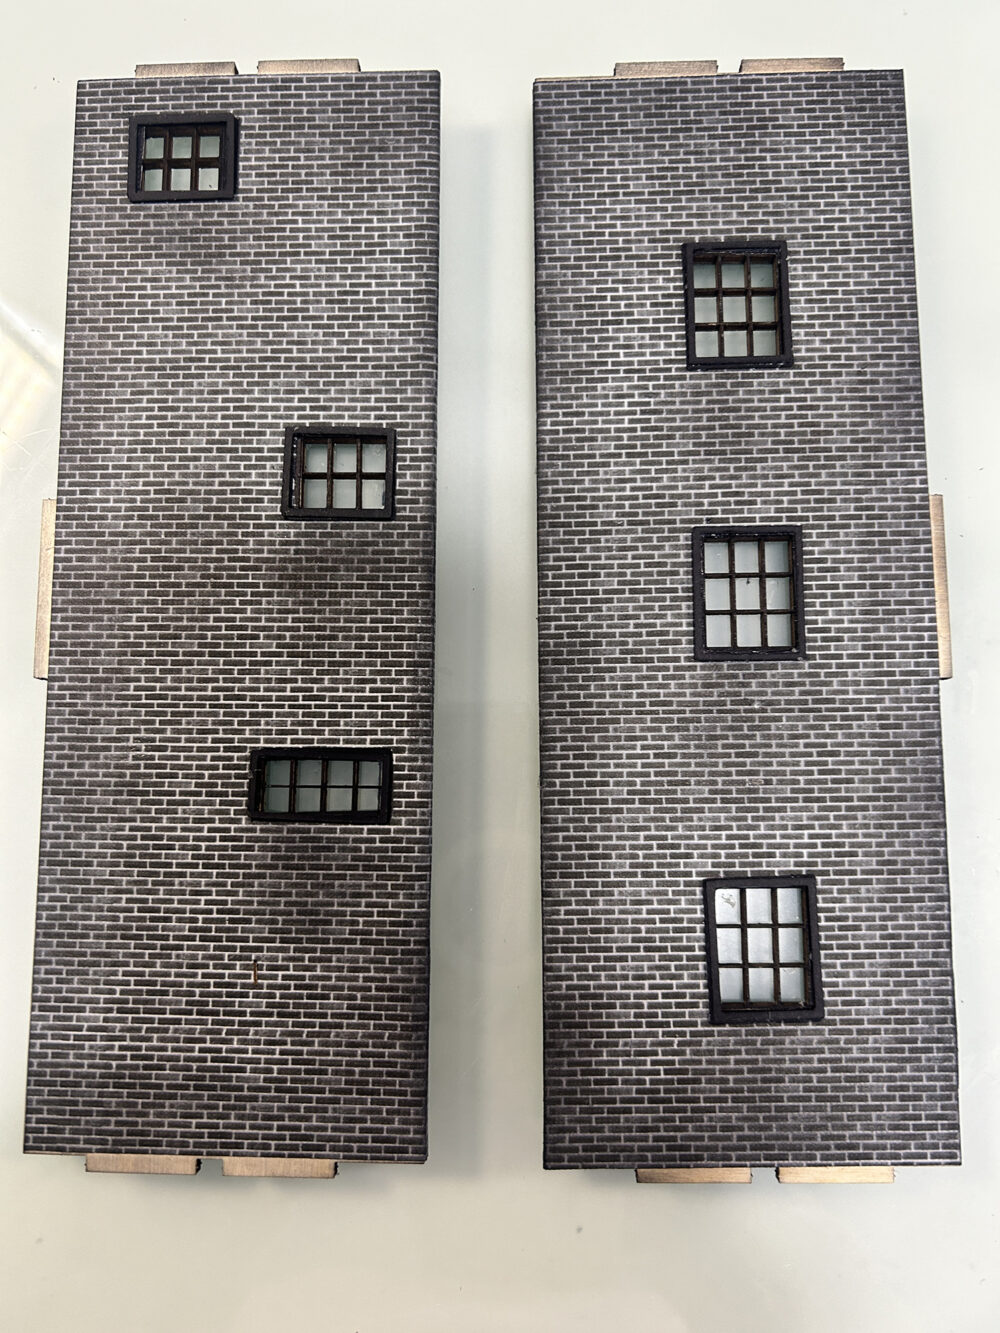
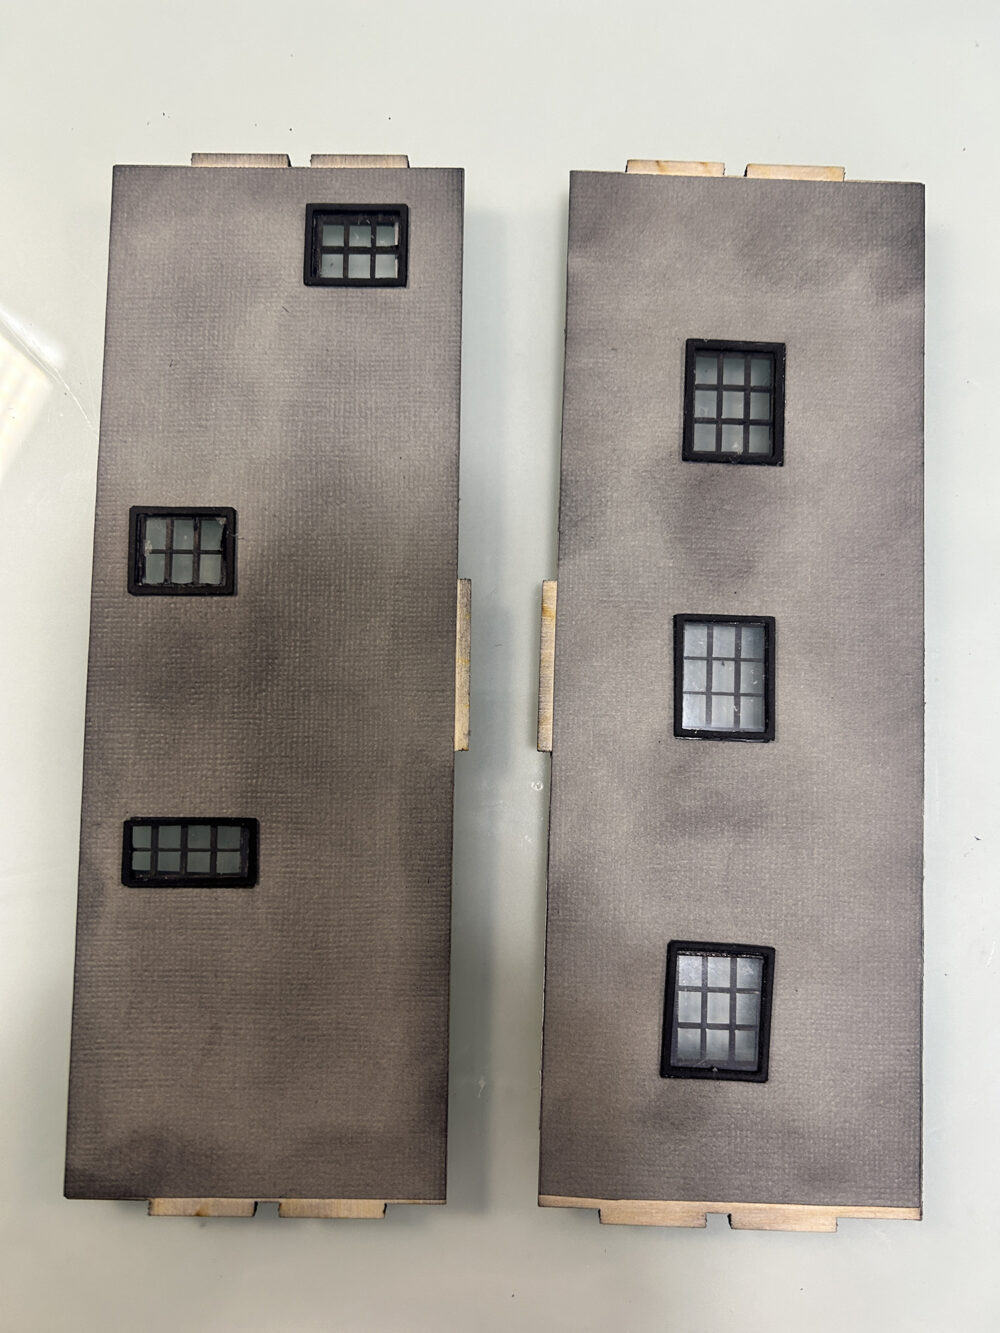
Side Walls
I have finished the side walls in the same way the front wall was finished. The outside brick papers were wrapped around the outside of the edges without tabs. Later I will be adding trim around the top and bottom of the side and front walls once I see the placement of the inside pieces.
TIP: When cutting the brick paper for the side walls, leave some extra along the tabbed edge of the wall, and don’t glue the paper all of the way to the edge of the wall. You will need this extra to wrap around the back wall later on. (I didn’t think of this at the time and had to piece mine lol)
Flooring & Gluing Walls
Using some old scrapbook paper, I’ve aged a piece and cut it to fit the flooring area.
Next, I added aged paper to the back shelf wall and finally glued all walls in place. Make sure that your paper is not covering any of the back wall holes!
You can also see here that I have added a baseboard at the bottom of the walls.

Inside Shelves
These instructions threw me off for a second (grin). Step 2 is listed before step 1 and in the image for the shelf verticle elements: 1, 2, 3 shows #2 is longer than #1 but that is not correct. If you place the pieces 1, 2, 3 in order from left to right you will see that 1 is the longest and this is correct. Here’s a look at these parts in place as well as the sign.
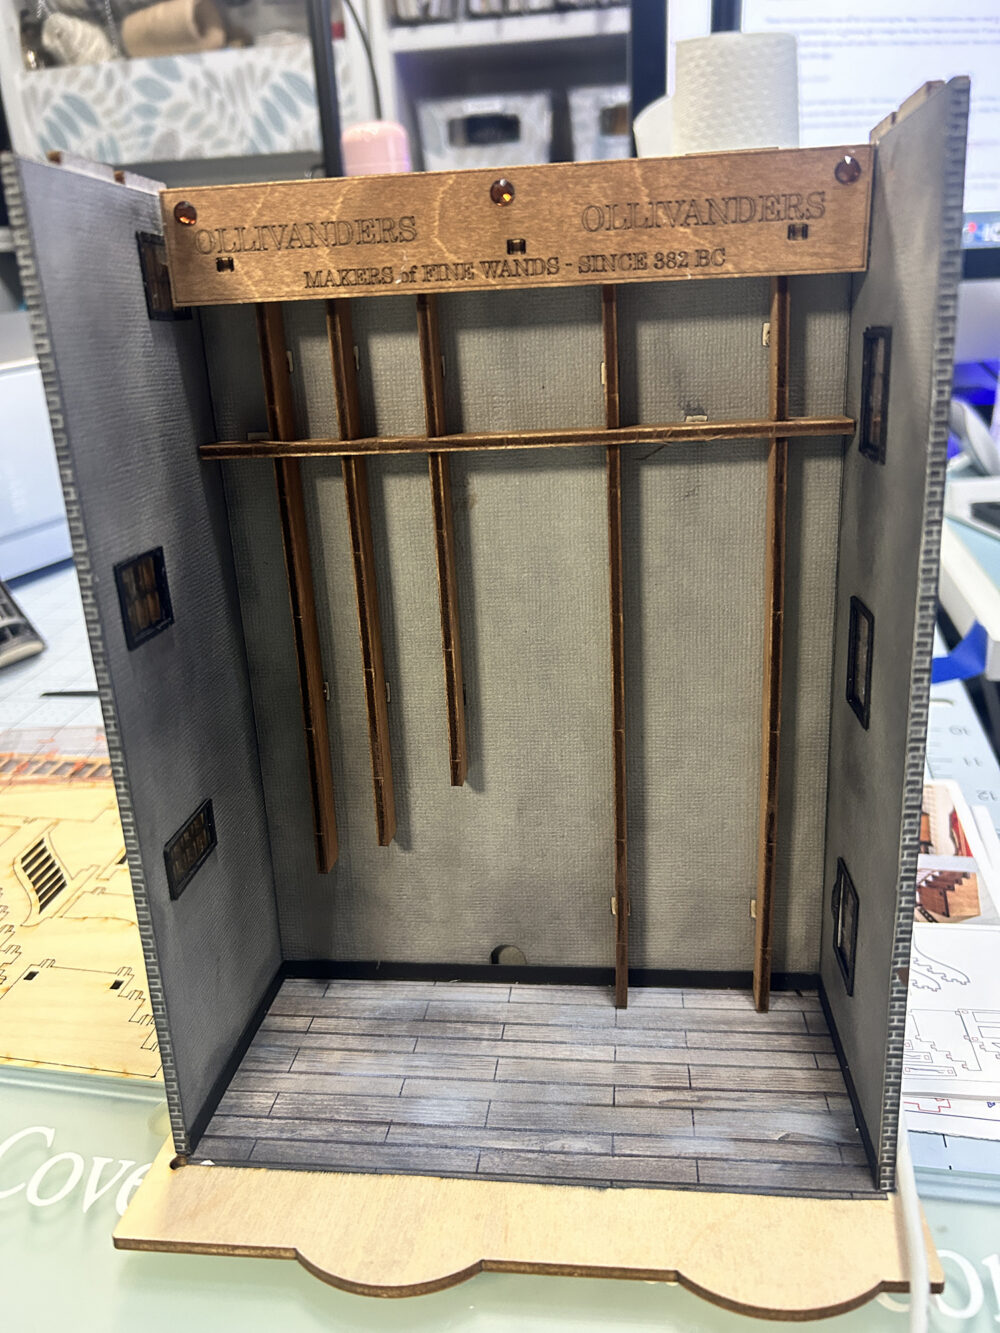
TIP: If you notice in the image at left, the topmost window frame is in the way of the sign edge. I wind up removing the sign, cutting away part of that window frame, and reinstalling the sign. So keep this in mind when adding your window frames inside!
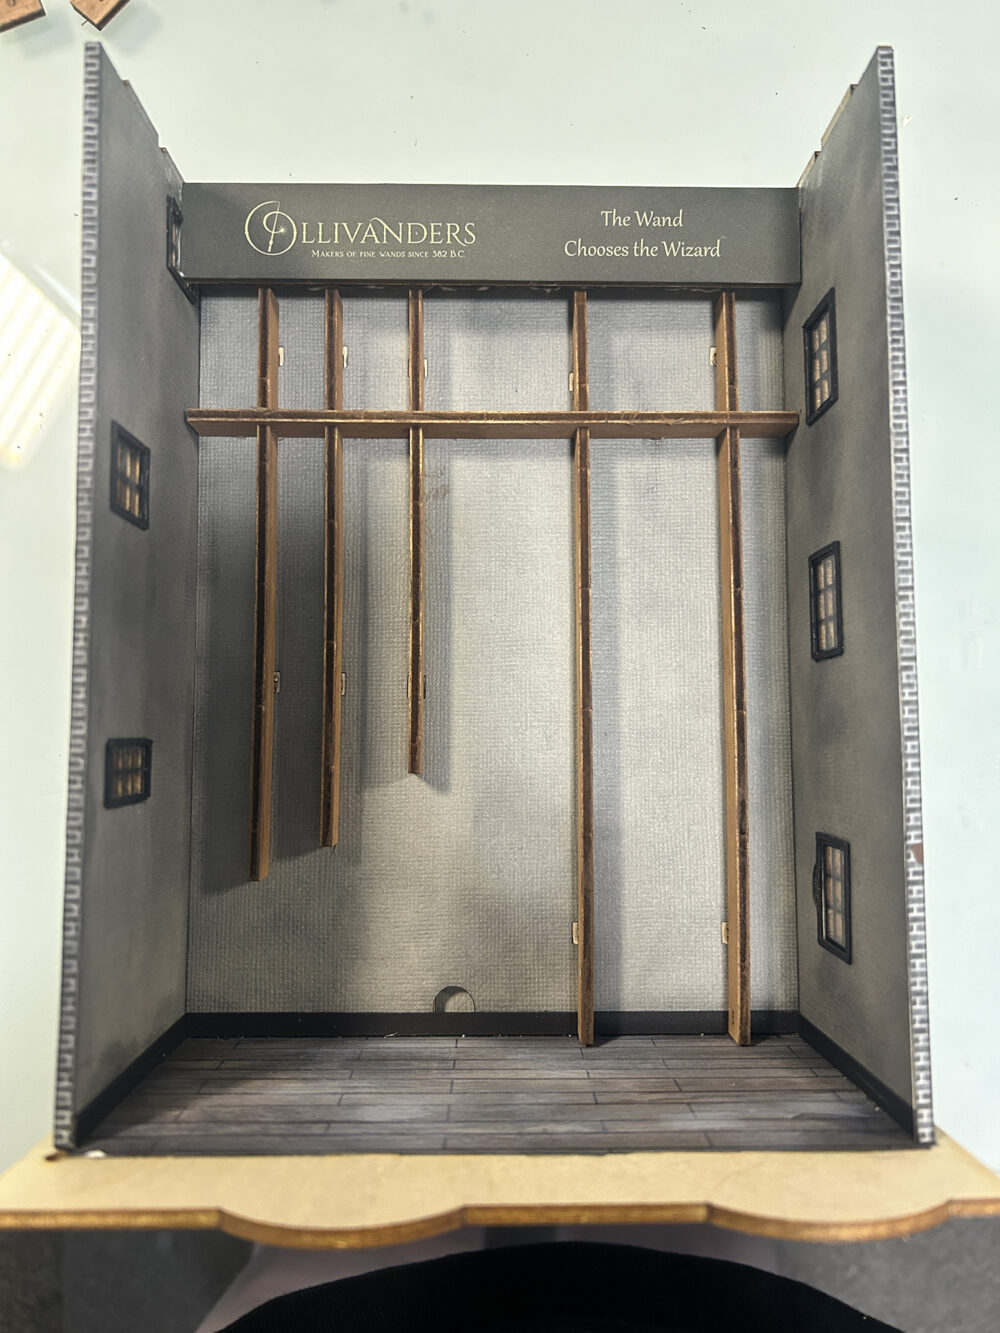
NOTE: My sign part had six holes in it – the images show it with only three holes. At first, I just went with it and covered the extra holes with some gems but then decided to make a printed sign to cover the wooden one in the kit (see above right image). I’ll be making other signs as well and will add a free download for these at the end of my post!
To stain all of the shelves I’ve used Folk Art Coffee Bean acrylic paint – very watered down. Apply the paint and then rub it off with a paper towel to get a stained effect.
Stairs & Small Shelves
TIP: I’ve decided to build and install the stairs before adding the smaller shelves. This will ensure that I do not place a shelf lower than it should be.
I’m using the same coffee bean paint, that I mentioned above, to stain the stairs. To make it easy I’m painting all of the stair parts, as well as the ladder, while they are still attached to the wood sheet. Once dry, pop out the pieces and check them for any wood slivers that might remain. You will want to cut these little slivers off with a craft knife.
Lay the pieces out as you see them below. Note that the square pieces in lower and upper stairs are different. Use the image below to put the correct square pieces with the correct other parts. The lower stair square has an extra – or – different shaped hole in the top right. Also, notice that one of the walls has a pattern scored into it. This wall will be at the back of the lower stair as you are building it but will be seen from inside the structure when it’s placed into position.
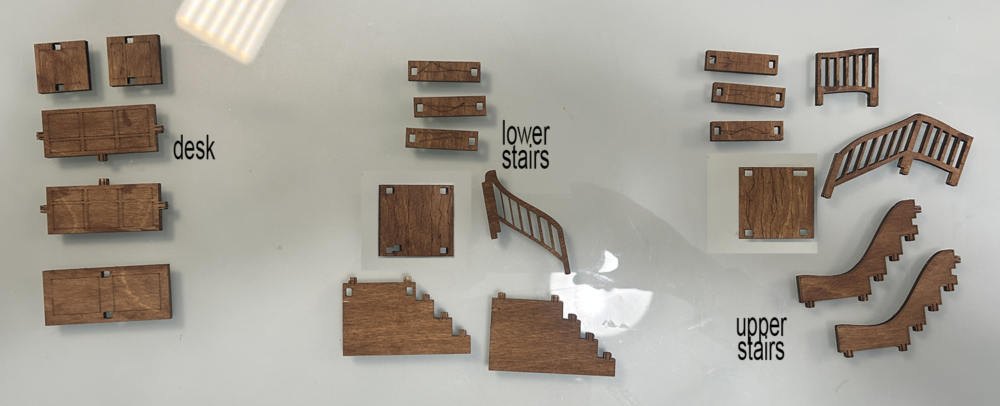
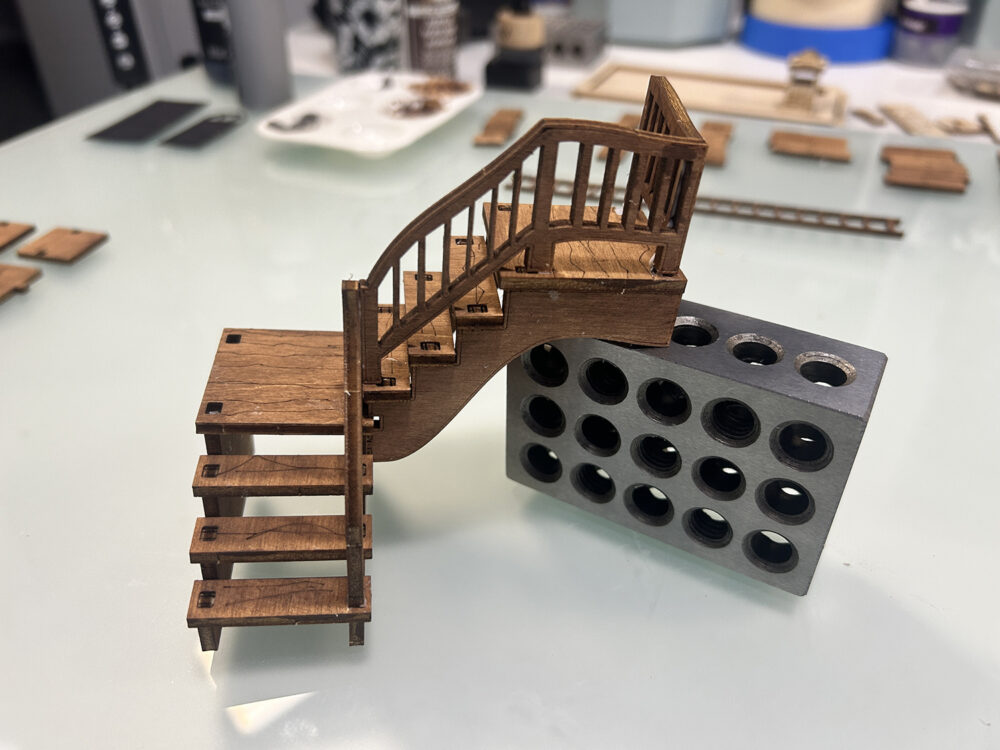
Stair Section
The diagram in the instructions are pretty good for this part of the build. That said . . . I would not super glue the stair railings right now. Follow my instructions below and use the diagram for reference.
- Glue the lower square piece on top of both bottom walls
- Glue the stair runners into place
- Glue the stair runners for the upper stairs to the upper curved sides
- Glue the curved side piece to the lower section (see holes on printed lower wall)
- Glue the upper square piece on top of the curved stair section
- Glue the upper side railing in place
- Glue the lower side railing in place – use the hole in the lower square but also glue to the upper side railing
- Glue the upper back railing in place – glue the legs to the square but also to the upper side railing
- Prop up the stairs and let them dry before installing into the structure
Once dry, the stairs should slide in perfectly! Go ahead and glue the stair section in place. Build the desk and also glue it in place.
Inside Doors
Because I covered up the scored doors on the inside back wall, and because I wanted them dimensional, I created doors from Cricut Black Kraft Board and glued them in place. I simply scanned the back wall earlier, saved it as a jpg file in the correct size, then uploaded it into Cricut Design Space. From there I was able to use the scanned image as a template and the shapes tool to re-create the two doors.
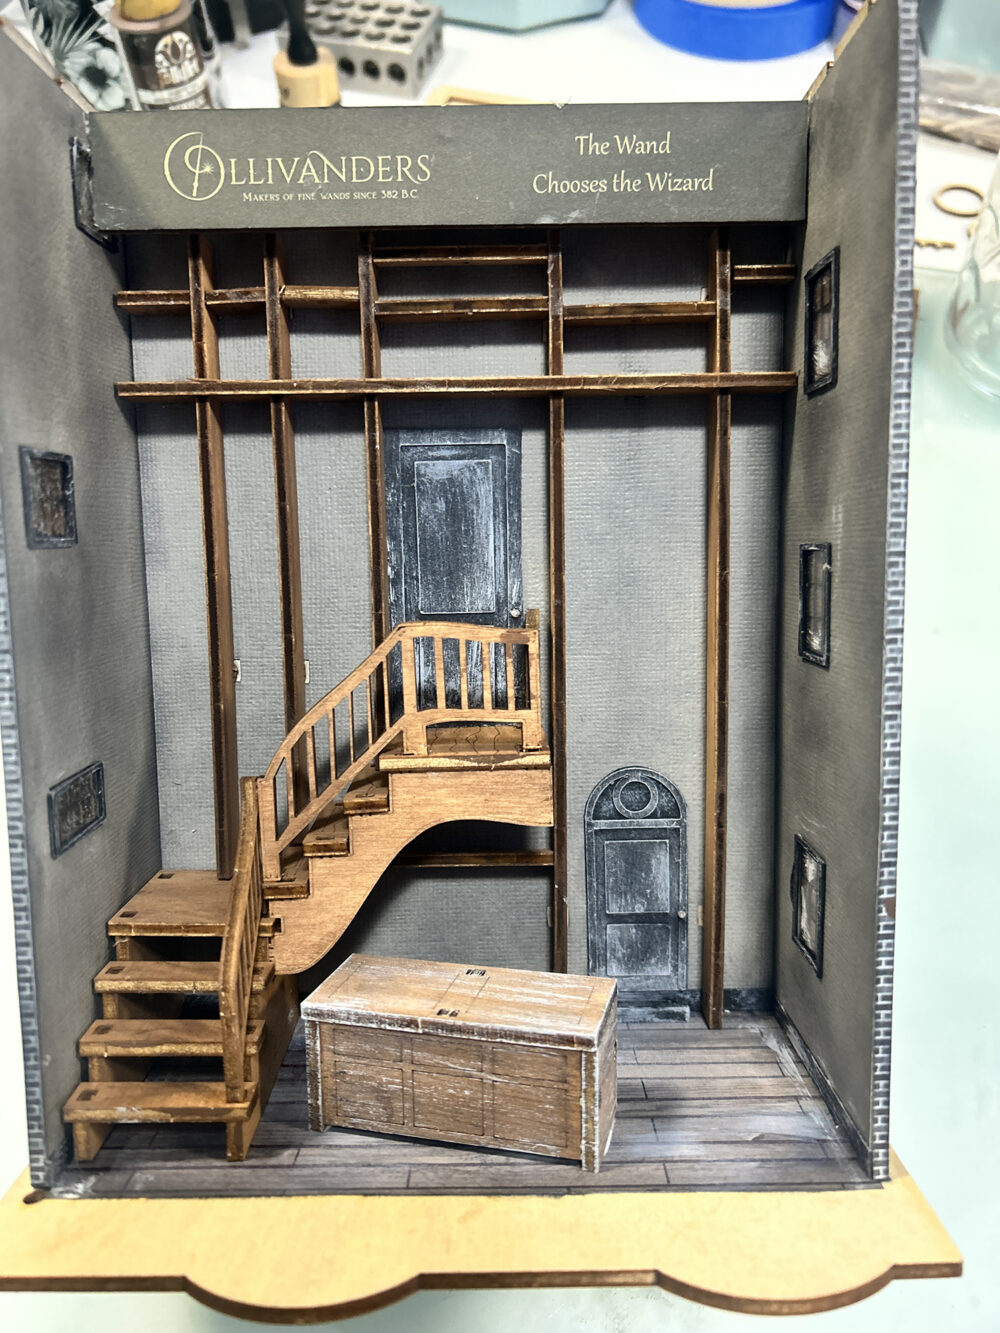
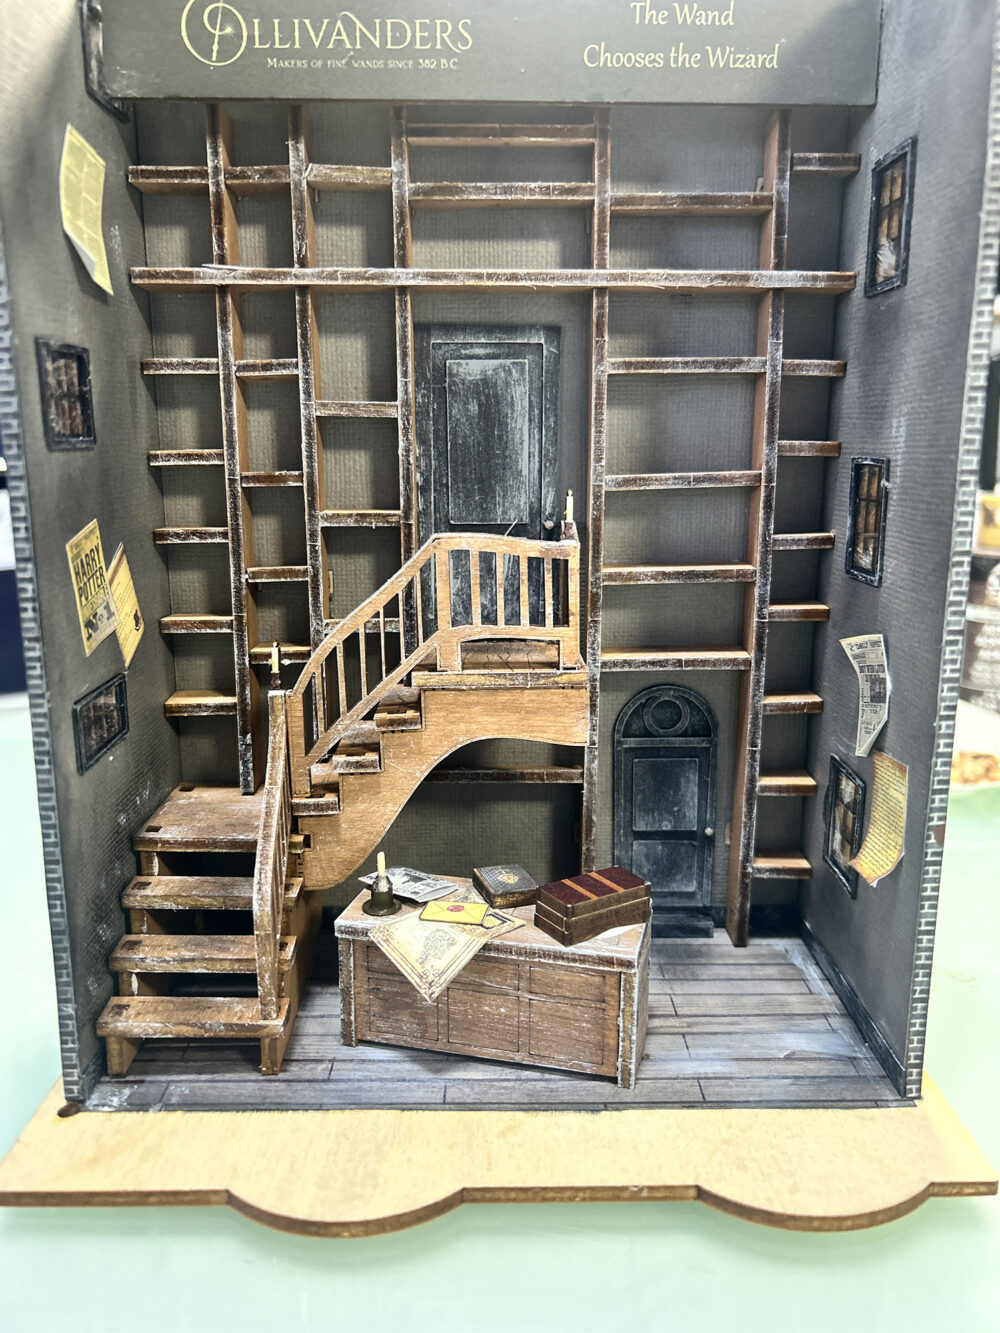
Now I will be adding the remaining shelf parts. If you notice, the small shelf parts are numbered 1 – 6. If you look at the spaces created after installing the vertical pieces you will see that there are six spaces. So shelf pieces #1 will go in the first space, #2 in the second space, and so on. These small shelf pieces are cut to fit exactly in the spaces so do not force a piece, they should go in easily.
You can also see that I’be done a bit of decorating here and there. You can find tons of images online that you can download and use in your own creations as long as you are using them for your own personal use.
From this point I have the roof, the base, and a LOT of little wand boxes to make lol. There are also a couple of outside signs I will need to make.
Here’s a free download for all of the signs I’ve made.
Base
Because the front wall swings open, you have to keep what you do on the base pretty flat. I’ve chosen to simply paint it a medium grey, distress it a bit with the black soot ink, and glue on some multi-colored sand for dirt.
I applied the sand to both the edges and corners of the base as well as around the bottom of the bow windows and doors.

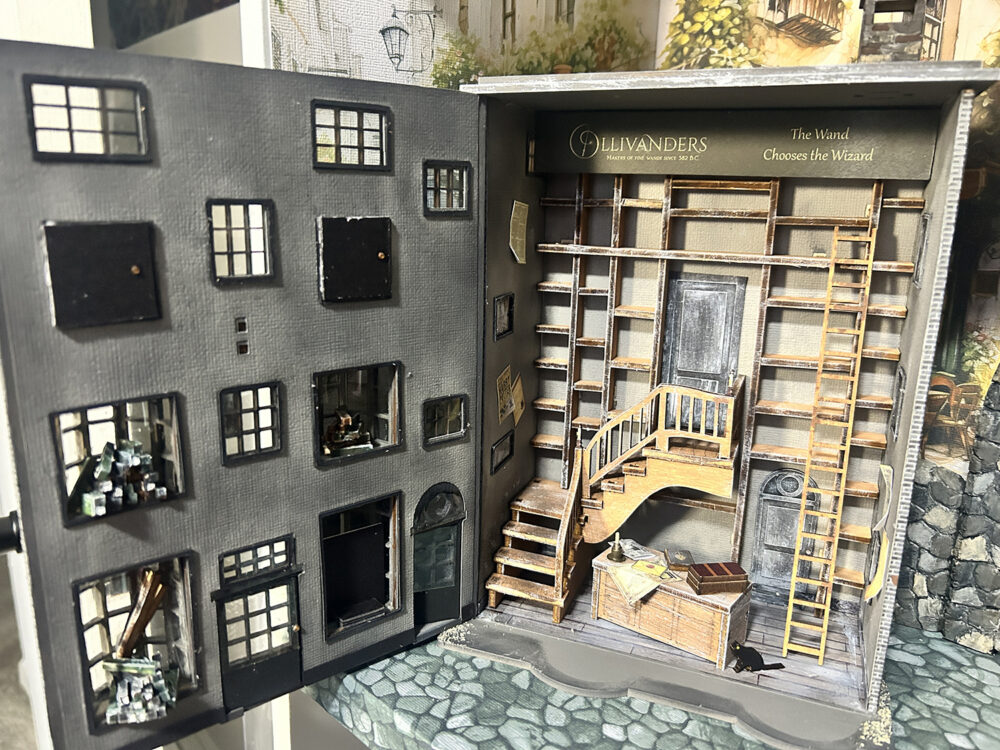
Here’s a final look at the inside with a few accessories added. The wand boxes will be added next but I will be working on these little by little.
There were some offcuts included in the kit which will work for wand boxes so I will use these in the front windows along with a few signs. If you do not want to spend the time to make the boxes you could always search the internet for images, print them, and slip them inside the shelf openings.
Final Thoughts. . .
I had so much fun working with this lovely kit! The few struggles I had with the directions were not even a deterrent from the enjoyment I’ve had and I would highly recommend this kit and shop to anyone.
Till next time . . .




Leave a Reply
You must be logged in to post a comment.