© The Fairy Treehouse by Teri Hanson – Features kits from Petite Properties
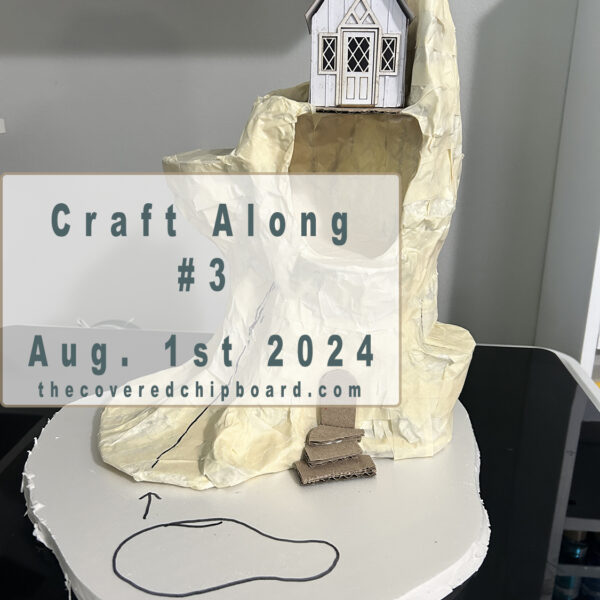
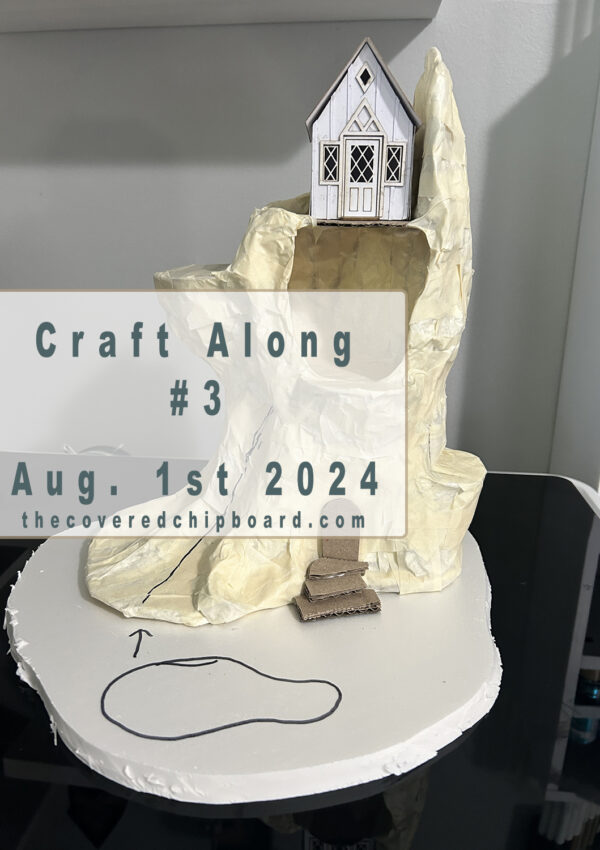
Welcome back to another Craft Along exciting project! This time, we will create a treehouse featuring a few kits from Petite Properties in both 1:48 scale and 1:76 scale. You can see the kits I’ve chosen to use in the supplies list below. Other than the kits, which are very affordable, we will be using found materials that you most likely have in your home. We will use an easy method to create the tree base making this a great project for beginners or advanced miniaturists.
Supplies . . .
Other than the basic supplies like a craft knife, glue, and acrylic paint, below is a list of other supplies you will need.
NOTE: You can always substitute other small houses for the Petite Properties ones but I highly suggest using them. They are inexpensive and wonderfully made as well as easy to put together.
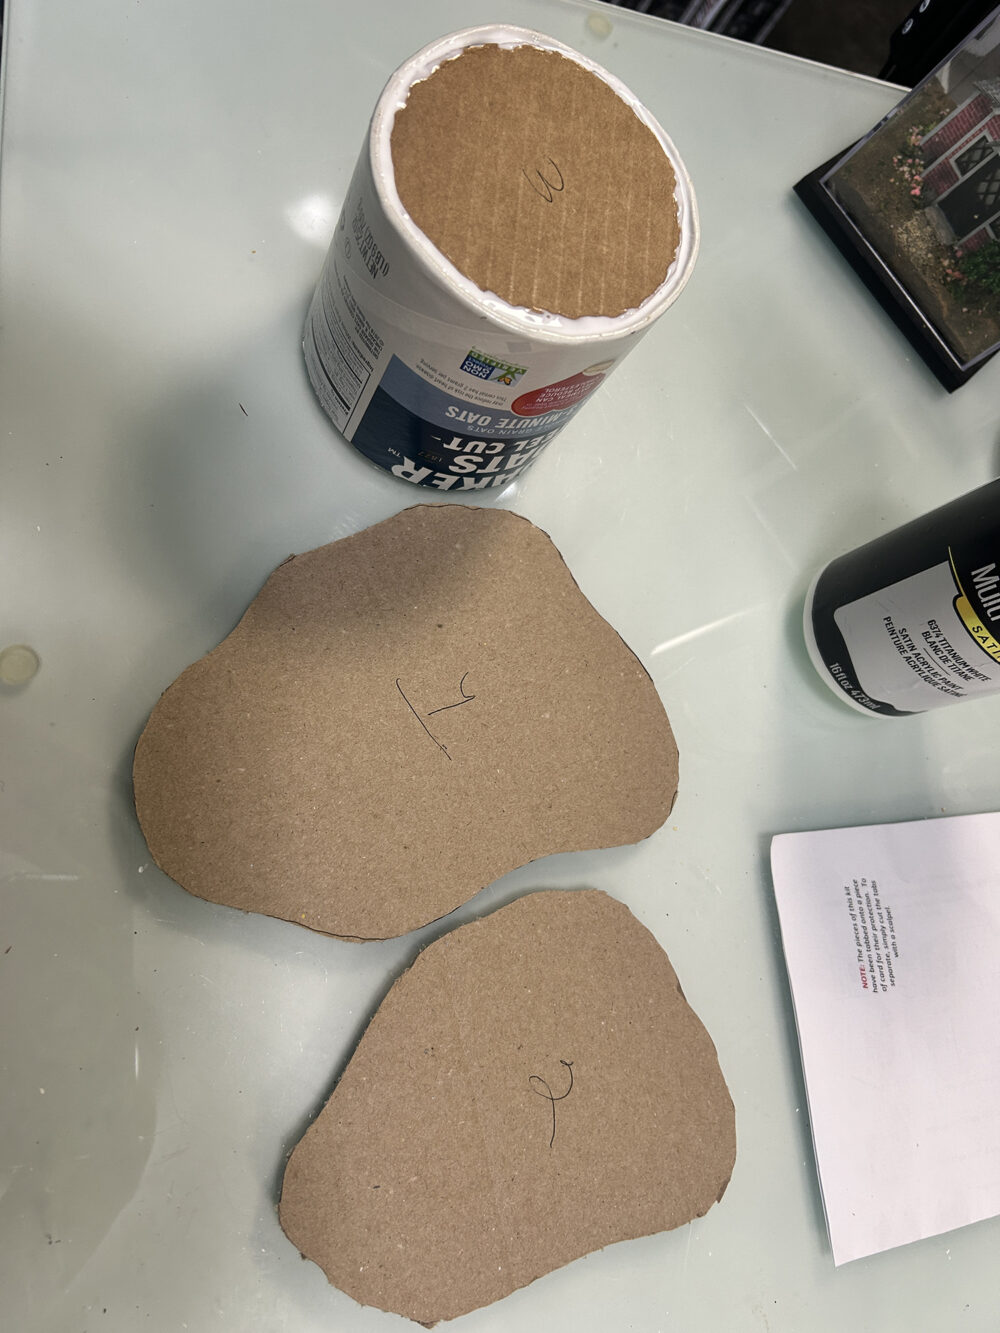
- 2 Oats or other cans – at least 4″ in diameter and 8″ tall
- 1/4″ Cardboard (any old cardboard)
- Cereal Box Cardboard
- Aluminum foil – cheap kind
- Masking Tape 1″ wide
- Elmers glue
- Old stiffer paint brush to use with the glue
- Paper Towels – without designs if possible
- Paint Brushes for dry-brushing
- Acrylic Paint: med brown, dk grey, lt grey, cream, mossy green
Note: There will be a few more supplies needed for part 2 of the project. These will mainly be landscaping materials from Woodland Scenics.
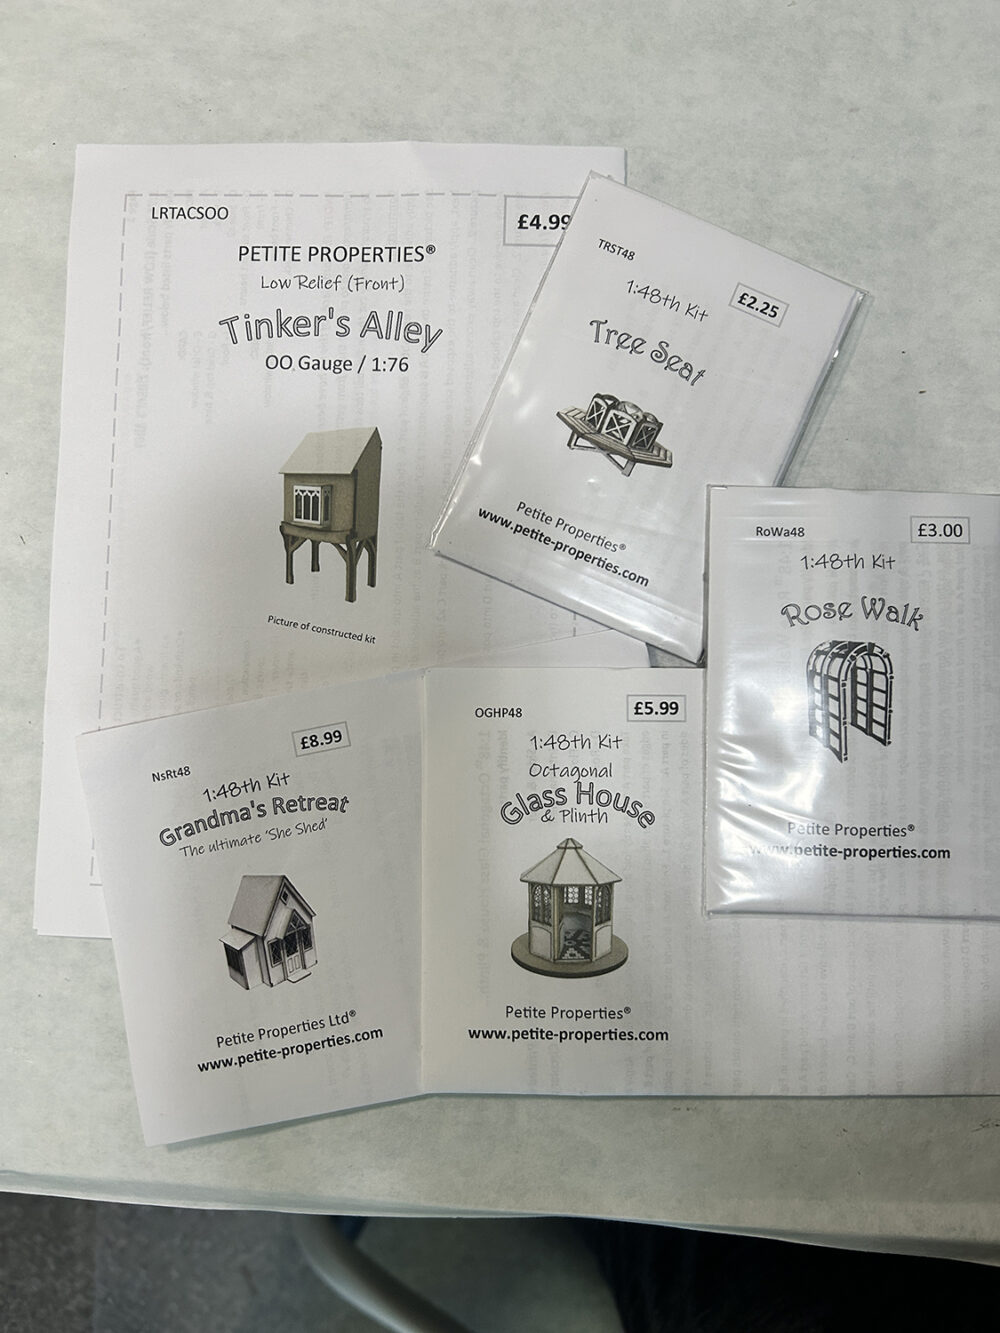
- Grandmas Retreat (1:48)
- Glass House (1:48)
- Rose Walk (1:48)
- Tree Seat (1:48)
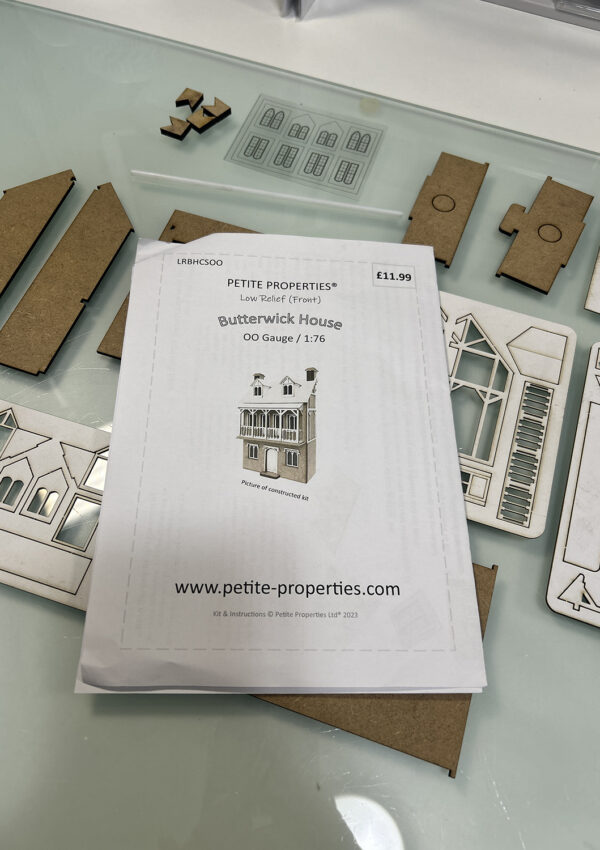
- Tinkers Alley (1:76)
Let’s begin . . .

- Measure and cut the oats can so that it’s 4″ high all the way around. Remove the lid and bottom. Cut cardboard circles to fit inside the can creating a new top. Stack cardboard if needed to create a sturdy top then glue the cardboard circles inside the can at top. This does not have to be perfect as it will be covered later on. Let dry completely!
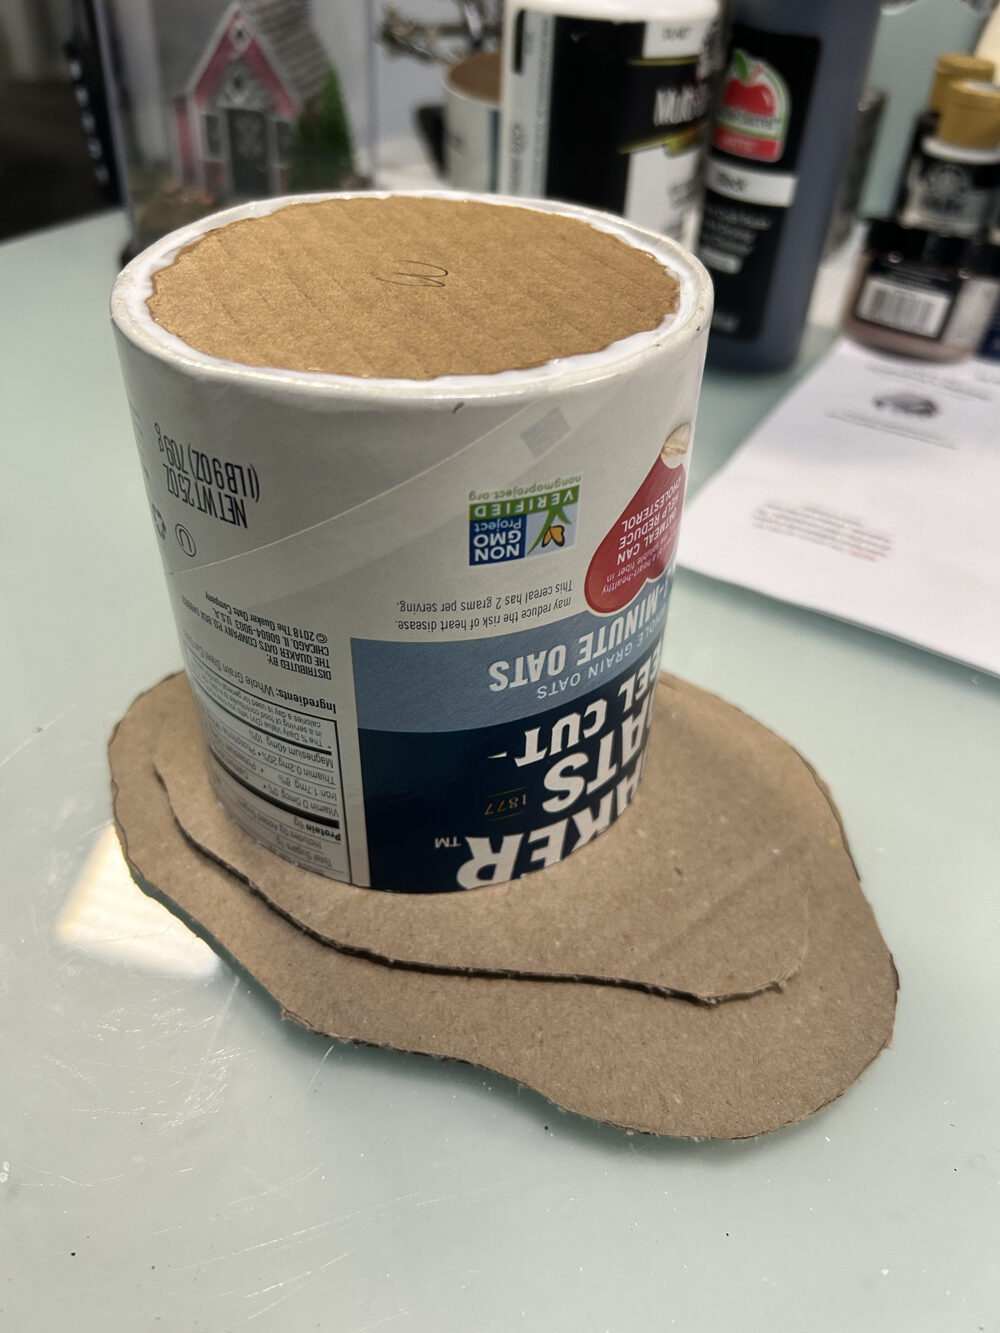
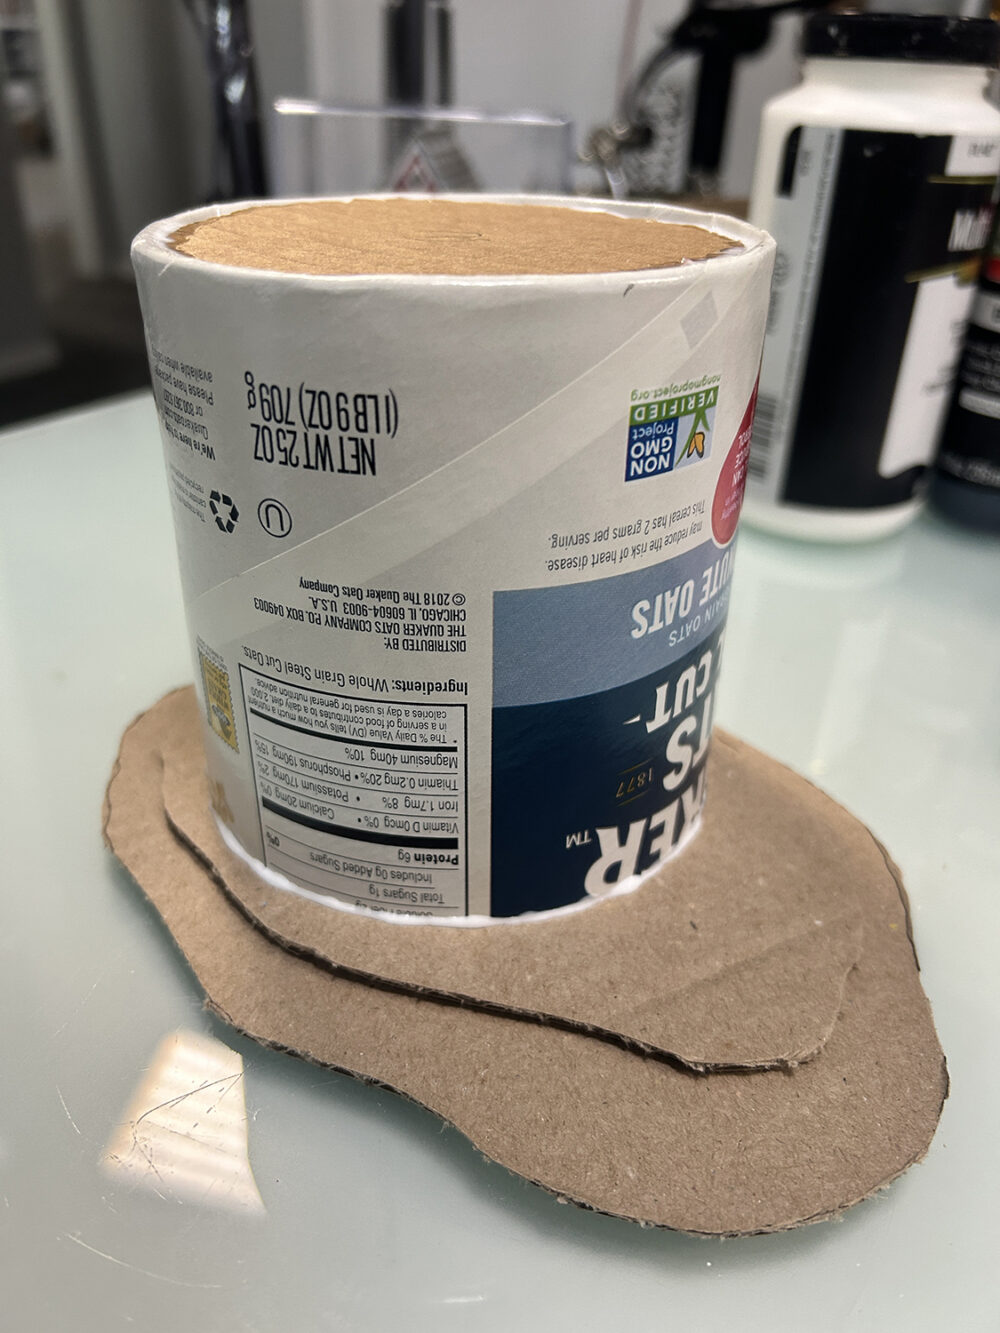
2. From cardboard cut two random shapes that will be used as the base. Cut one smaller than the other so that when glued together it creates a ridge and variation in size. NOTE: Be sure that the can still fits on top of the smaller shape with just a bit of space left around the can.
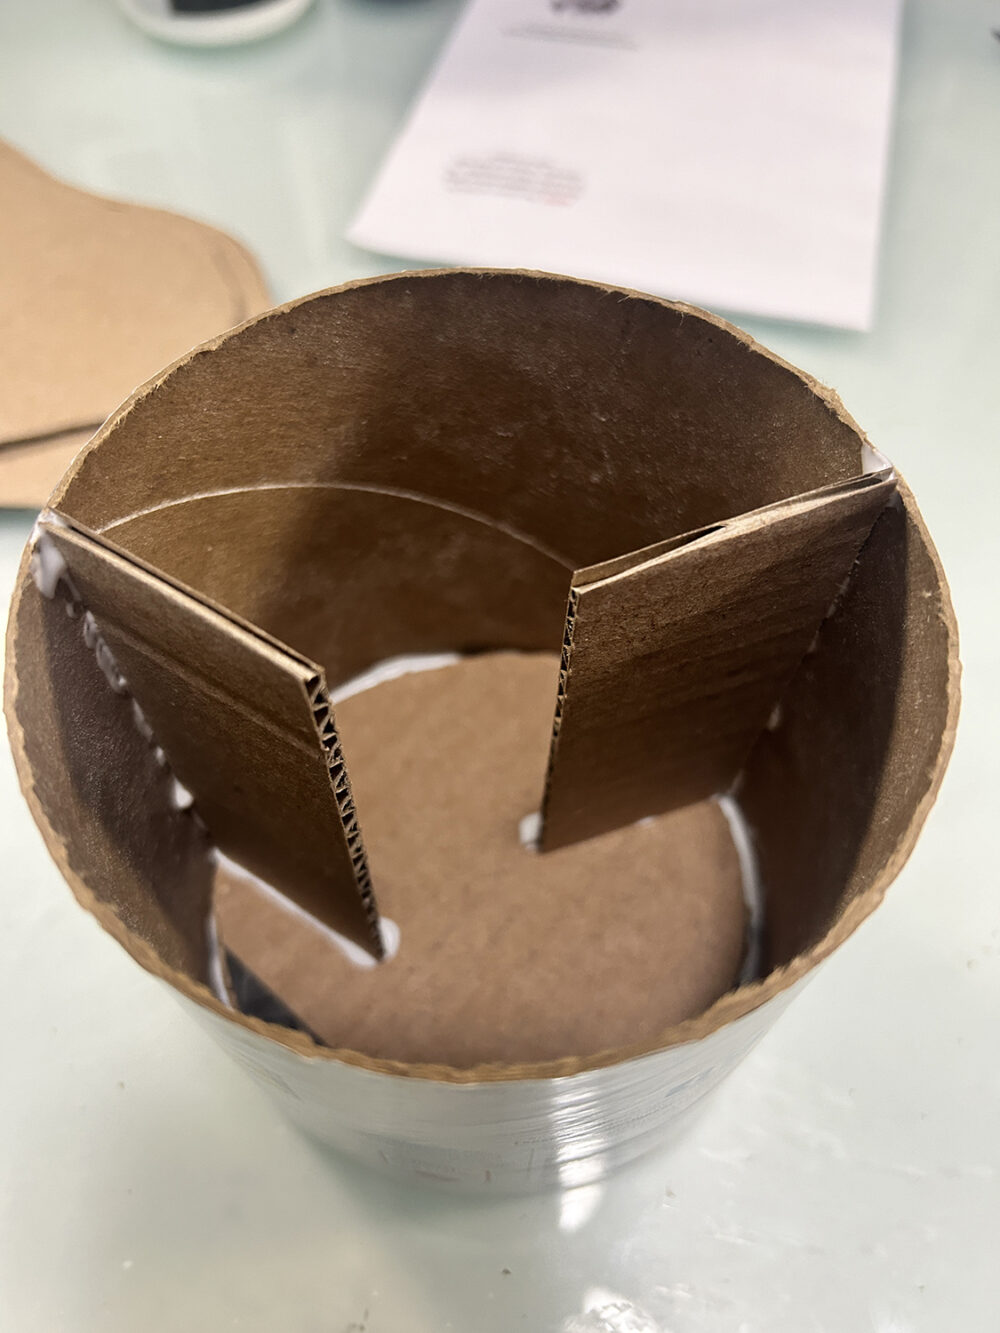
3. Cut two strips of cardboard 1.5″ wide by 4″ long and glue them inside the can as a support for the can.
NOTE: Test fit the strips and trim even with the bottom of the can.
4. Glue the can section on top of the smaller base piece. Let this part completely dry.
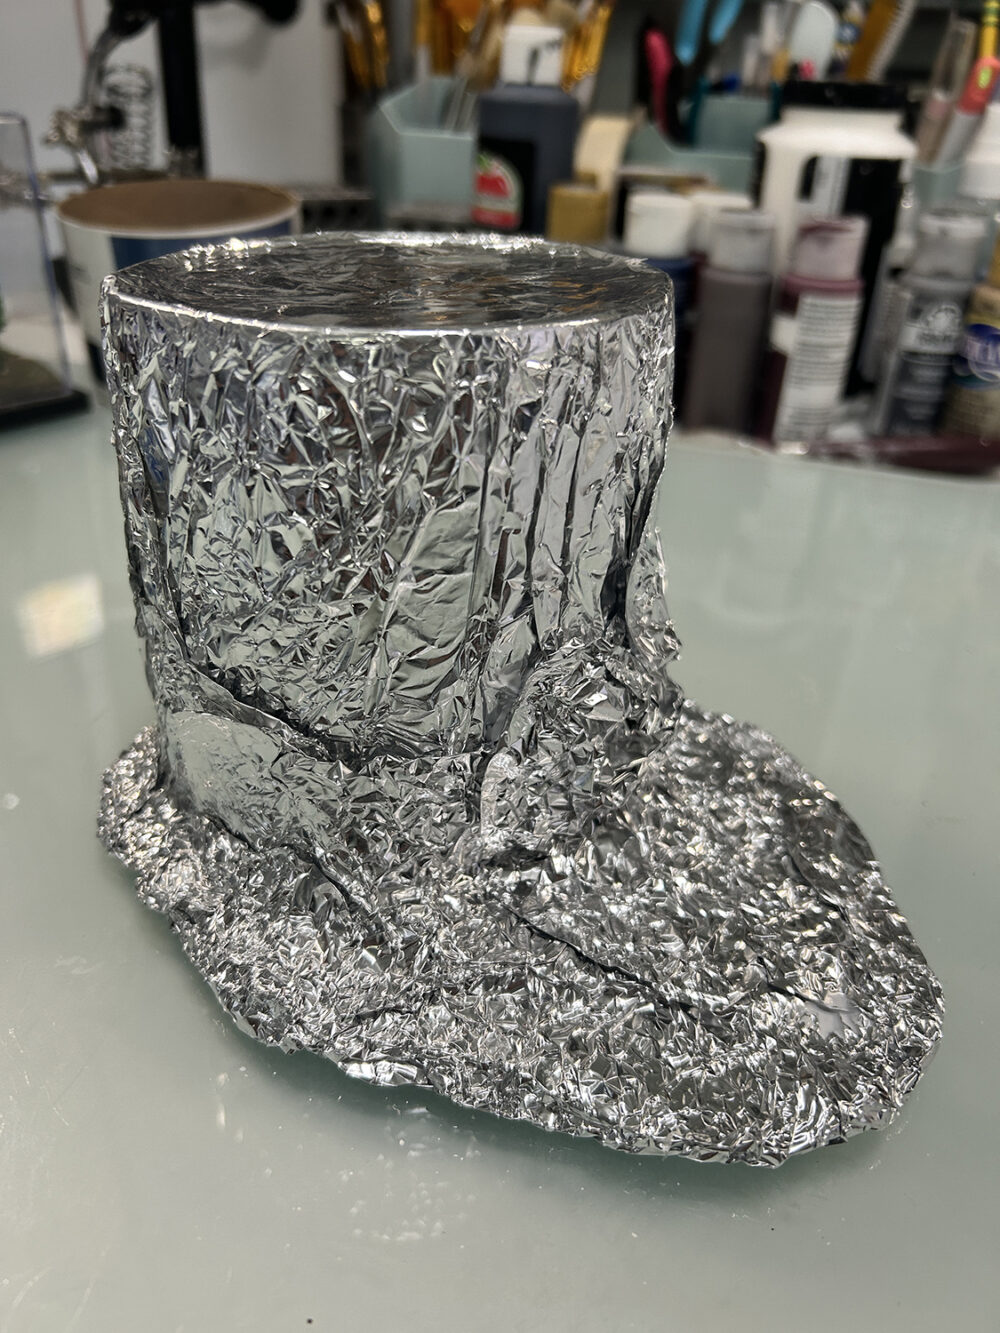
5. Cover the entire piece in crumpled aluminum foil adding bits of glue here and there to help secure the foil. Be sure to wrap the foil around the edge and underneath the bottom base. Try and create a couple of large tree roots along the larger area of the base and add bulk to that side of the tree to change the perfect cylinder shape from the can. Just keep playing with the foil till you get to a shape that you like.
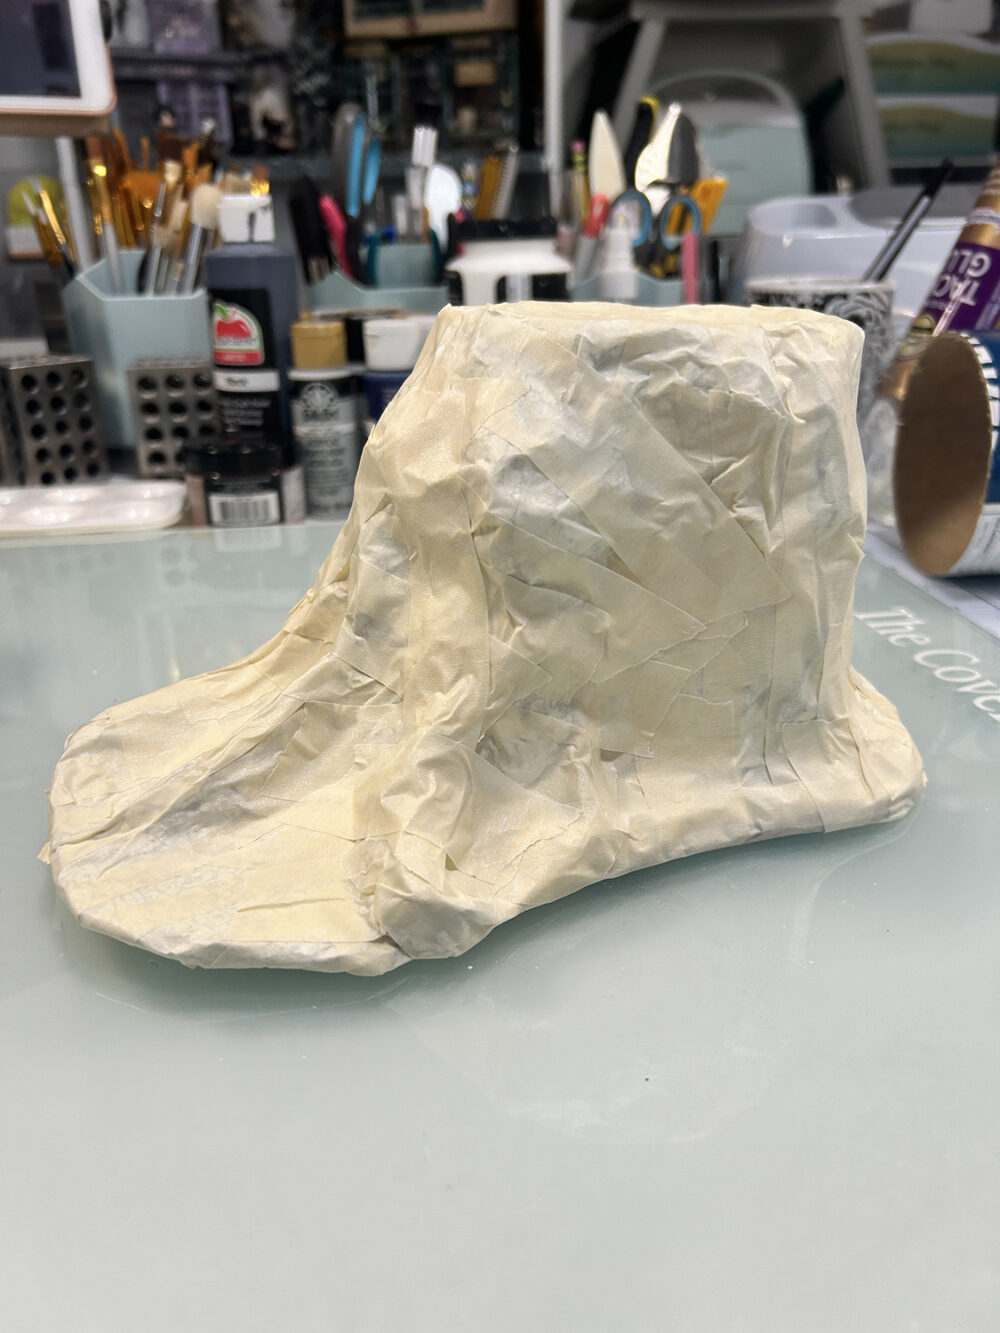
6. Once you have a shape you like, cover the entire piece with strips of masking tape. Be sure to cover ALL of the foil and wrap the tape under the bottom of the piece.
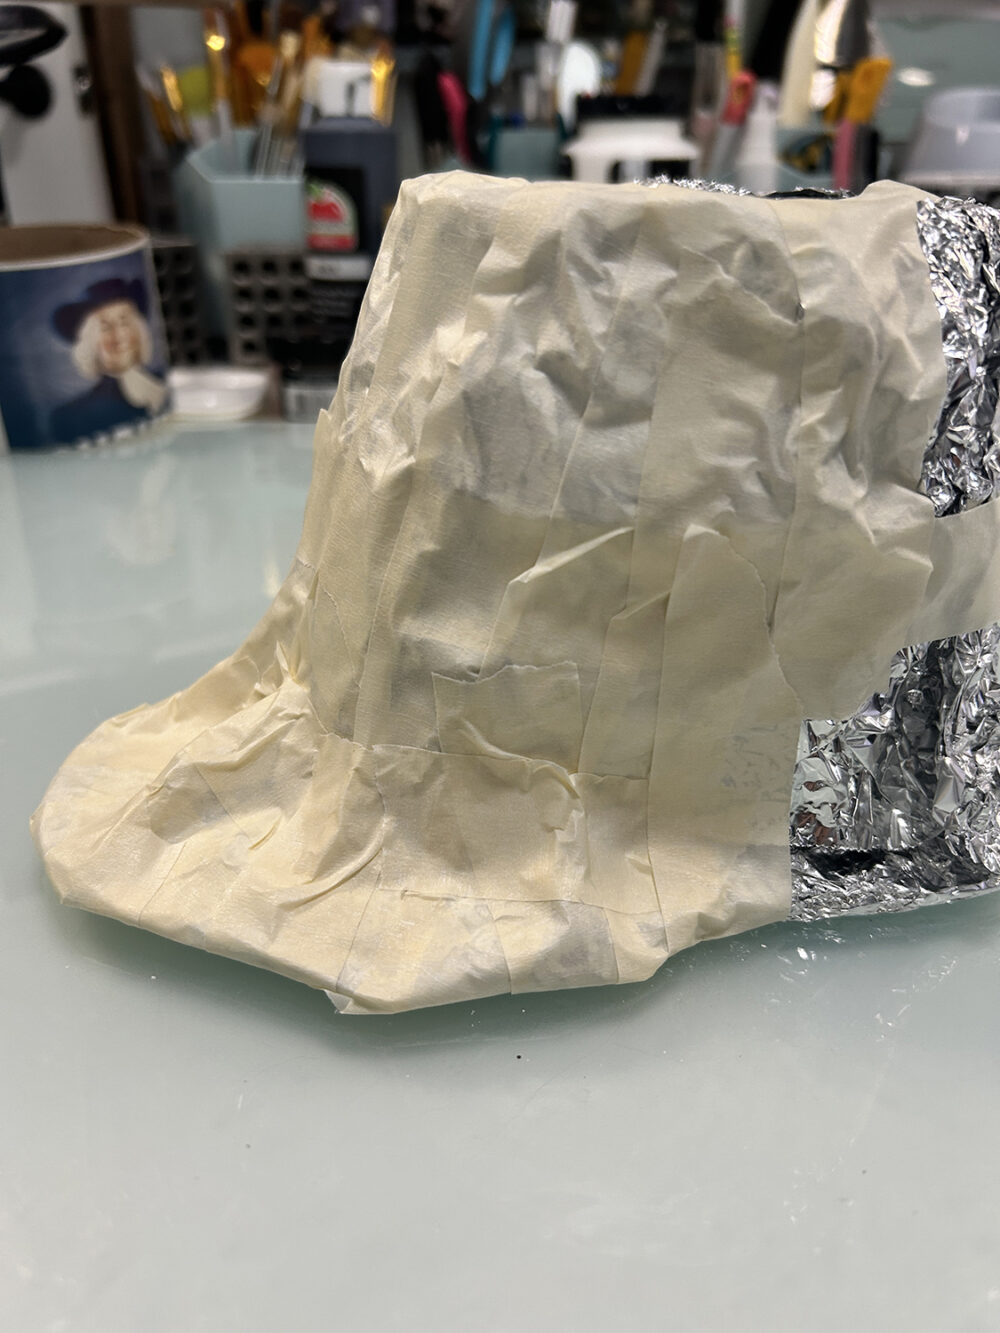
NOTE that I did go back and add a larger cardboard piece to the bottom of the base and was then able to create larger roots.
TIPS: Once you have tape on the entire piece you can squish it with your hands to adjust the shape and you can always add more foil and tape if you want. There will also be another layer added where you can again add more detail and define the shape.
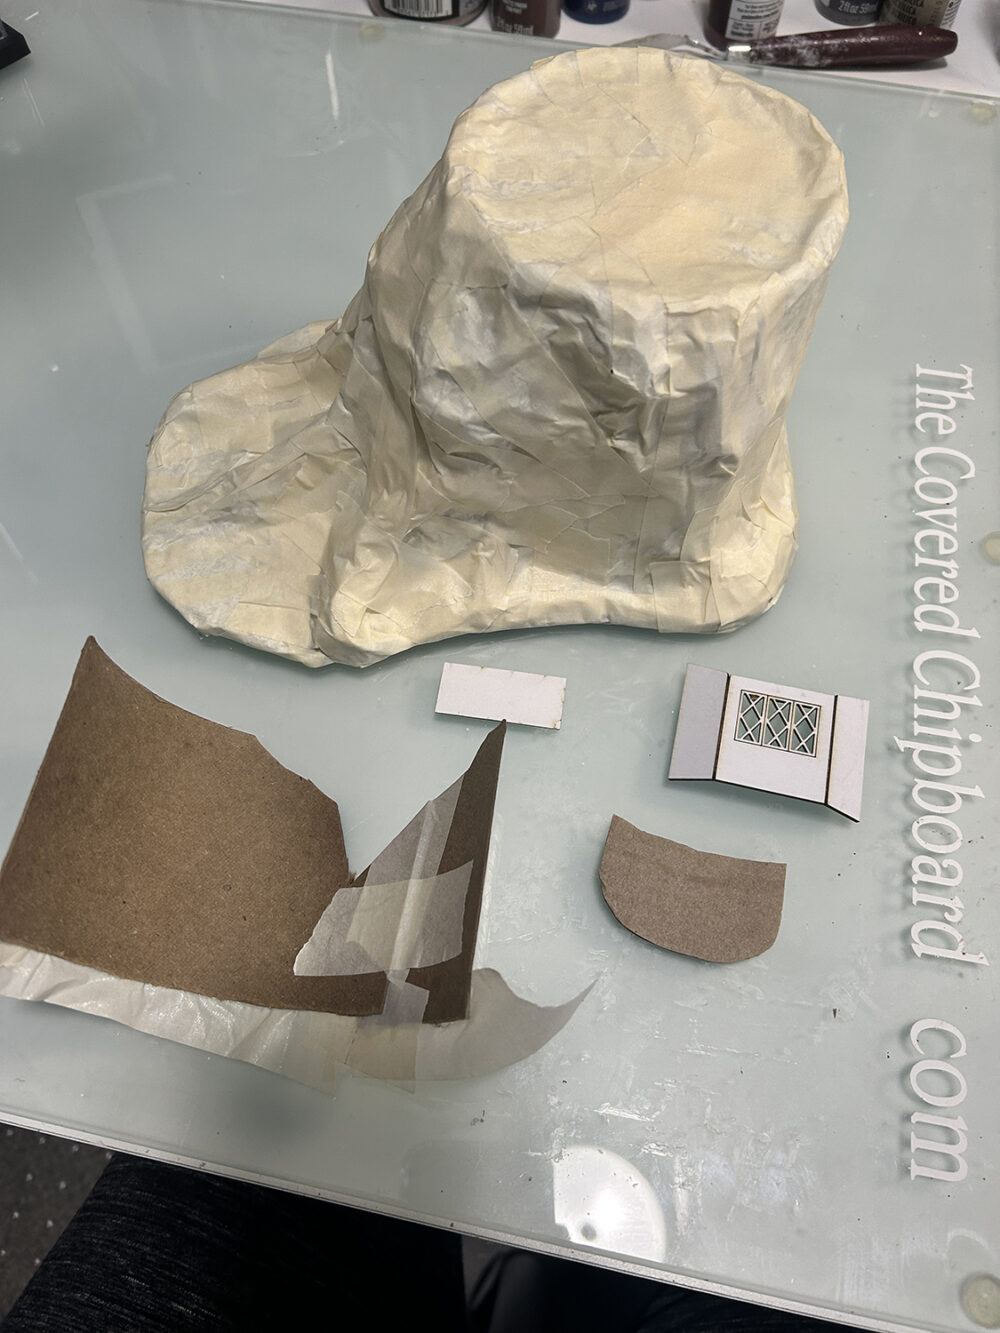
7. From the leftover can cut a piece about 6.5″ wide and 3″ high. Cut a shape from the top of this piece as seen in the image above. Cut a rounded shape from cardboard as seen above – lower right of image. This will become a ledge to hold the bay window from the kit.
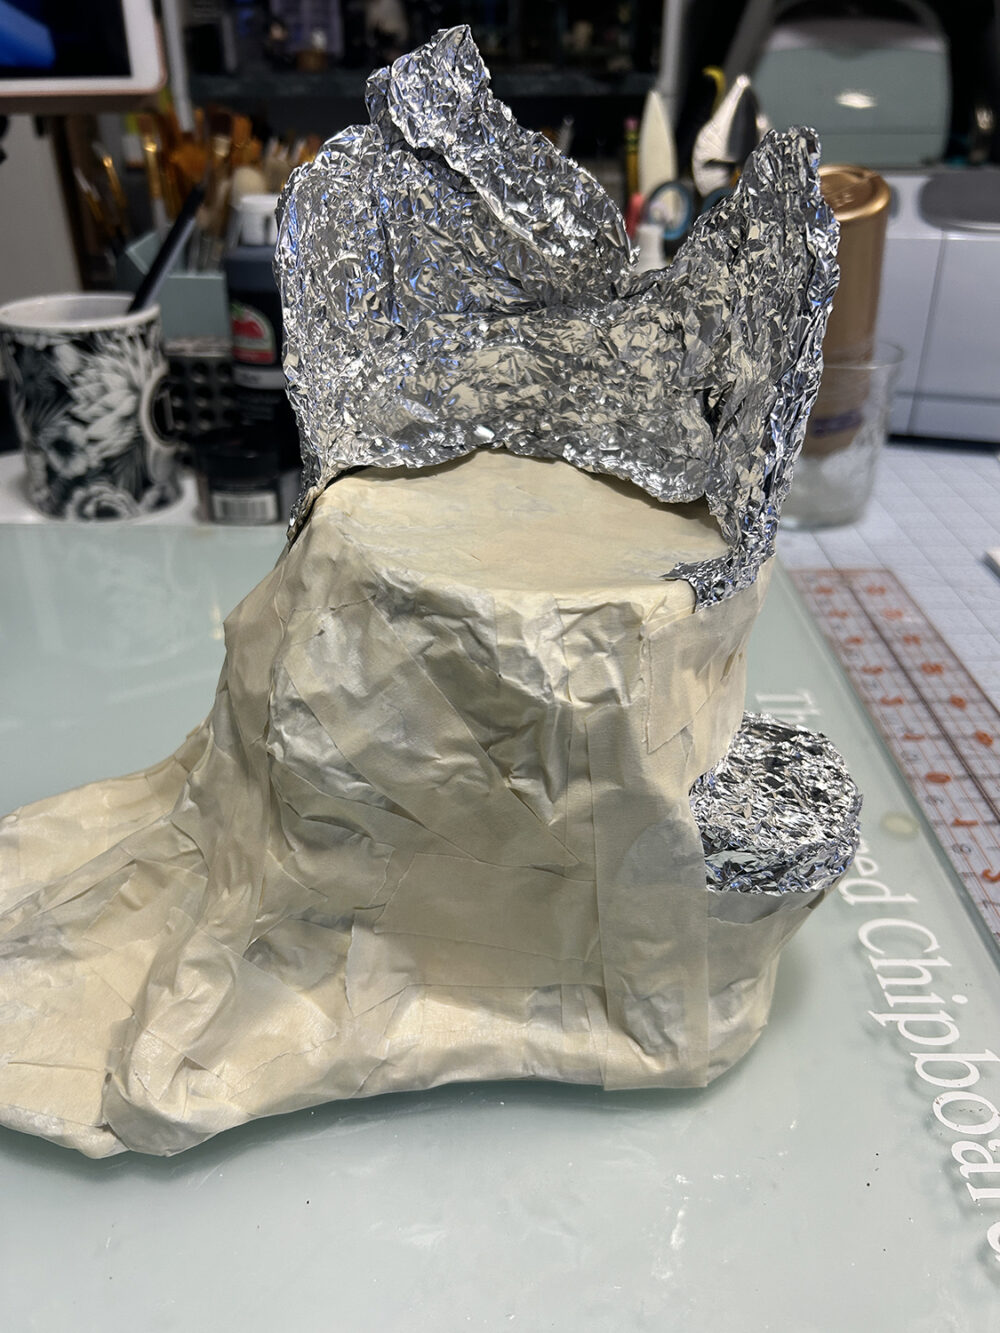
8. Cover both cardboard areas with aluminum foil completely. For the lower edge portion, use foil to build up the area underneath the cardboard ledge piece. You can easily add extra areas to the upper portion with the foil and shape the top portion as well.
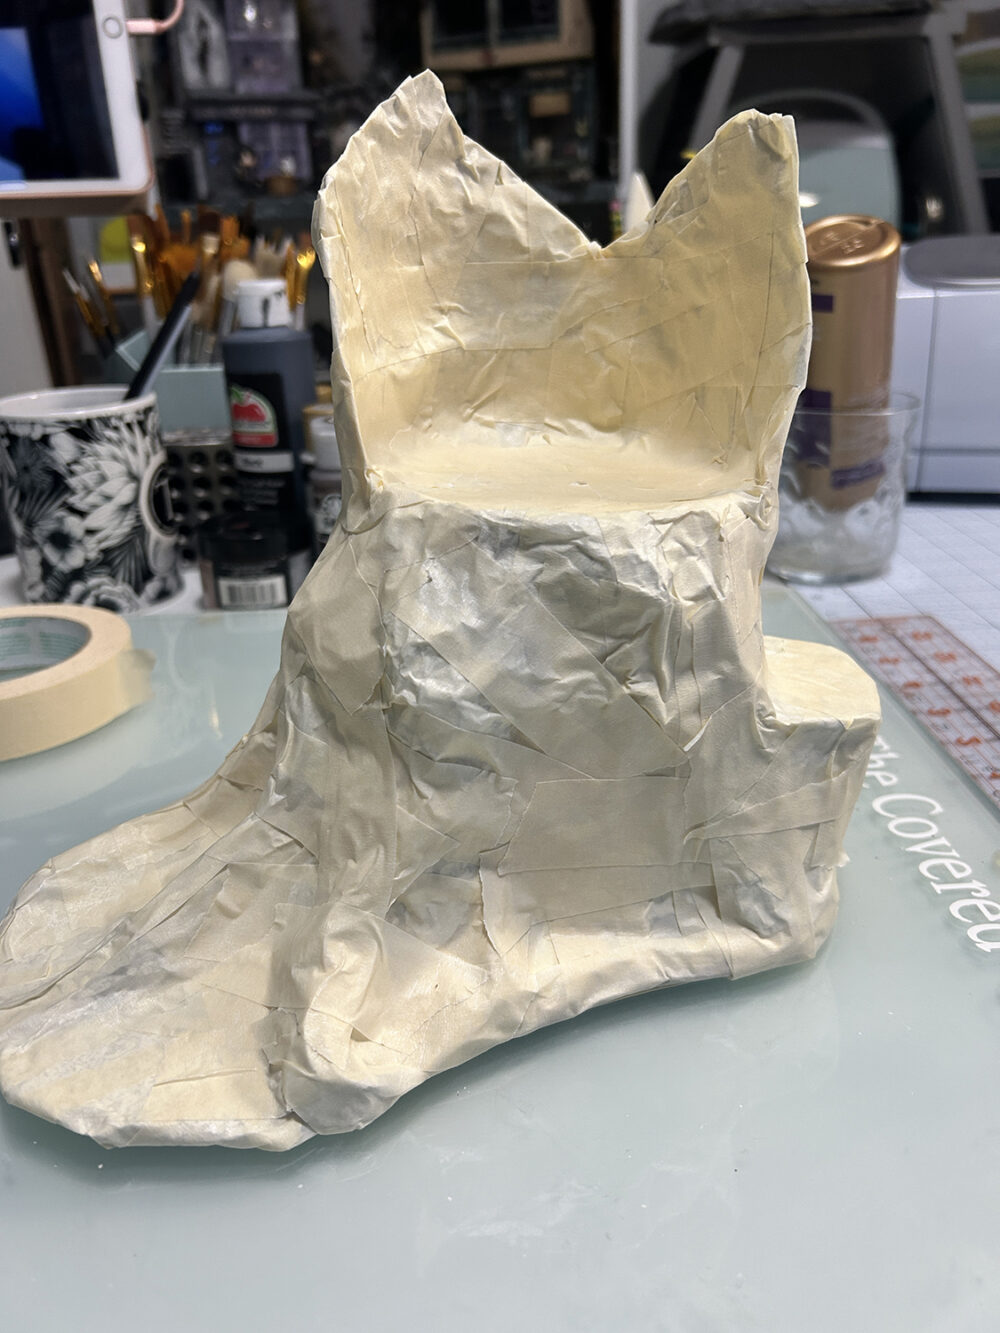
9. Cover all of the new foil areas with masking tape. The upper portion is like a hollowed-out dead bark area so you should smash it flatter when applying the masking tape.
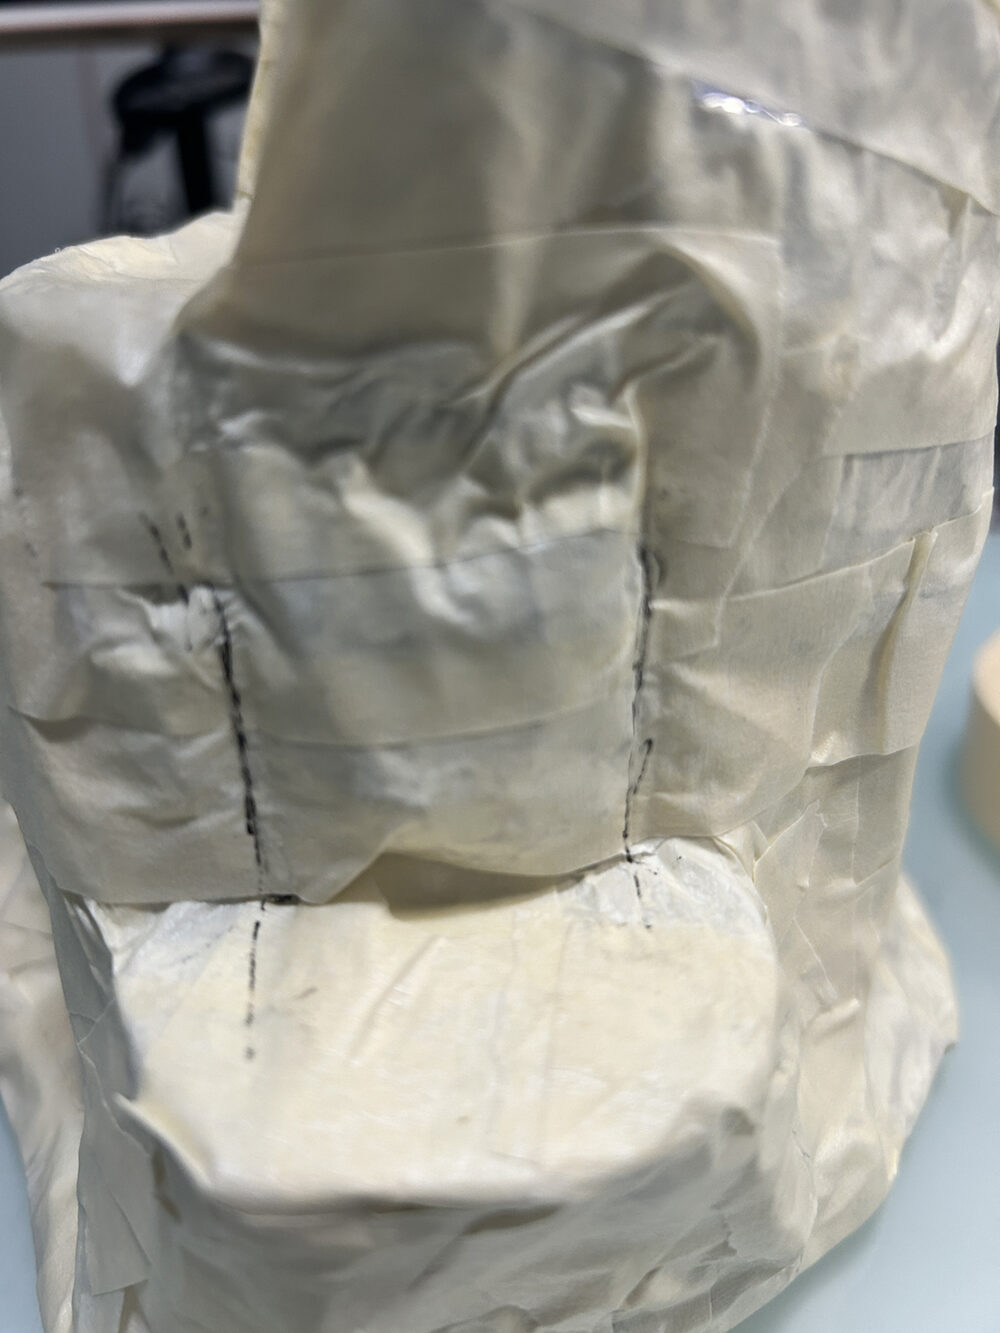
10. Test the fit of the bay window from the house kit and mark the left and right edges on the ledge area. The sides of the window will need to be flush with the tree stump sides and you may have to add a bit more foil to achieve this.
When you add paper towels in this area be mindful of the drawn lines and do not add any bulk that might affect how the bay window fits.
11. You should play around with the tree stump by adding bits here and there until you are happy with a shape. You can see my final stump shape here. Notice that I’ve added another ledge on the left side. I’ve also created an inside space in the lower area of the stump.
12. If you want, add another larger bottom base for further landscaping. As you can see, I’ve added some cardboard steps and what will be a door when finished. I’ll also make a pond area out front.
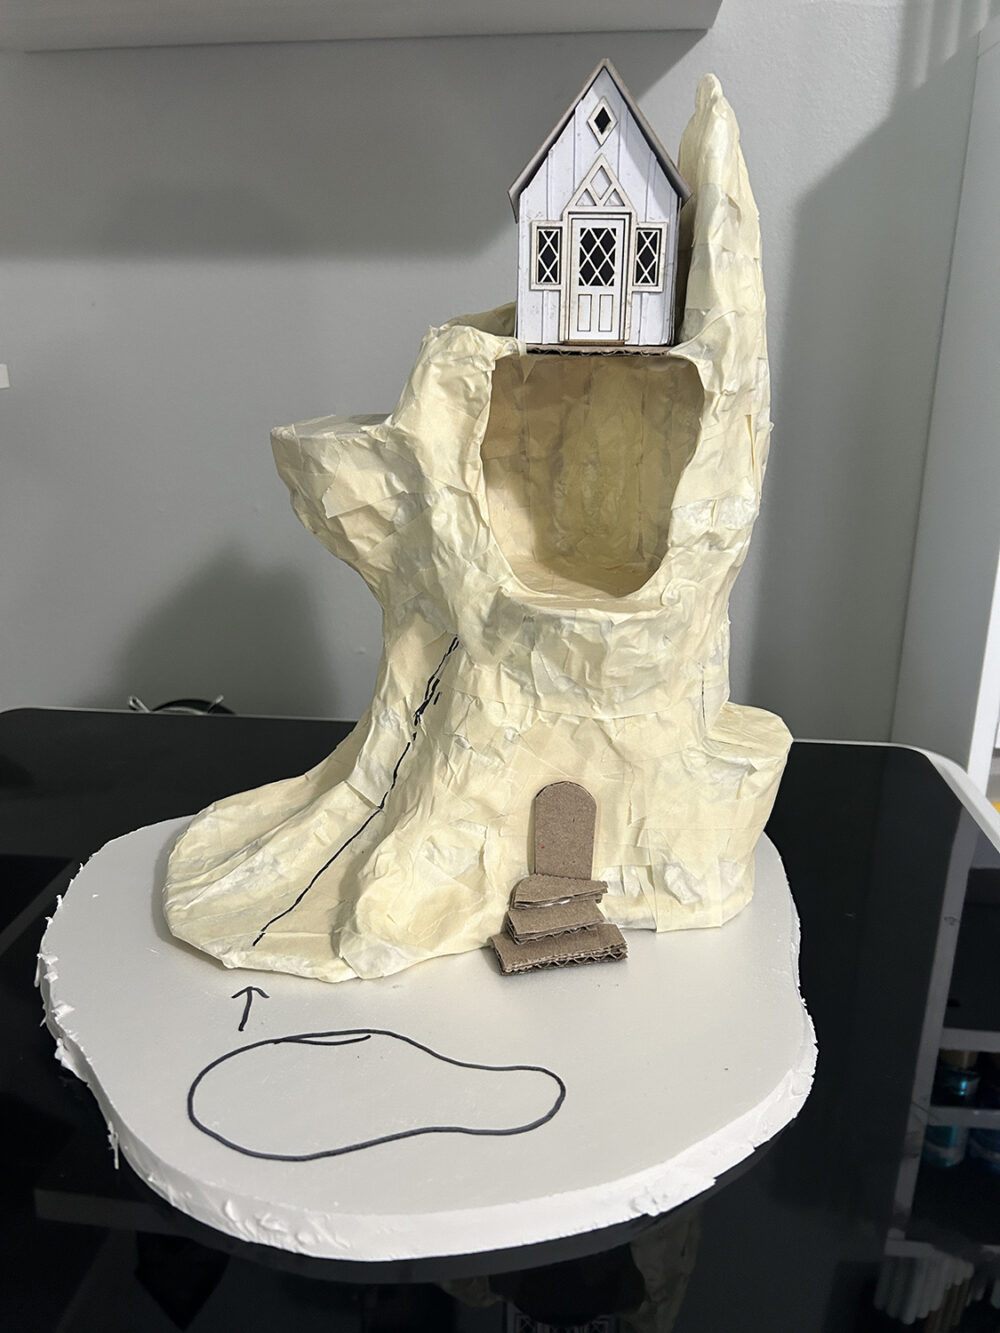
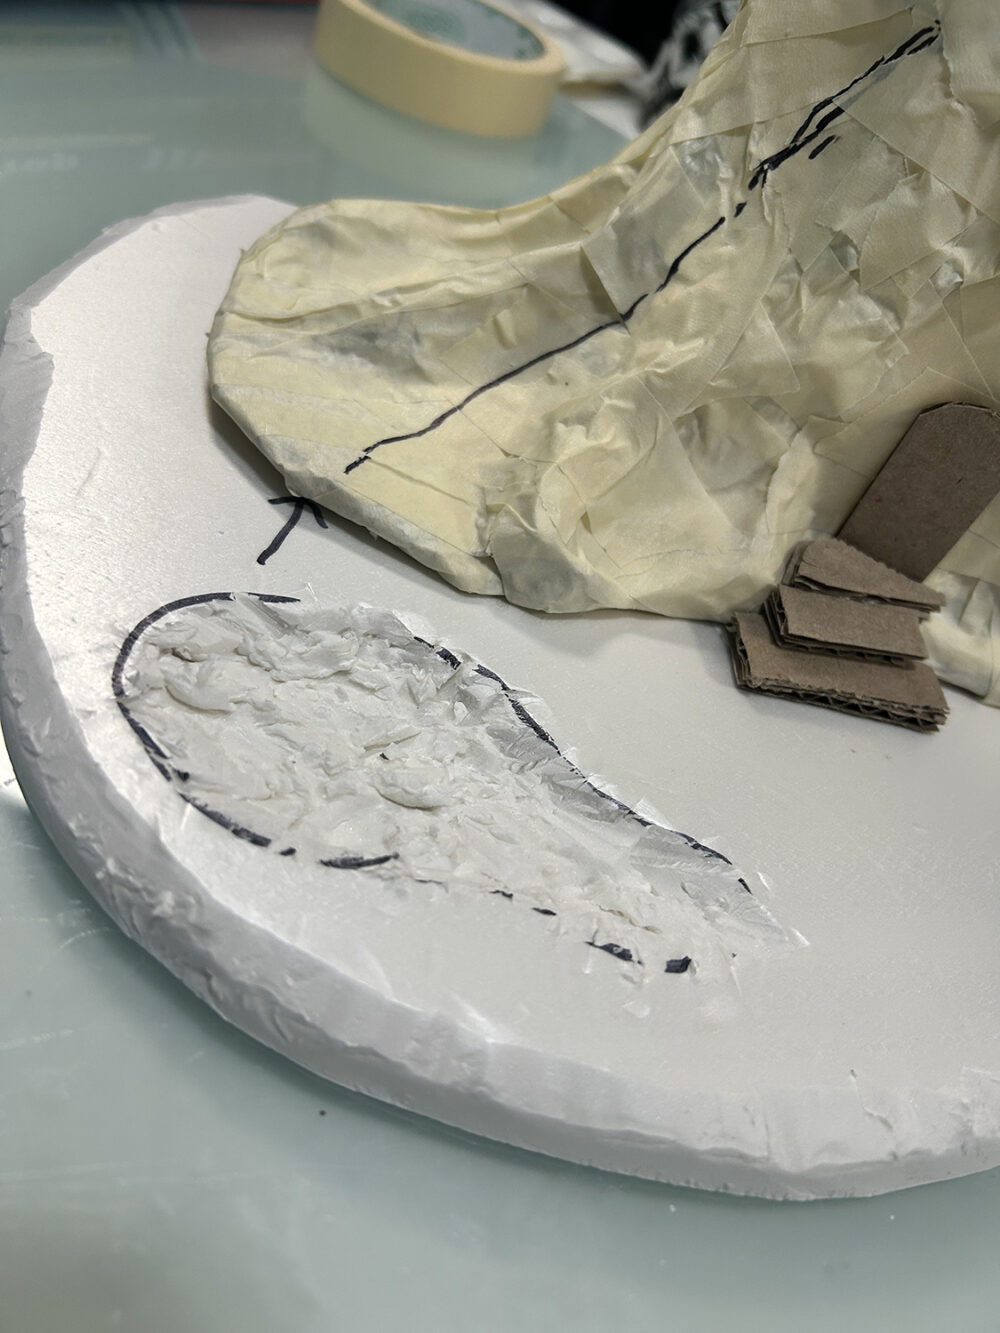
13. Carve the edges of the large base so they are not squared off or a harsh line. If you want a pond, use a craft knife to carve it out as seen at left. This way you can fill it with UV Resin and have some depth to it.
14. Cover the larger base, going around the pond area, with foil then masking tape. This should be done just as you did for the tree stump. Use the foil to build up a little ledge around the pond.
As with all my projects, this one evolved during the process. Here’s a look at the final shape for the tree stump and ground.
Remember that this is YOUR project so make the shape in any way you like. Have FUN with it!
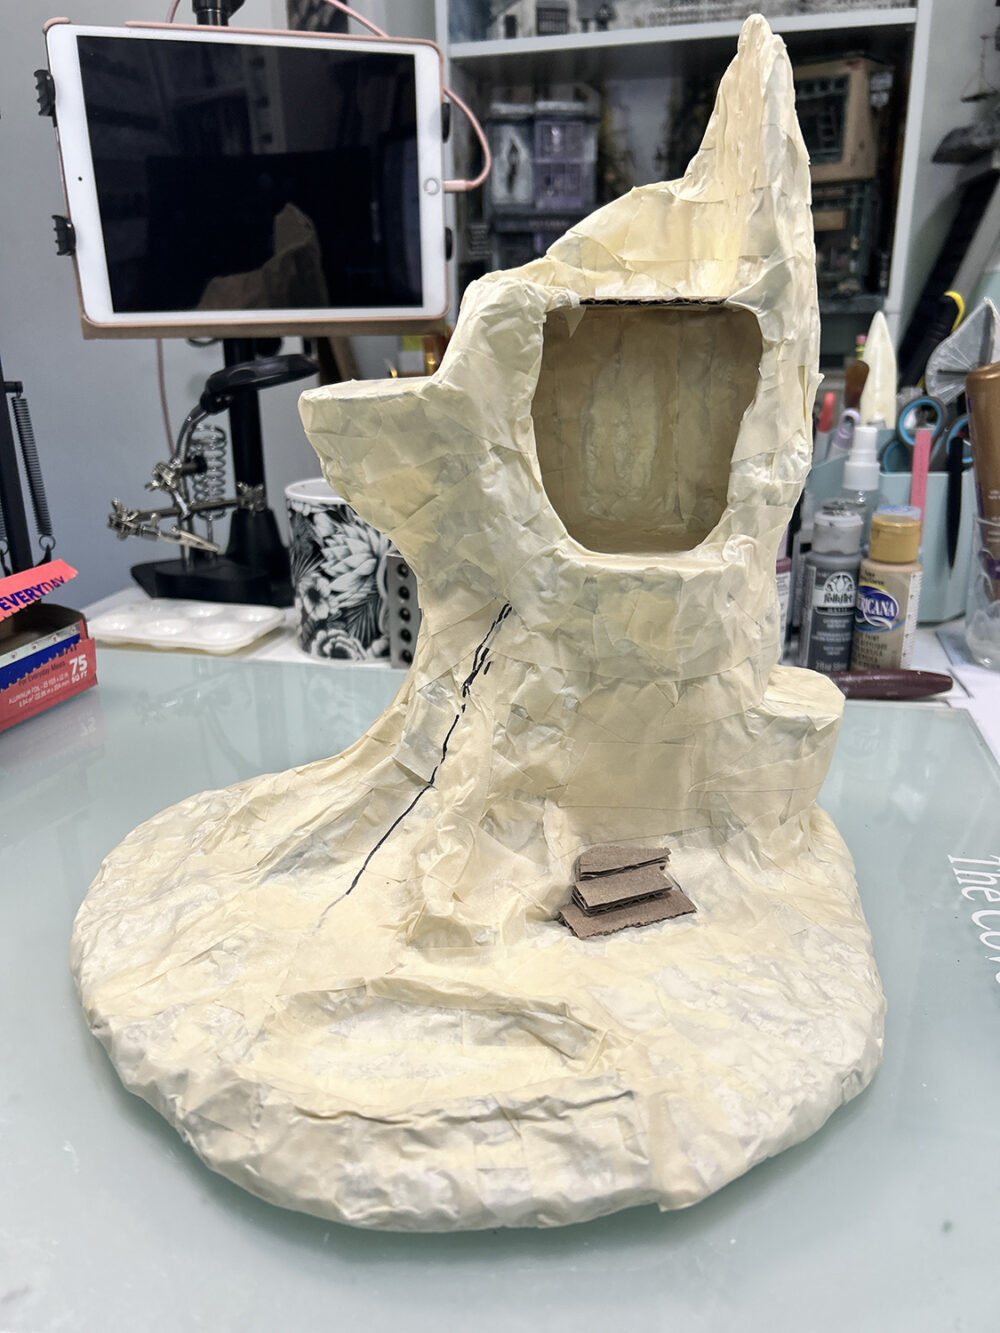
15. Now it’s time to apply the paper towels with a mixture of glue and water. This will be messy so I suggest that you cover your work surface with parchment paper. Look at the examples below for adding texture to the paper towels. Apply glue mixture to the base in small areas, lay the paper towel on the surface, and apply more glue on top of the paper towels. When you apply the glue use the brush to push the paper towels down and bunched up. Work the edges well so that you do not see definite lines. You want to create something that resembles ground on the base and tree bark on the stump. For the areas at left, right, and at the top where houses will sit keep the texture to a minimum and flat.
NOTE: I discovered this method for ground and trees at Where The Gnomes Live. She has a great tutorial on creating bark in two different ways. Hop over to her YouTube channel and take a look at THIS VIDEO and THIS VIDEO. While I have used the paper towel method you could easily use the clay method if you like.
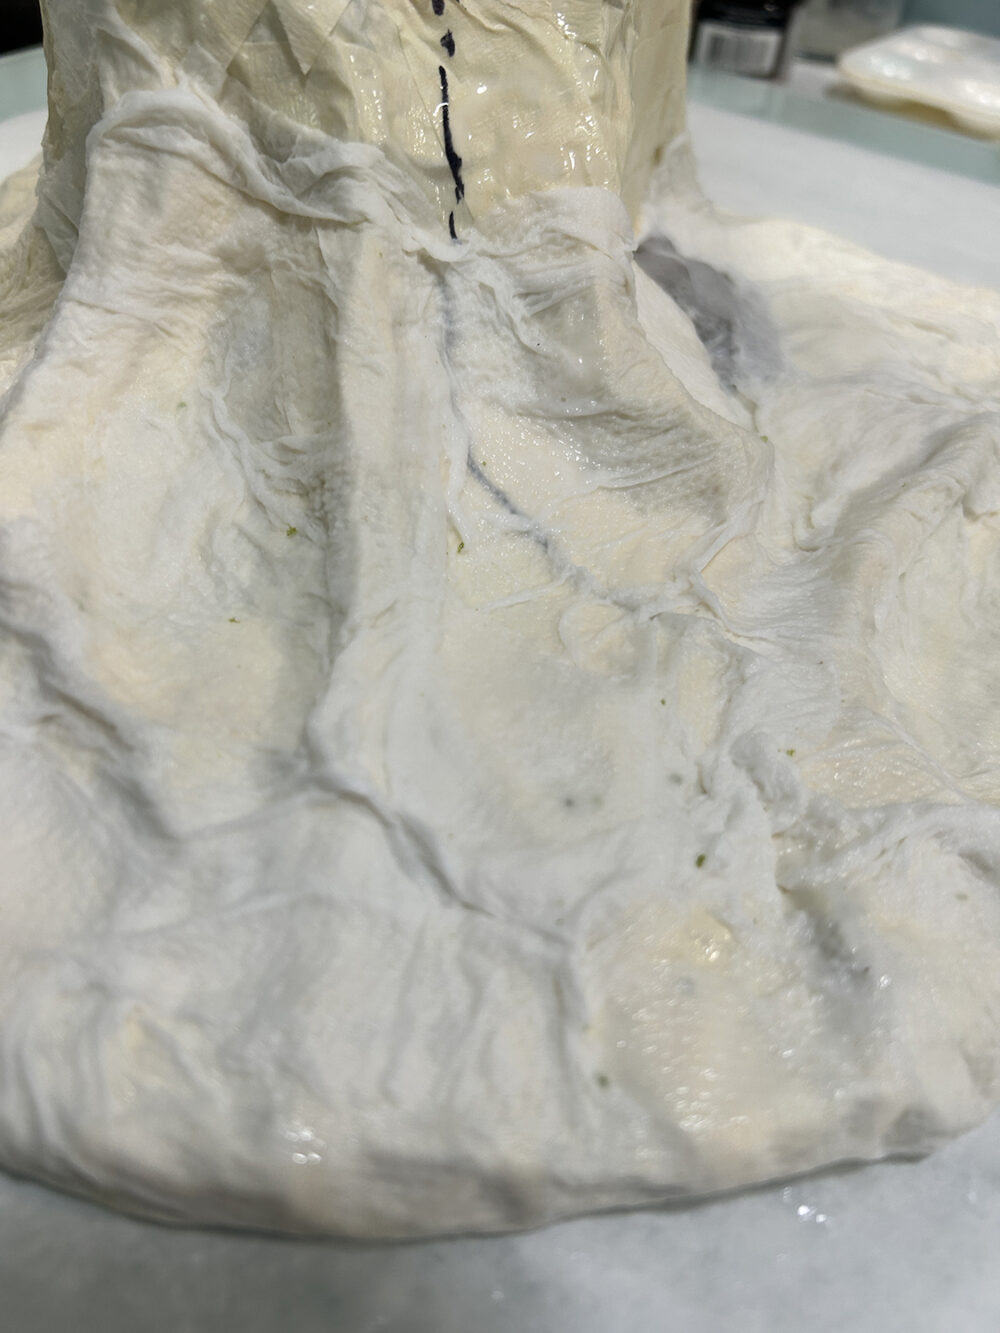
Notice how I have pushed the wet paper towel around with the brush to extend the tree roots.
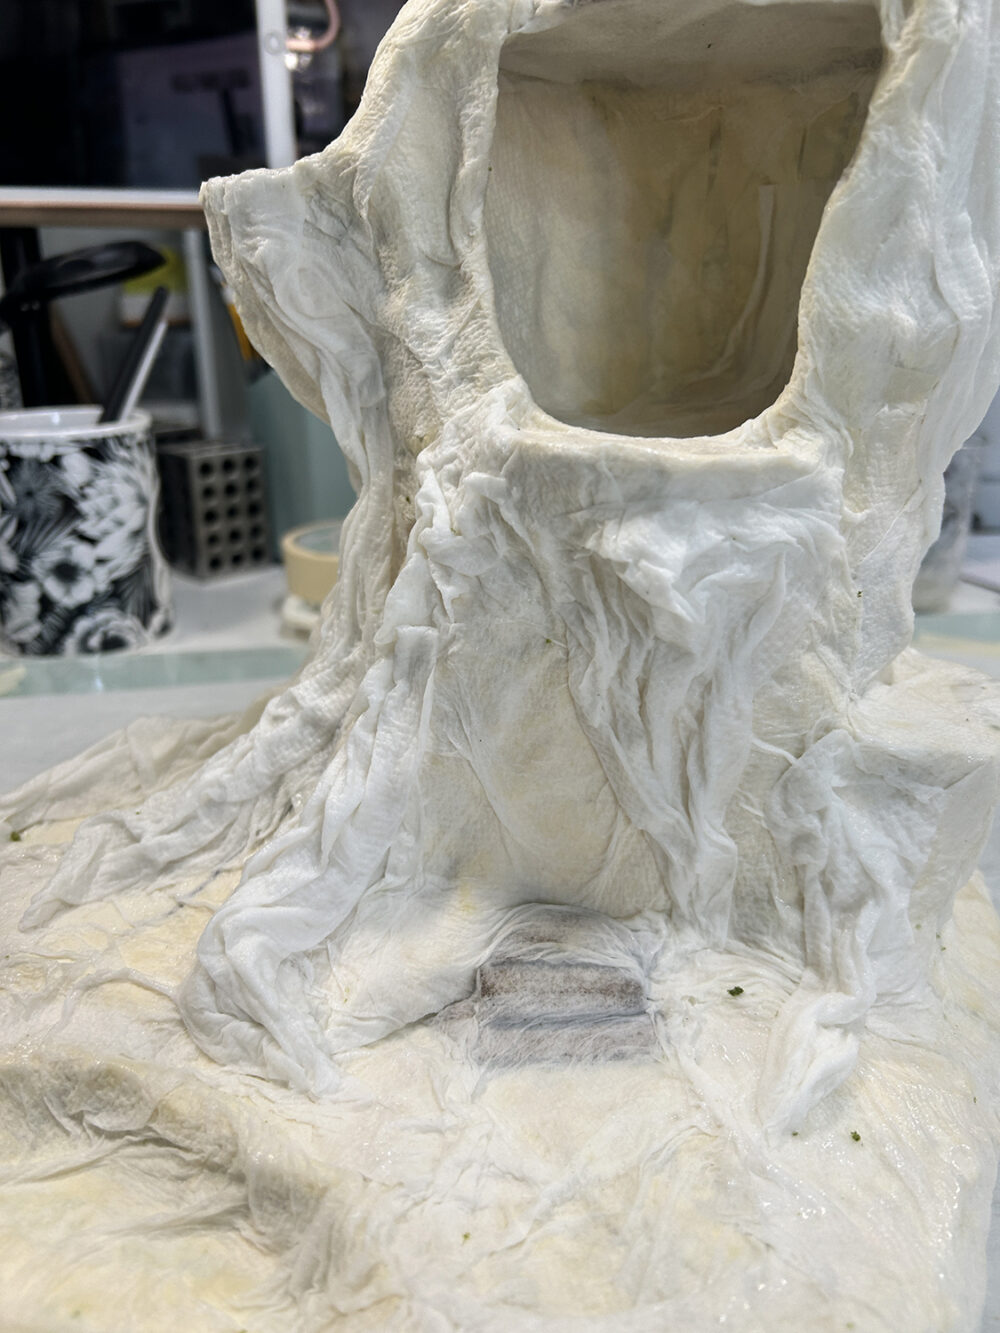
Add more paper towels in various spots to create more texture.
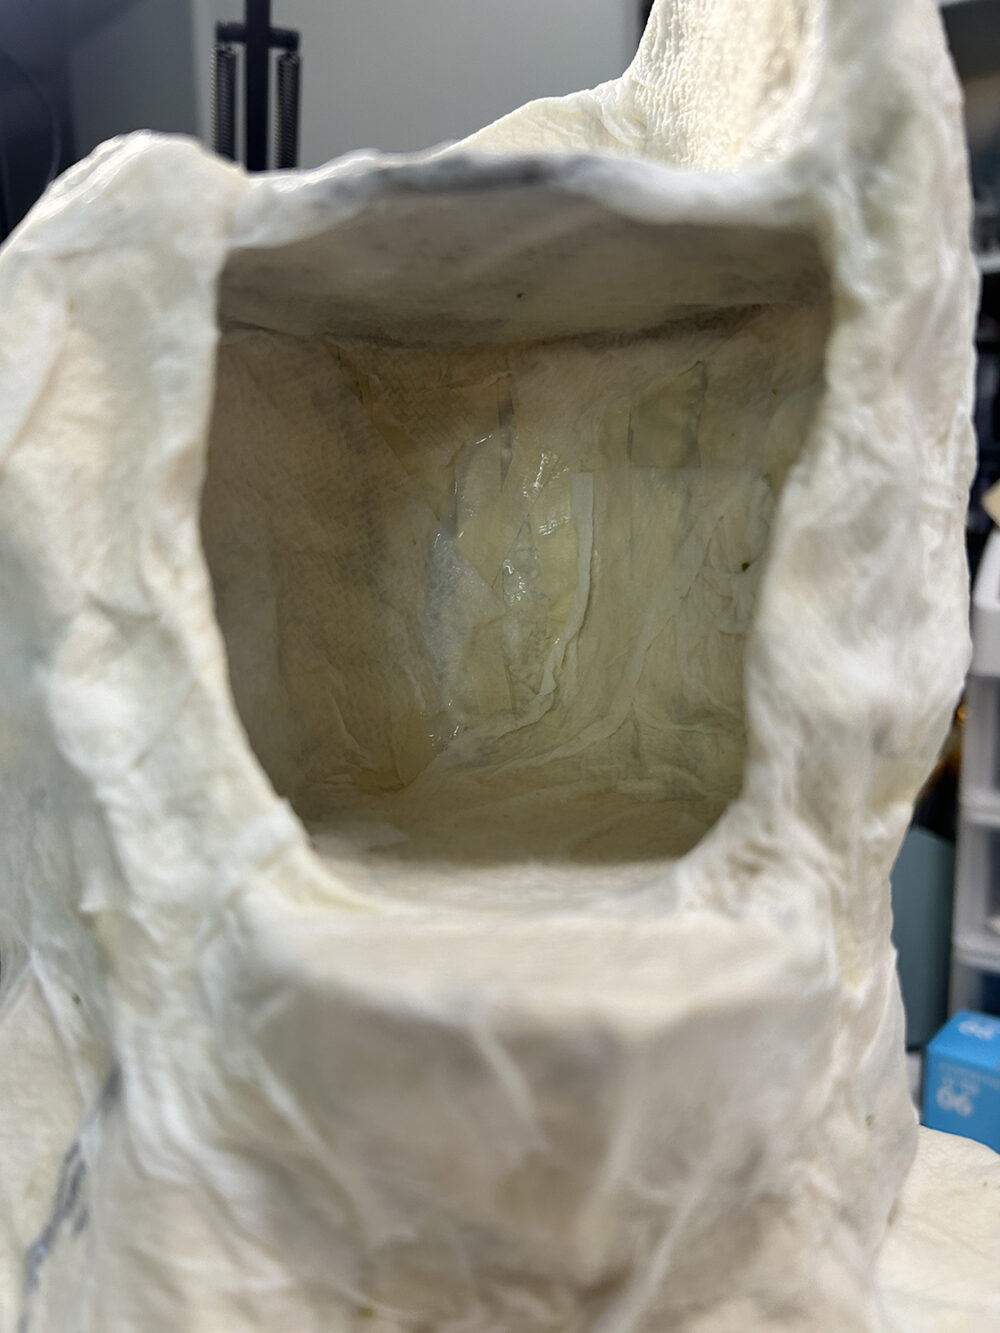
Don’t forget to apply at least one layer of the paper towel to the inside of the hole.
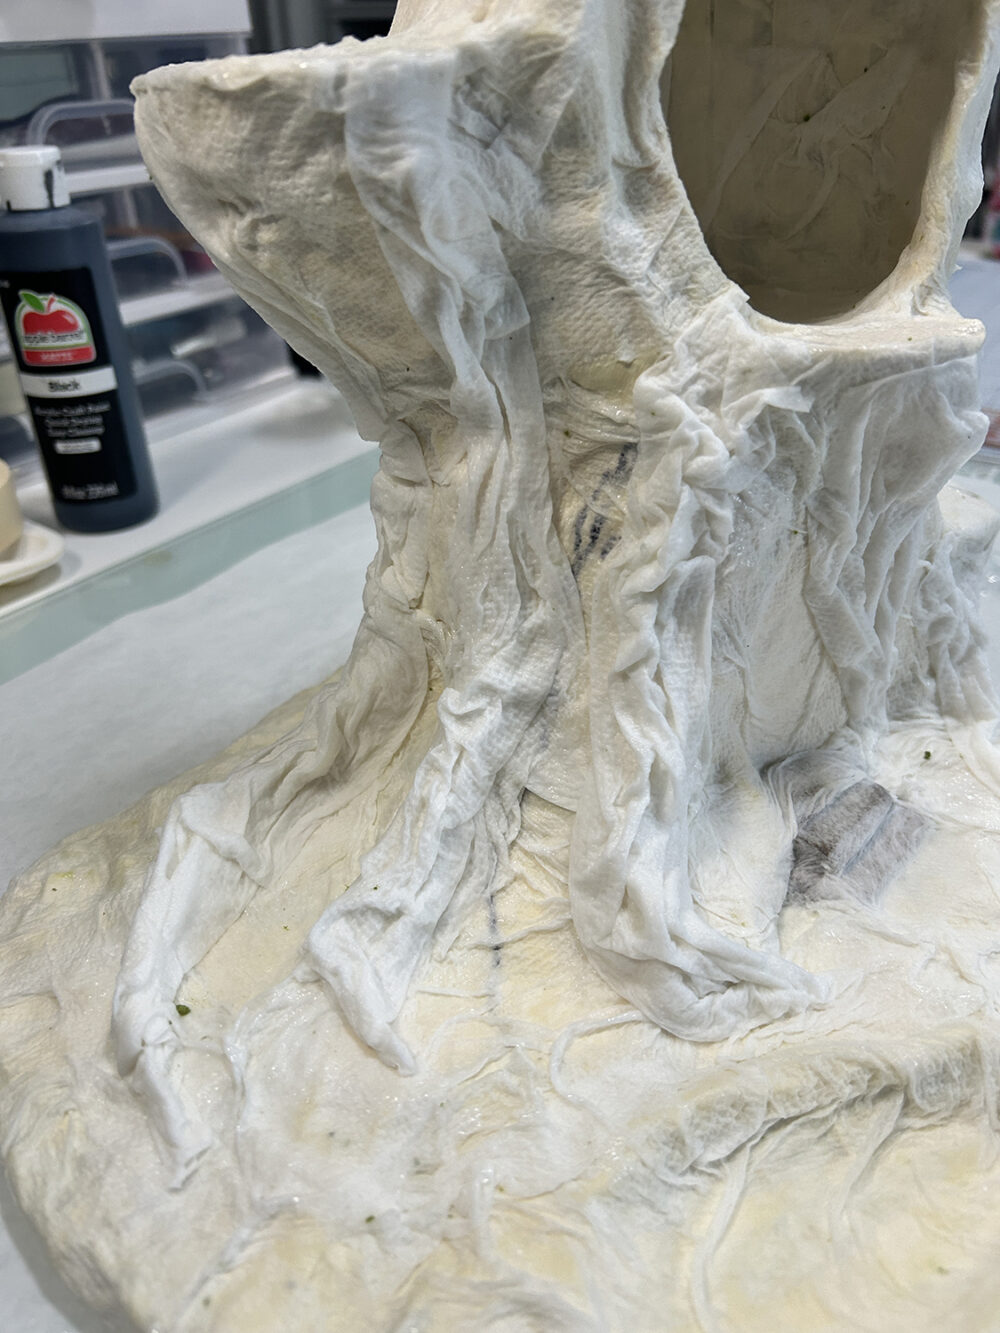
Soak a paper towel and squeeze off the excess glue then apply to the stump.
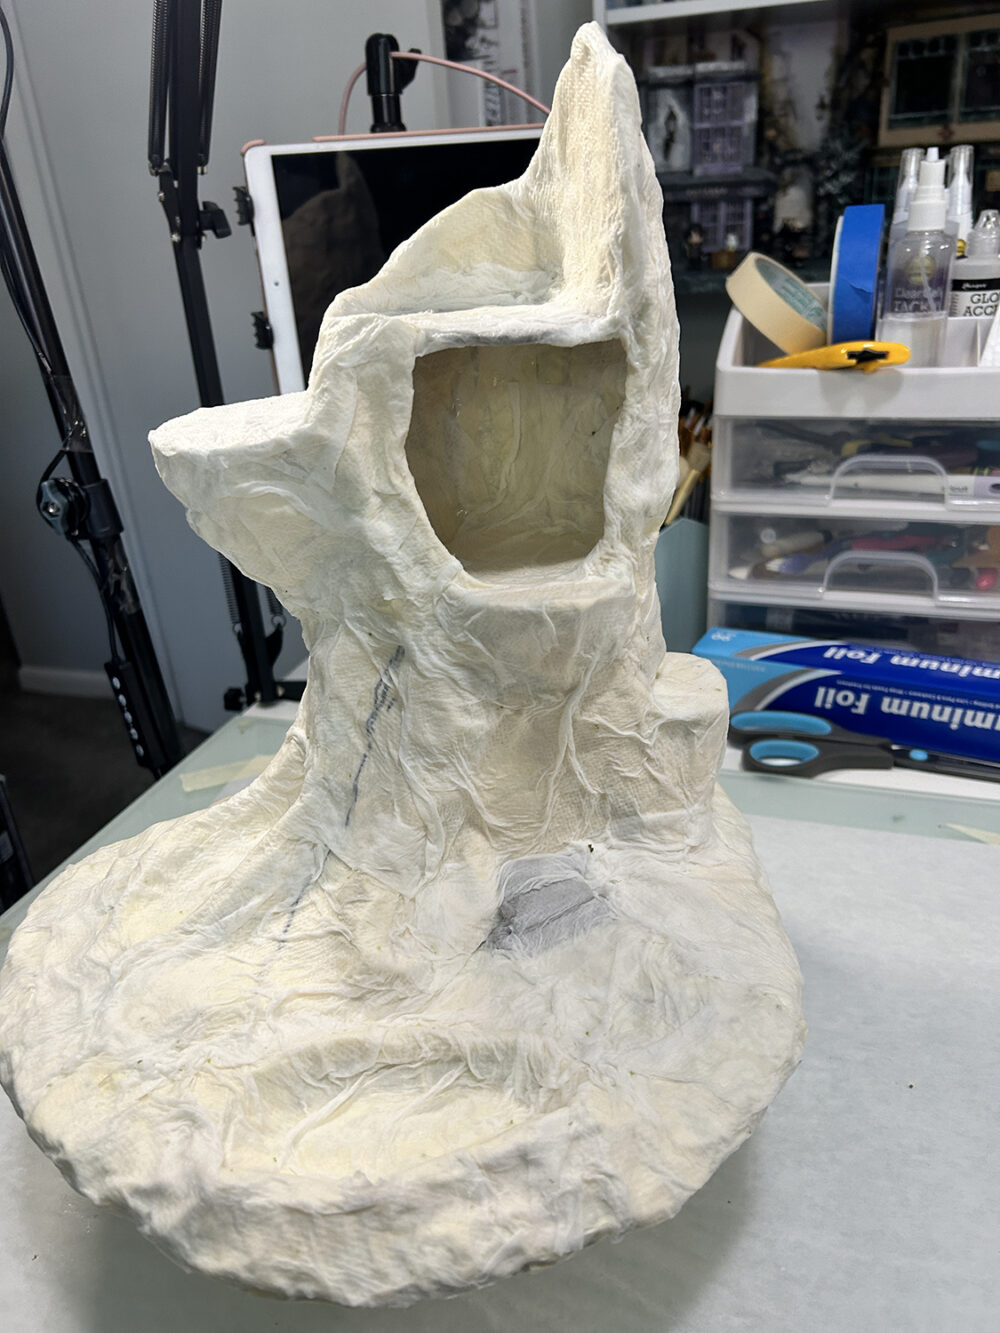
Let this first round of paper towel application dry overnight. Next, add more texture. (below)
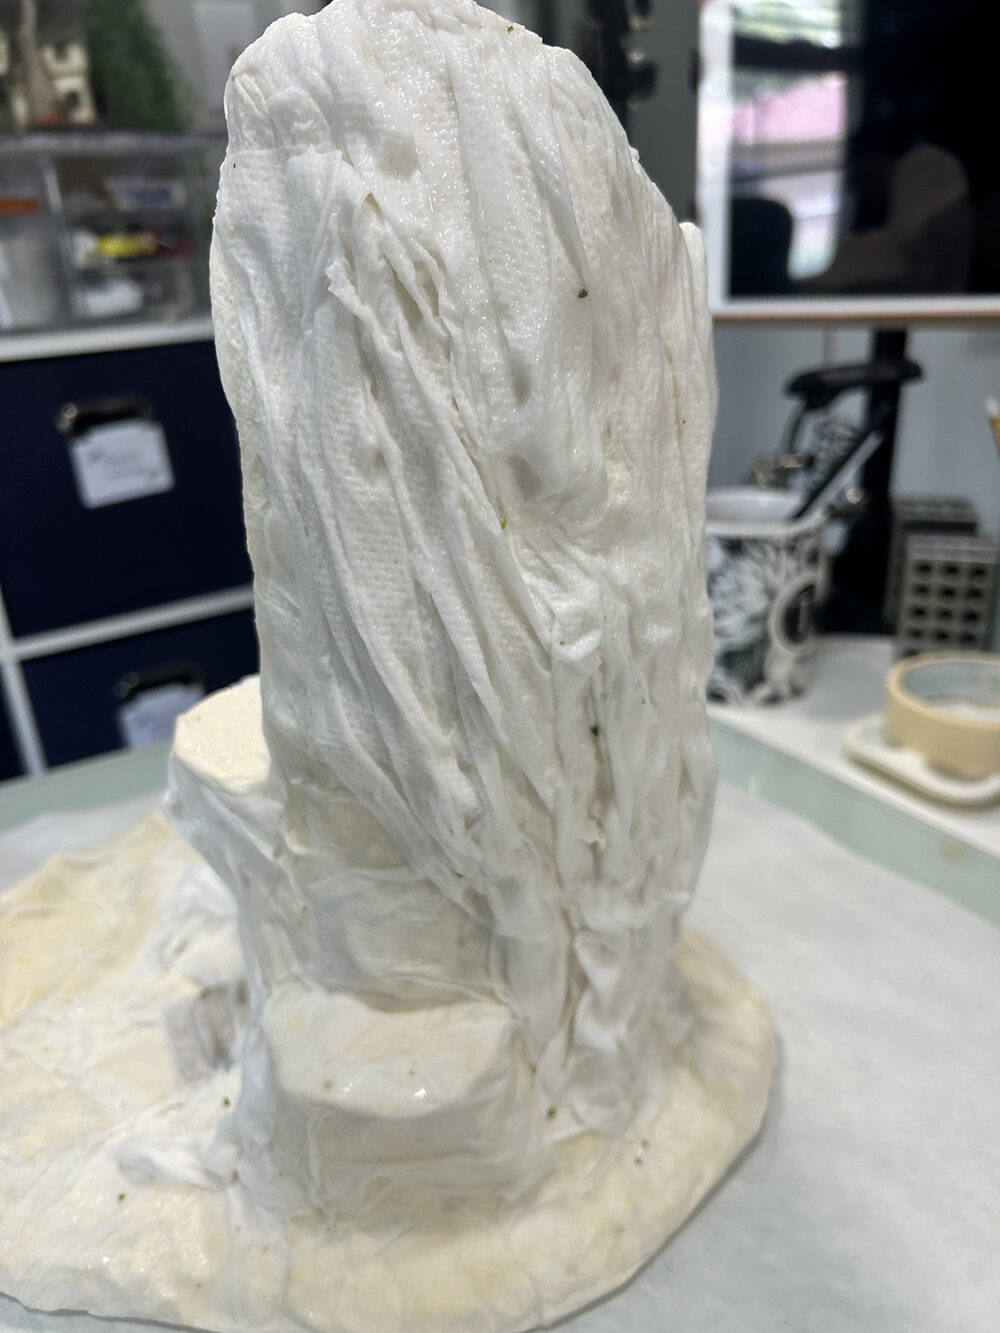
Wrinkle the paper towel up with your fingers to create a bark-like texture. Let dry overnight.

16. One final thing to do before moving on to the dry-brushing stage . . . I’ve built the Rose Walk Petite Properties kit and am using it as an entrance into the tree stump. Once attached I will paint this all black.
17. Once the paper towels have dried, paint the entire stump piece with a thick coat of black paint. Let it dry then inspect it to look for any white spots that need to be touched up with the paint. Check down in the folds as these spots are easy to miss the first time around. Let any touch-ups dry before moving on to the next step
You can now see the final shape of the tree stump and ground.
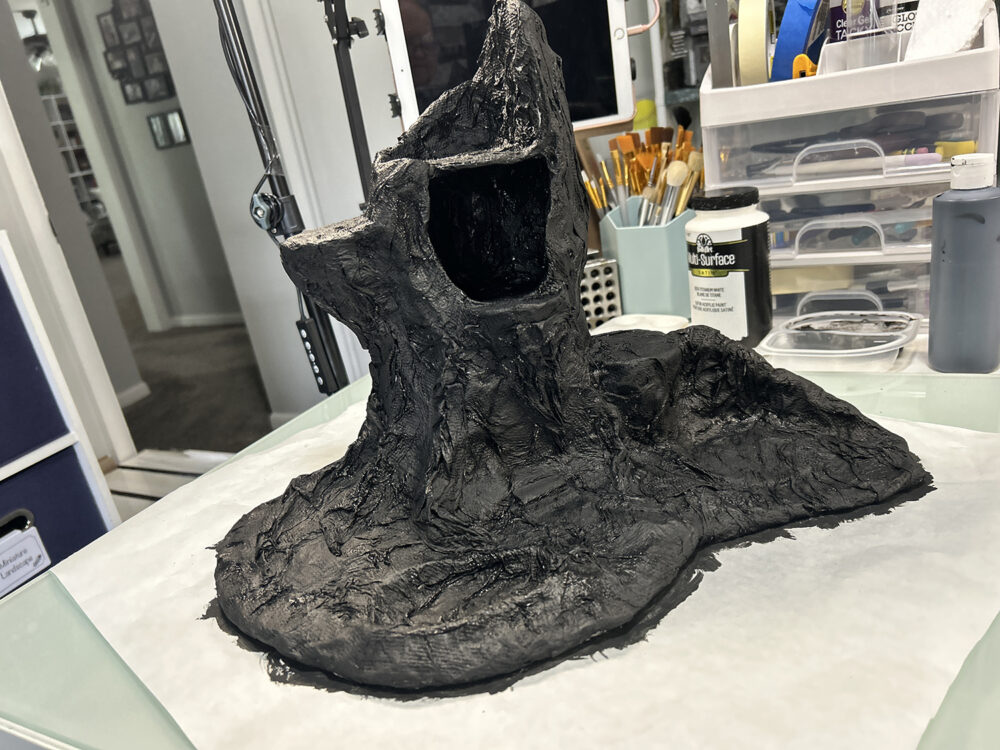
18. To finish the tree stump, dry-brush the ground and stump in the following colors – letting each color dry before moving on to the next color – dk brown, med grey, lighter brown, light grey, and cream. Do not dry brush the pond till the end of this section.
NOTE: I’ve created the door by using part of the Rose Walk Petite Properties kit plus cardboard for steps. You will see a closer image and finishing of the door in part 2.
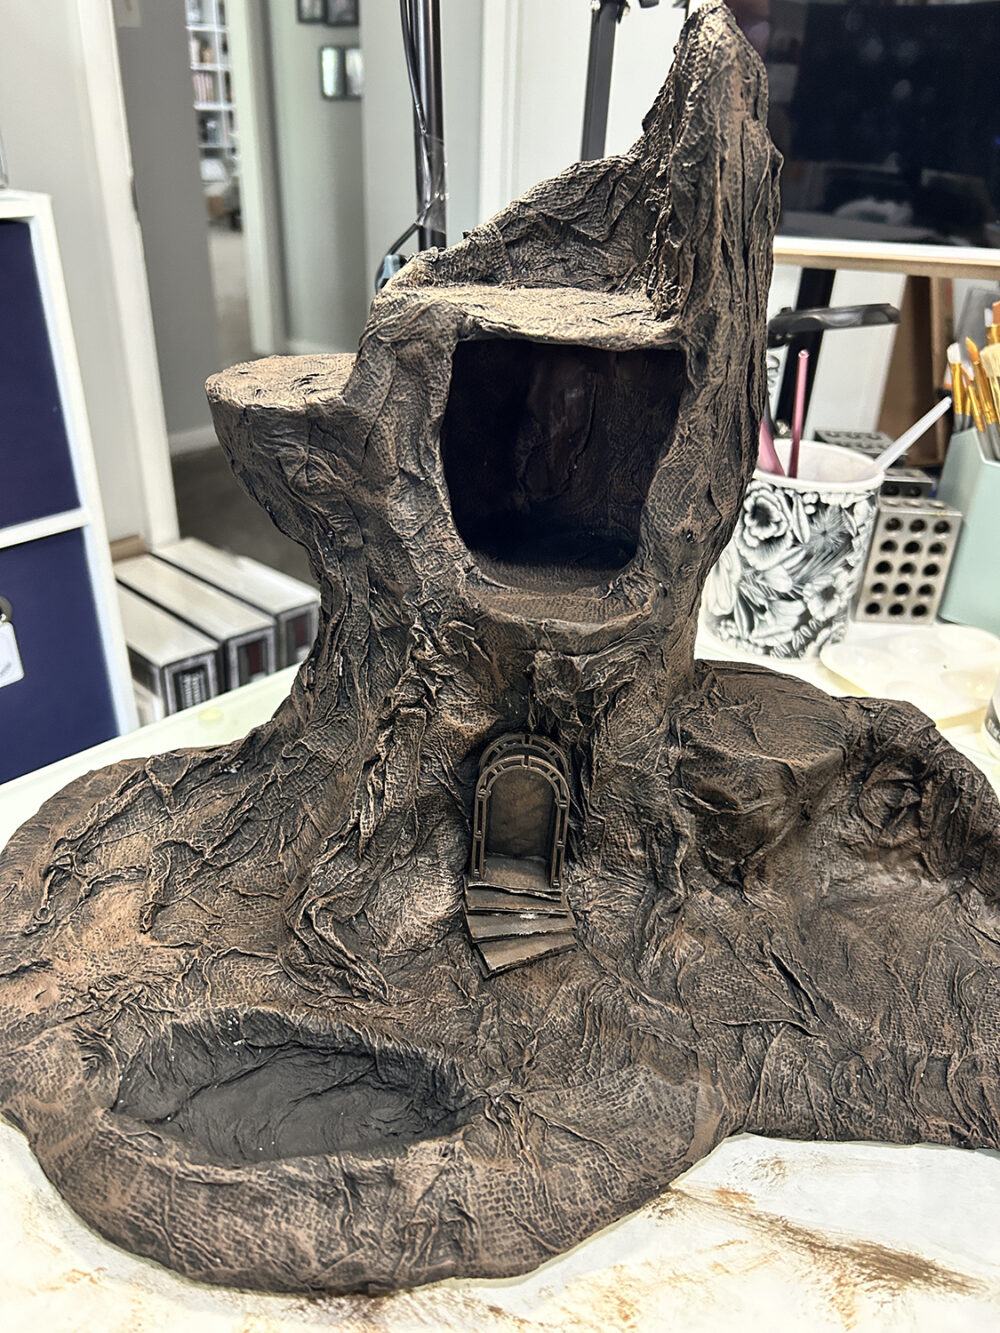
Here I’ve used dark brown on the entire piece except the pond. Don’t forget to also work in the hole in the stump area!
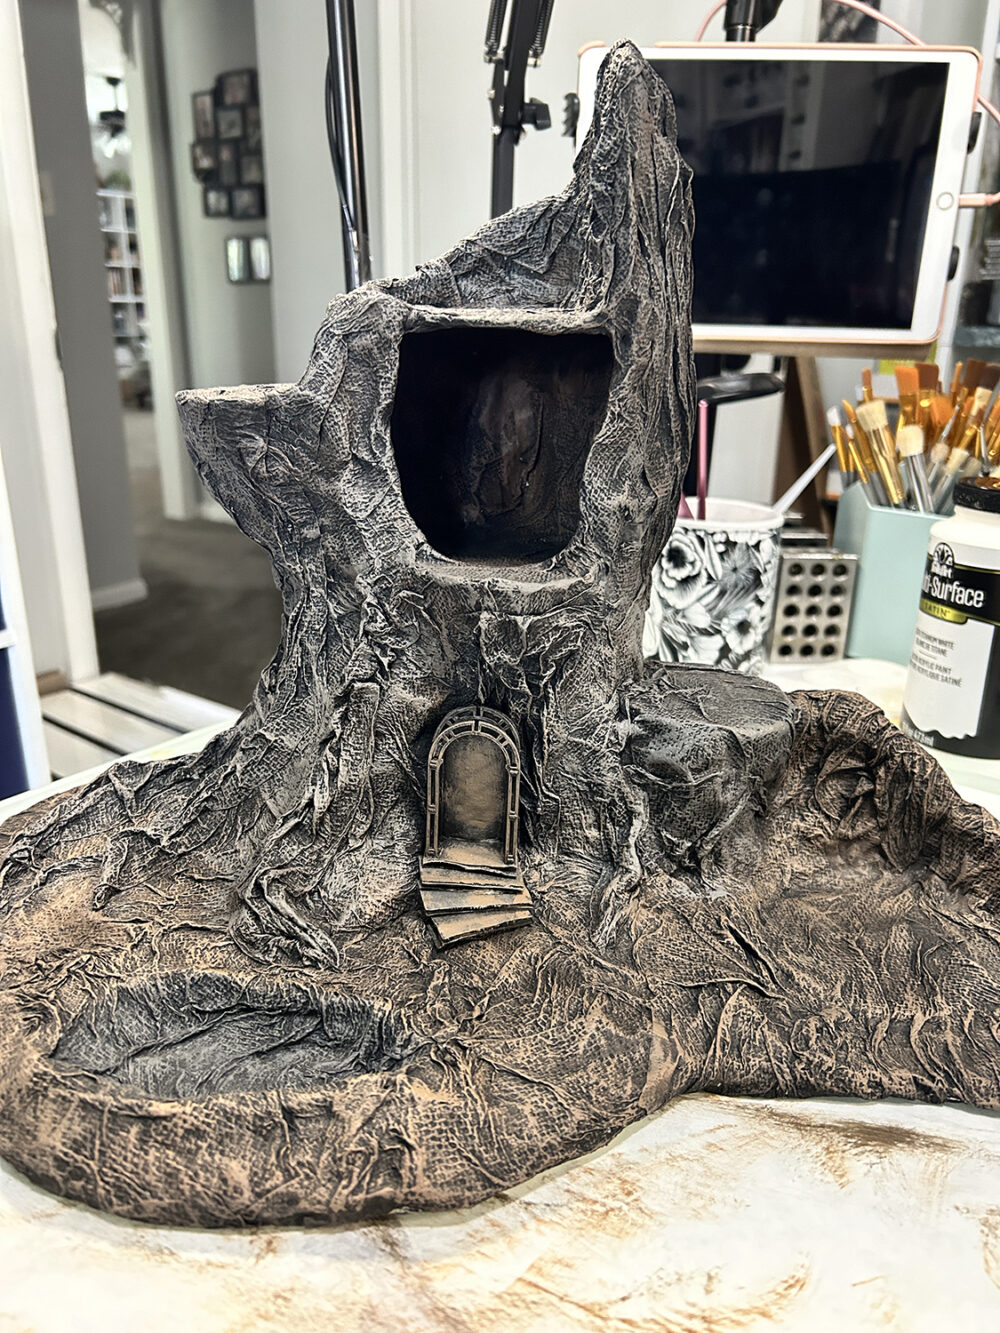
Here I’ve added a lighter brown to the ground areas and a medium grey to the tree stump.
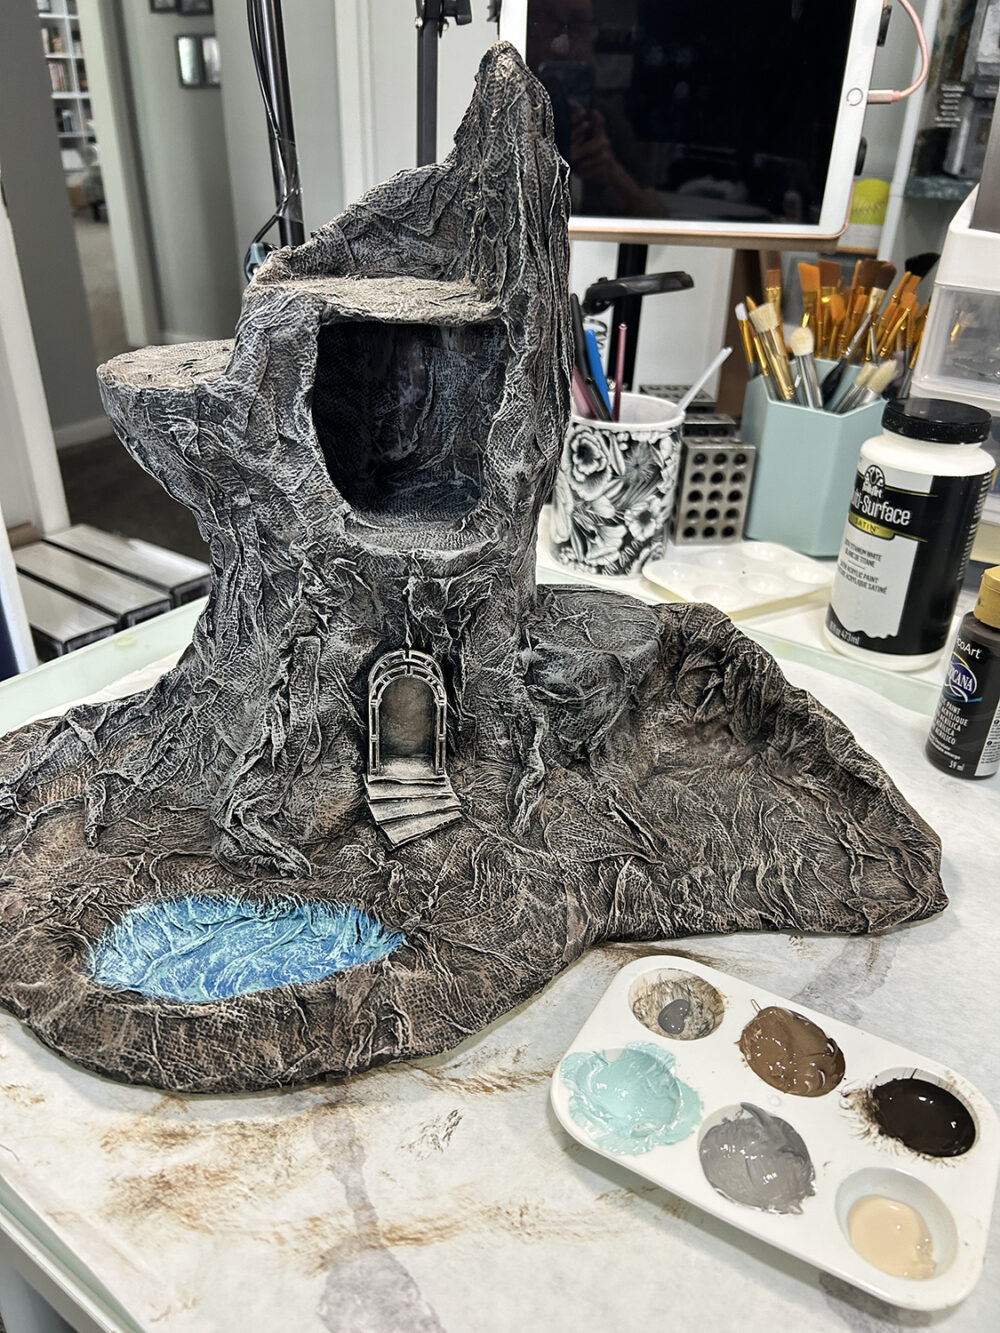
Cream added to the ground, and a lighter grey to the tree stump. I’ve used two different blues for the pond and solid coverage on the first coat.
I hope you have enjoyed part 1 of the Treehouse build and are looking forward to part 2. In part 2 we will finish up the remainder of the build.
Thank you so much for stopping by and I will see you in part 2!
Teri


Leave a Reply
You must be logged in to post a comment.