© The Fairy Treehouse by Teri Hanson – Features kits from Petite Properties
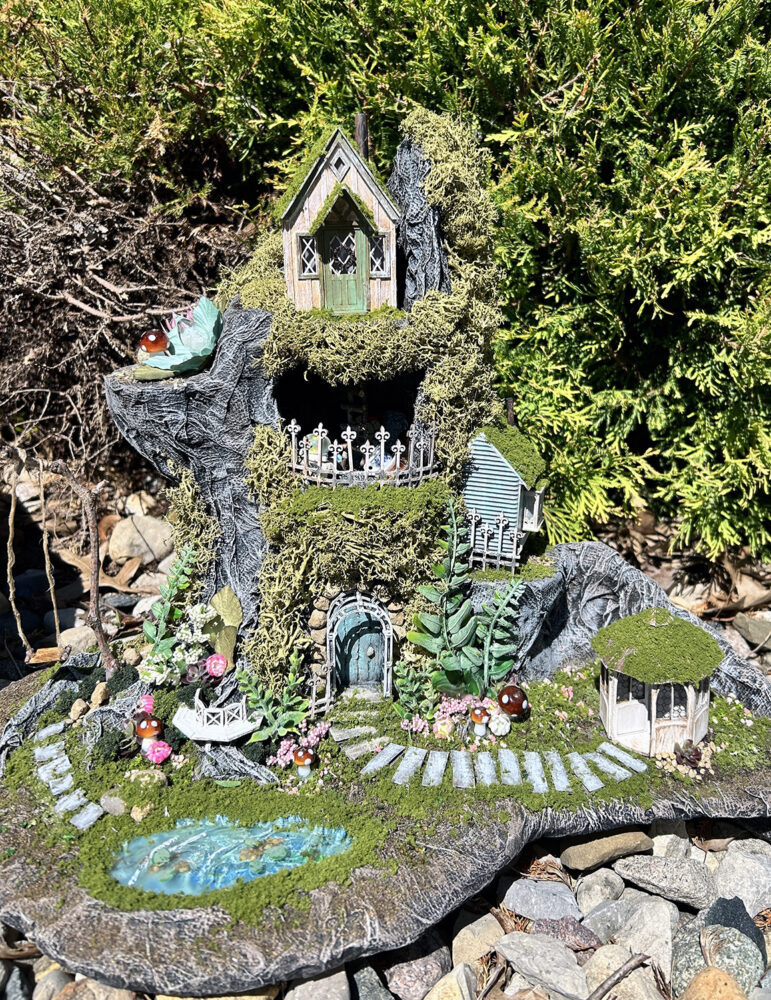
Welcome back to my third Craft Along series for The Fairy Treehouse! I do hope you enjoyed creating your treehouse in part 1. Now that our tree stump has been finished it’s time to start adding the landscaping, fairy houses, and other accessories to bring the scene to life.
The Petite Properties kits all come with instructions that are pretty straight forward so I don’t feel the need to explain those. The remainder of what we have to do is also straight forward and needs little to no explanation. Most of what is left really is up to the creator as to colors and finishing. The following is more of a visual reference with some ideas thrown in. If you are unsure about anything, please use the comments section below to ask me. I’m happy to help anytime!!! Enjoy the rest of the process!
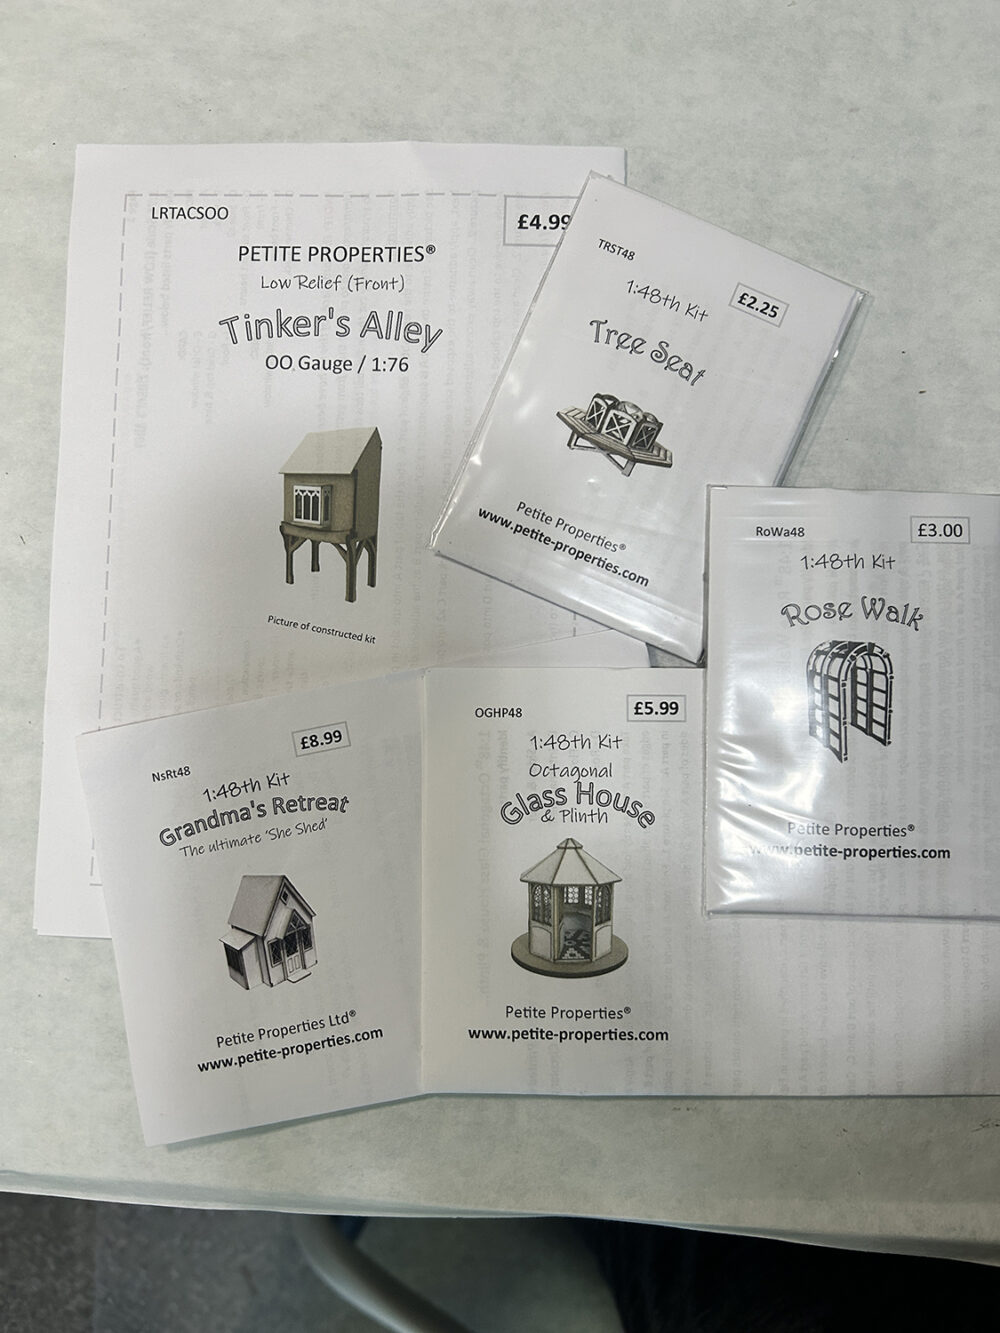
Supplies . . . (All kits are from Petite Properties)
- Tinker’s Alley 1:76 scale
- Grandma’s Retreat 1:48 scale
- Tree Seat 1:48 scale
- Rose Walk 1:48 scale
- Glass House 1:48 scale
Other Supplies . . .
- Acrylic paint: your choice of colors above kits
- A few small twigs from your yard
- Aleen’s Tacky Glue
- Landscape materials of your choice
- Vine/Greenery – I found mine at Hobby Lobby
NOTE: I will not be adding furnishing to the inside of any house so the insides will all be painted white. I will also be adding velum inside the windows to block views to the inside. If you choose to light your houses, don’t forget to add holes for the wiring as needed. If using fairy lights, they can be wrapped around your greenery as I’ve done.
Now it’s time to add the landscape materials to the base and tree stump. Take a walk outside and find some little rocks, twigs, and maybe some sand or dirt for inexpensive materials. Remember that this is your project so you can do any kind of landscaping you prefer. Use your imagination and add other accessories to the landscaping as well. Have FUN with it!
NOTE: Another option for foliage is to buy cheap plastic plants and vines at the dollar store. Spray them with a clear matte sealer then paint with acrylic paints using a dry-brushing technique to make them look more realistic. Always finish them off with a coat of spray matte clear sealer.
Landscape Materials . . .
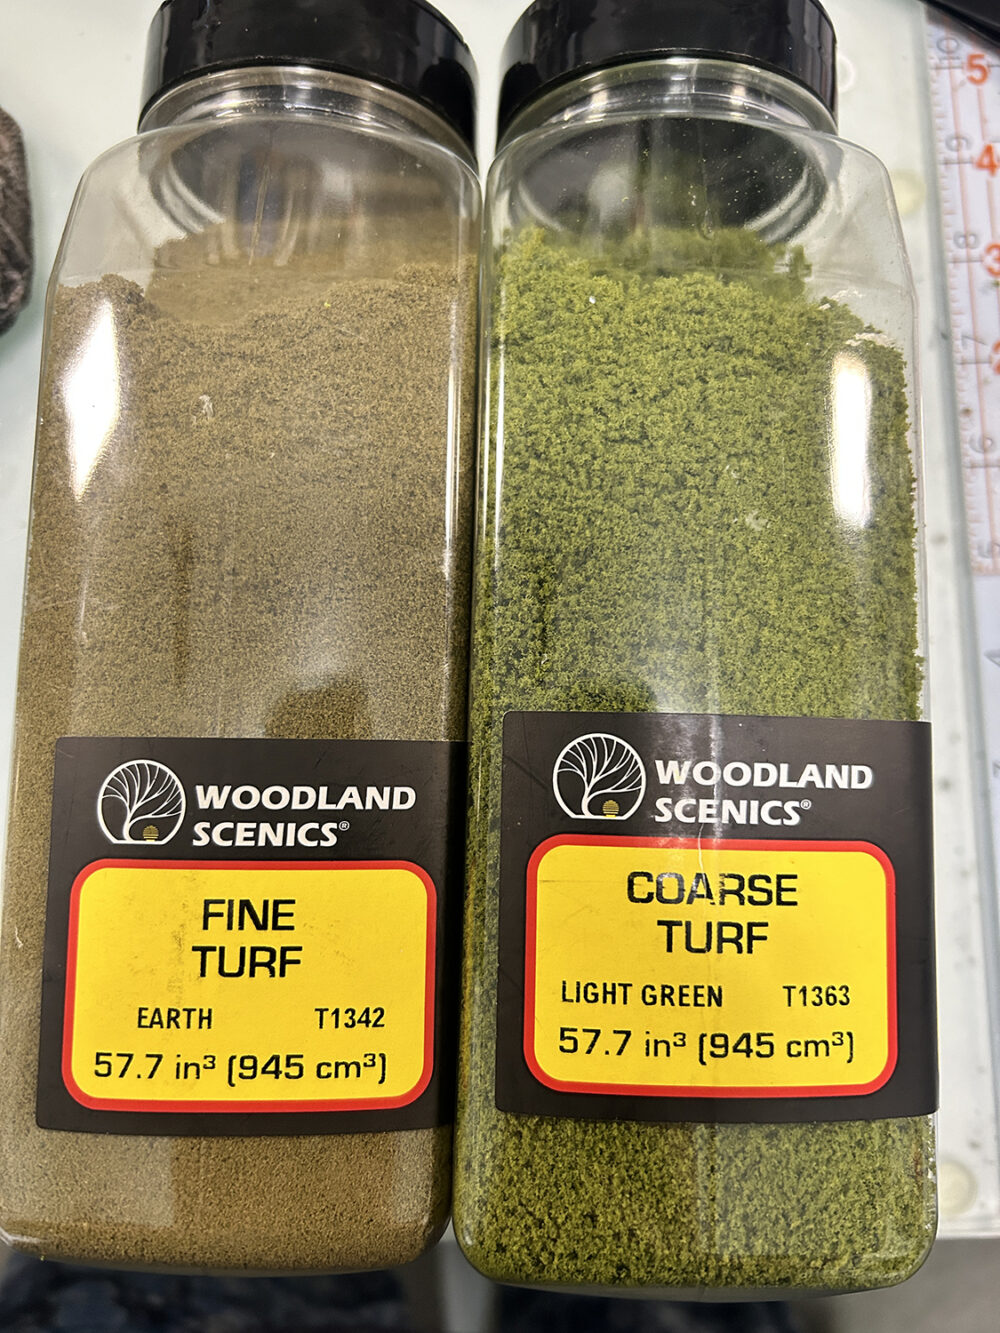
- Woodland Scenics Fine Turf – for ground
- Woodland Scenics Coarse Turf – for moss
- Aquarium gravel type rocks for accents
- Larger rocks from the yard for accents
- Plastic fern leaves, plastic rosette style flowers, and tiny pink plastic flowers (all from dollar store)
- Cardboard for walkways and swing seat
- Twine for swing rope
- Dried Spanish Moss from dollar store
The two Woodland Scenics Turf materials I’ve been using for some time now. I consider these to be a great investment and they do go a long way! These were my main landscaping materials for this project.
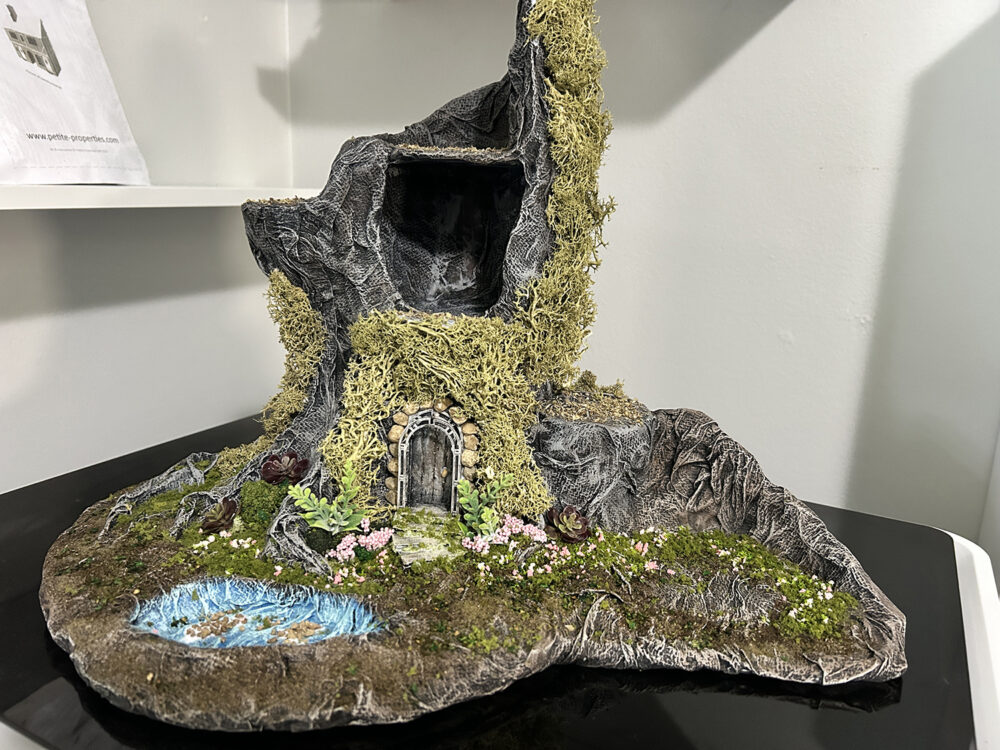
Here is a look at the main landscaping I’ve done as well as a look at the entire idea with houses included.
Below are some close up pics.
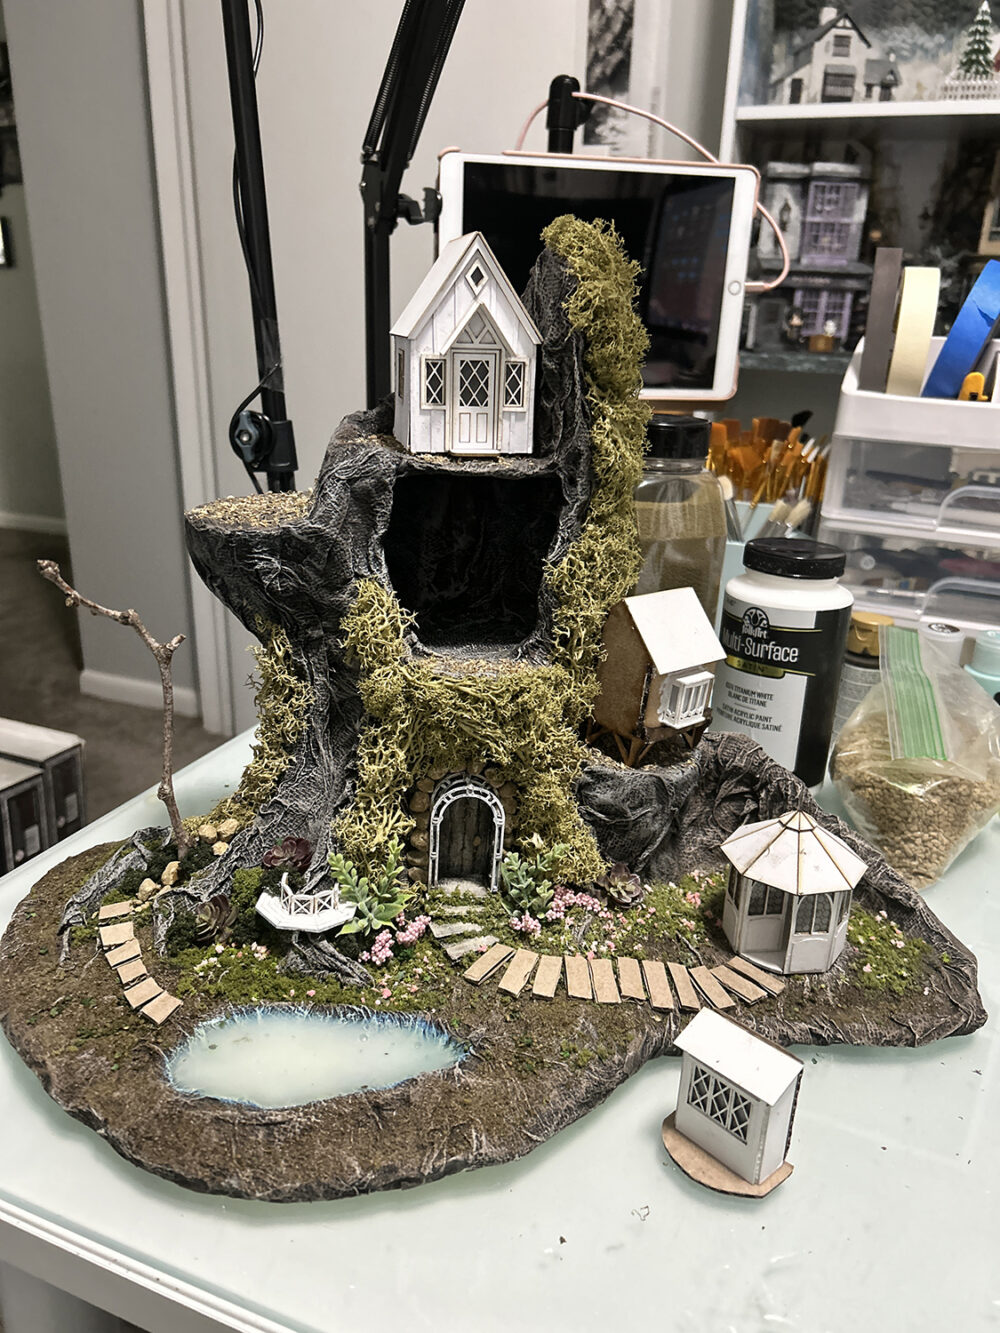
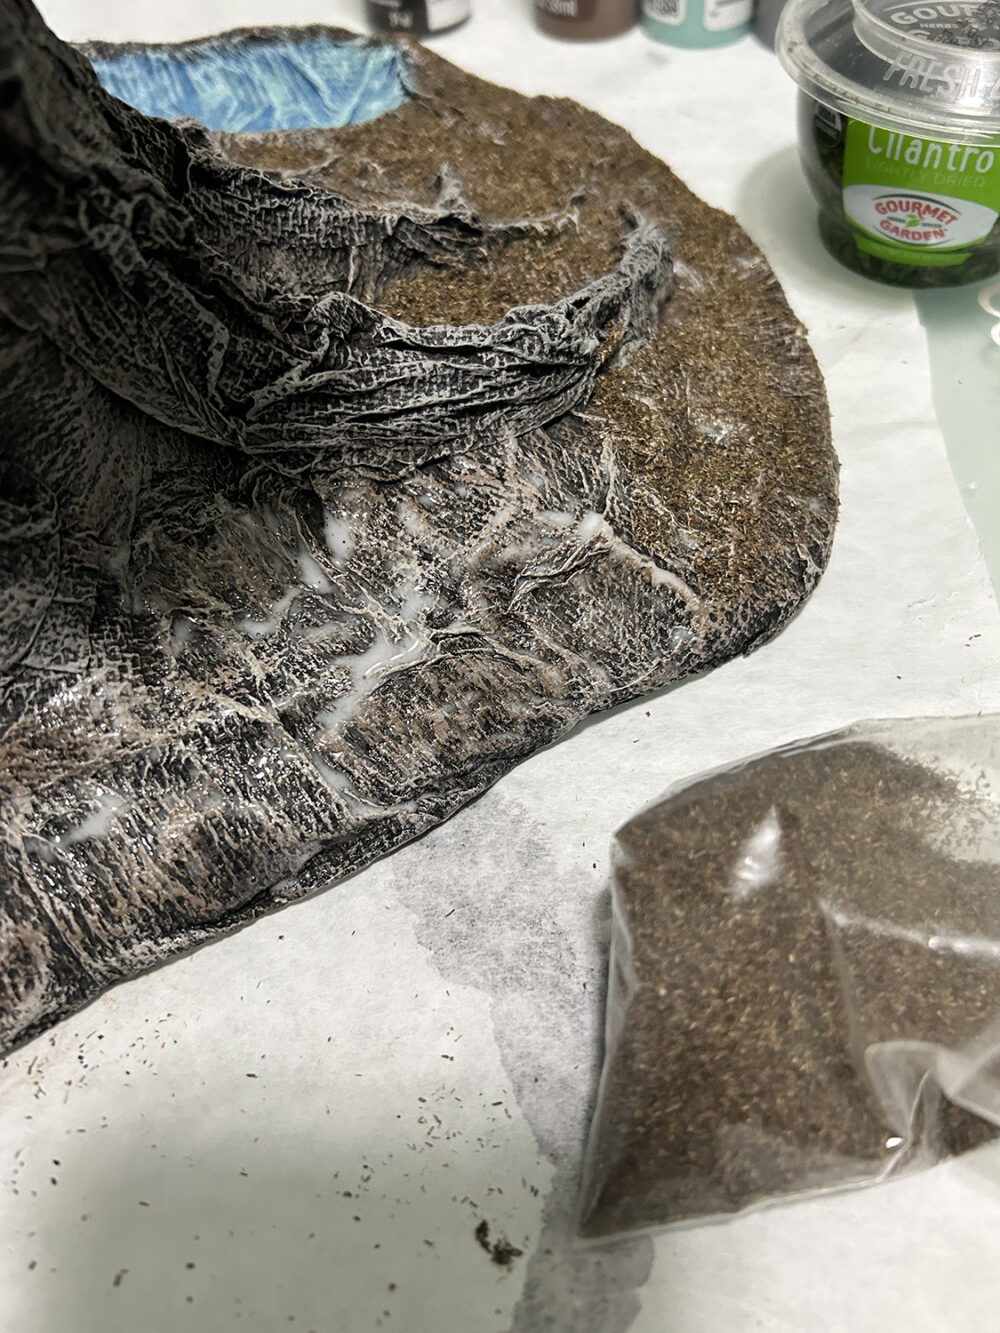
To add ground cover, paint on a generous layer of the watered-down glue then sprinkle on the turf and dirt. Pat the material down on the surface gently and let dry. Once dry you need to spray the material with either a clear matte sealer spray or you can use cheap hair spray. Spray once, let dry, and spray a second time to get good coverage on the turf.
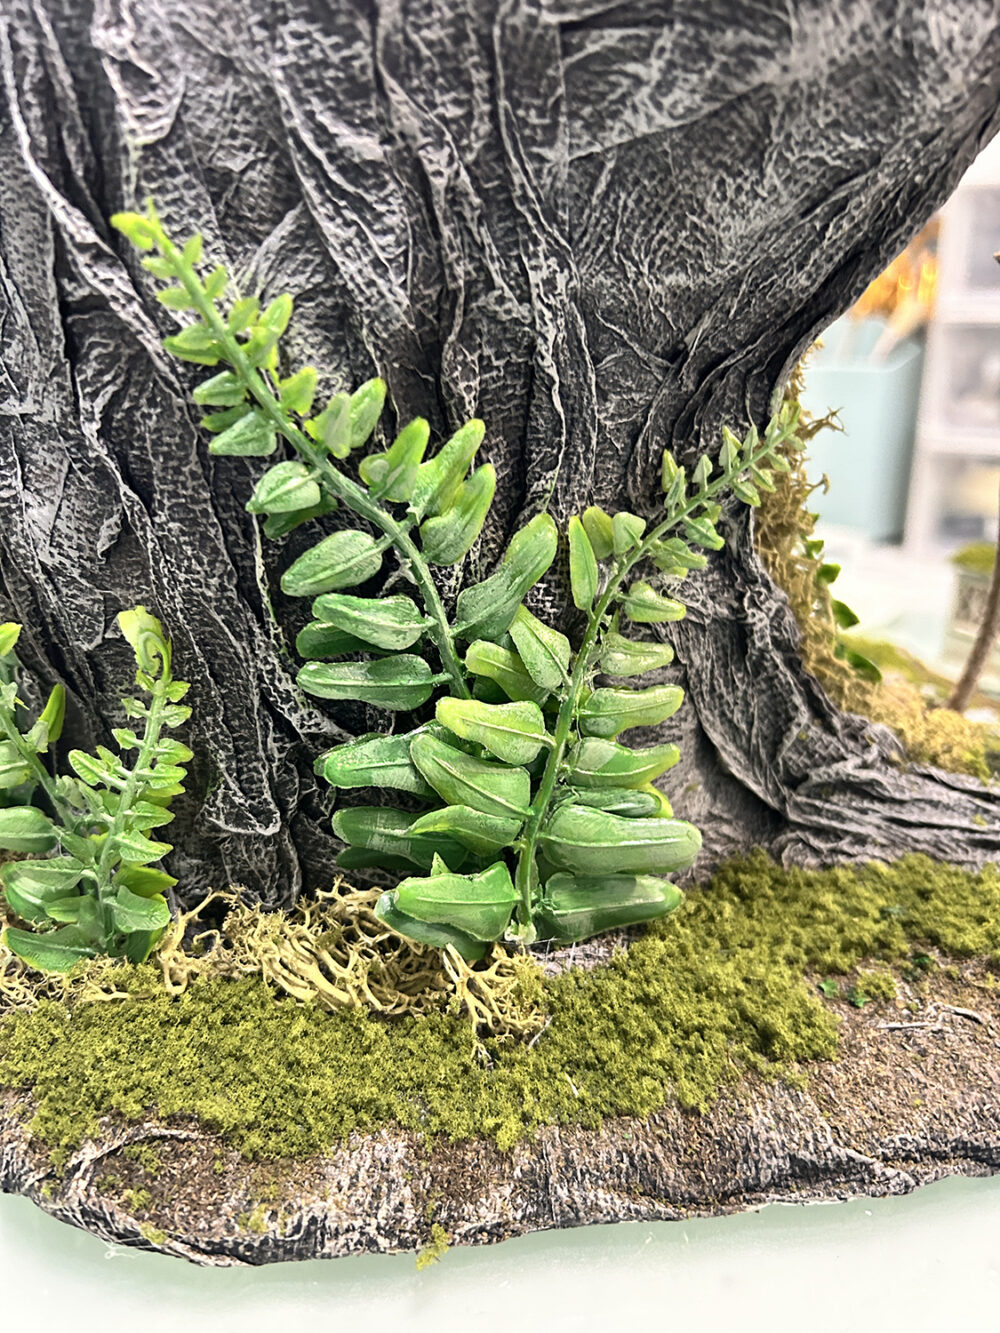
I’ve added some plastic fern pieces here and dry-brushed them with two shades of green acrylic paint.
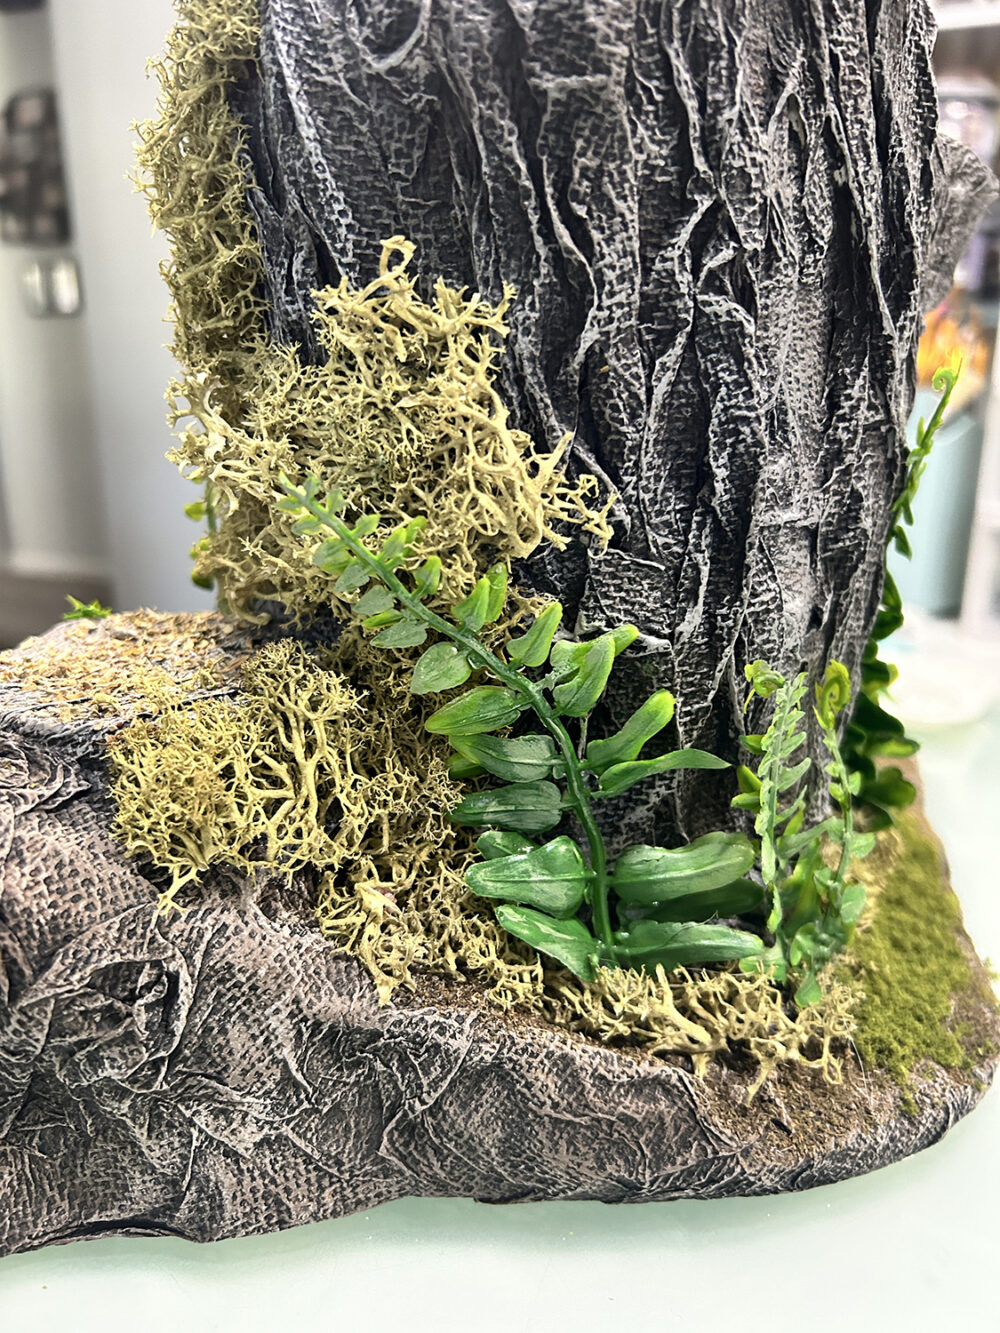
More plastic ferns and some Spanish Moss were added here to the side of the stump.
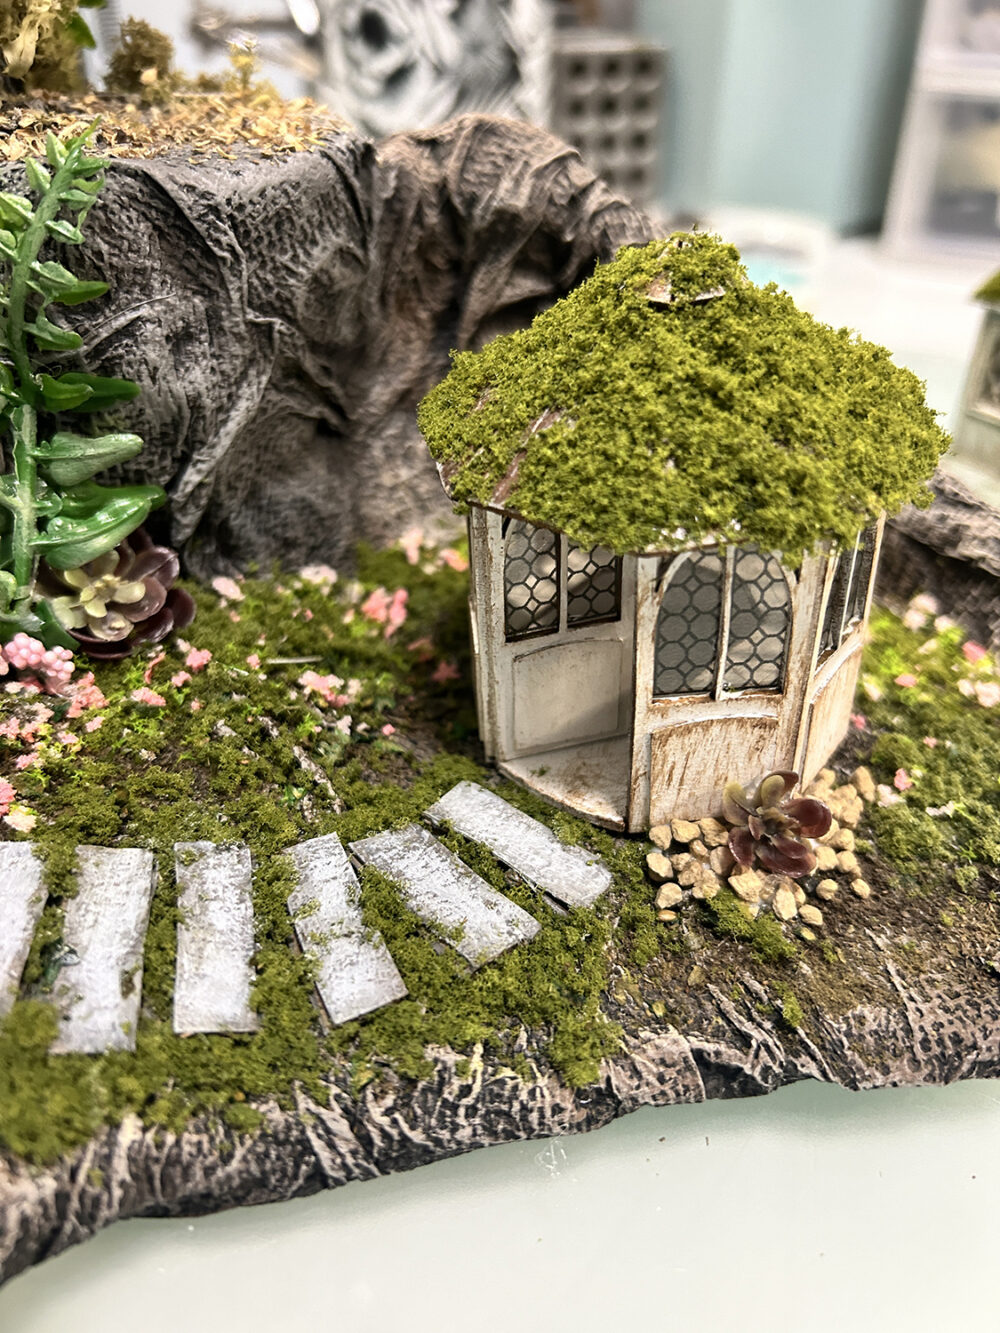
I painted the gazebo white and then dry-brushed it with some brown paint. Coarse turf was added to the roof for moss.
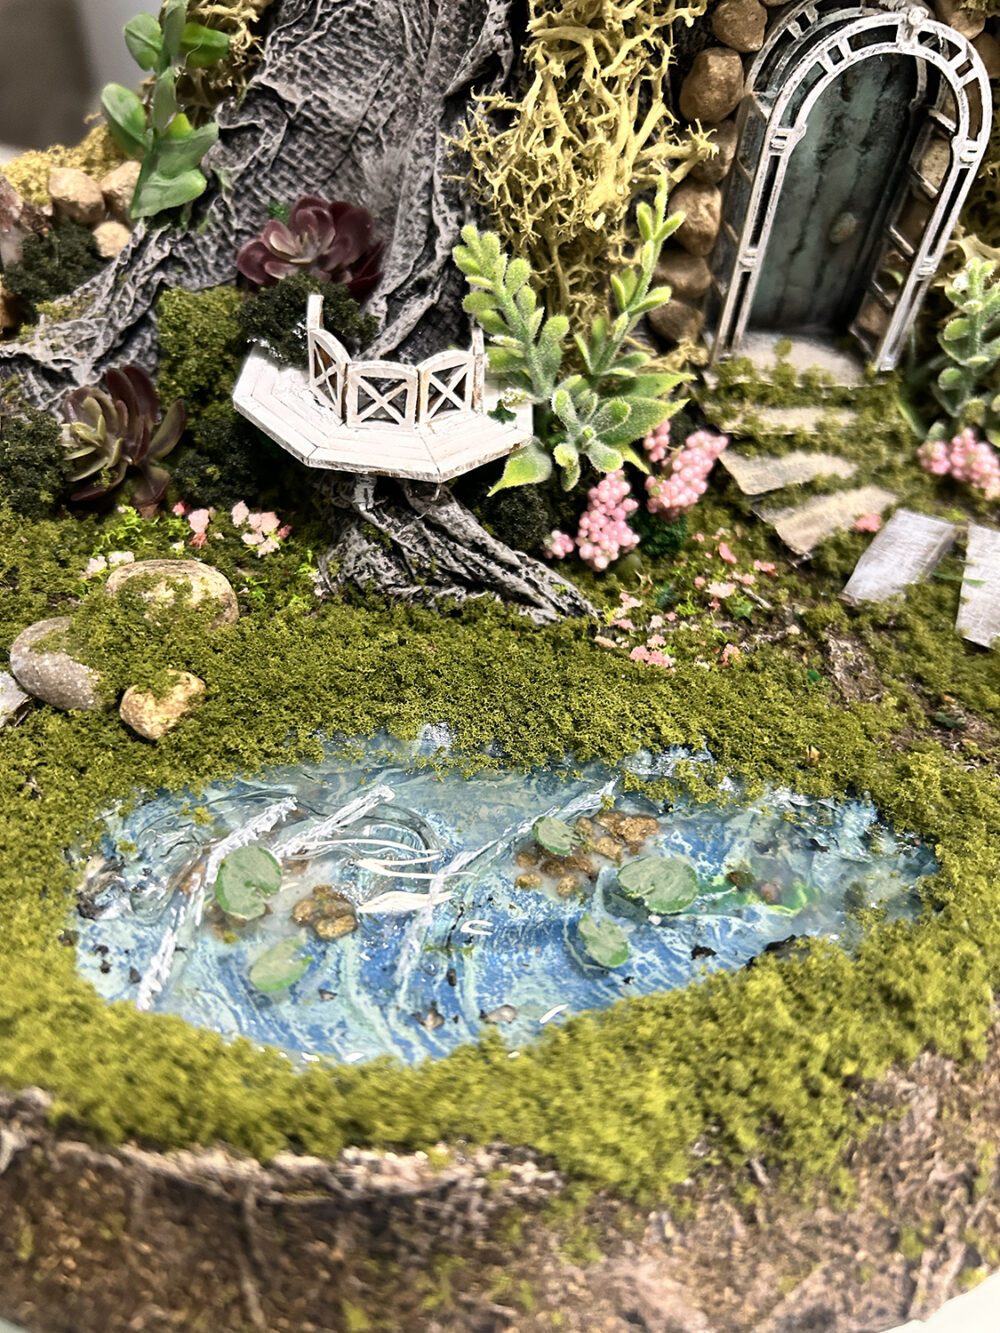
Here you can see the liquid glass has dried in the pond. I added some tiny lily pads and some fine lines of white acrylic paint to the water. More coarse turf was glued around the perimeter of the pond.
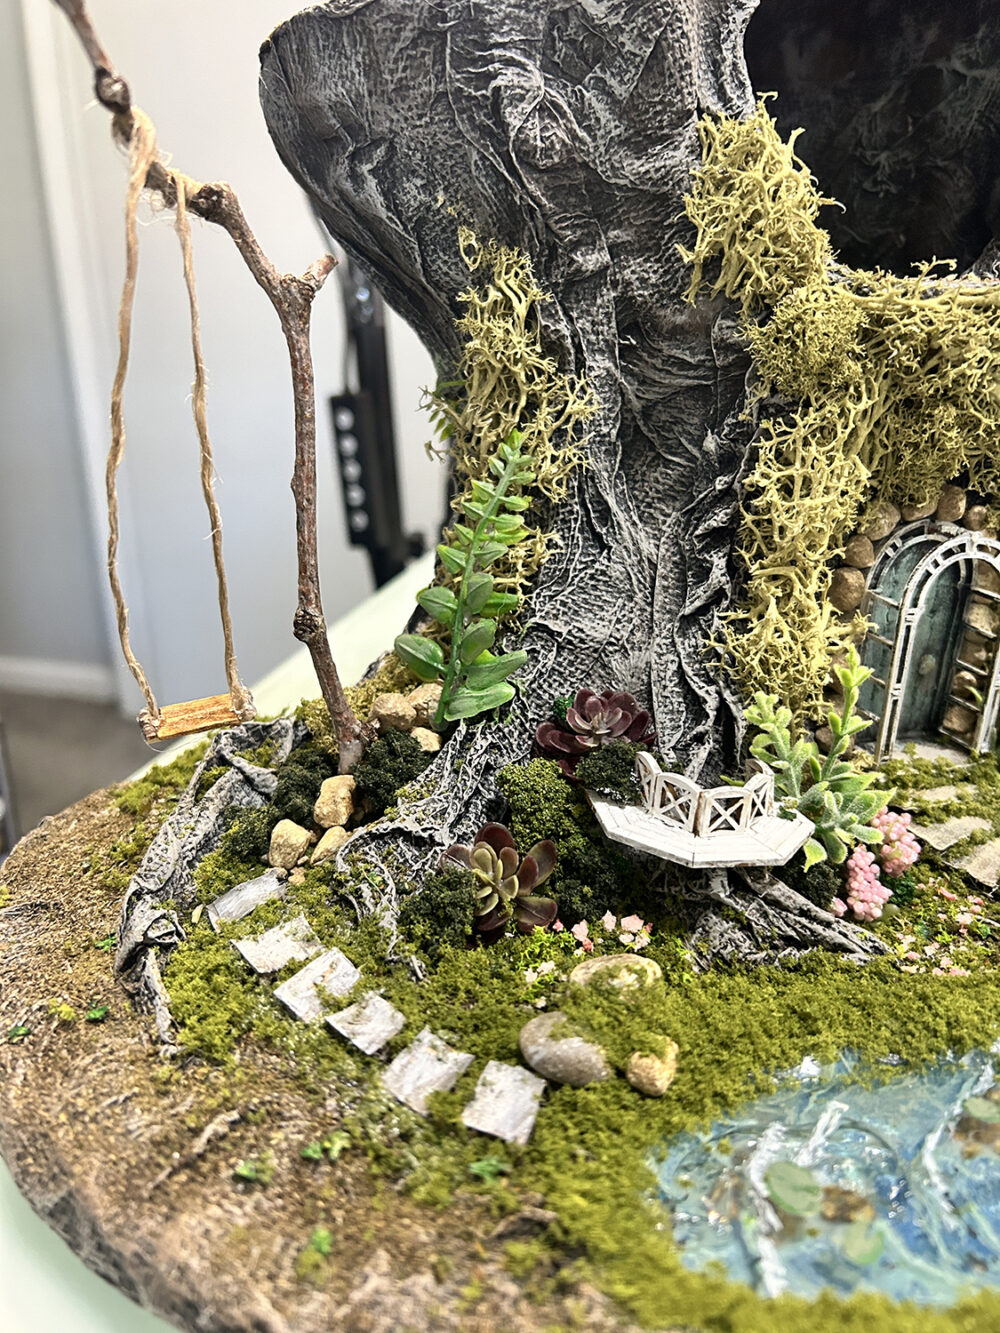
Twine and popsicle sticks created a little swing hanging from a stick found in our yard. You can see a portion of the Tree Seat kit has been used around a tree root. Little rocks make great accents as well.
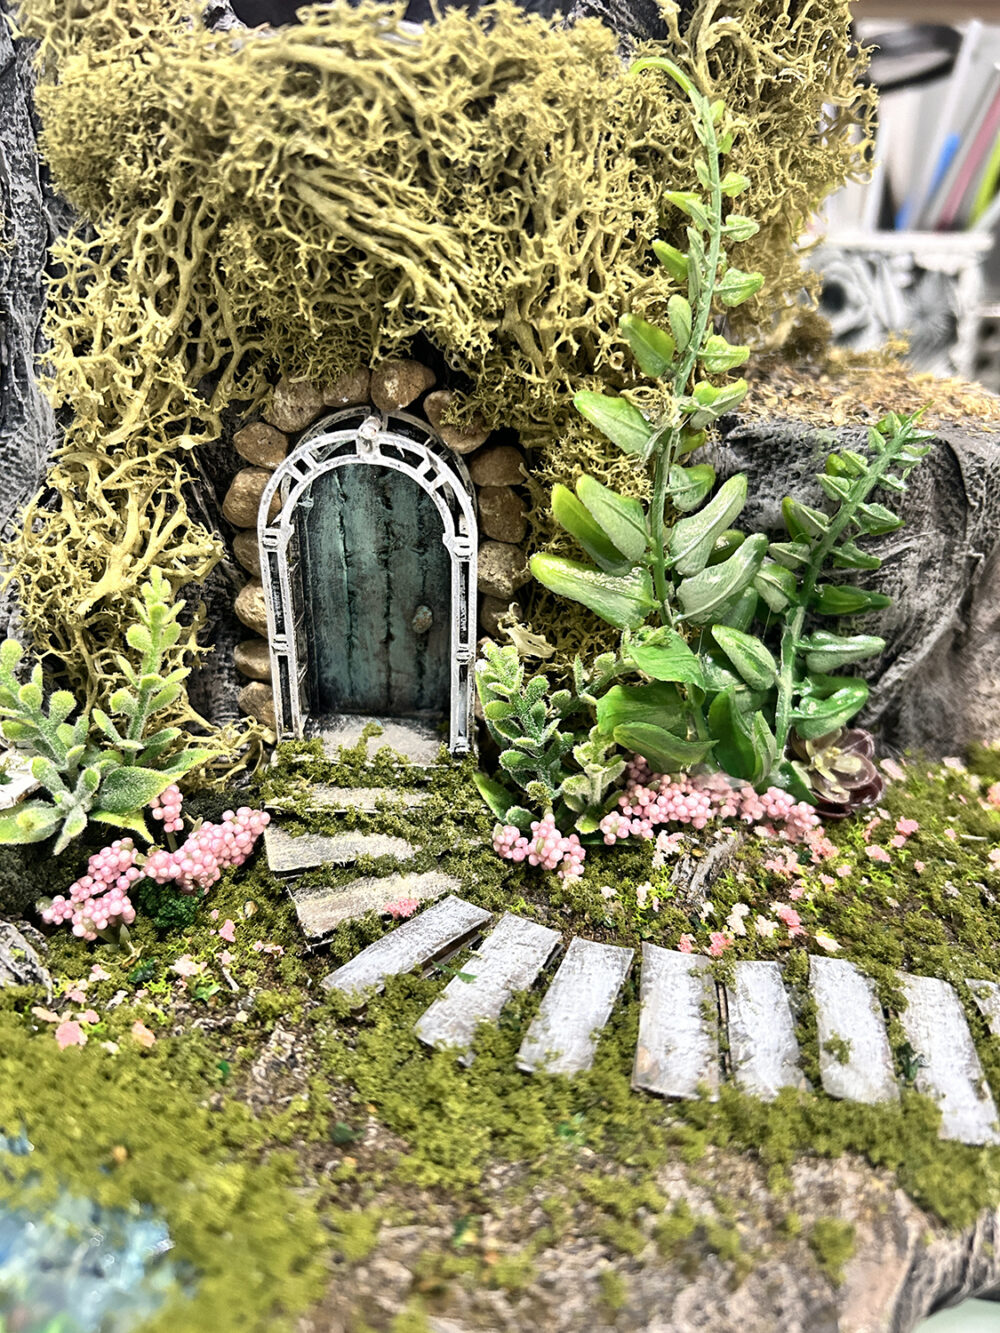
Here is a close-up of the door. The door is cardboard with a portion of the Rose Walk kit as a frame. I painted the door brown and then marked the lines with a dark brown marker. Dry-brush the door in a Turquoise then lightly with white. The doorknob is a tiny rock.
All of the walkways were created with cardboard. I painted them with a medium grey then mixed in some white and dry-brushed each piece. Glue moss (turf) in between and around all of the walkway pieces to hide the cardboard edges.
Last but not least . . . the tiny houses! For the first house, I moved the side with the window to the left side of the house. The right side will be so close to the tree stump wall that you won’t see it much at all. The bay window from this house was made up separately with a cardboard bottom and back. This will be used as another house on the backside of the tree stump. For the third house, I cut the long part of the legs off to bring it closer to the ground.
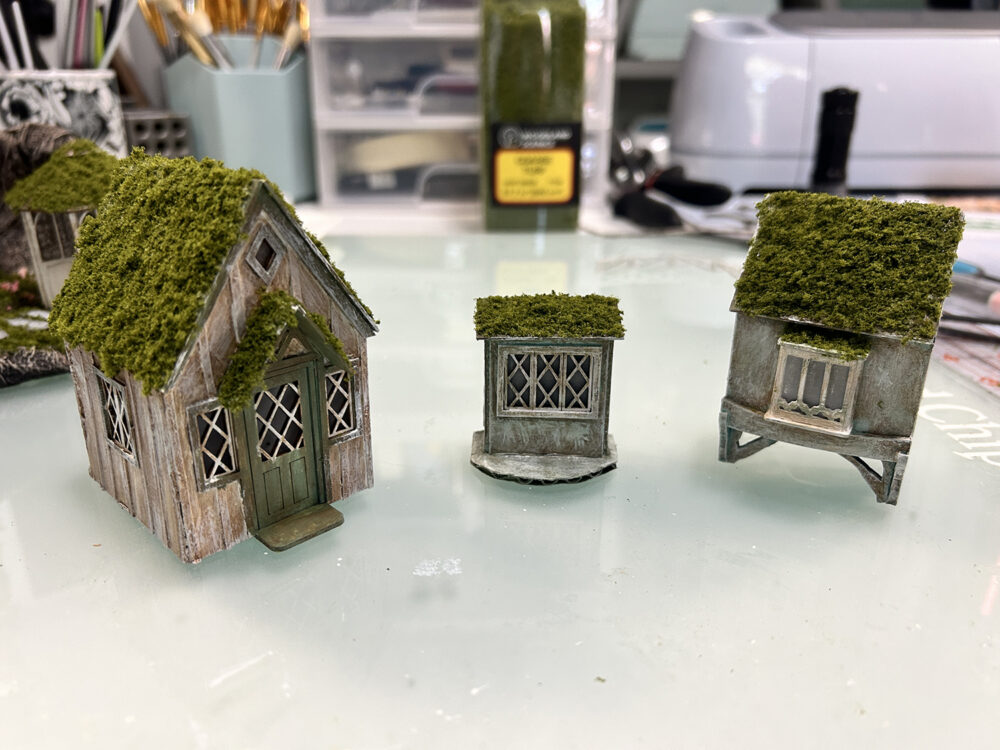
The bay window house and house on a stand were both painted Turquoise and then dry-brushed with brown and white paint. The larger house was painted white and then dry-brushed with brown. Moss (turf) was added to all house roofs.
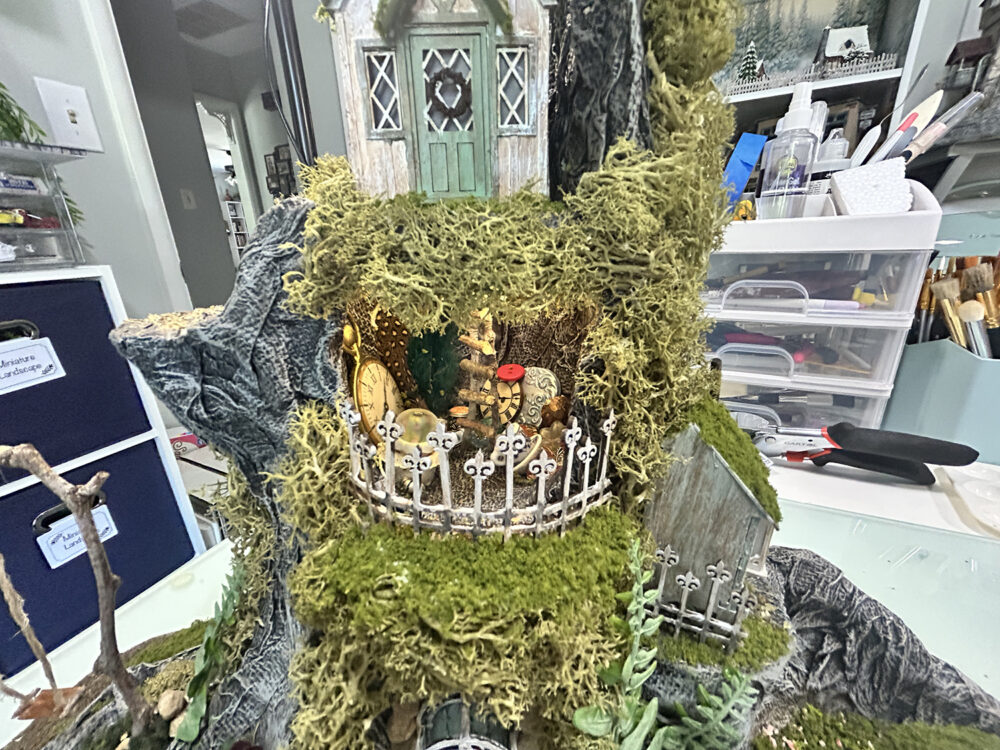
I’ve used the hole in the stump as a “Fairy Treasure Hold”. You can see random items inside the hole with a ladder created from a few twigs out of our yard. I’ve lit this area with a string of fairy lights glued to a piece of cardboard that is then glued to the inside top of the hole. The battery pack comes out the front, down by the side of the top house, and rests behind the house. The Spanish Moss helps to hide the wire and batter pack.
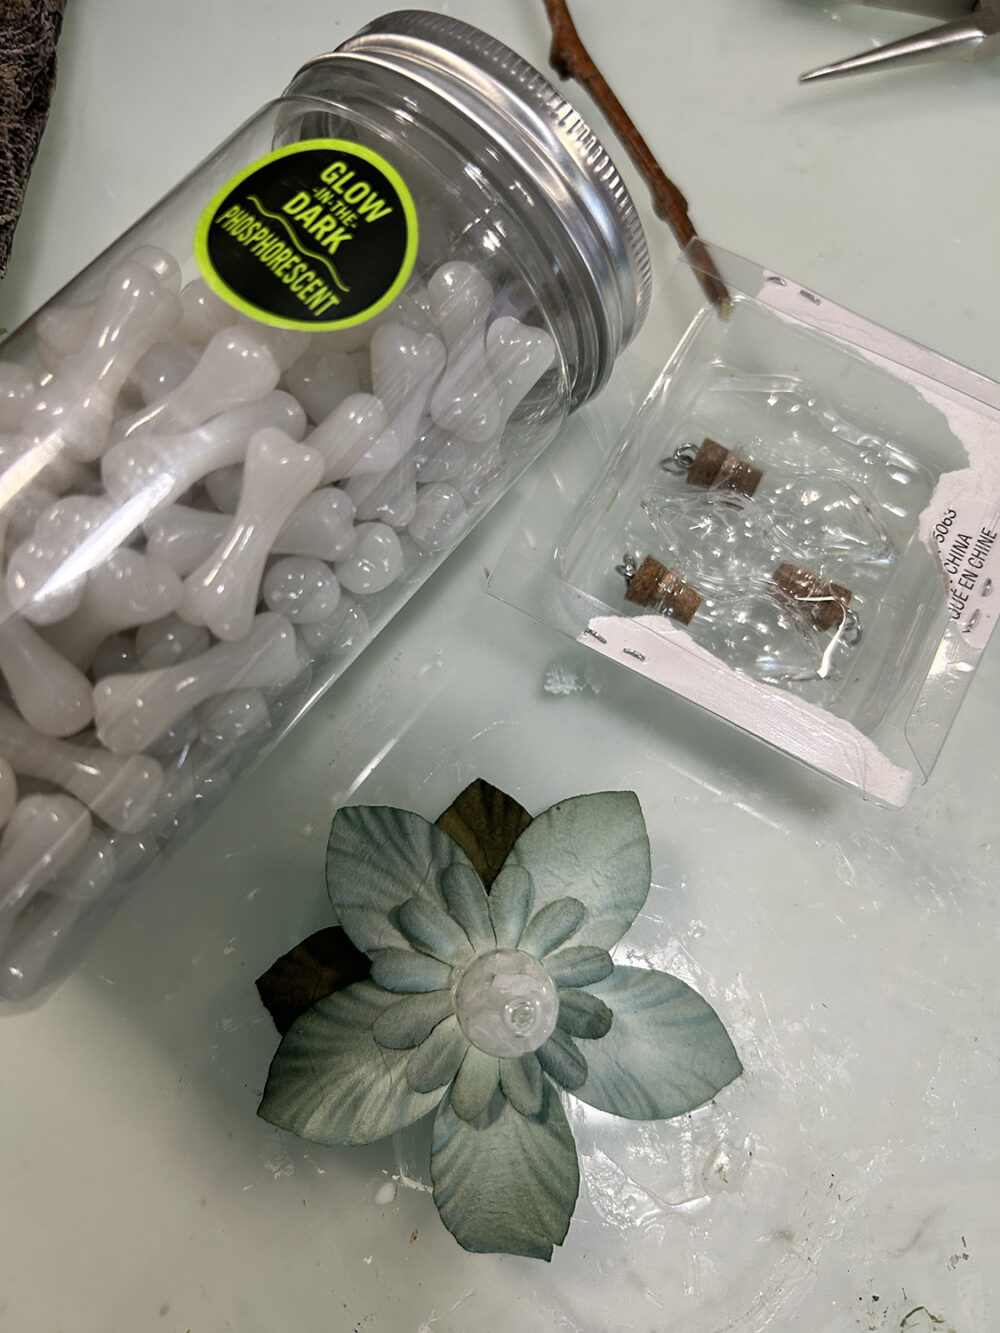
I’ve created a floral firefly-style light for the left side edge of the stum using a crushed-up glow-in-the-dark bone, a potion bottle, and some silk flowers. If the mini is placed near a light then at night the center of the blue flower will glow in the dark!
Lastly, a bit of whimsy has been added with some glass mini mushrooms!
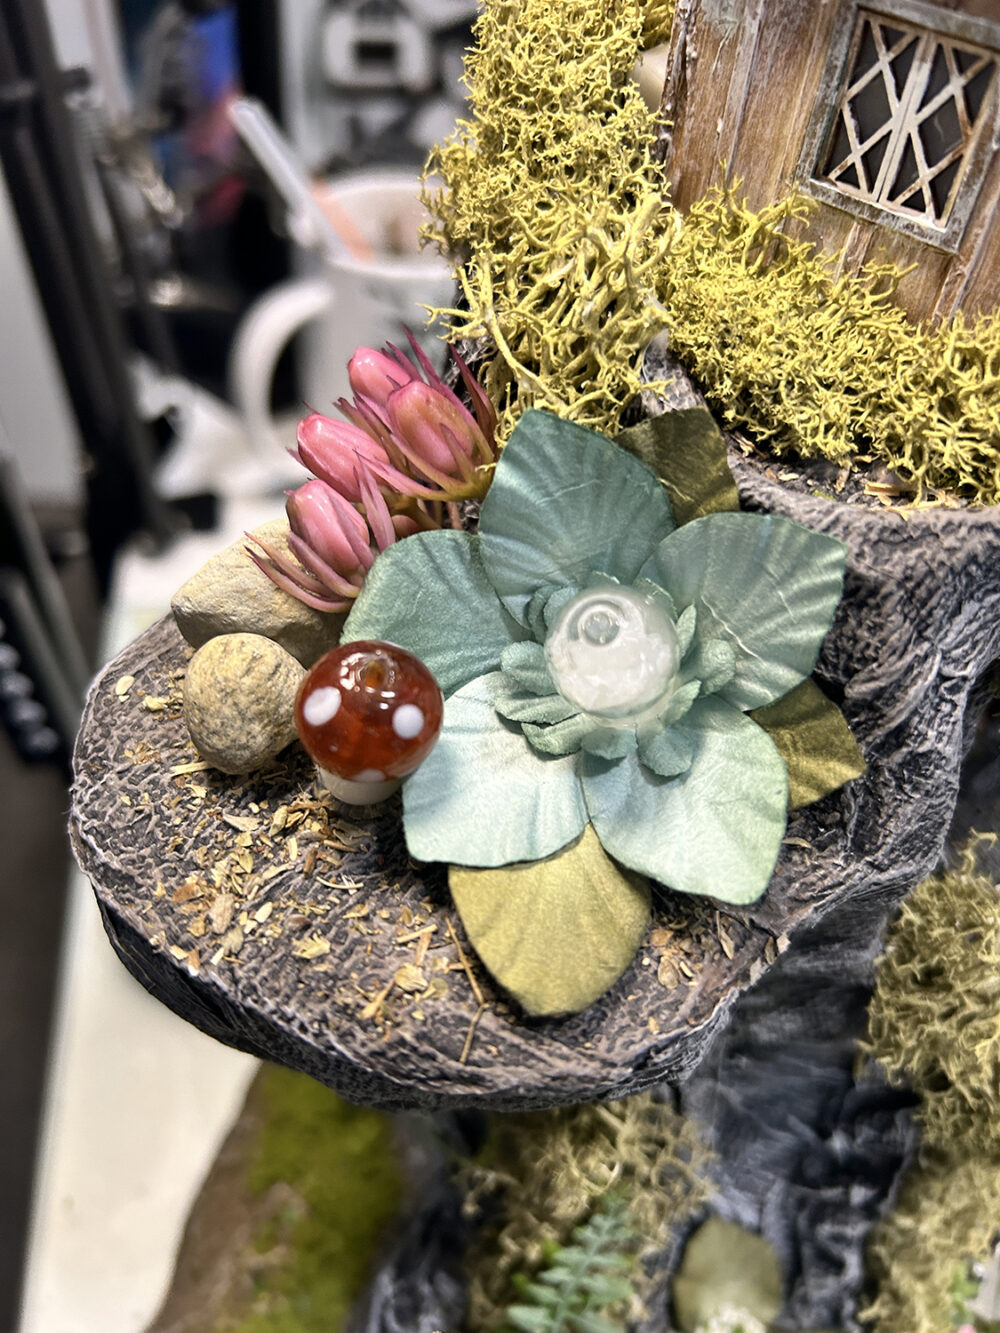
Now it’s time to glue the houses in place and add those extra touches you might want! Here’s a look at my house placement.
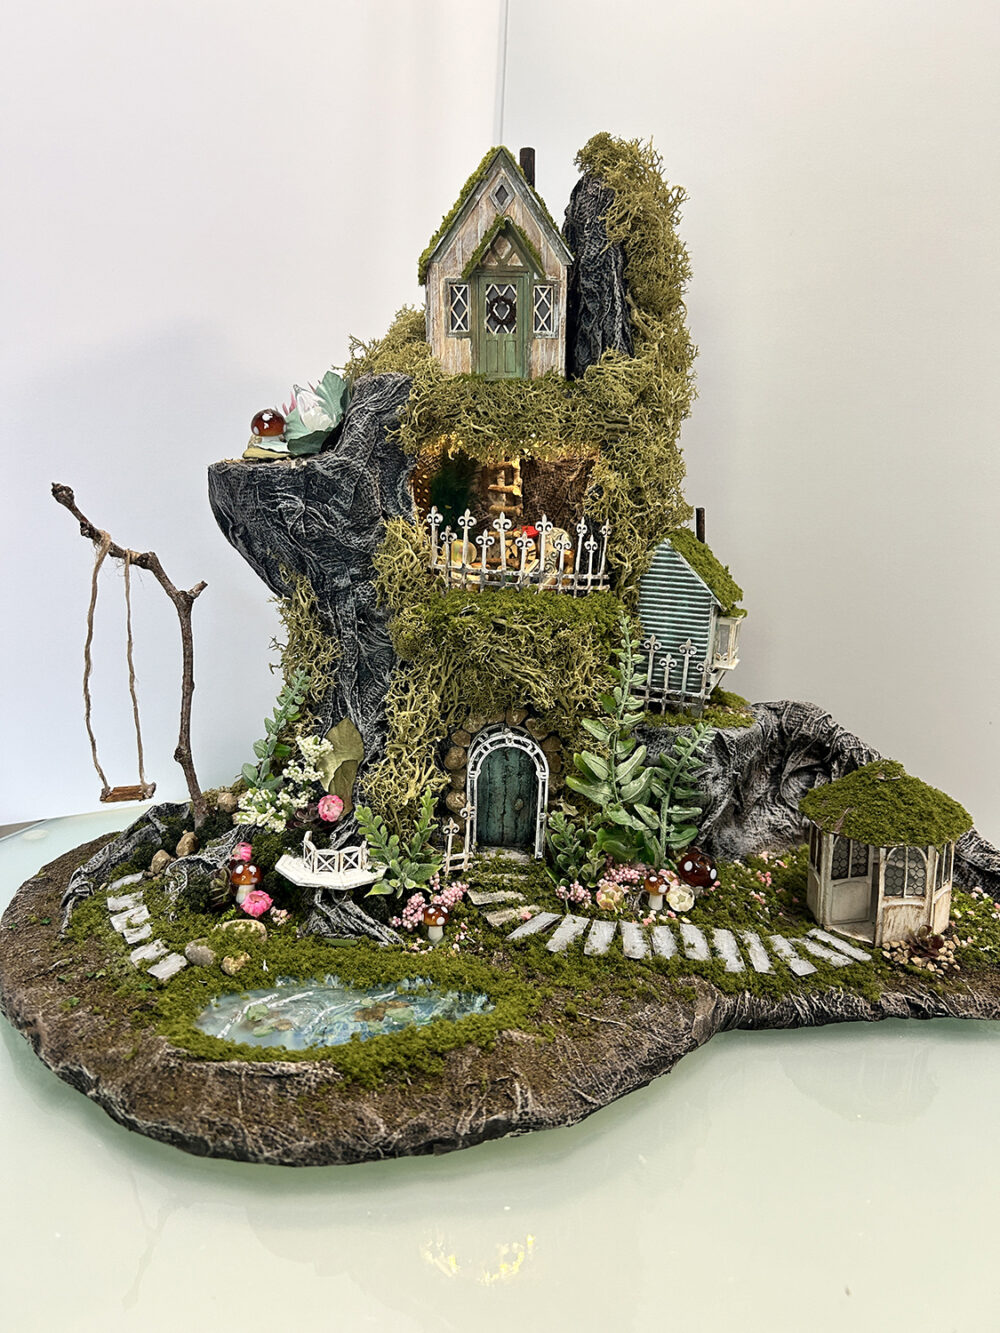
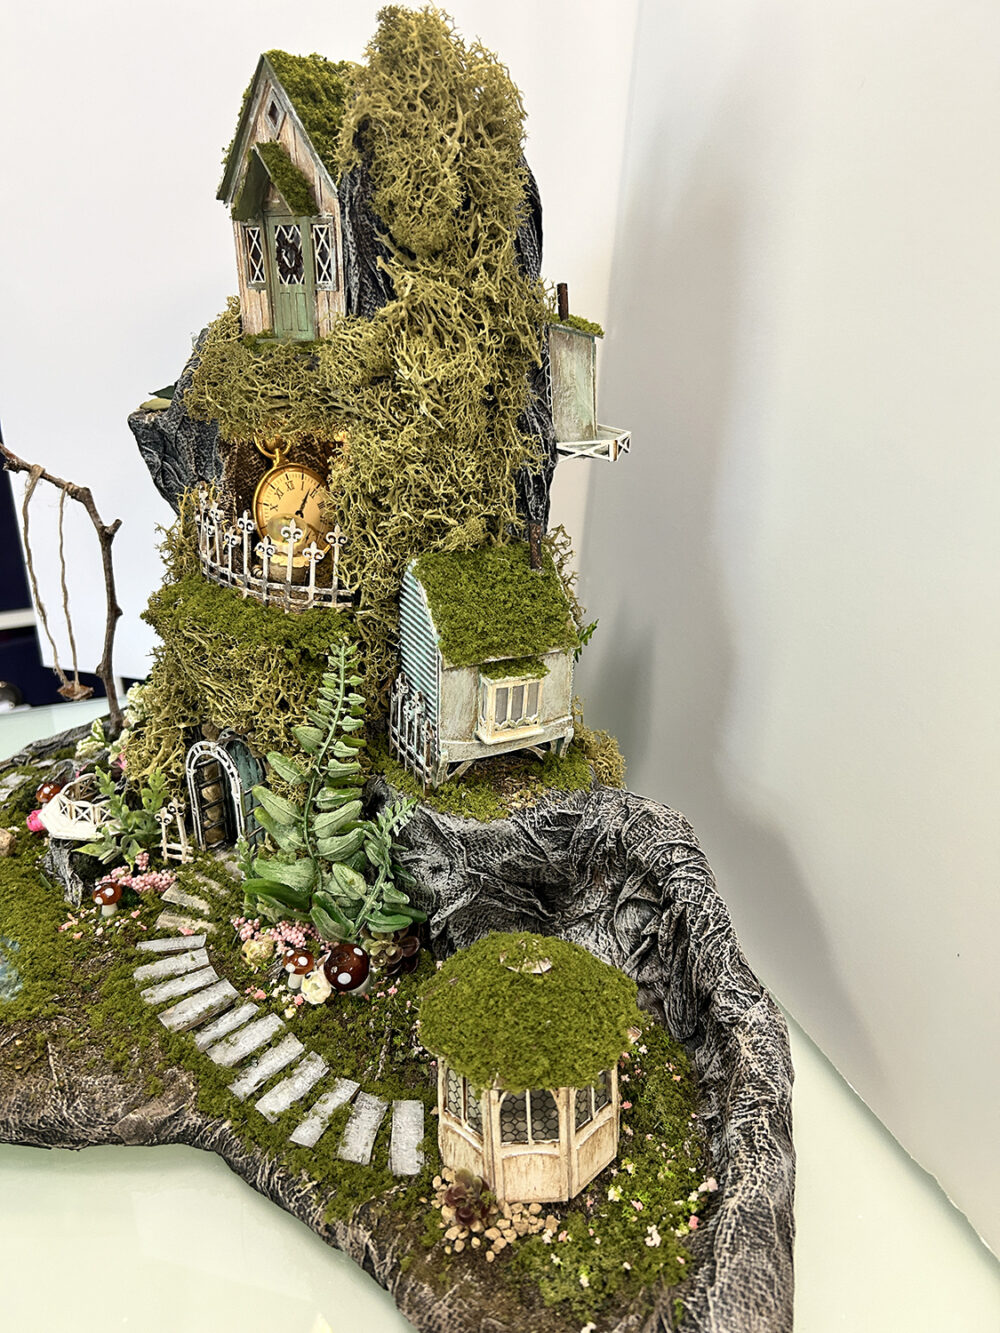
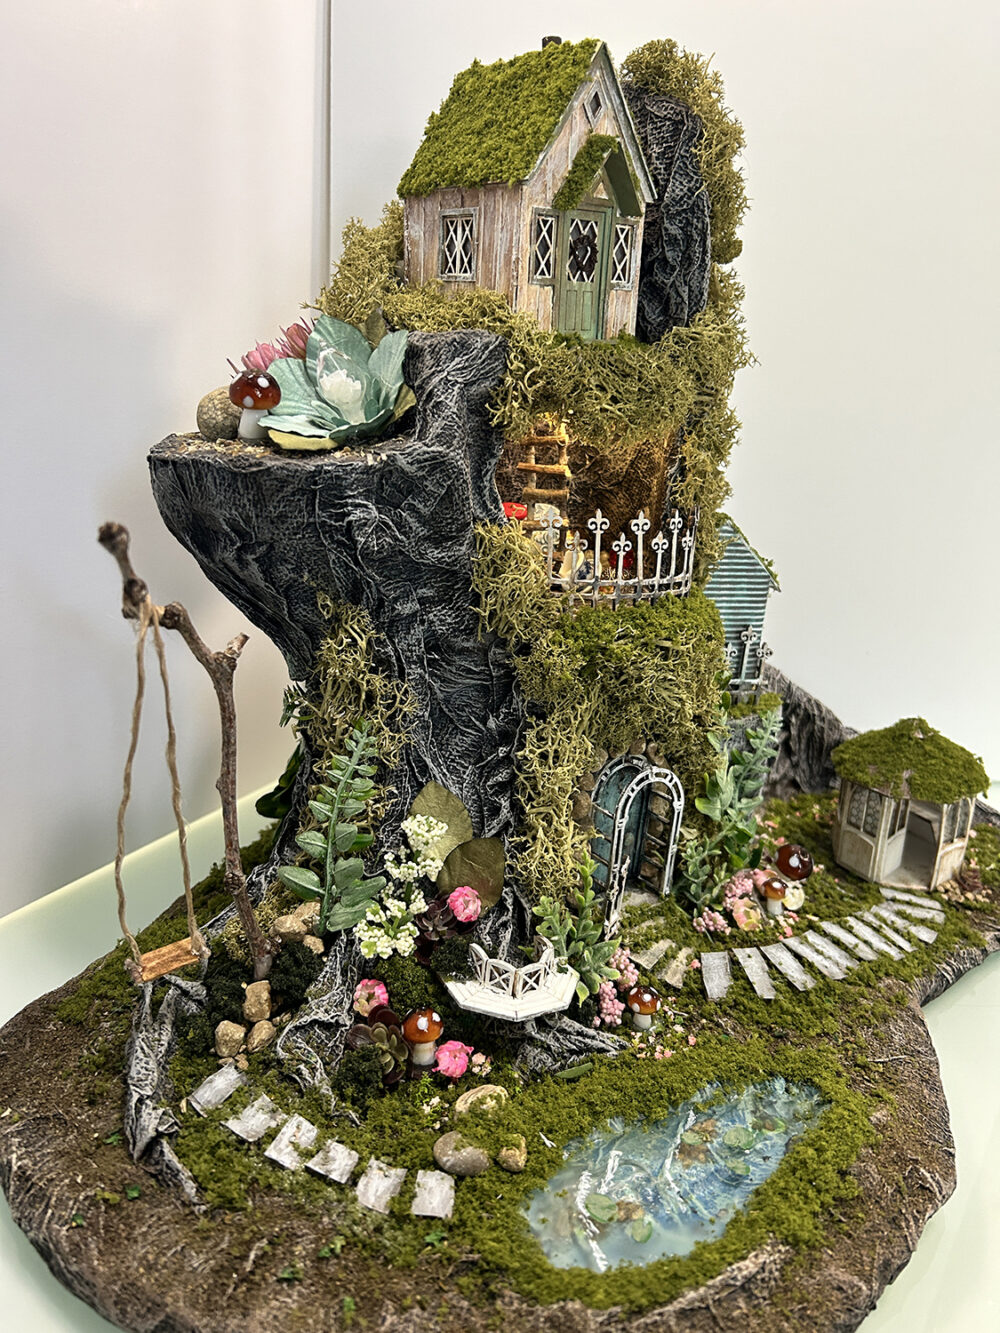
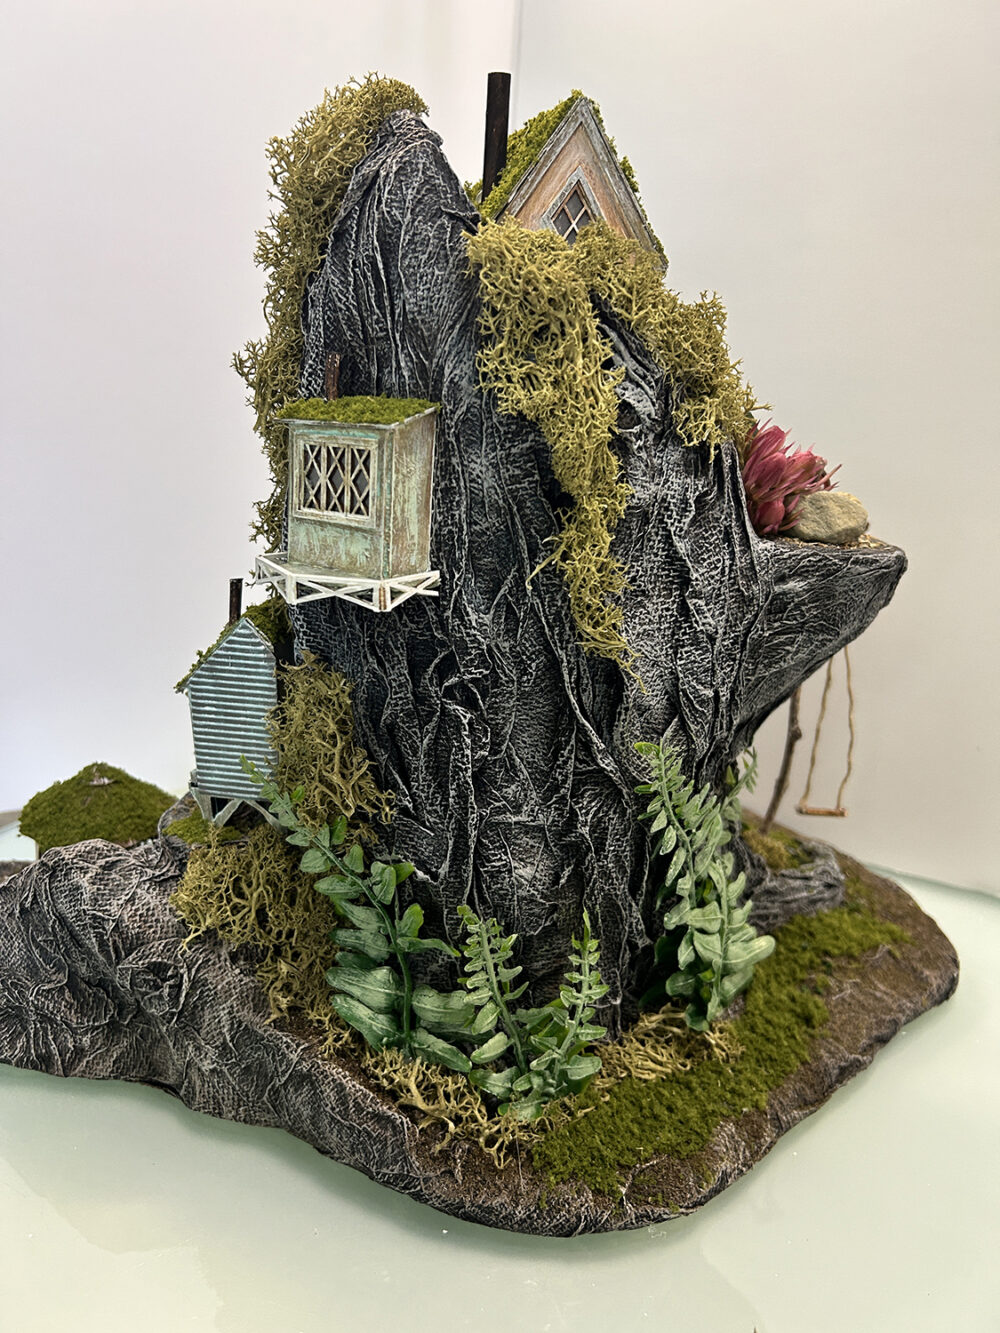
And there you have it! A Fairy Tree Village!! Hopefully, you have enjoyed the build and found something useful in the process. If you decide to build your own Fairy Village, please send me a picture so I can post it here as another example!!!


Leave a Reply
You must be logged in to post a comment.