© The Magic Bookshop by Teri Hanson
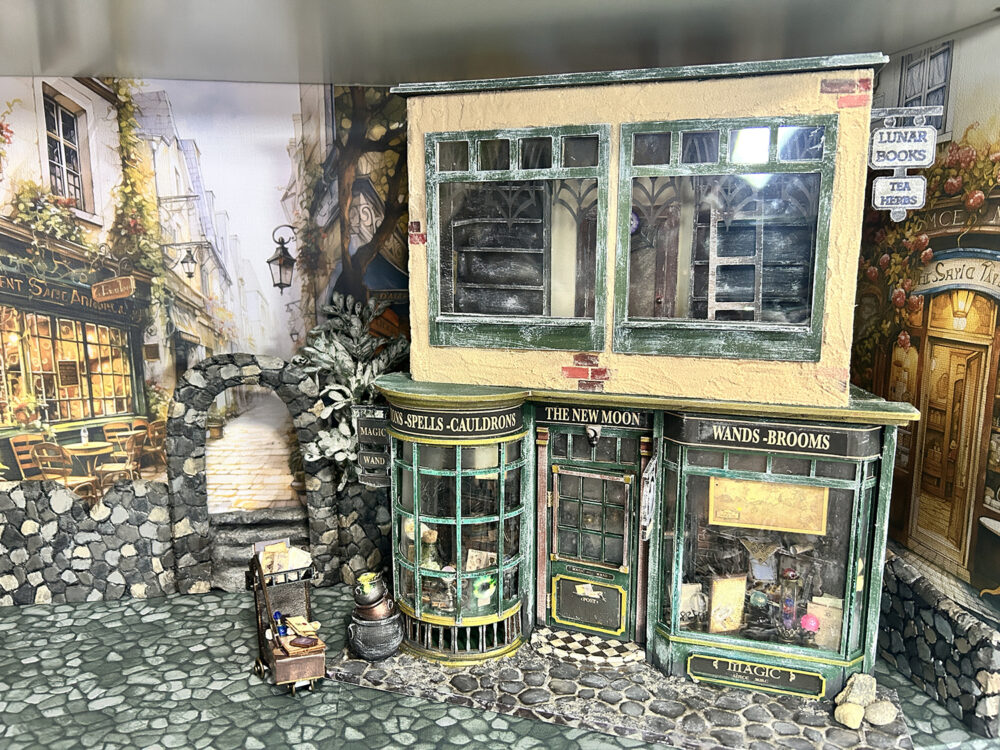
I hope that you have enjoyed the first part of the May Craft Along and that you will also enjoy these next steps as we finish up the bookshop. We will be working on the outside walls first so that we can let these dry while building the bookshelves and a few other inside furnishings.
VIDEO CAN BE VIEWED AT THE BOTTOM OF THIS POST AND INCLUDES BOTH PART 1 & 2
GET THE FREE PROJECT SVG FILES DOWNLOAD
Remember to use the Cutting Guide below if you need to locate parts!
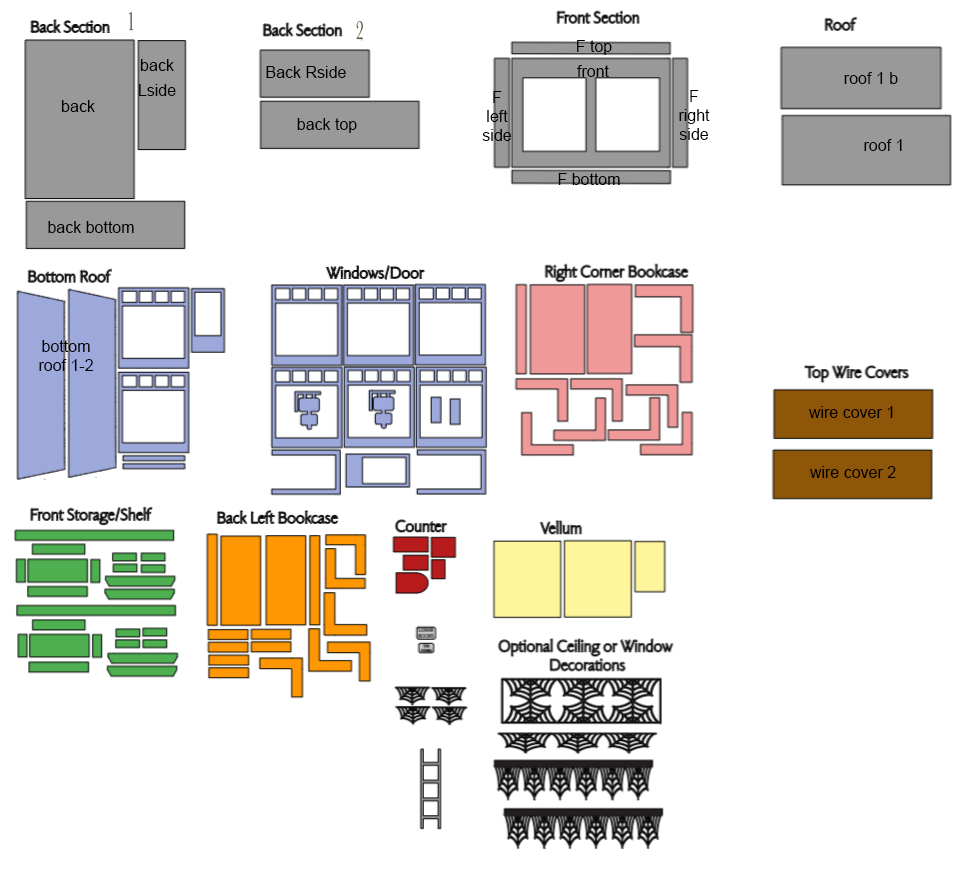
Use the following measurements when you upload the SVG files into your cutting machine in case they do not open to size
- Back 1 – 8.09 x 10.52
- Back 2 – 8.01 x 4.96
- Front – 9.75 x 7.13
- Roof – 8.56 x 6.94
- Bottom Roof – 10.44 x 9.66
- Windows/Door – 10.83 x 10.59
- RCorner Bookcase – 8.92 x 8.61
- Top Wire Covers – 8.03 x 5.49
- Front Storage Shelf – 8.19 x 7.36
- Back Left Bookcase – 8.22 x 8.22
- Counter – 3.12 x 2.83
- Vellum – 8.64 x 3.87
- Bookcase Webs – 3.6 x 1.89
- Ladder – 1 x 4
- Ceiling Window Decor Webs – 8.5 x 8.57
- Sign – 0.94 x 1.29 (Print and Cut PNG file)
Outside Wall Texture
1. Cut a strip of kraft board that is a tad less than 1/4″ wide. Then cut the strip into smaller sections to create a brick shape. You can use the brick pattern on the back of the magic shop as a reference for size. Now use some of these brick shapes to glue to the front section outside wall in random areas as seen at right. Mix up three shades of red paint, again using the printed brick paper as a reference and paint the faux bricks you have just added to the structure.
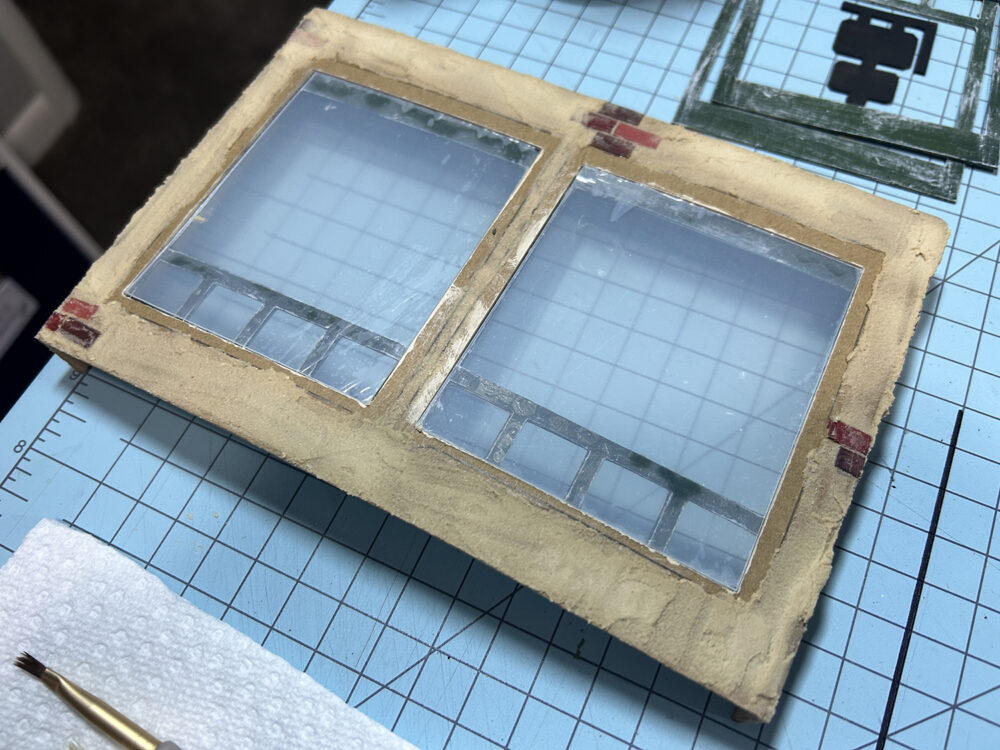
2. We will be using the Grit Paste to create a texture to the outside of the structure: front wall, side walls, back section side walls. You can also do this on the back wall of the back section or apply printed brick paper as I’ve done. Watch the video to see me applying the grit paste.
TIP: the grit paste can be colored by adding a drop or two of acrylic paint. I normally keep several jars of the grit paste on hand in white, lt. tan, and brown. I’ve used the lt. tan created by adding two drops of Linen paint to the grit paste.
Set these aside to dry completely. Note that if you did not seal the chipboard in part 1, the chipboard might warp a bit but it should go back to shape once dry. If it does warp you can place it flat and lay something on top to weigh it down for a bit or gently bend the wall into shape. Do this very carefully!!!
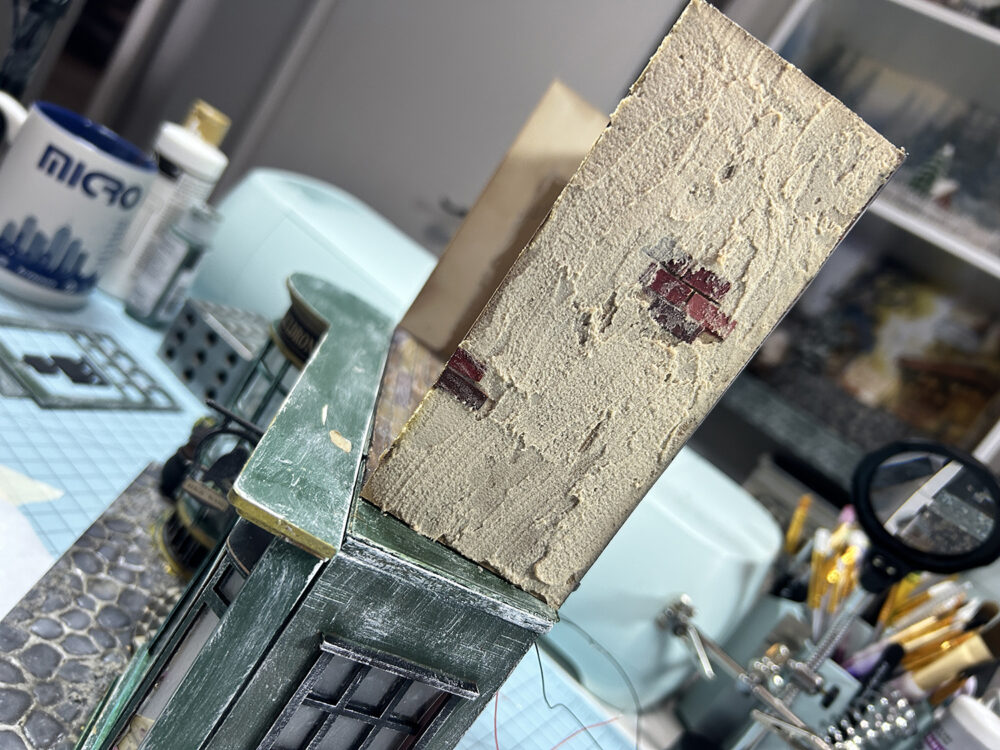
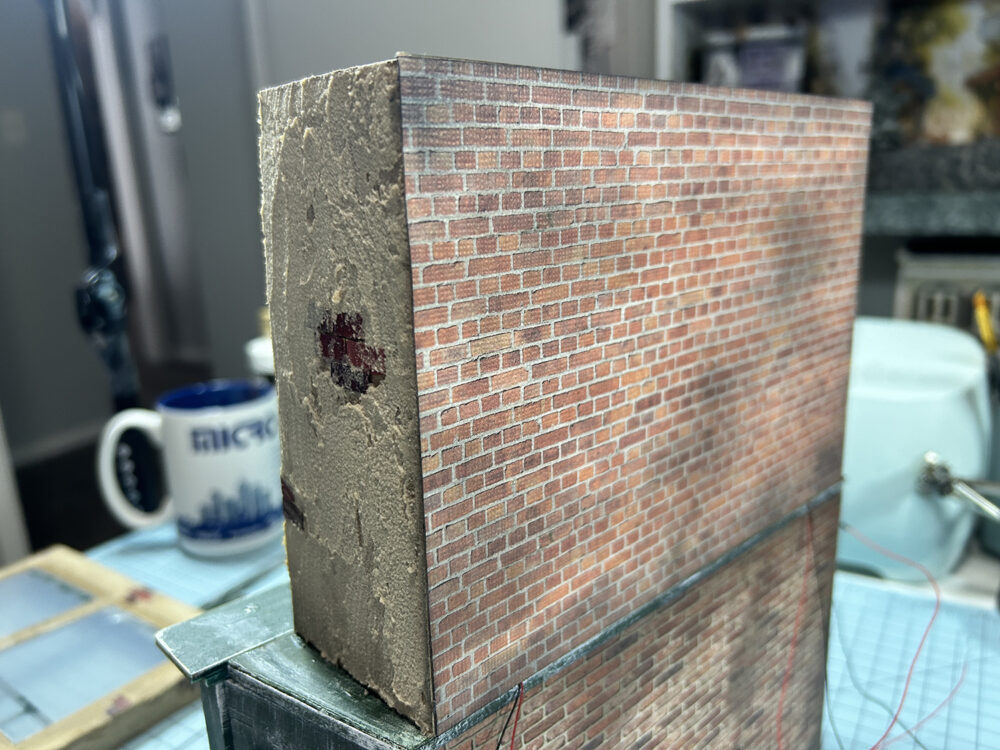
Once these walls are completely dry we will lightly sand the walls. We then can remove the other acrylic window protective coverings and glue the front window frames in place.
Bookshelves (right side of back section)
You can cut the bookshelves out of the 1.5mm Cricut chipboard -OR- 1/16″ matboard. Once all pieces are cut out, paint every piece except the smaller L-shape pieces (shelves) with black acrylic paint.
**Unfortunately, I lost the video part for building the shelf but it’s pretty easy so you shouldn’t have any problems. I did manage to film the left side bookcase so you can watch that part of the video for reference as they are built the same.
NOTICE: I changed the shape of the shelves after the image below was taken. The short rectangles were changed to smaller L-shaped pieces.
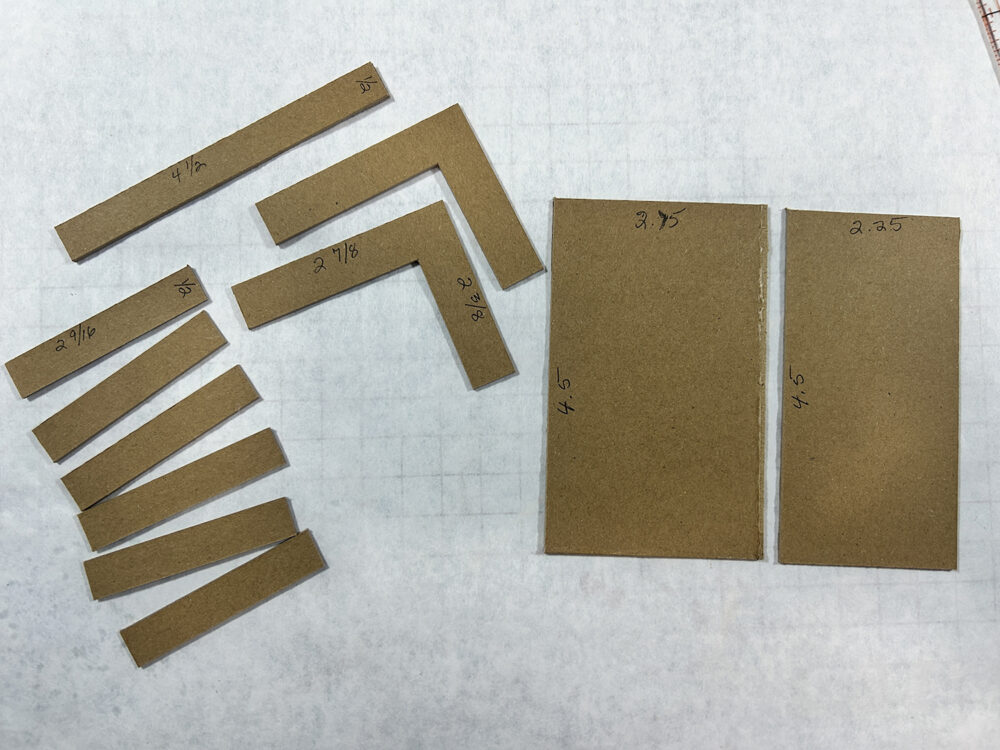

- Glue one of the larger L-shaped pieces to the bottom floor up next to the back and side walls.
- Glue the larger rectangle to the back inside wall.
- Glue the smaller rectangle to the right inside wall.
- Glue the back edge of one tall narrow rectangle on top of the back left inside of the bookcase and on top of the bookcase base.
- Glue the last larger L-shape to the top of all pieces.
- Glue the unpainted smaller L-shaped pieces (shelves) inside the bookcase. You can use as many or as few of the shelves as you like.
- Glue the remaining tall narrow rectangle to the back and bottom pieces on the right side to close up the bookcase.
- Once the shelves have dried, paint them with the black acrylic paint.
- Dry brush the entire bookcase lightly with white acrylic paint.

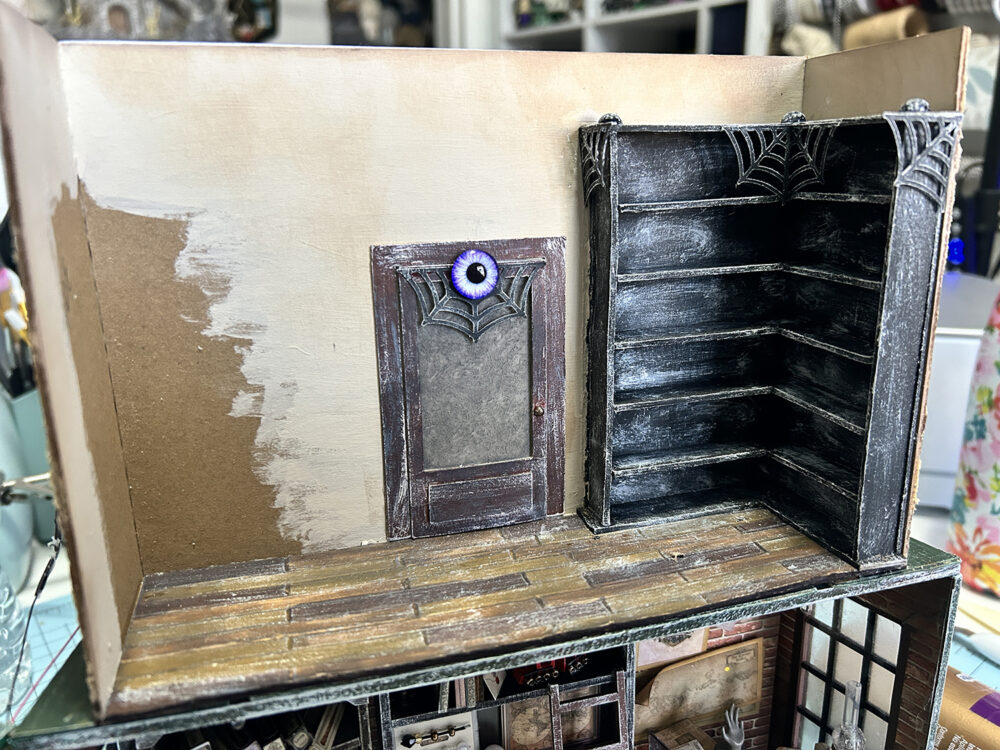
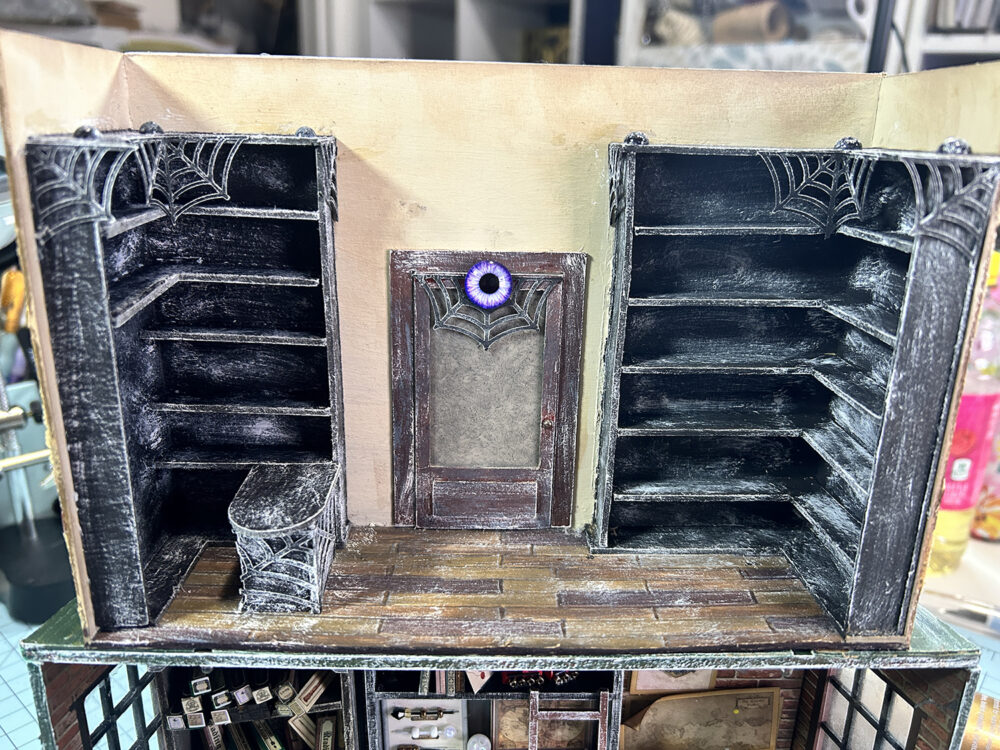
Below you can see how I’ve finished the bookcase and added a few decorative pieces to it and the door. The spider webs were found in Cricut Access – there are tons you can use if you like. I’ve just cut them with the Cricut Maker then cut them into parts by hand.
You can see in the image below right that I’ve now attached the front section.
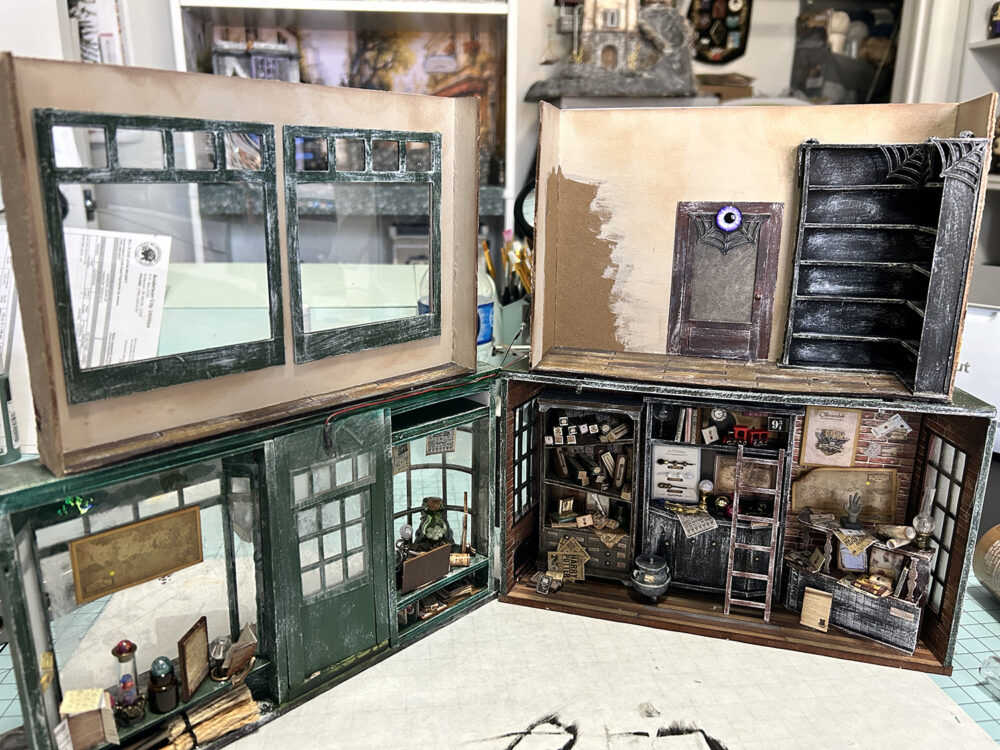
The left side bookcases are built in the same way except for shelf variations and a check-out counter. Here’s a look at the finished left side. Watch the video if you need further reference.

Front Section Cabinets
In the files, you will find an optional long shelf to use inside the front section by the windows. I’ve also included, and used, a storage cabinet for both front windows as seen at right. It’s up to you as to which you want to use in your shop.
For the storage cabinet, you will find both a plain bottom and fancy bottom piece to choose from. I’ve used the fancy bottom which is the same as the top.
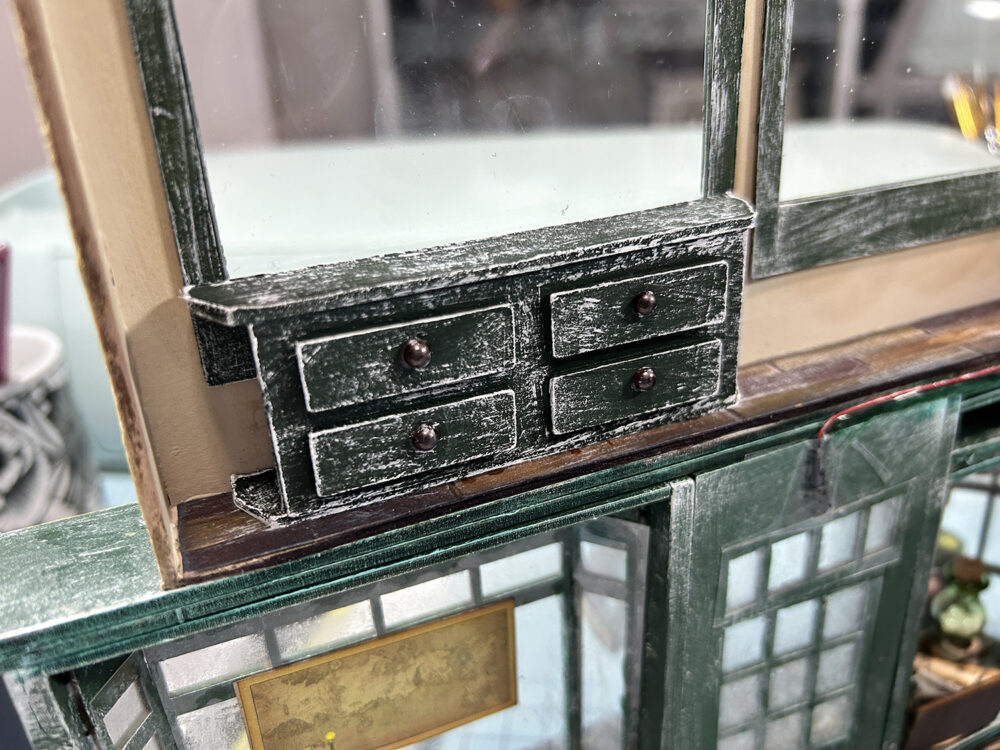
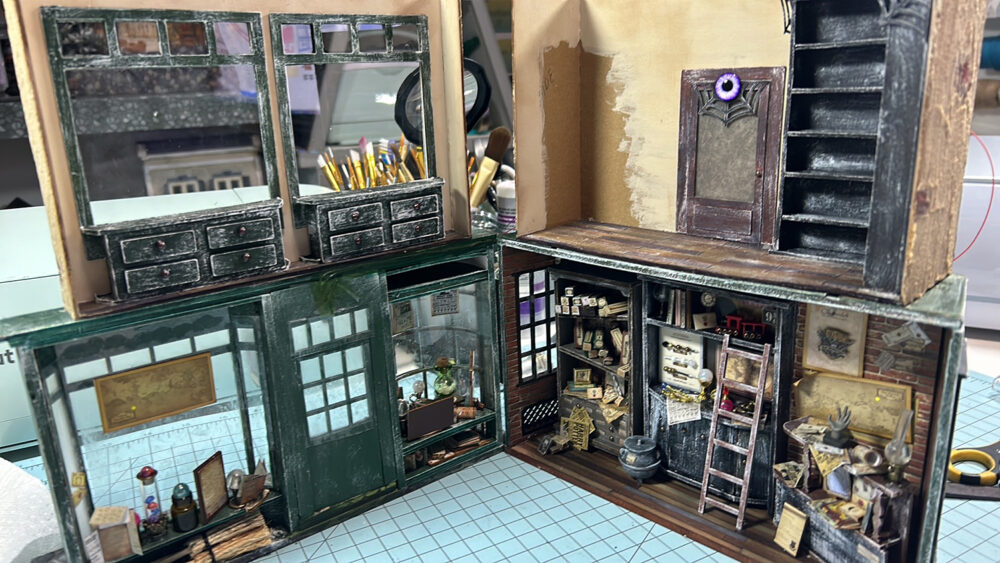
- Lay the front piece down flat. Glue the fancy base to the edge of the front piece keeping both pieces flush to the front side.
- Glue both sides in place keeping them flush to the outside edges of the front piece.
- Glue the back piece to the sides – place it inside the side pieces and flush to the back edges of each side.
- Glue the top in place.
- Glue on the faux drawer fronts.
- Paint the cabinet then dry brush it.
- Glue on the faux knobs (flat back pearls)
- Glue the cabinet in place as seen in the image above.
Ceilings
VIP: Drill two holes for the lights as indicated by the red dots on the image below left.
Both ceilings should be glued to the inside of the back and sides. This will pull the walls that may have warped earlier and make them straight again. If you want to decorate the ceilings, now would be the time to do it. I’ve used the spider webs to create a pattern for both ceilings and to make a curtain of sorts for the front window. The web curtain was wrapped around a wood dowel and then glued to the wall at the top of the window.
(excuse the blue tape – it’s holding the dowel in place to dry)
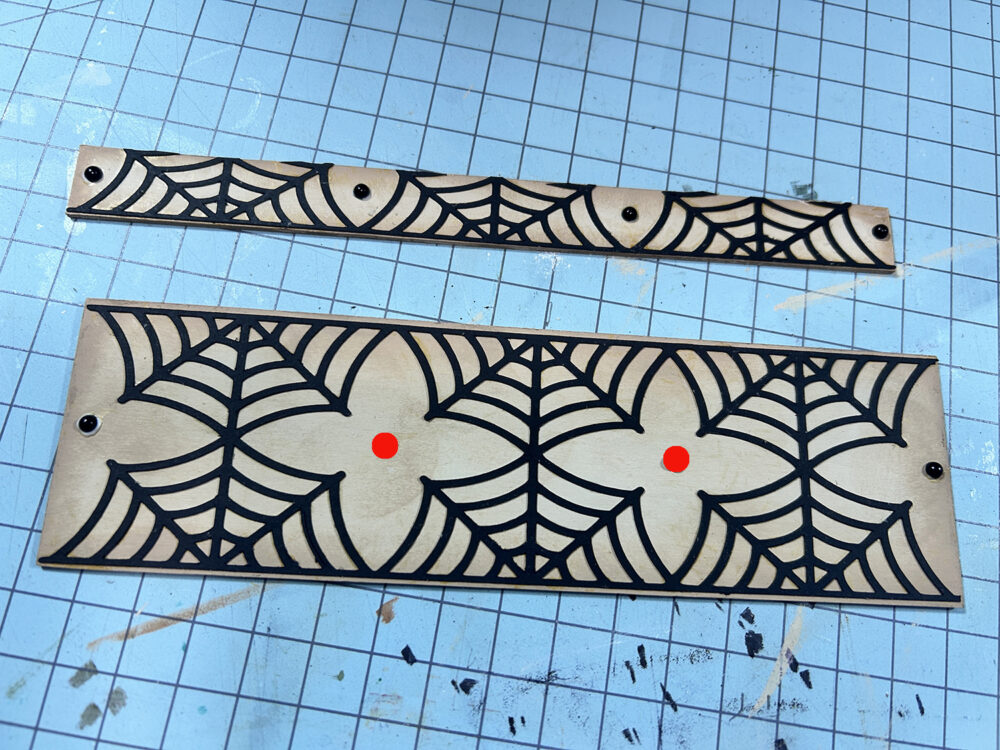

Once the ceiling has dried you can glue it into place. Check the ceiling fit before you glue it! You may need to make a slight trim to it in case finishes have altered the space.
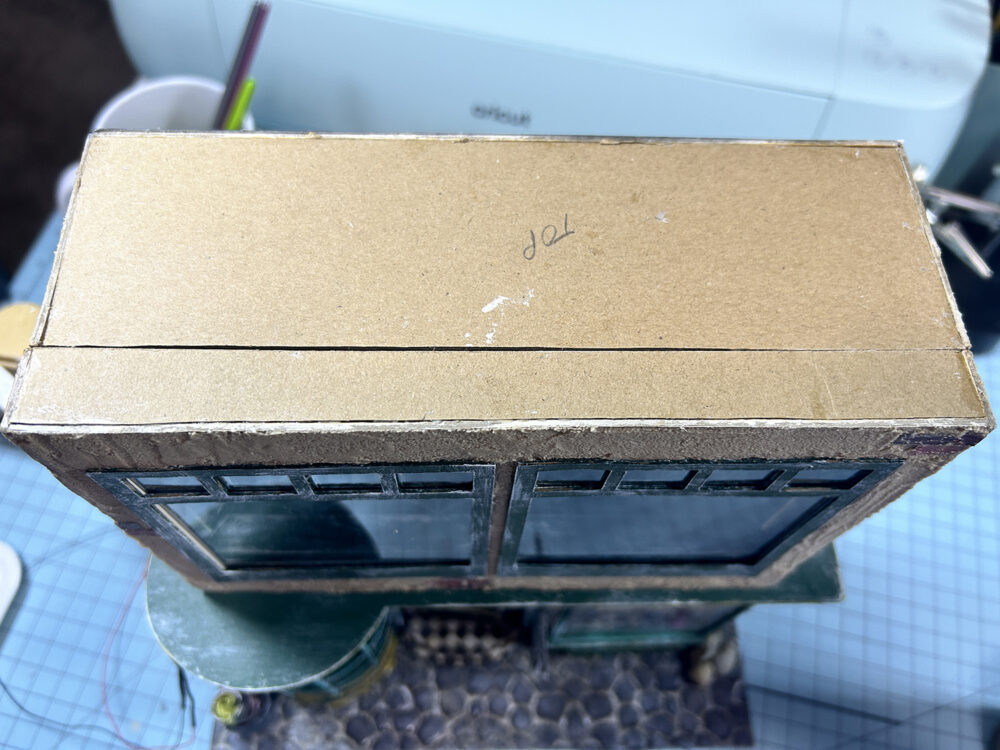

Lights & Roof
Thread the lights through the holes you drilled earlier and bend them “carefully” right as they come out of the hole on the top of the ceiling. Tape them down to secure.
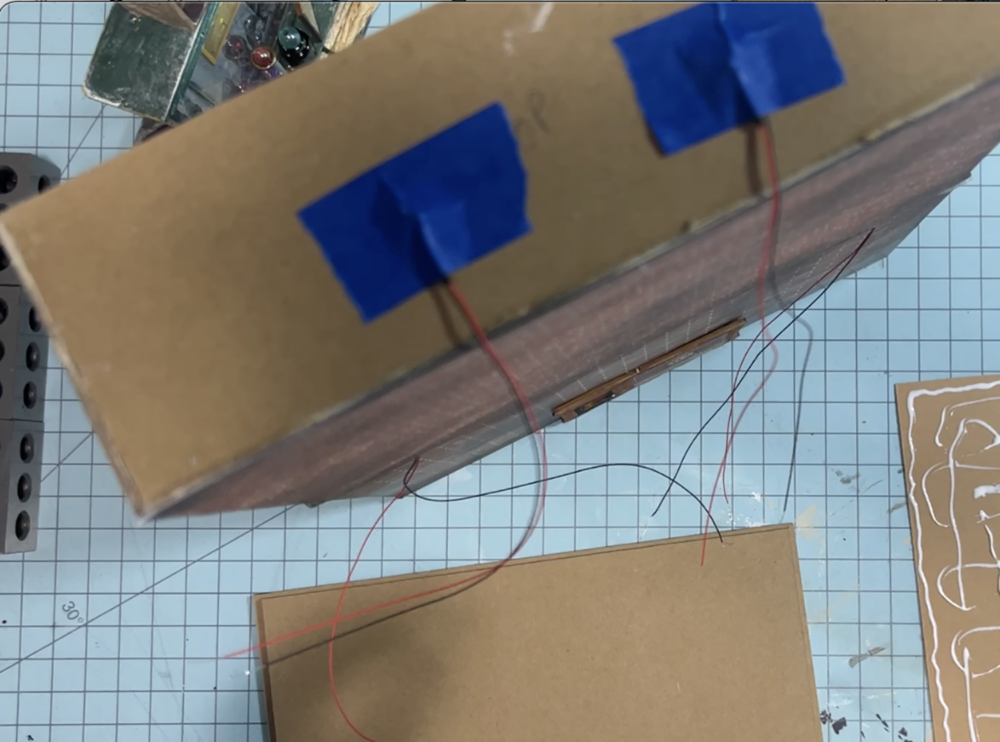
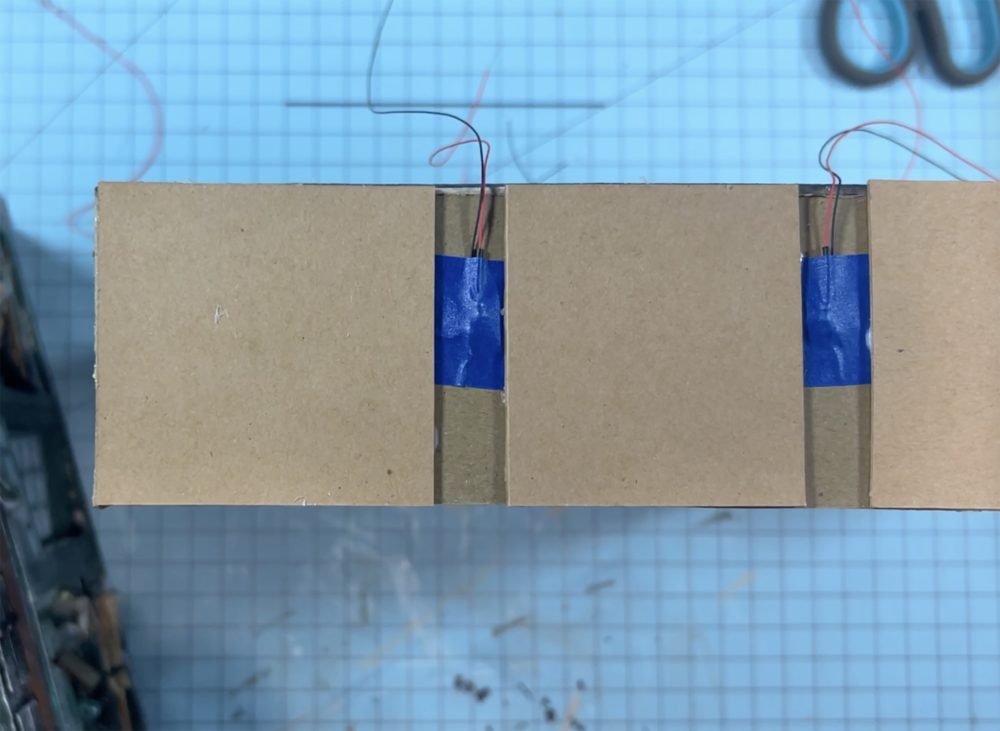
Cut the Top Wire Covers from the SVG files and glue the two pieces together. Just as we did at the beginning of the project, lay the piece on top of the structure back section and place a mark on either side of where the wires are. Now cut the piece into three pieces and glue them to the top of the back section.
Look at all edges of the shop and make sure they are finished in some way. If not, do this now.
Glue the final roof into place – make sure you have both front and back sections sitting as they should be to help you with placement, but only glue the roof to the back section!
You might want to use some clamps or weights on the roof till it’s dry.

While the roof is drying you should finish the top of the front section. You could add texture paste to it or just paint it to match the roof. I’ve painted mine to match the roof. Remember that this area will only show when the front section is opened.
Once the tops are dry, use white paint and dry brush it.


Last minute things
- You will notice in the images below that I’ve added a few last-minute items to the files: a ladder and ledges for the outside of the front windows. I just thought it needed a few extra touches.
- And now the only remaining thing to do is to hide the wires in the back. This is pretty much up to you on how you want to hide them. It’s also up to you if you want to just twist the wires together to make the connections or if you want to try to solder the wires. For now, I’m just twisting them together but I will eventually solder them. One idea to hide the wires would be to use bendy-straws as a drain pipe on the backside and run all wires through the straw. You then could use velcro to secure the batter to the back, or simply lay the battery down behind the structure. I’ll leave this part up to you to decide.
- I have ordered some piano hinges to replace the hinges that came with the kit. These should work better but I will let you know how that goes. I suggest that you do not add the hinges until you are finished with the project as they are not truly made to be opened and closed a ton over a short period of time.
- Books: you can find all kinds of book covers online to make books for the shelves. I suggest using a white foam core 1/4″ wide and thinner for the base of the book. Simply print out the bookcovers, cut them out, then wrap them around and glue them to the foam core, and cut them out. You might want to distress the edges of the foam core if you think it will show. Best of luck making a LOT of books!
- If you are interested in how I made the backdrop scene for this build, refer to my “Making a stone wall” post on the blog.
I hope that you have enjoyed the shop build and I would love to see yours when you are all finished with it. Just post a pic in the Facebook group or email me a pic via the blog.
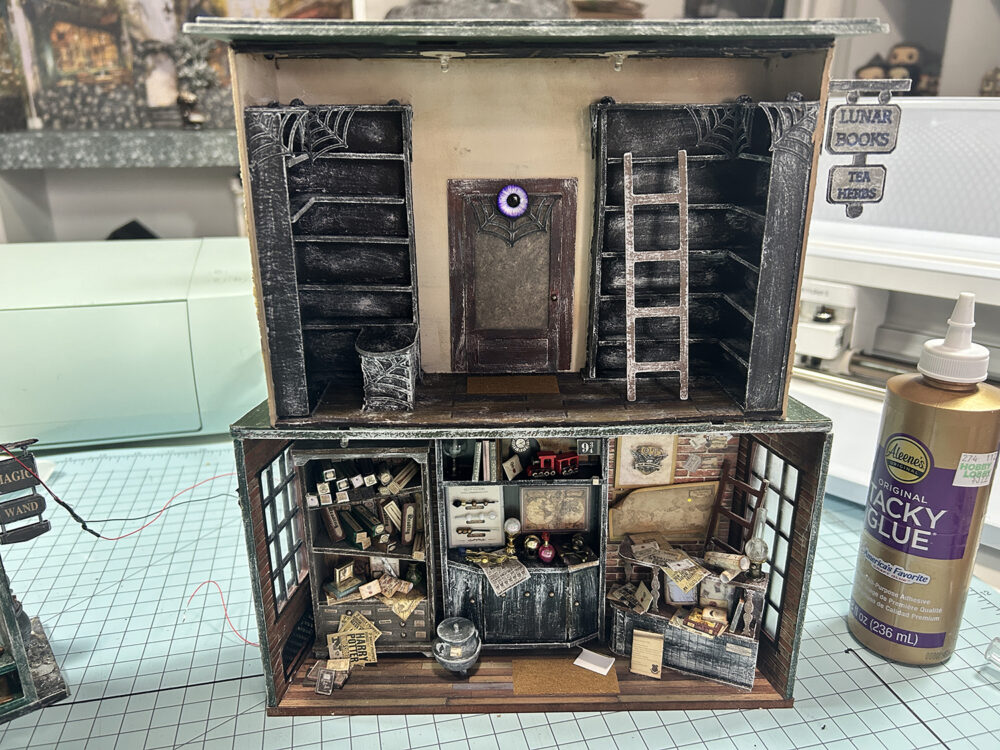
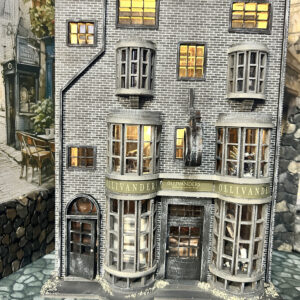
Here’s a look at the finished project . . .


Till next time . . .
Thanks for being a part of this Craft Along!
Teri


Leave a Reply
You must be logged in to post a comment.