I’ve always had a “thing” for Edgar Allen Poe, the mystique around him was fascinating to me as was his writing. Not long ago I ran across a diorama dedicated to Poe on Pinterest and knew that I wanted to make something similar and that’s where the idea for this tombstone was born.
Born in 1809 he was best known for his poetry and short stories, particularly his tales of mystery and the macabre. His father abandoned the family in 1810, and when his mother died the following year, Poe was taken in by John and Frances Allan. They never formally adopted him, but he was with them well into young adulthood. In 1836, he married his 13-year-old cousin, Virginia Clemm, but she died of tuberculosis in 1847.
In January 1845, Poe published his poem “The Raven” to instant success. He planned for years to produce his own journal The Penn (later renamed The Stylus), but before it could be produced, he died in Baltimore on October 7, 1849, at age 40, under mysterious circumstances. The cause of his death remains unknown and has been variously attributed to many causes including disease, alcoholism, substance abuse, and suicide.
If you are also a Poe fan I hope you enjoy this project and are inspired to create your own! You can find my tombstone SVG file in the shop to get you started.
The Tombstone . . .
You could make the tombstone pretty much any size you like and out of a variety of materials. I wanted something that was pretty sturdy to sit on its own by my much loved E.A. Poe book and decided to use the Cricut chipboard. I used a lot of chipboard sheets so if you are looking to spend less on materials, I would suggest using XPS foam or foam core. With XPS foam you would only need one layer for the main tombstone and then another for the raised area. Also only one piece for each of the steps area. With foam core, I would double up on the main layer and use one sheet on the raised area. Also, double up on the steps area.
Material note: If you use XPS foam there is no need for the texture as you can do that easily with a scrunched-up piece of aluminum foil pressed into the foam. Once you have finished adding texture I would add some black paint to Mod Podge and paint the entire tombstone with one coat of the Mod Podge mixture. This will protect and harden up the foam.
Here’s a look at the files with some notes on its use.
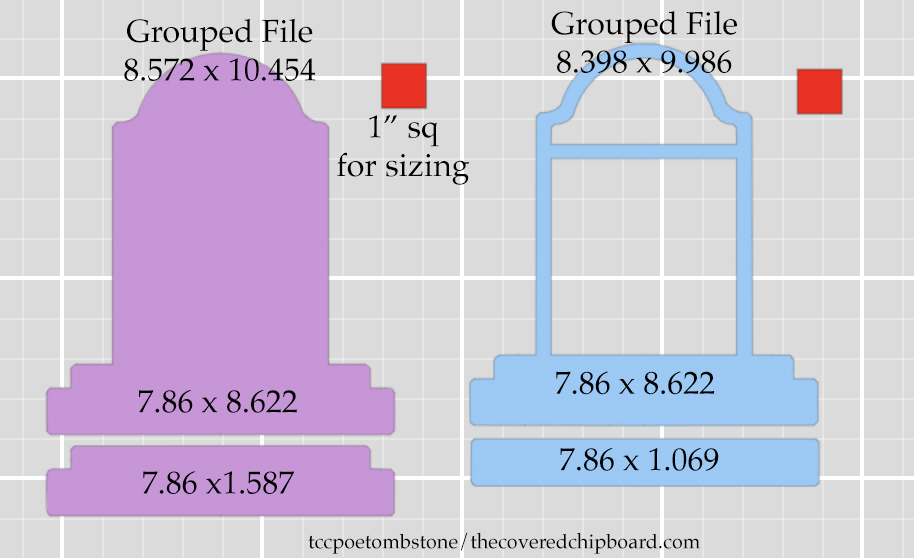
When you first upload the files to Cricut Design Space they may or may not load at the correct size. Above you can see that I’ve listed the size for each file as a whole along with the size for each element. You can ungroup each file, delete the red 1″ square, and then manipulate the pieces as you like. The red square is there only for size use. If you make sure each square is 1×1 then the pieces will be sized correctly as I’ve used them in my own project.
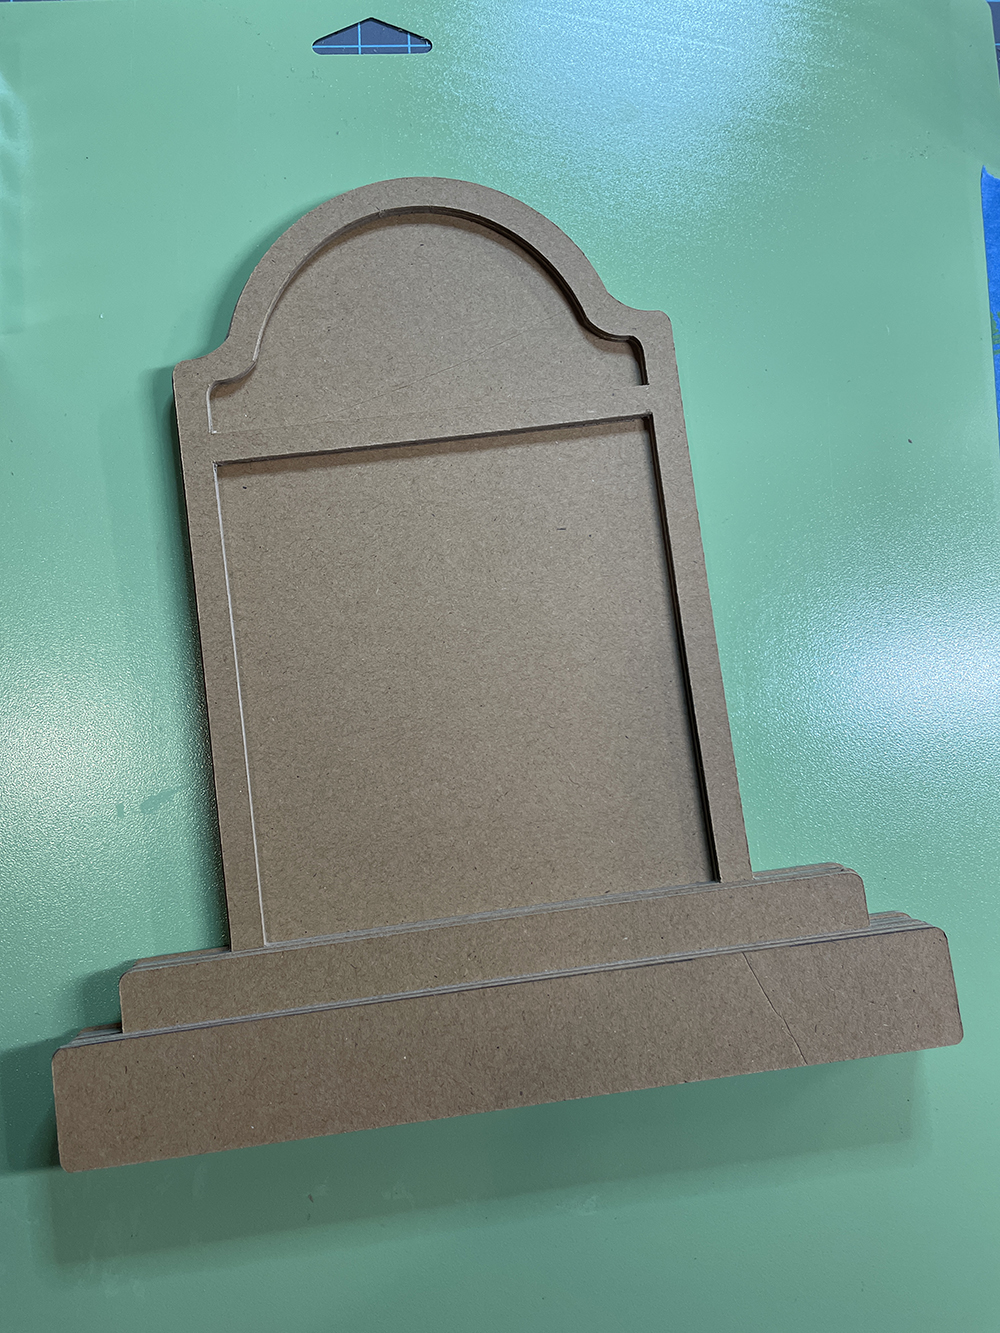
Now here’s a look at the pieces cut and glued together. I’ve cut the following number of each piece as listed below and glued them in the order listed.
- Main stone (cut 3)
- Overlay stone (cut 2)
- Double step (cut 4)
- Single step (cut 4)
This makes the larger section about 3/8″ thick and the bottom section 3/4″ thick.
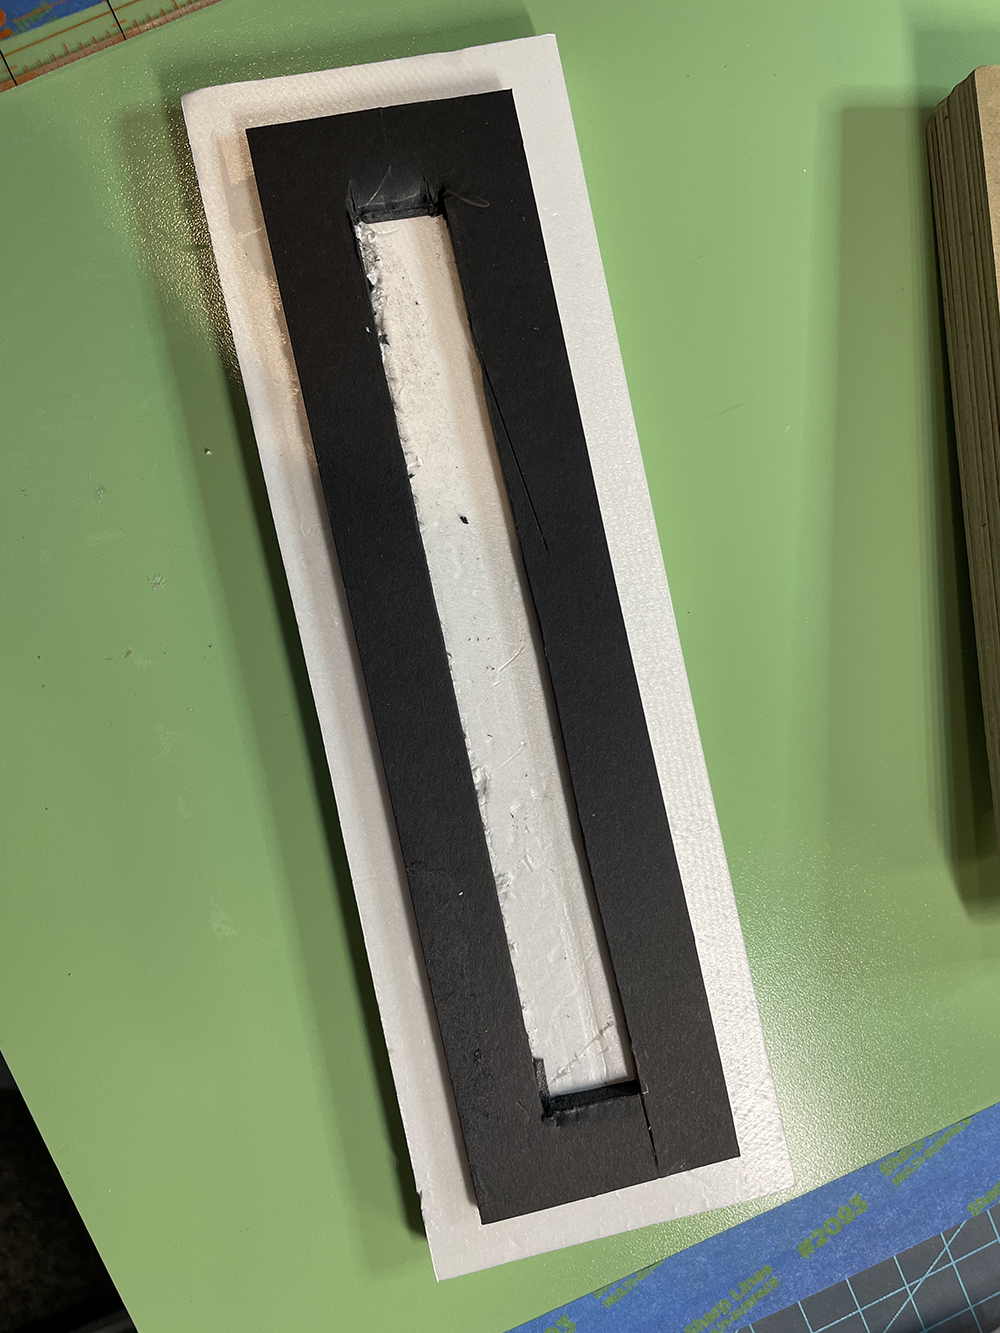
Next, I’ll be creating a flat base to hold the tombstone structure and allow room for additional embellishments. You can see the base below. It was built with 1/2″ thick XPS foam and an inexpensive dollar-store foam core. The tombstone structure is then glued inside the center area of the base.
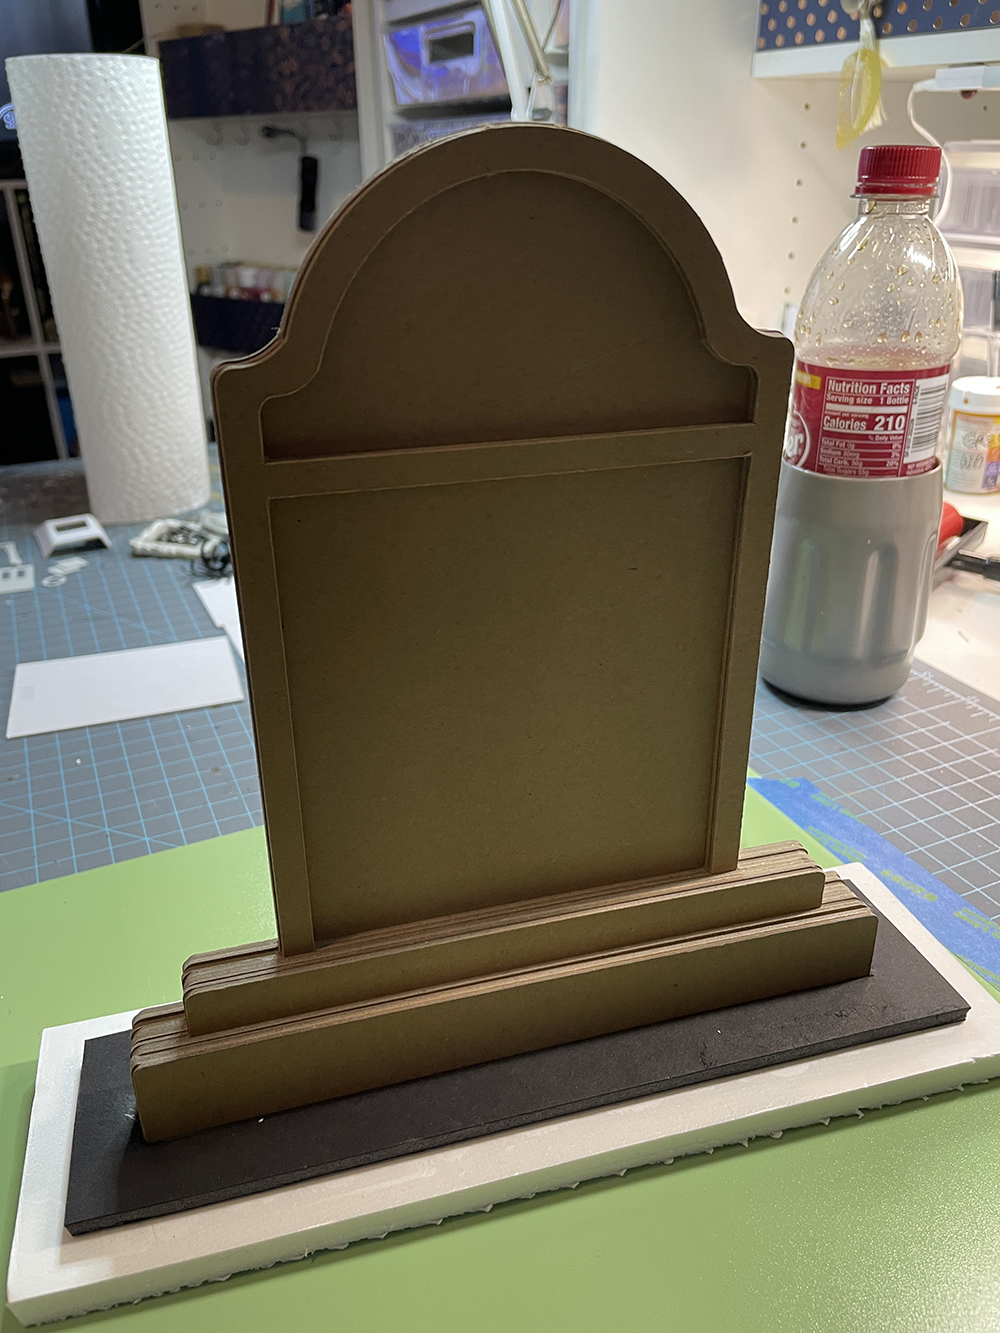
Once the glue is dry it’s time to add texture to the structure. I’ve used something called Martha Stewart White Texture Effect but I’m almost positive that it’s no longer available. You really could use any type of texture material as long as it can be spread with a palette knife. Wait for the texture to mostly dry and then carve cracks in it as well as any text you might want on it.
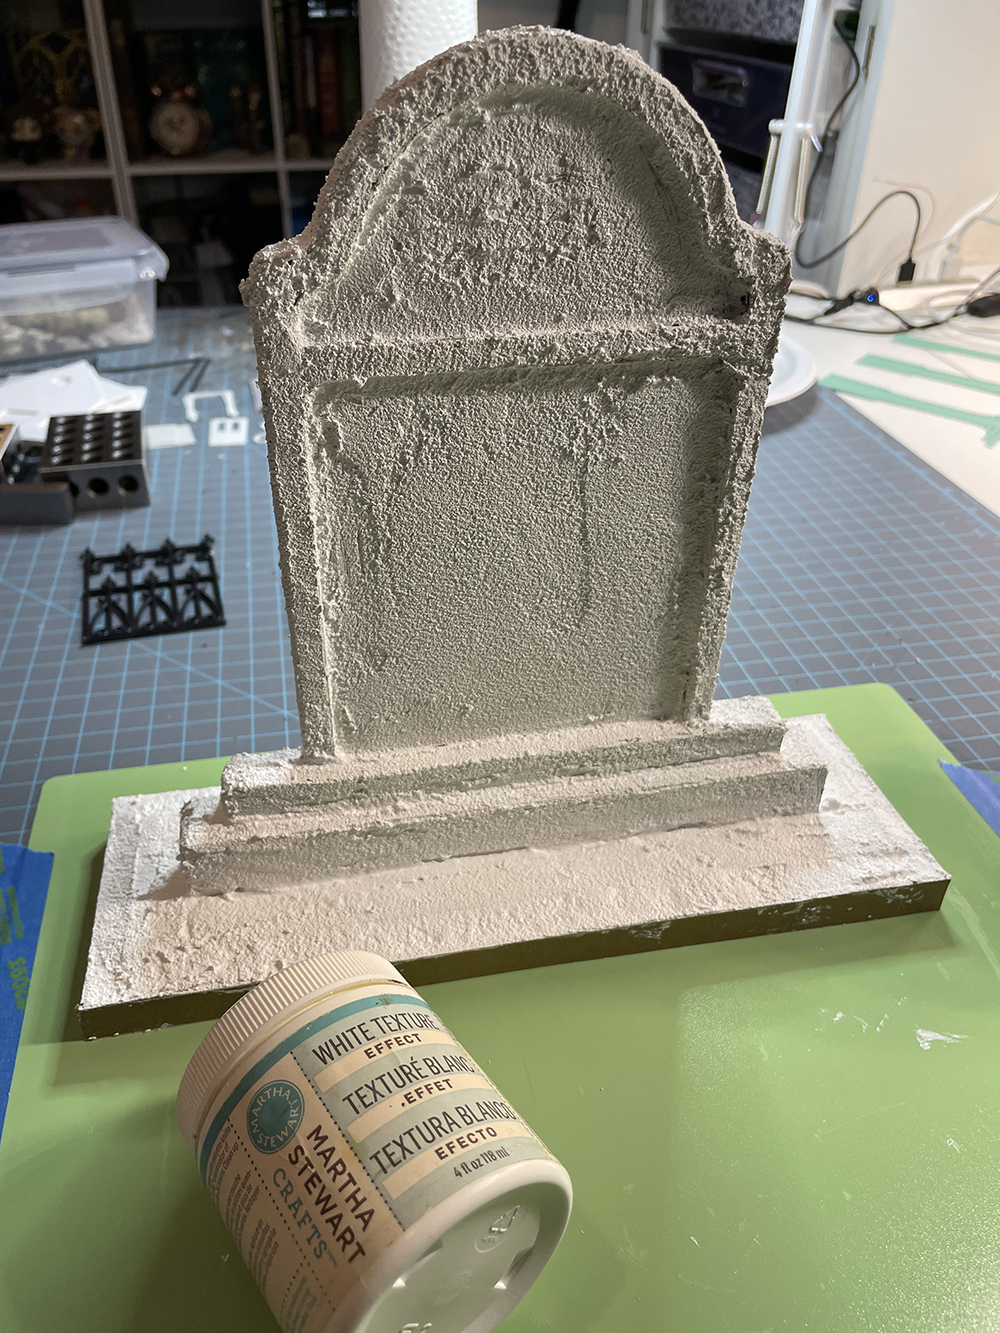
If you are finding it hard to get a smooth texture, no worries. You can use your finger to smooth it out. Dip your finger in some water then smooth the texture. When the texture has completely dried and no more carving is needed, it’s ready to paint and embellish.
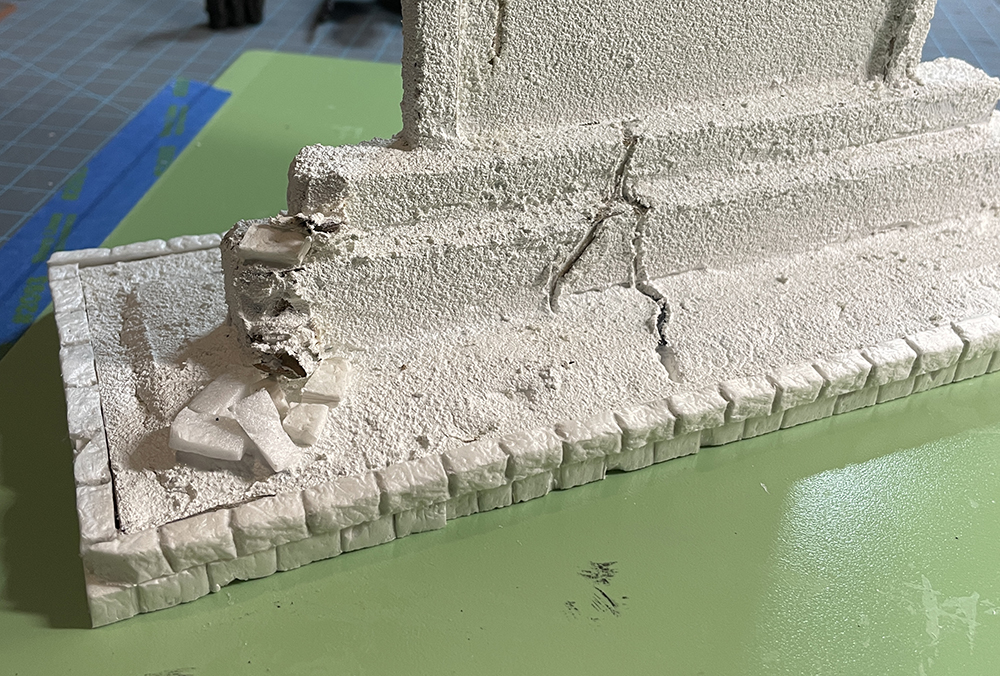
For the very bottom, I’ve used a hot wire cutting machine called the Proxxon to cut strips of XPS foam and then carved them into bricks. Each side is two strips high. You can also see where I’ve carved a few cracks into the bottom section as well as destroyed the two bottom steps on the corner.
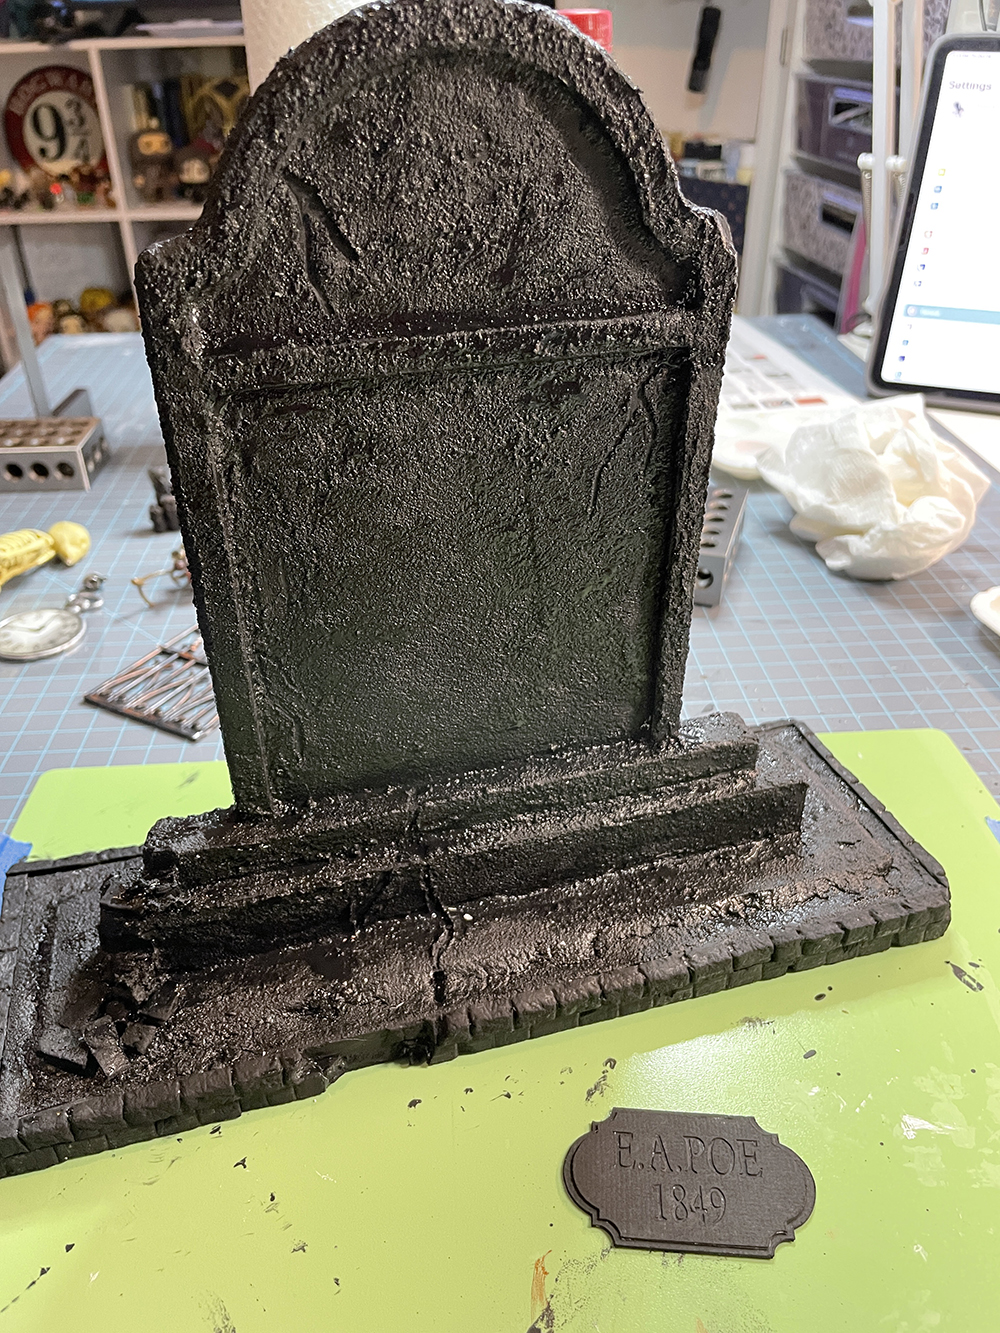
Now it’s time to paint the structure. The first coat will be black paint as seen below. This must be completely dry before moving on to the next step! You can see that I’ve also painted the plaque with the first coat of black paint. The plaque was created with cardstock, two plain layers on the back, and a top layer with text cut out. I used a label shape in Cricut Design Space and then sliced out the text.
While I wait for the tombstone to dry I’ll work on the two fence sections that will be attached later. These are dollhouse black plastic fencing I found at Factory Direct Crafts. I believe they can be found at other shops as well.
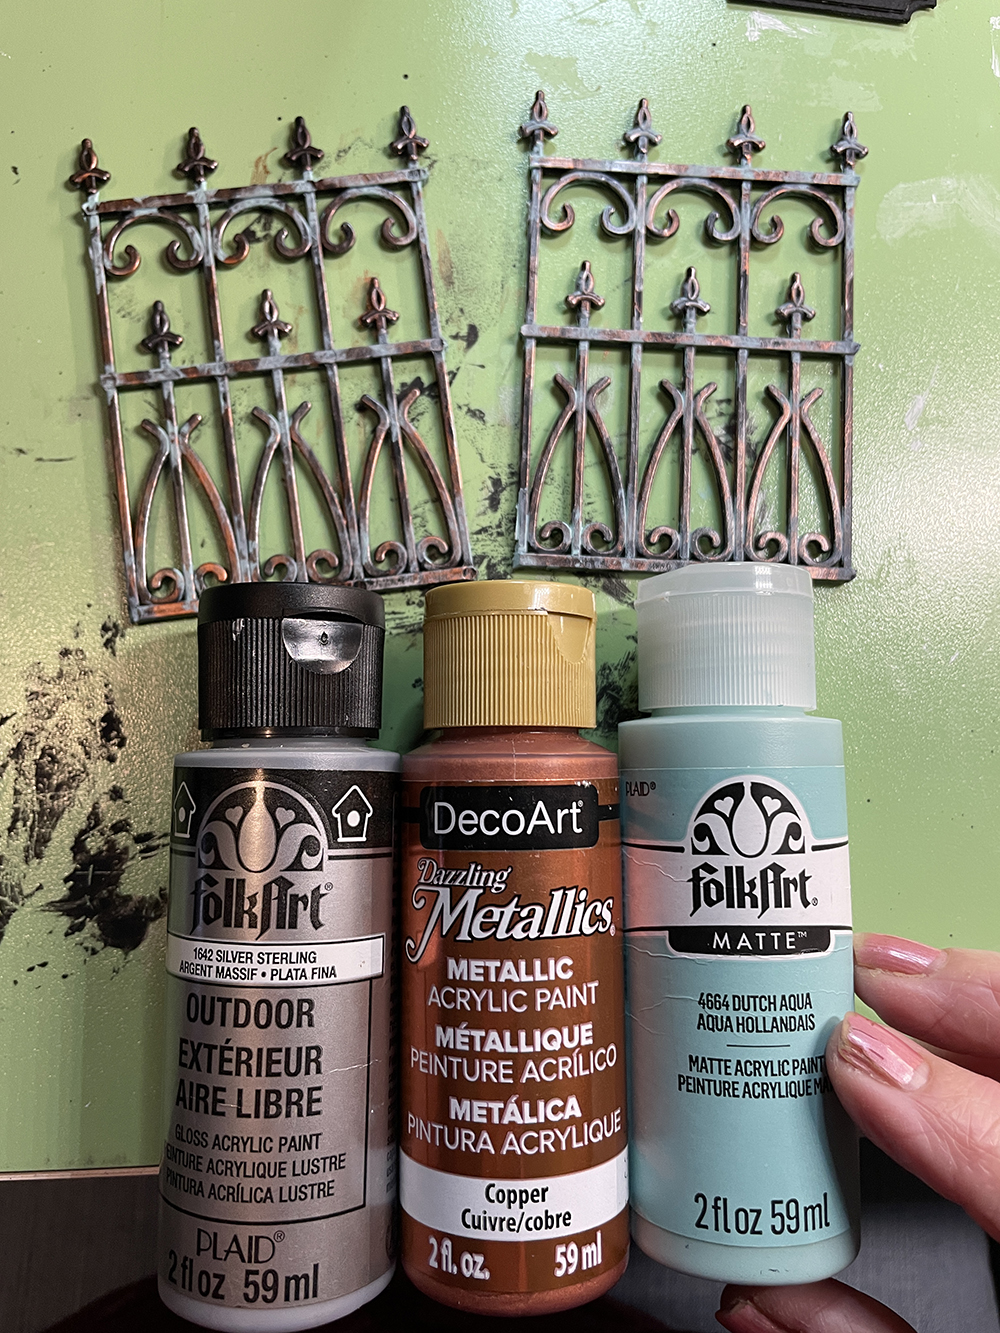
Above right, you can see my painted fence. I start by lightly sanding the fence then lightly brush some silver paint on leaving some black showing. Next, I lightly brush on some copper paint leaving some of the black and silver paint showing through. When that has dried I add little touches of the dutch aqua to create corrosion. After the fence has completely dried I will cut out some parts and bend some sections to make the fence appear to have fallen apart from age. Finally, a single spray coat of Krylon matte spray sealer is applied to both sides of the fence.
The next part of painting the tombstone is a dry brush method. This is working with a totally dry brush and full-strength paint from the bottle. Dip your brush in the paint and then wipe most of it off on a paper towel. Now lightly brush the paint onto the tombstone surface. Several colors are used, one on top of the other, without washing out the brush. With each layer and lighter color, apply the paint with a lighter touch.
In the first image, I used medium grey paint with a heavy touch. In the second image, I used a pale grey with a lighter touch, and in the last image a white with a very light touch.
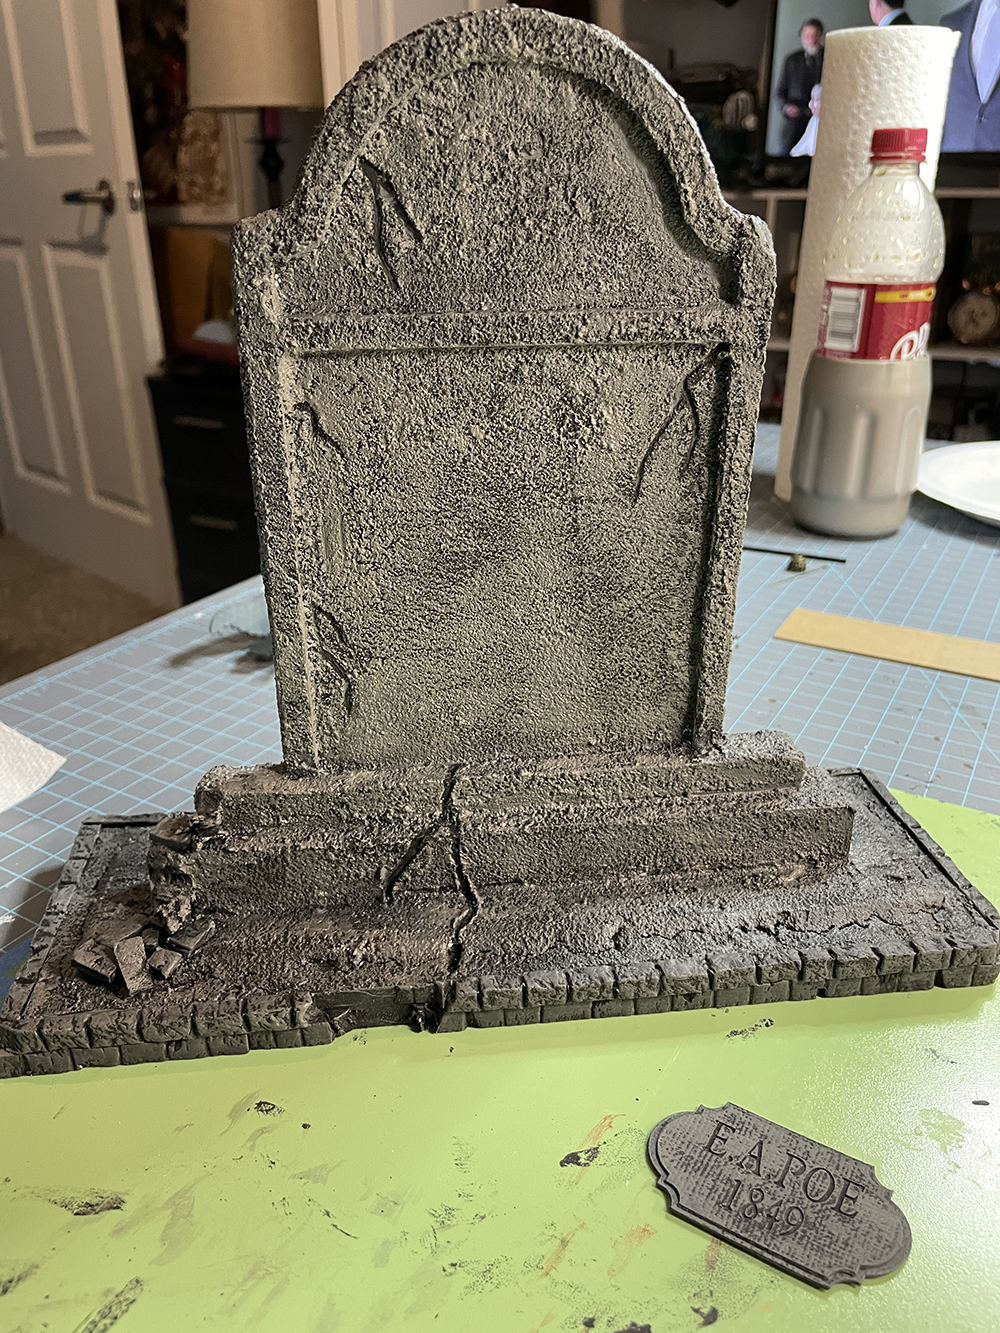

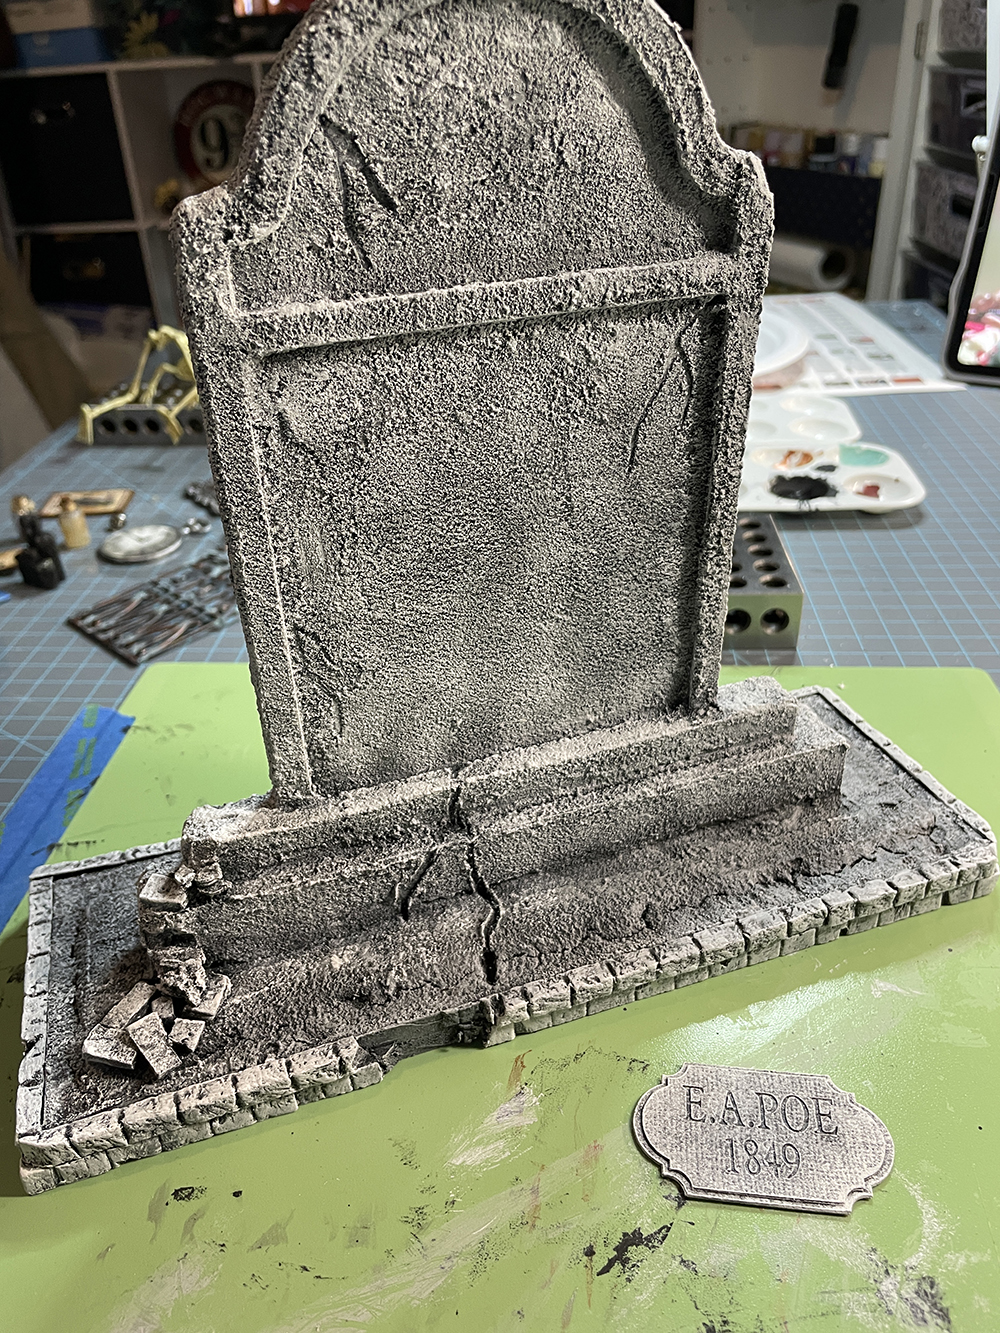
Notice that I’ve also used the same paint process on the plaque. Let both completely dry before moving forward.
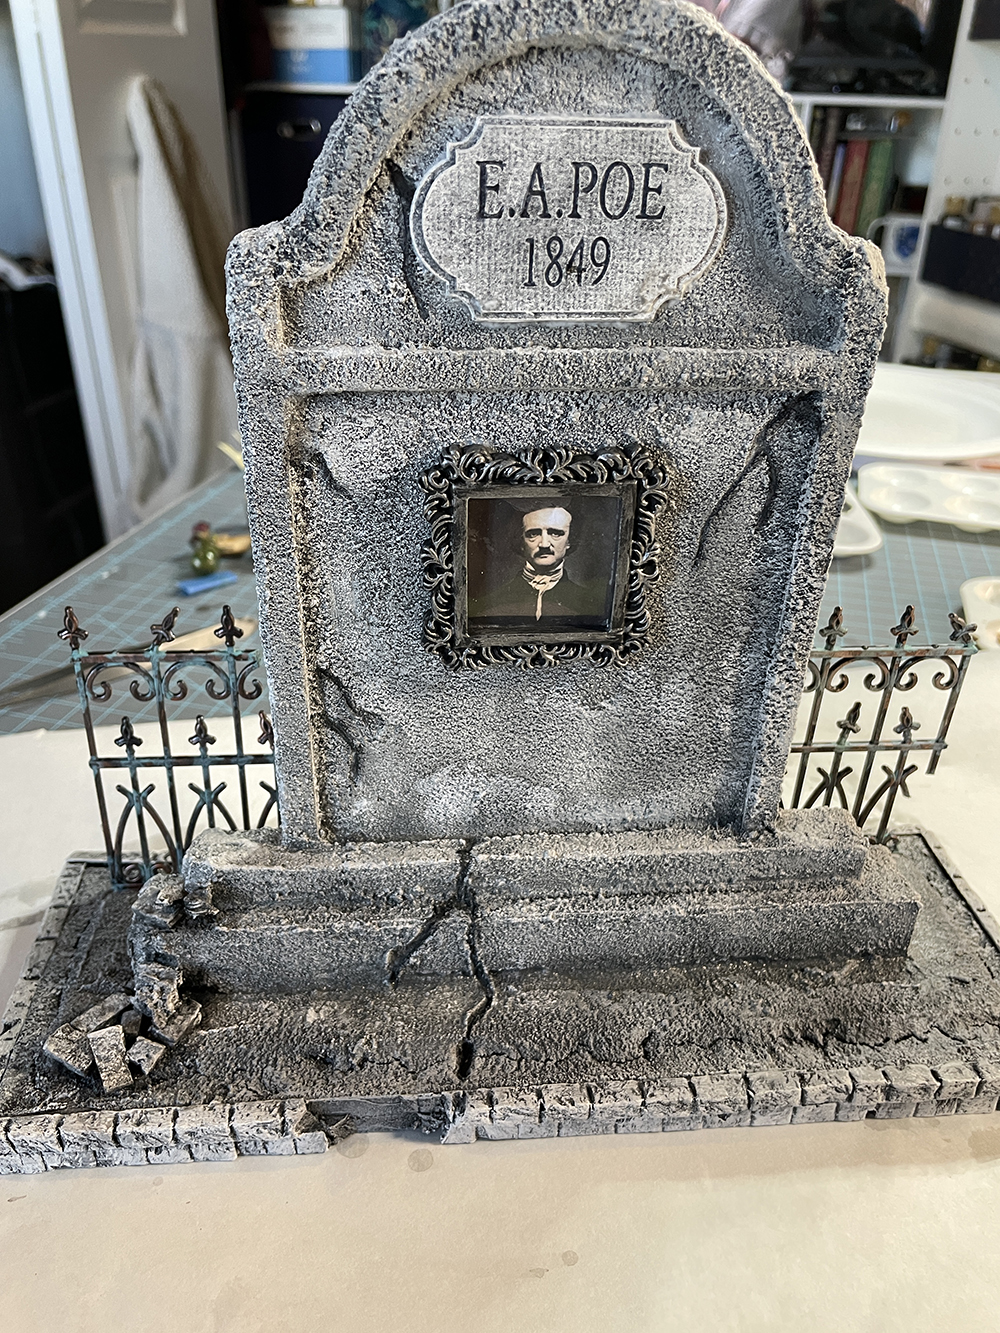
It might be hard to see in the above image but the final step is to add a wash over the top of the entire piece. A wash is simply water with a very small amount of paint or ink and a single drop of dish soap. I’ve used the med grey paint in this wash but could have gone darker with black. The idea is to let the wash run down the piece and puddle in crevices. You can add wash as many times as you like to get the tone that you want. Also know that the wash, like rain, would puddle darker around the base and on the corners.
As you can also see, I’ve begun to add embellishments such as the fence, the plaque, and a framed image of Poe found online. There are tons of images related to Poe online now that are not copyright-protected. Just be sure to check your source!
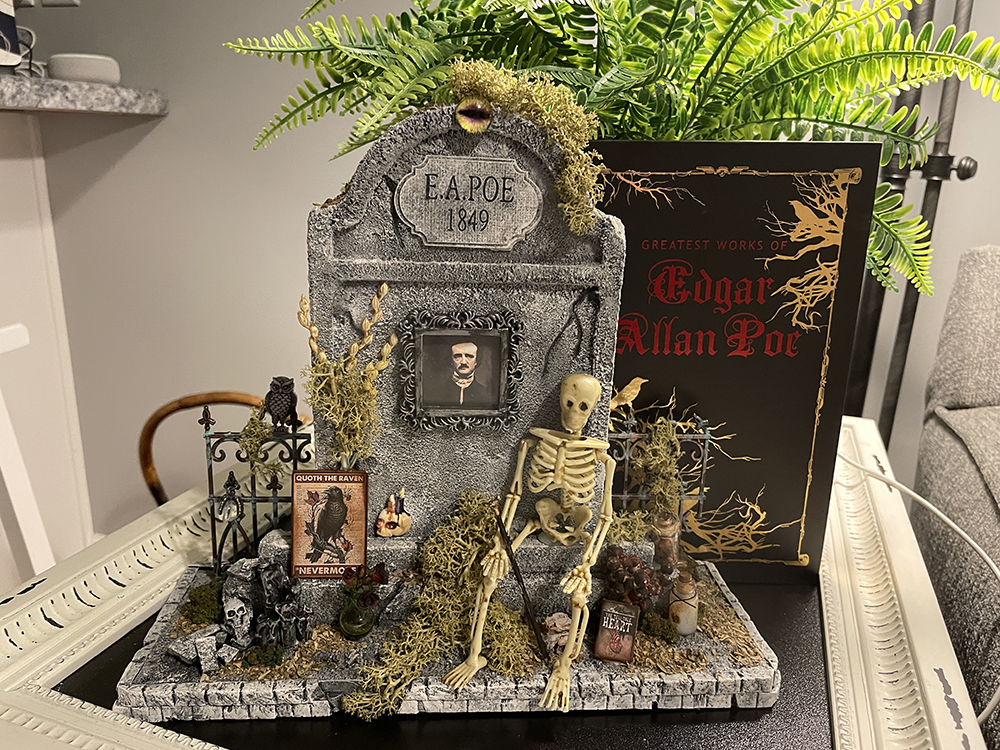
Now that you know how to make a tombstone, get busy and create some of your own! You can use this idea on any size tombstone. Just imagine an entire graveyard scene!!!
Last but not least, here’s a look at my completed project . . .
Till next time . . .



Leave a Reply
You must be logged in to post a comment.