© 2024 Teri Hanson / The Covered Chipboard
PURCHASE LINKS:
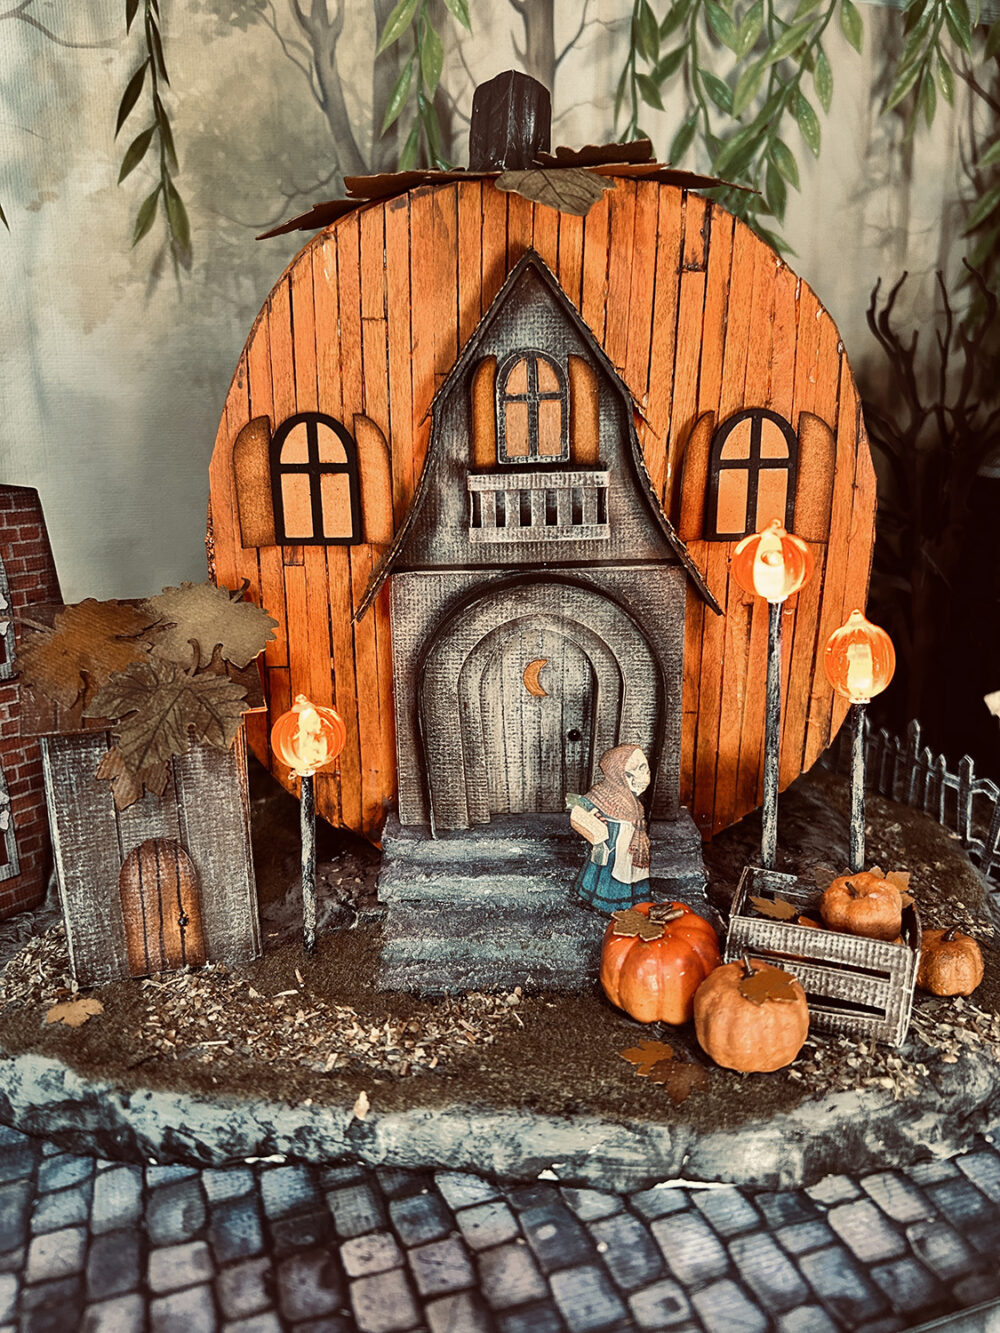
Here’s a fun fall decor for your table or an area that needs a bit of fall feeling. You can easily create your own Pumpkin House using a foam pumpkin and my Pumpkin House SVG files. I’m also willing to do a pre-cut kit for the project if anyone is interested. Just get in touch with me by email to discuss options.
Before we begin, a word about cardstock . . .
I don’t consider my creations to be a paper craft. This is because I rarely leave cardstock in it’s original color mixing a lot of different materials within a project. I would say that 95% of the time any cardstock used will be painted or distressed with ink. With that said, I tend to use a lot of white, black, brown, and medium to light grey cardstock. If you want to make this project with colored cardstock leaving it the original colors, that is perfectly fine. If you want to paint and distress the pieces then I would use one of the main 4-5 colors I mentioned above or even just one color for everything. Remember . . . this is YOUR project so do what you like and make it your on way!
Materials . . .
- 6.5-7″ foam pumpkin from your local craft store.
- Chipboard – Cricut 1.5mm Chipboard (2 sheets)
- 80lb Cardstock in brown or medium grey
- Popsicle sticks: Woodpile 125 slim sticks from Michaels – #135087
- Two pieces of foam: 8″x10″ and 4.5″ x 7″
- Quick dry glue and acrylic paint
- Ranger Vintage Photo Distress Ink
- Ranger Grit Paste
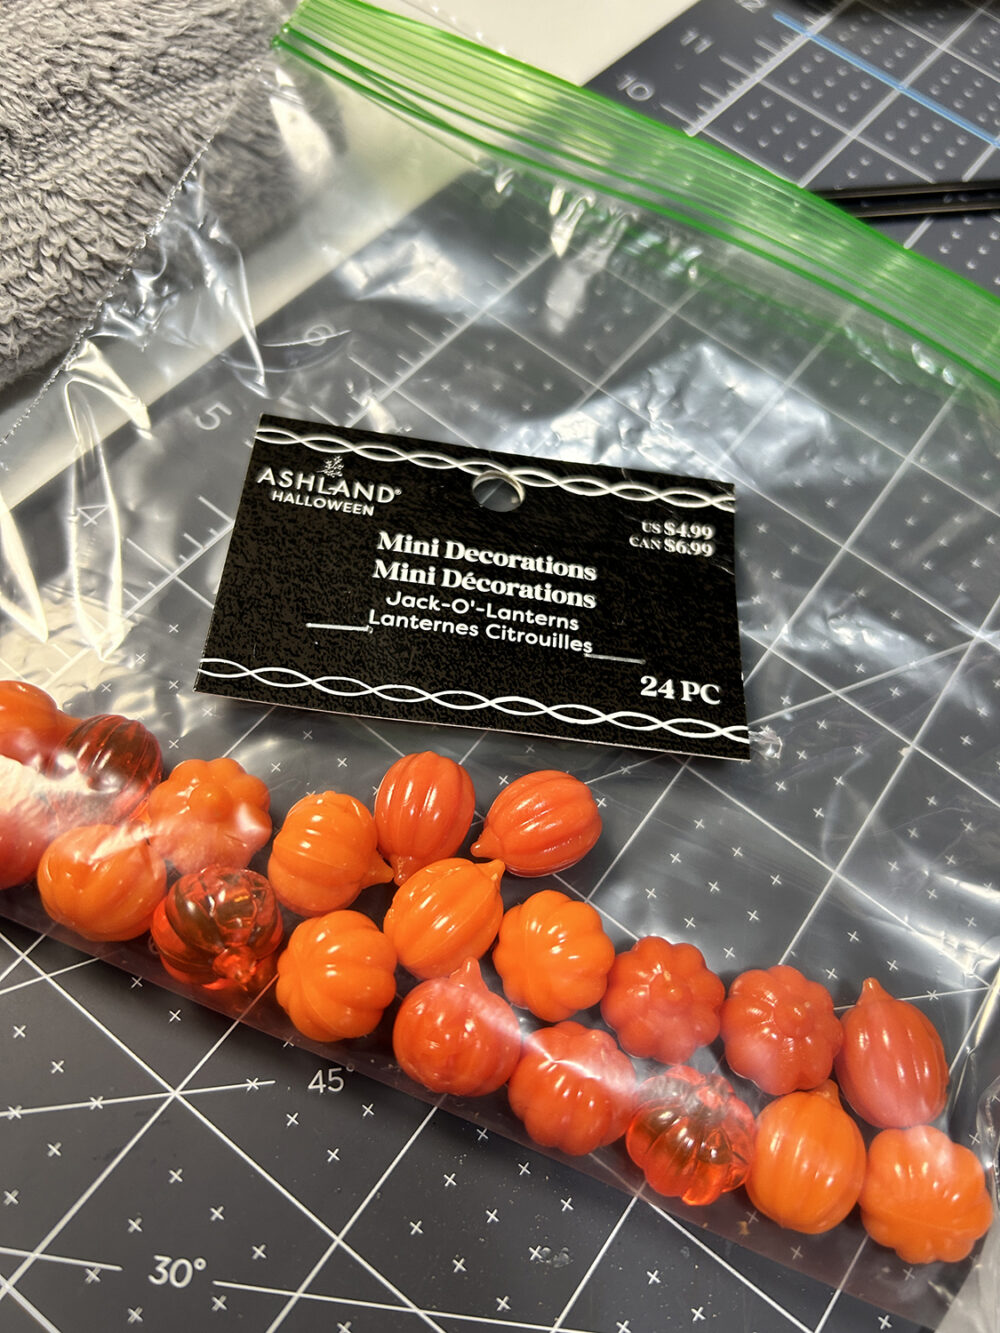
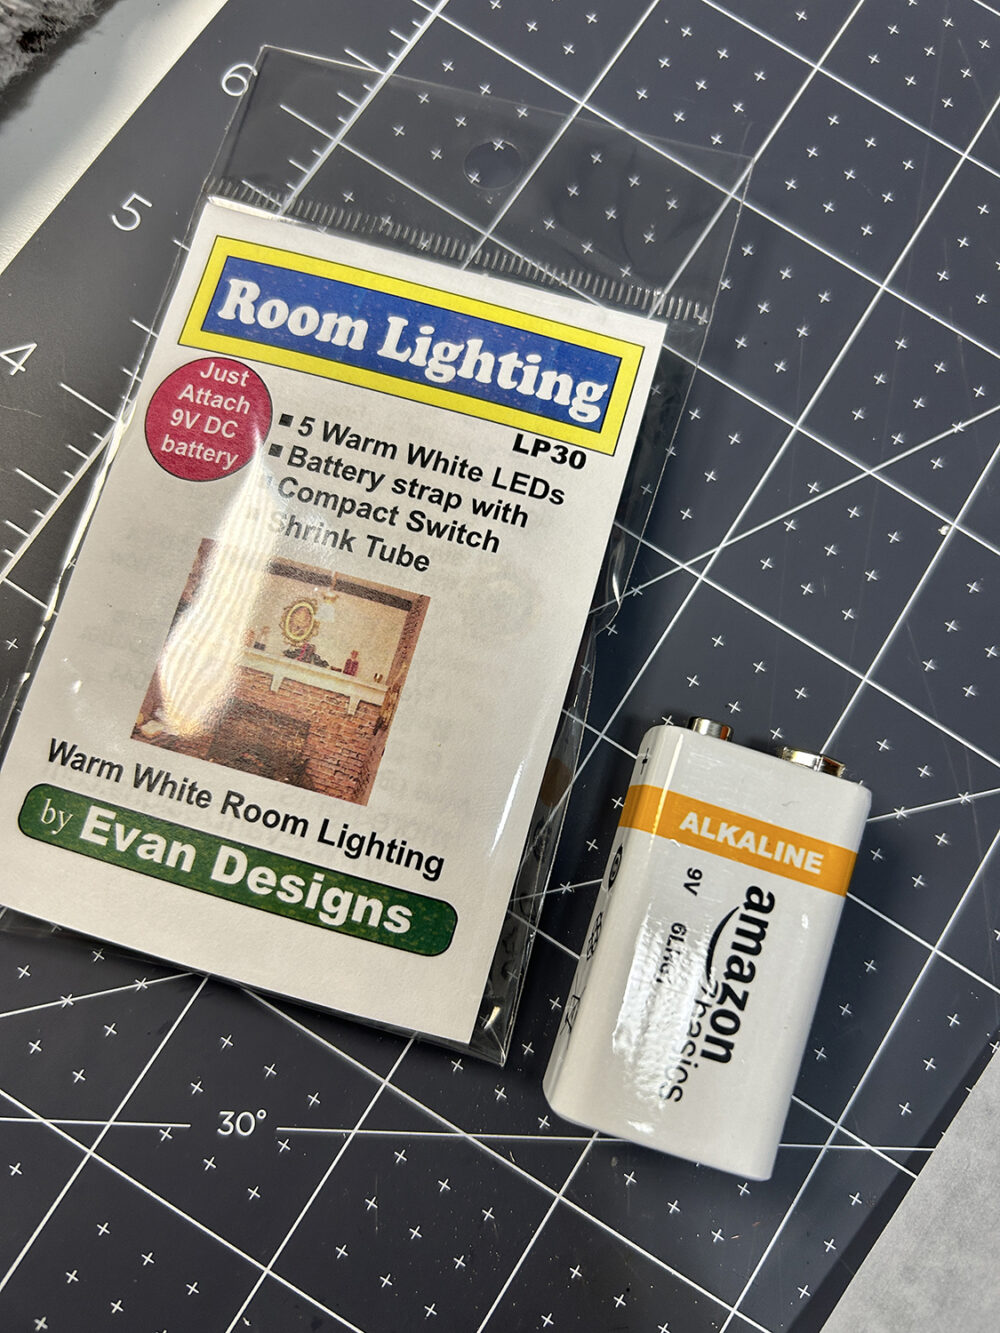
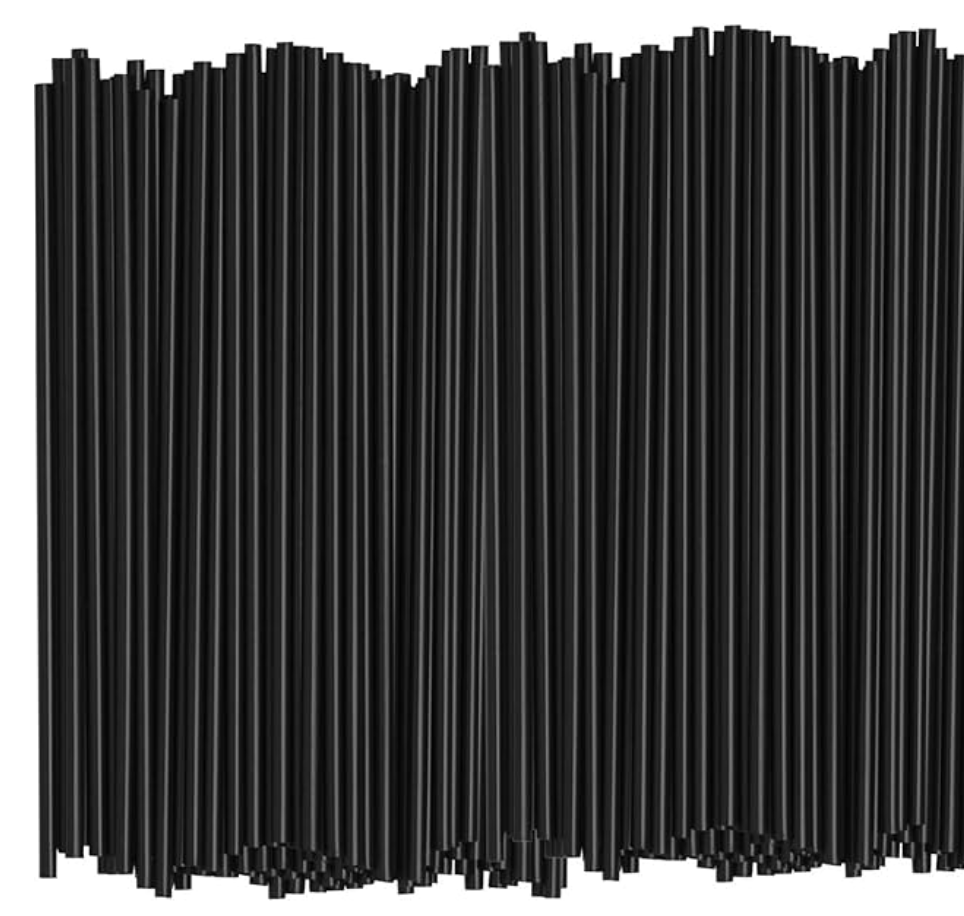
If you want to light your scene as I have you will need to pick up some of these little pumpkins from Michaels, a battery set from Evan Designs(video for use), a 9V battery, and a couple of hollow coffee stir sticks. You can see how I’ve added the pumpkin lights on down the page.
Construction . . .
NOTE: Refer to the cutting key download folder for images to identify pieces before you begin construction.
Pumpkin
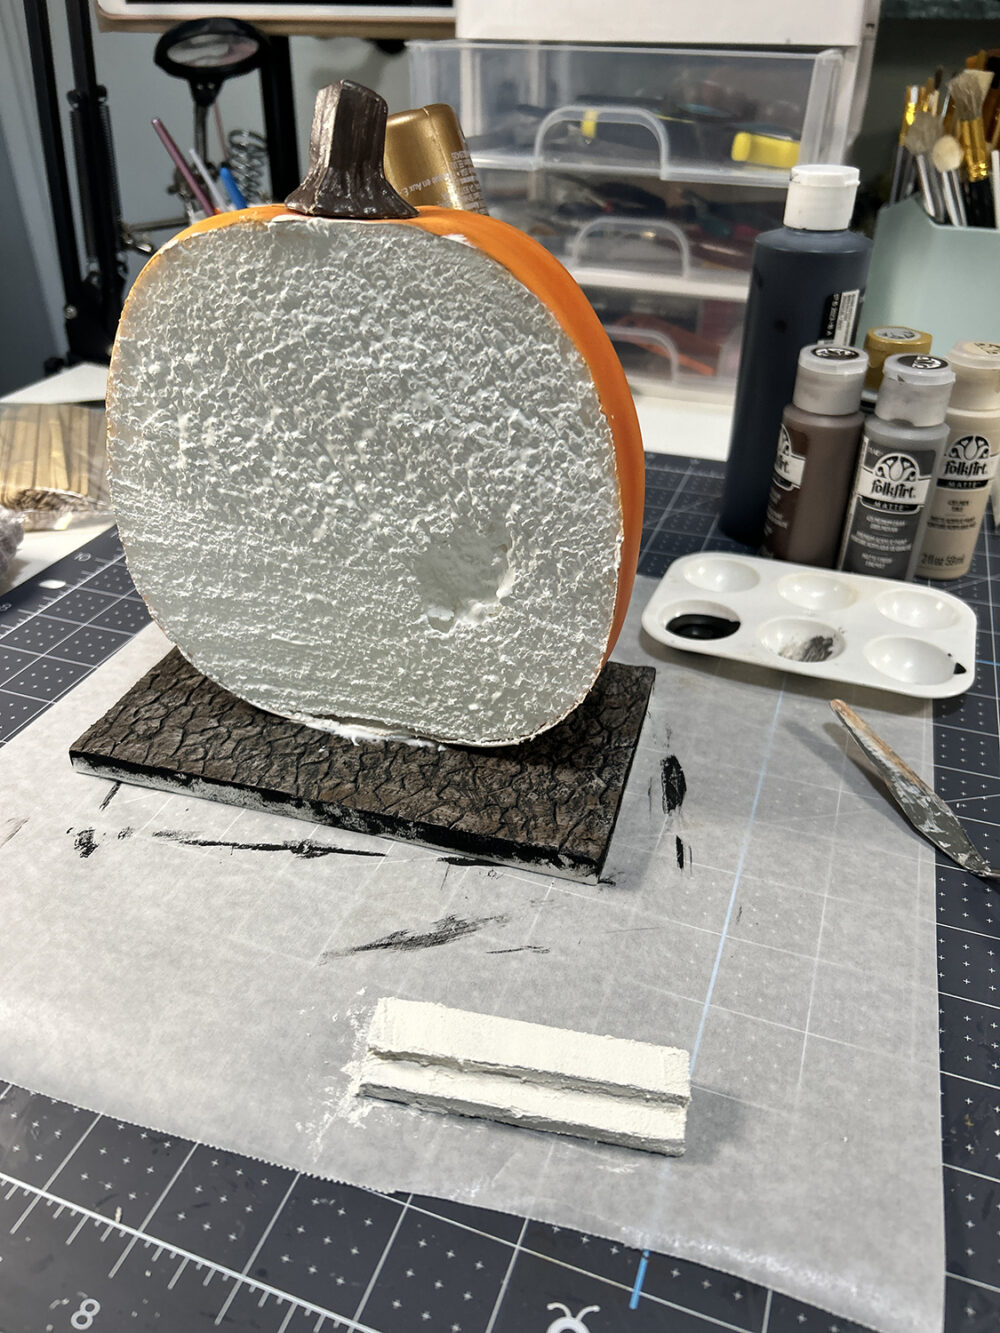
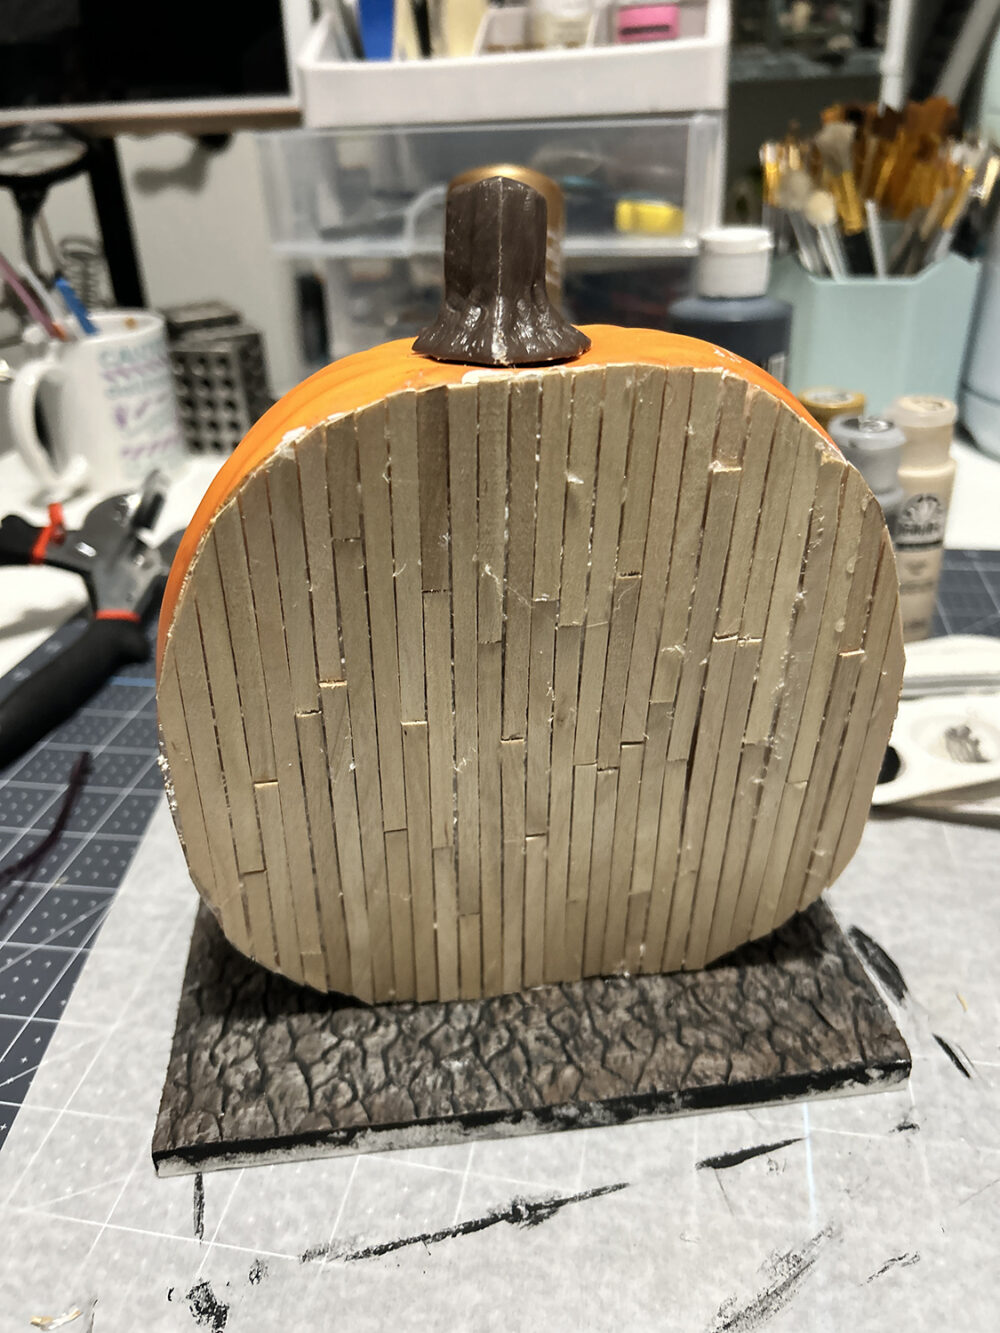
- Cut the front section of the pumpkin off with a hacksaw or large serrated knife – about 1/4″ away from the stem.
- Cover the front area of the pumpkin with popsicle sticks in random sizes. I’ve used the Woodpile 125 slim sticks from Michaels – #135087.
- Paint the front of the pumpkin orange then wash it with a medium to dark brown adding some wash to the rest of the pumpkin. A wash is simply a watered-down paint. Brush the paint on then wipe with a paper towel to remove most of the paint.
- Set the pumpkin aside to dry.
Base
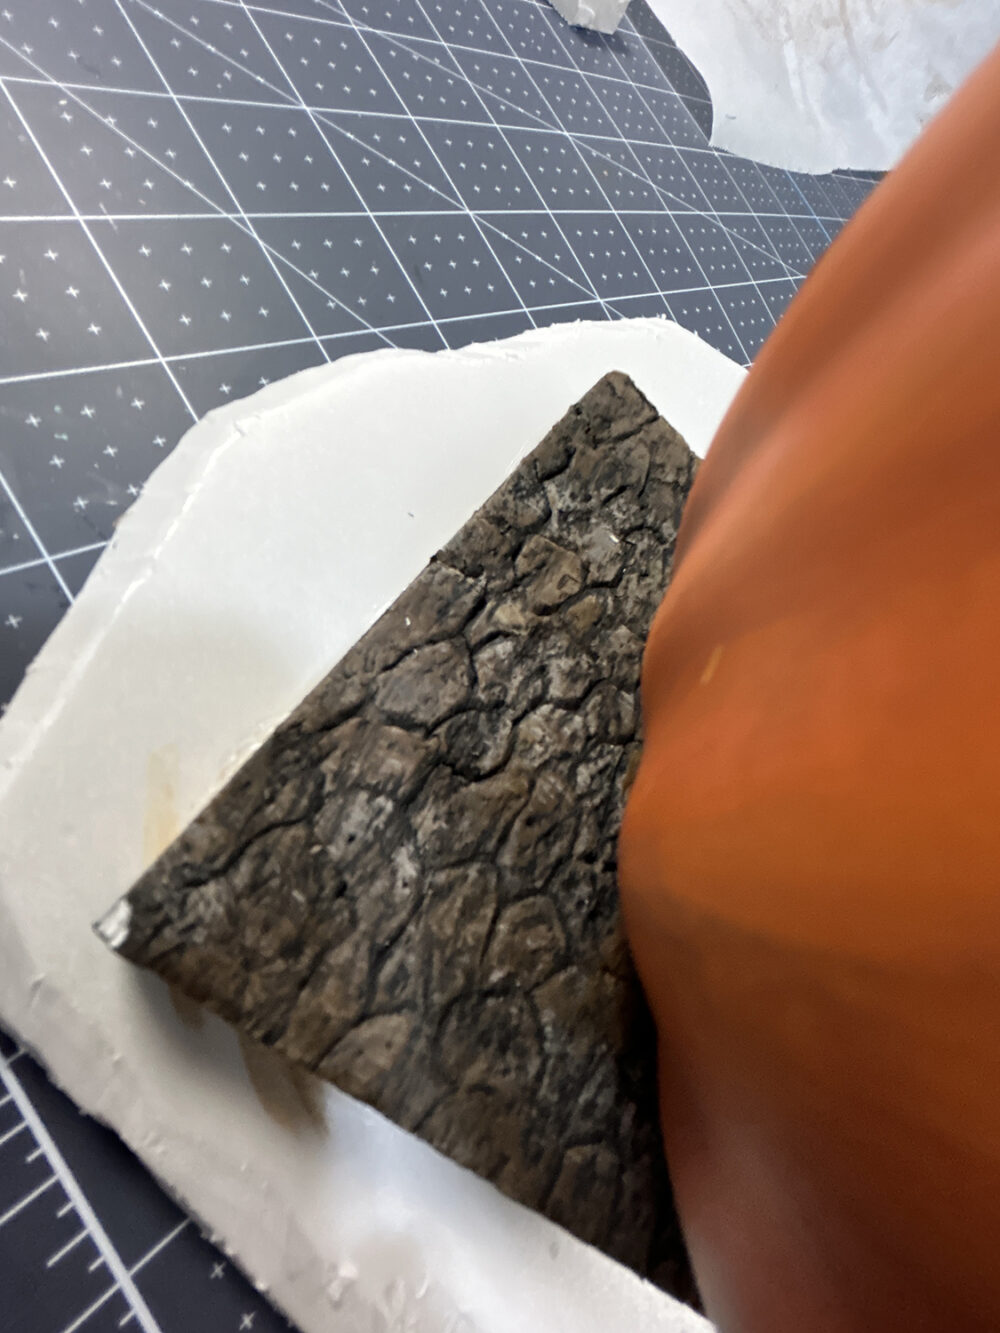
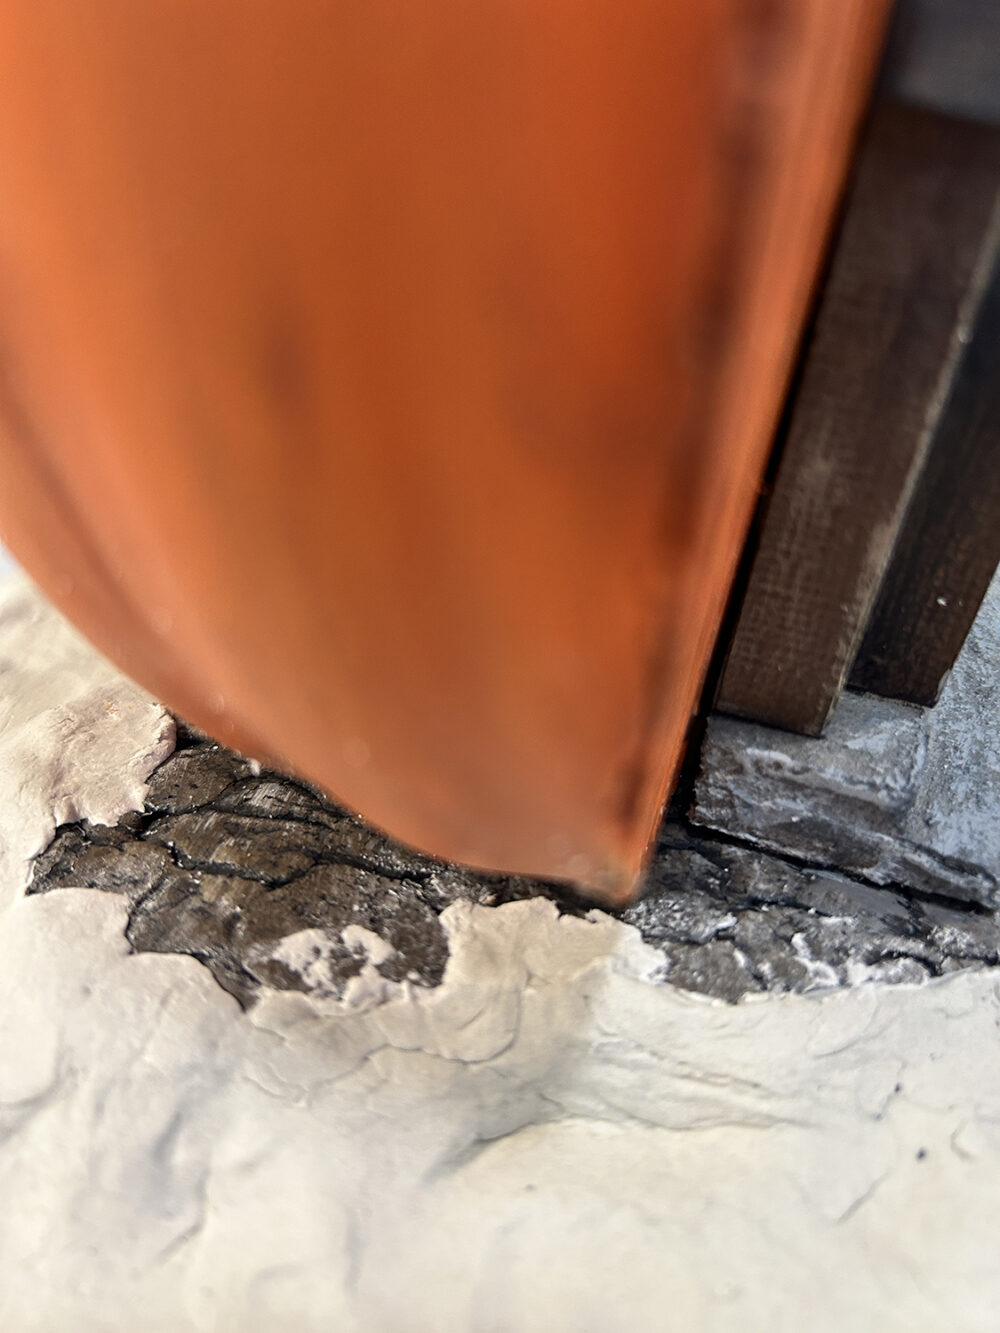
- I created the base with two pieces of XPS foam. You could use the same or Foamcore. Cut into any shape you like making using the dimensions mentioned in the materials for approx. sizes. Glue the two bases together leaving room at the front to add steps and other various items.
- On the top base carve some stones into it using a pencil
- Paint the base black then dry-brush with a medium grey and then a light grey. Lightly brush the top in random areas with a light cream.
- Use two pieces of small round dowels to push into the bottom of the pumpkin. Leave 1/4″ of the dowels sticking out. Glue the dowels in place then push the remaining section of the dowels into the base and glue at the same time. Let dry.
- You have various options for finishing the base. As you can see above, I’ve covered the entire base – leaving some stones showing – with DAS Air Dry Clay. Other ideas would be to use the foil, tape, and paper towel method you probably have seen me use before, or you could use landscaping materials to cover the base. I will finish more of the base near the end of the build.
Steps
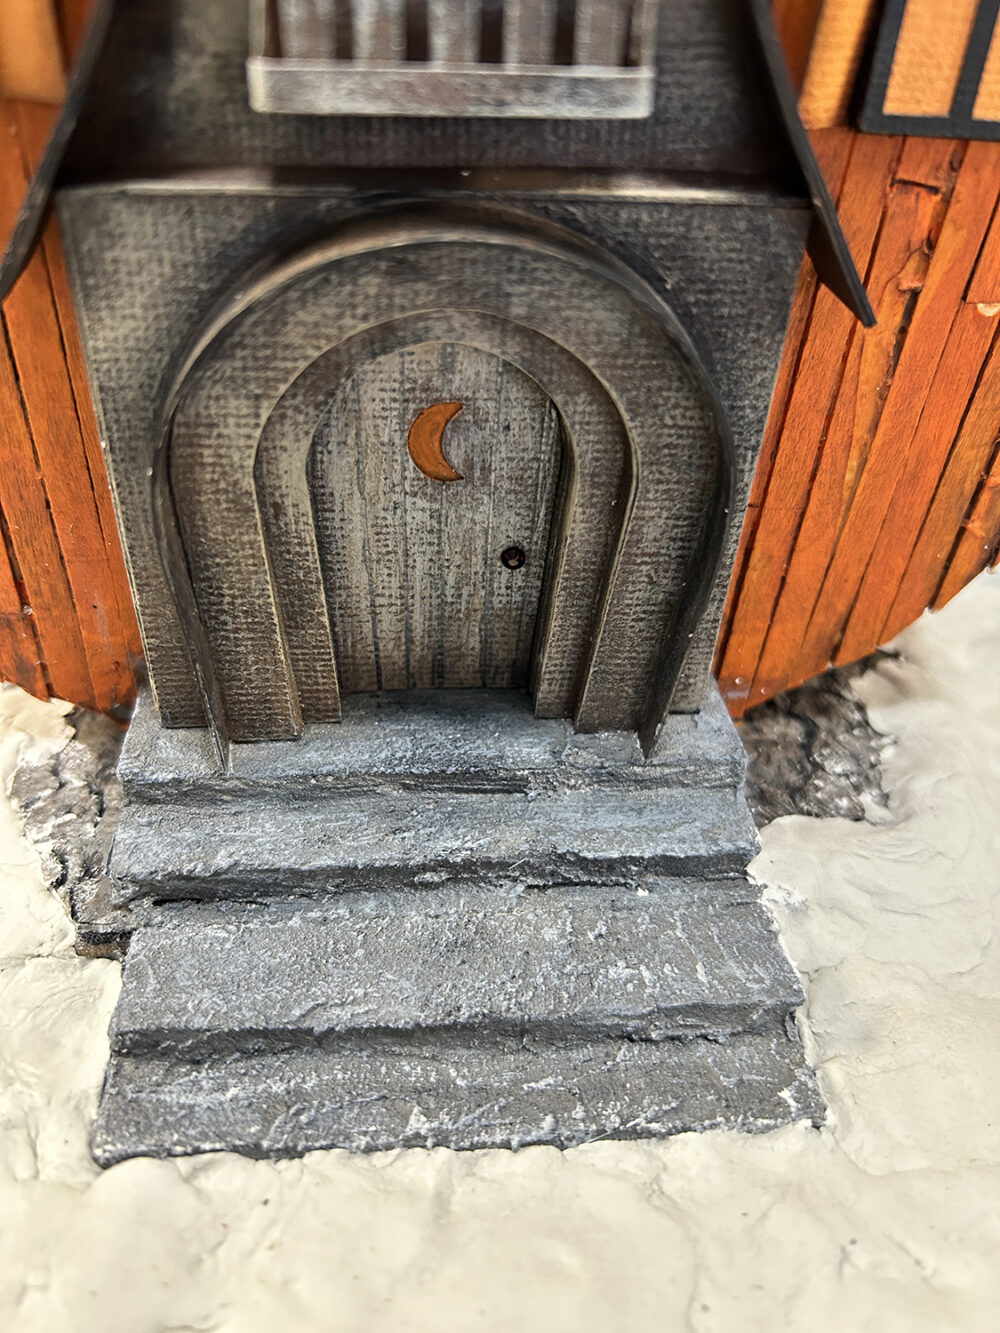
- Cut four pieces of the foam core to create the steps, less if you are using a different base material. My steps measure: 3″ in length. You will have to figure out the width of your steps based on your base materials.
- Glue the steps as seen at left then glue to the base right up against the base of the pumpkin.
- Cover the steps with grit paste and let the paste dry completely.
- Once dry paint and distress the steps as seen at left.
House – Door – Windows
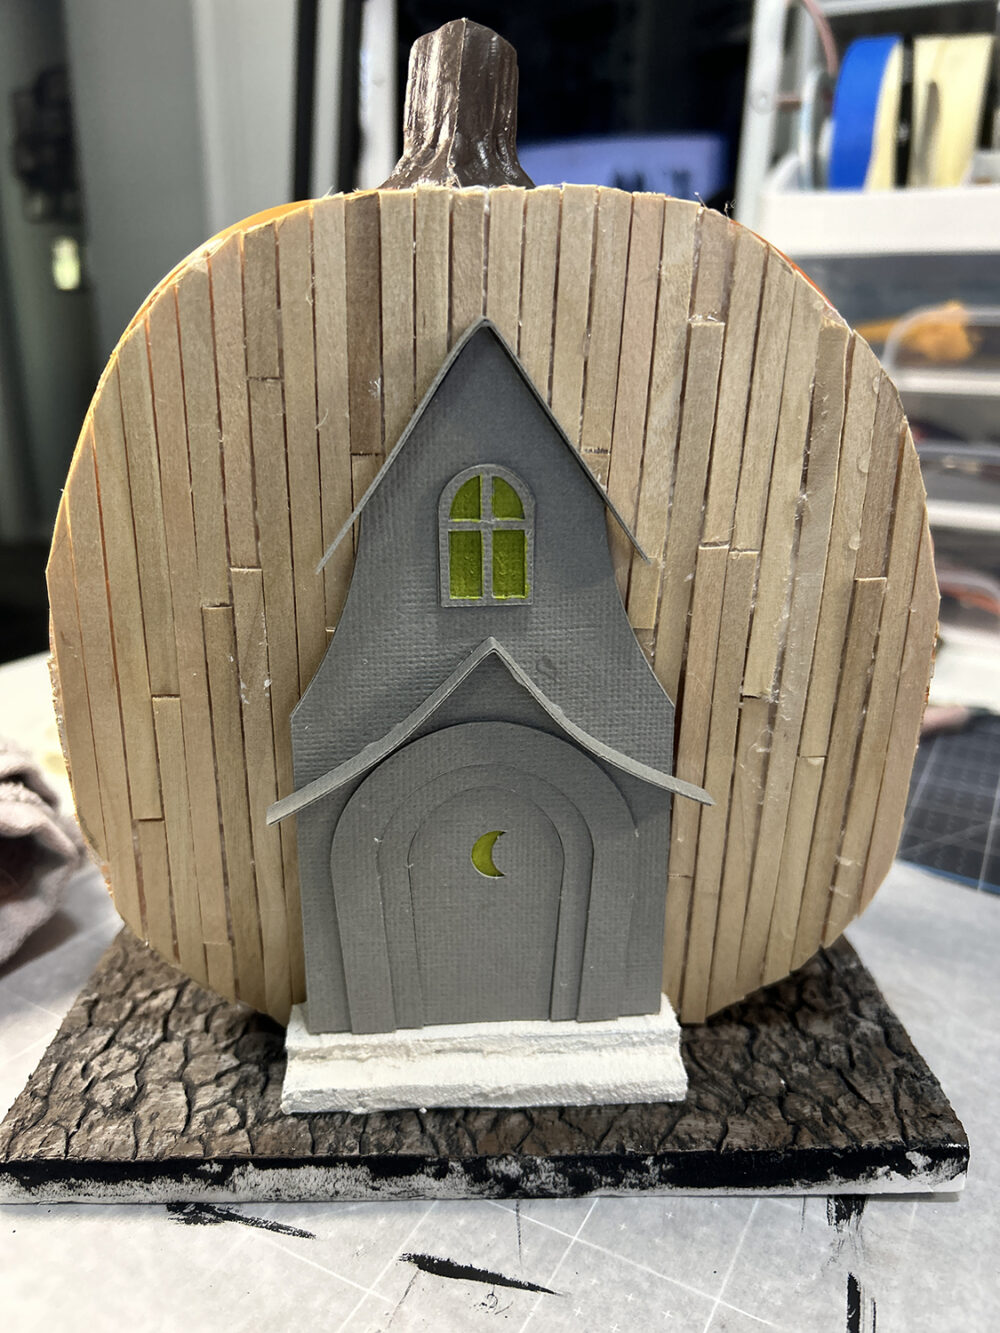
**Image above shows alternate roof ideas.
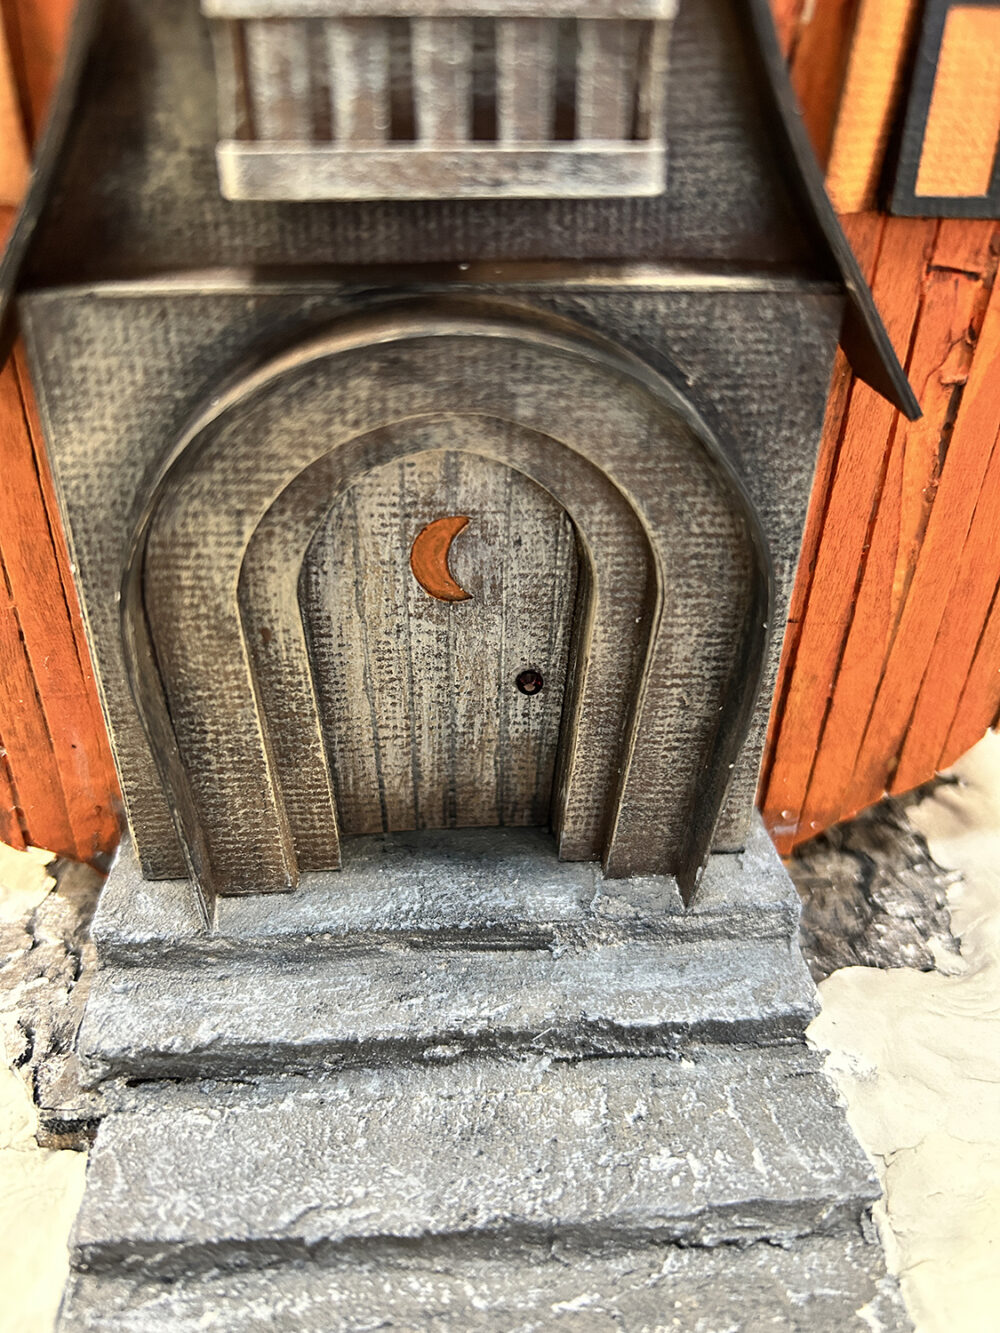
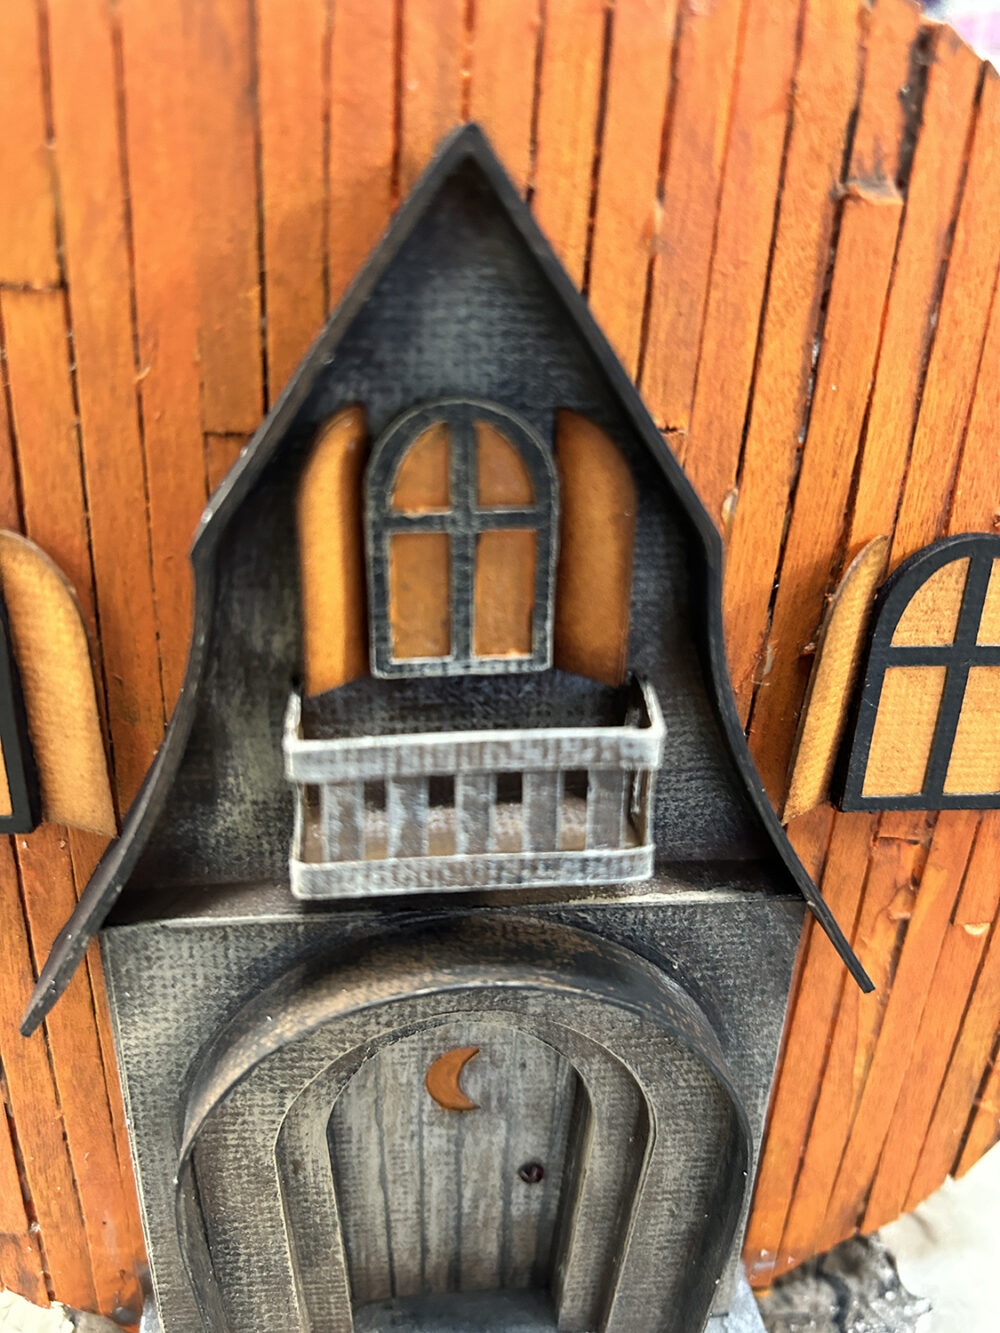
**This is my final door frame and roof.
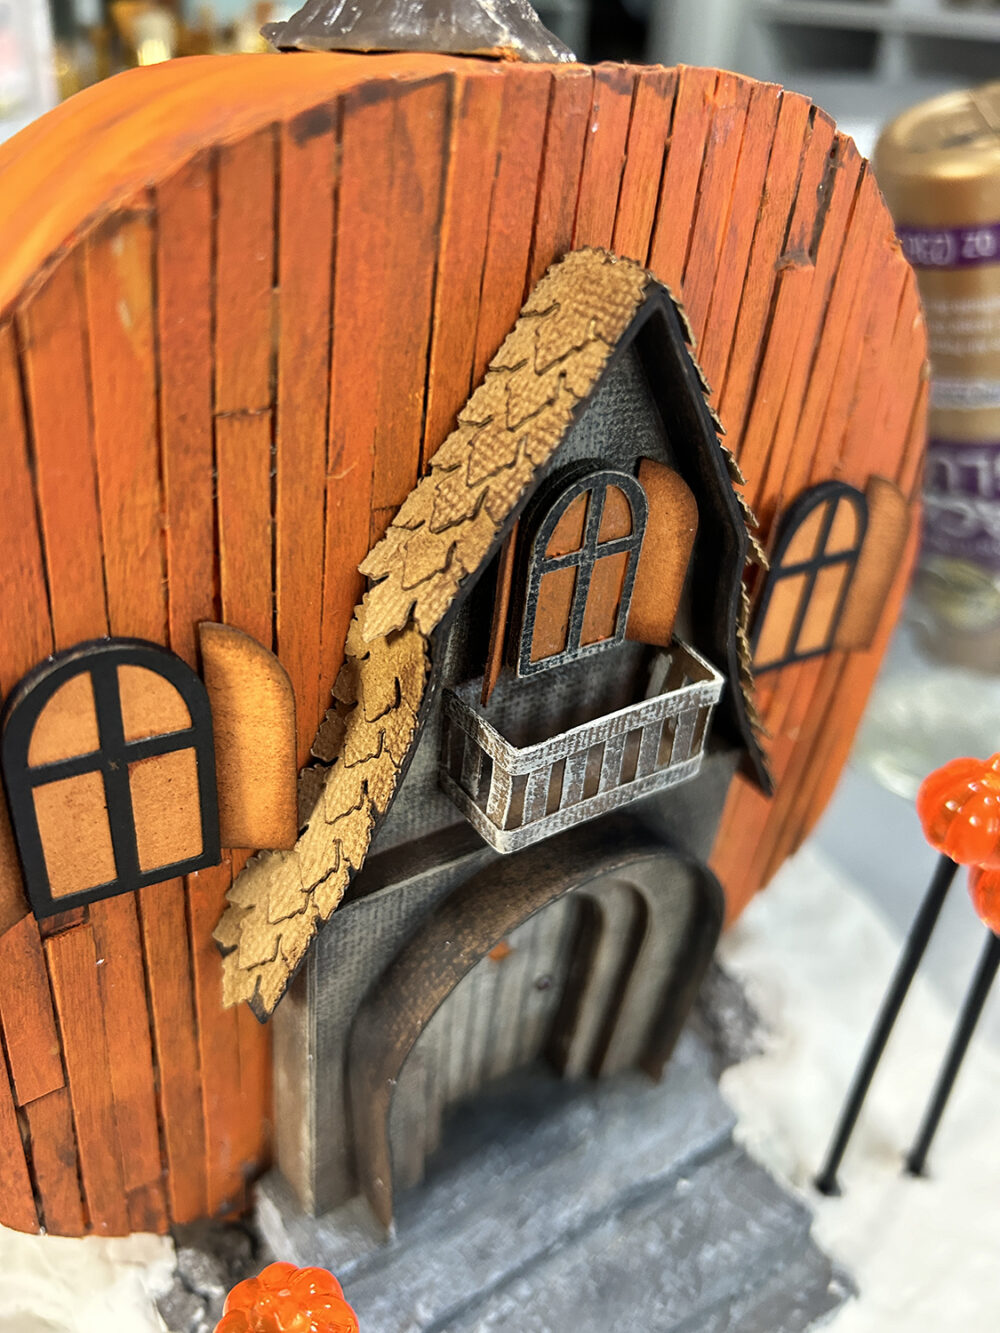
- Once you build the house/door part, glue it to the front center of the pumpkin.
- Start by gluing the three chipboard house pieces on top of each other – refer to the cutting key – parts 1. 2. 3. Glue bottom to top in that order.
- Glue chipboard parts 4, 5, 6, together then glue the set to the bottom half of the house part from step 2.
- Glue the cardstock pieces House A & B on the top and bottom section of the house.
- Glue chipboard Door 1 & 2 together then glue at the bottom, center of the house part.
- Glue cardstock Door A to the chipboard door part you just made.
- Glue chipboard Door 3 & 4 together then glue the cardstock Door 5 on top. NOTE: for the moon cut-out, you can use a yellow or orange cardstock piece from the “windows key” or just paint the chipboard piece yellow or orange before adding the top cardstock Door 5 piece.
- Glue the finished door in place by pushing it into the opening. Push it all the way to the back. If you have not done so by now, you might want to paint the door/house section before gluing to the pumpkin.
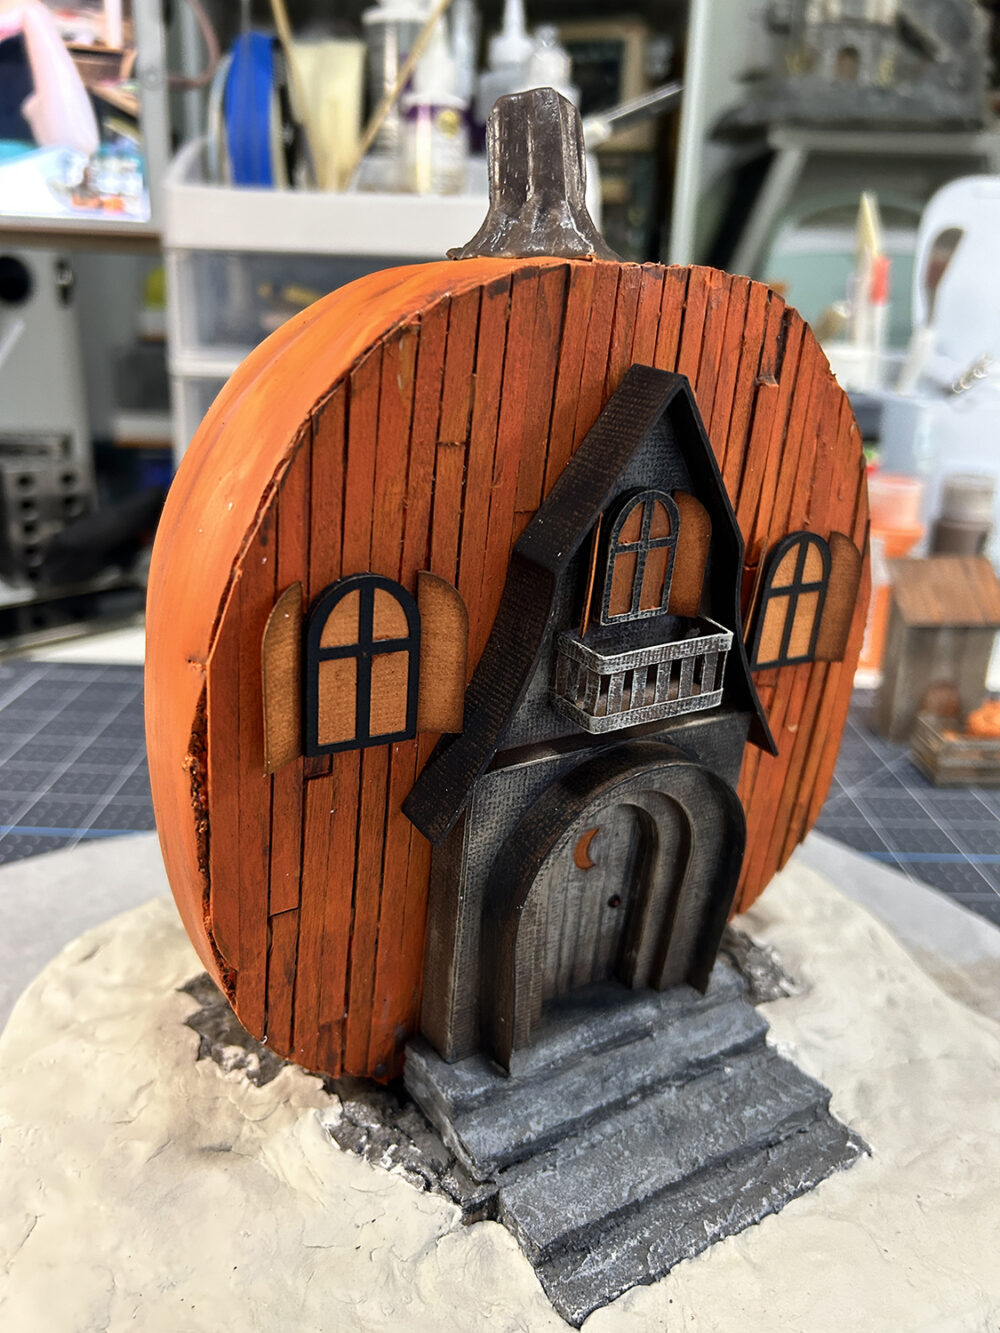
9. On the cardstock key you will see three narrow strips and four wider strips. The narrow strips are for the curved Door Frame. The wider strips are for the Roof. Glue all the corresponding strips together then glue them to the door section as seen in the above photos.
10. Build the balcony from cardstock then glue on the house as seen above.
11. I’ve made files for the window and shutter parts in cardstock should you want to use colored cardstock here as I’ve done.
- The balcony window uses chipboard Win 3&4 glued together, cardstock sm window cover, with black Sm Win on top. It will be glued above the balcony as seen above.
- The other side windows use one each of Win 3 – Win 4 chipboard pieces with Lrg Window yellow cardstock cover and finally, the cardstock Lrg Win piece on top. You can paint these any color you would like. And use any color for the glass other than yellow if you like.
- Shutters are built by gluing two pieces together for each of the left and right sides. Add a good bead of glue to the inside edge and edge back of a shutter and glue in place while holding it at an angle.
Shed & Crate
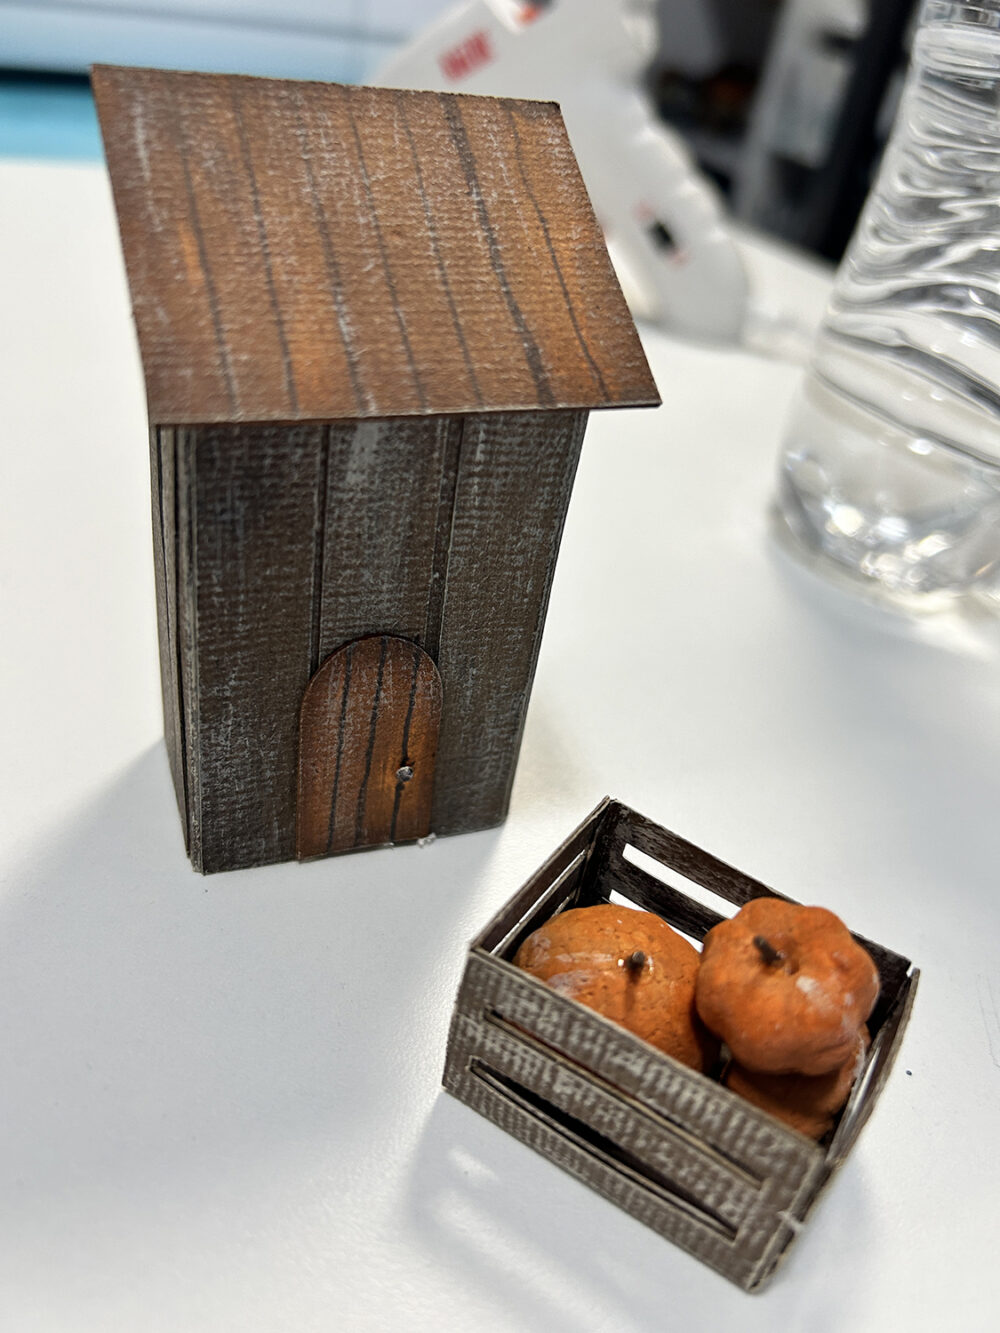
- Build the crate with the little tabs. Glue this part to the bottom of the crate without tabs then glue all sides to both together.
- Built the shed walls gluing the tab to the inside of the opposite side.
- Glue shed boards in place to walls.
- Glue shed to the chipboard shed base.
- Glut shed door and roof in place.
- Paint and/or distress each.
Pumpkin Lights
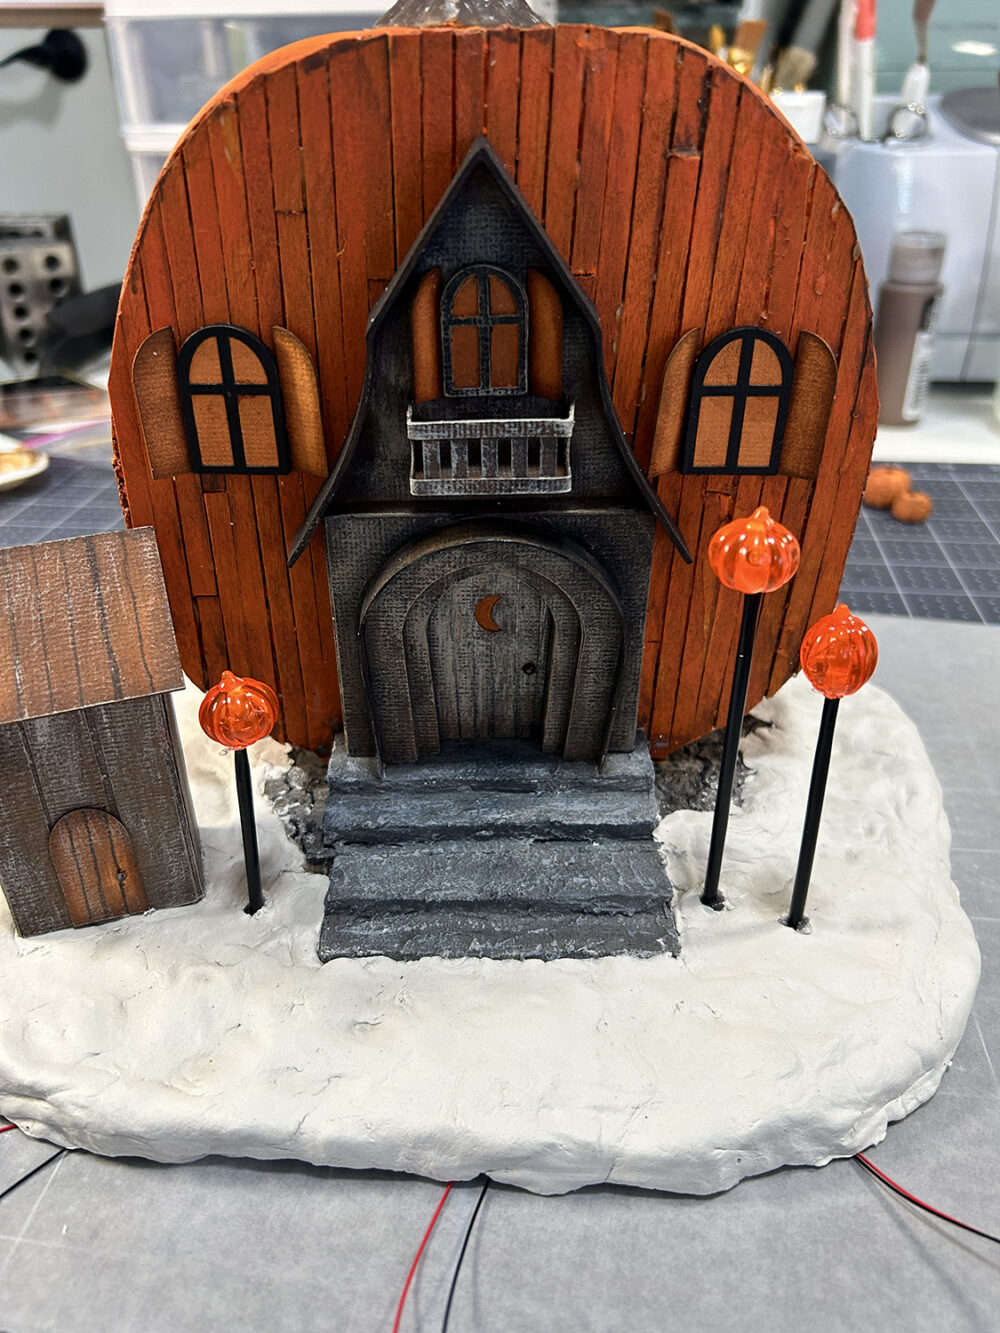
- I’ve listed the pumpkins and the lights in the materials list above with links.
- I drilled a hole in the bottom center of each pumpkin deep enough that the top part of the light fit inside. Drill slowly and keep the bit as straight as possible. Keep testing the fit of the light as you drill.
- Glue the light into the hole with clear drying glue or hot glue.
- Run the wires through the coffee stir stick.
- Poke a hole in the base, all the way through the bottom with a wood skewer, Run the wires through the hole.
- Use hot glue to attach the stir stick into the hole in the base, holding till dry.
- Later you will need to find a place to hide the 9V battery and cut a trench in the bottom of the base to hide the wires.
- Below you can see how I’ve wired up the lights (minus the shrink tube).
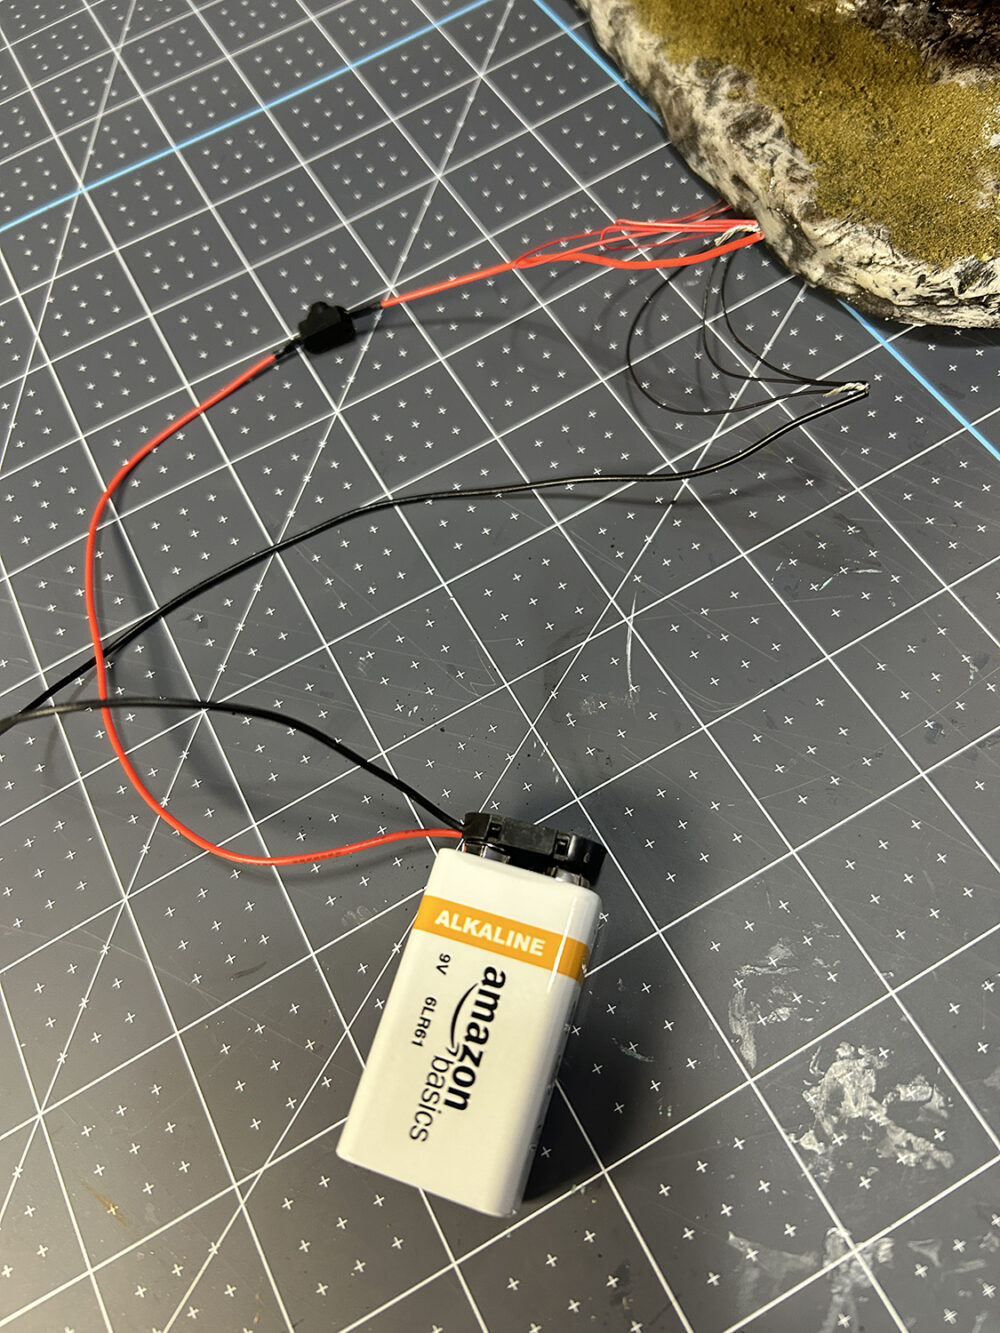
- Put the red wires from the pumpkin and from the battery switch together and twist the ends tightly.
- Put the black wires from the pumpkin and from the battery switch together and twist the ends tightly.
- Attach the 9V battery and use the switch button to turn the lights on and off.

NOTE: What I have done is only temporary. Once I hide the battery I will connect everything the same way but before connecting the wires together I will add a piece of shrink tube to each group to secure the twisted wires. You can read more about this and watch the video on Evans Designs sight (link above in materials list) for a more detailed idea of how this all works.
Shingles
Shingles were created by using one of the leaves in the SVG files. Choose one and size accordingly. My photo shows a different leaf which was sized as follows:
- XSmall (for shingles) – .56x.69
Distress the shingles once they are dry.
Finishing

At this time you might want to finish the base with paint and landscaping. I’m using a combination of both. I have several posts on my blog and there are tons of videos on YouTube for landscaping techniques so I’m not going over that here. I would suggest that you look on my blog as well as videos for model train crafters.
I first painted the entire base with black paint then dry-brushed with: brown, medium grey, and light grey. Two different types of landscape materials were used for the ground. Cardstock leaves were painted, inked, and glued into place. I also dry-brushed the lamp posts.
NOTE: The skeleton lady is clip art from Artfully Musing.
And there you have it! You can make this as cute or as spooky as you like just by adding different elements in the finishing stage. Have fun with it!
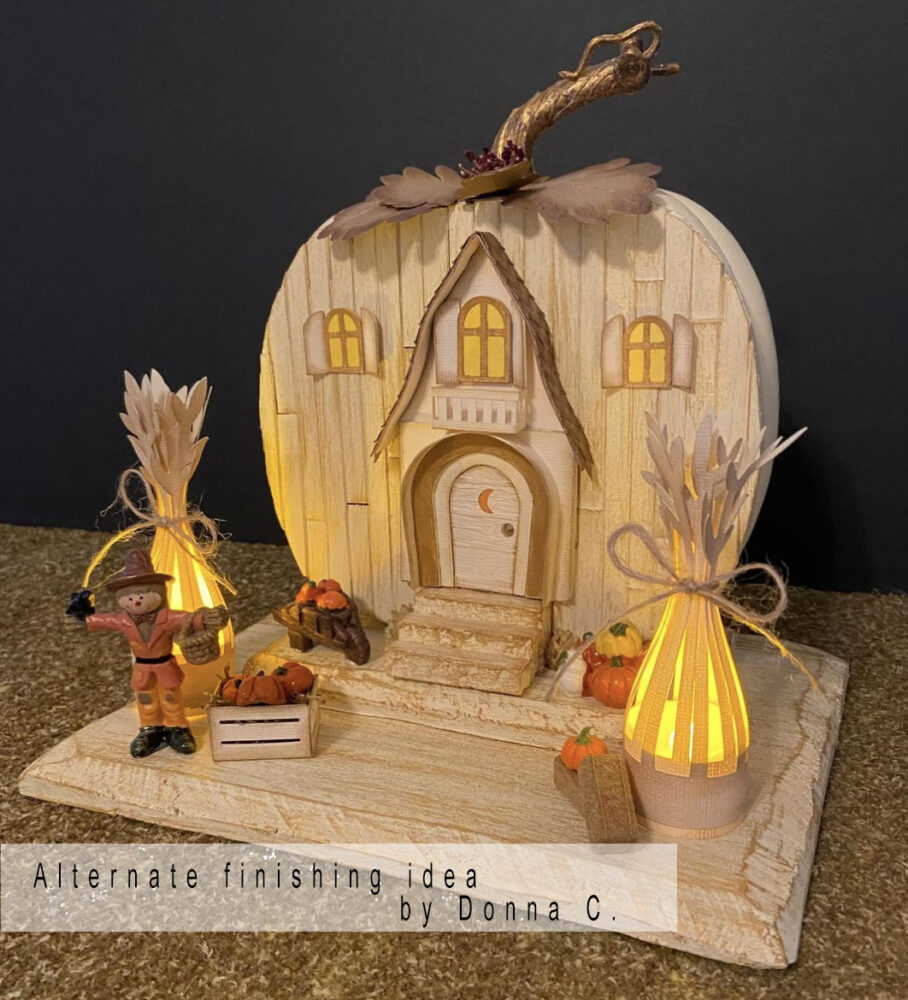
Here’s a look at an alternate finishing idea from Donna C.
Till next time . . .
Teri



Leave a Reply
You must be logged in to post a comment.