Box Stack Mini House by Teri Hanson
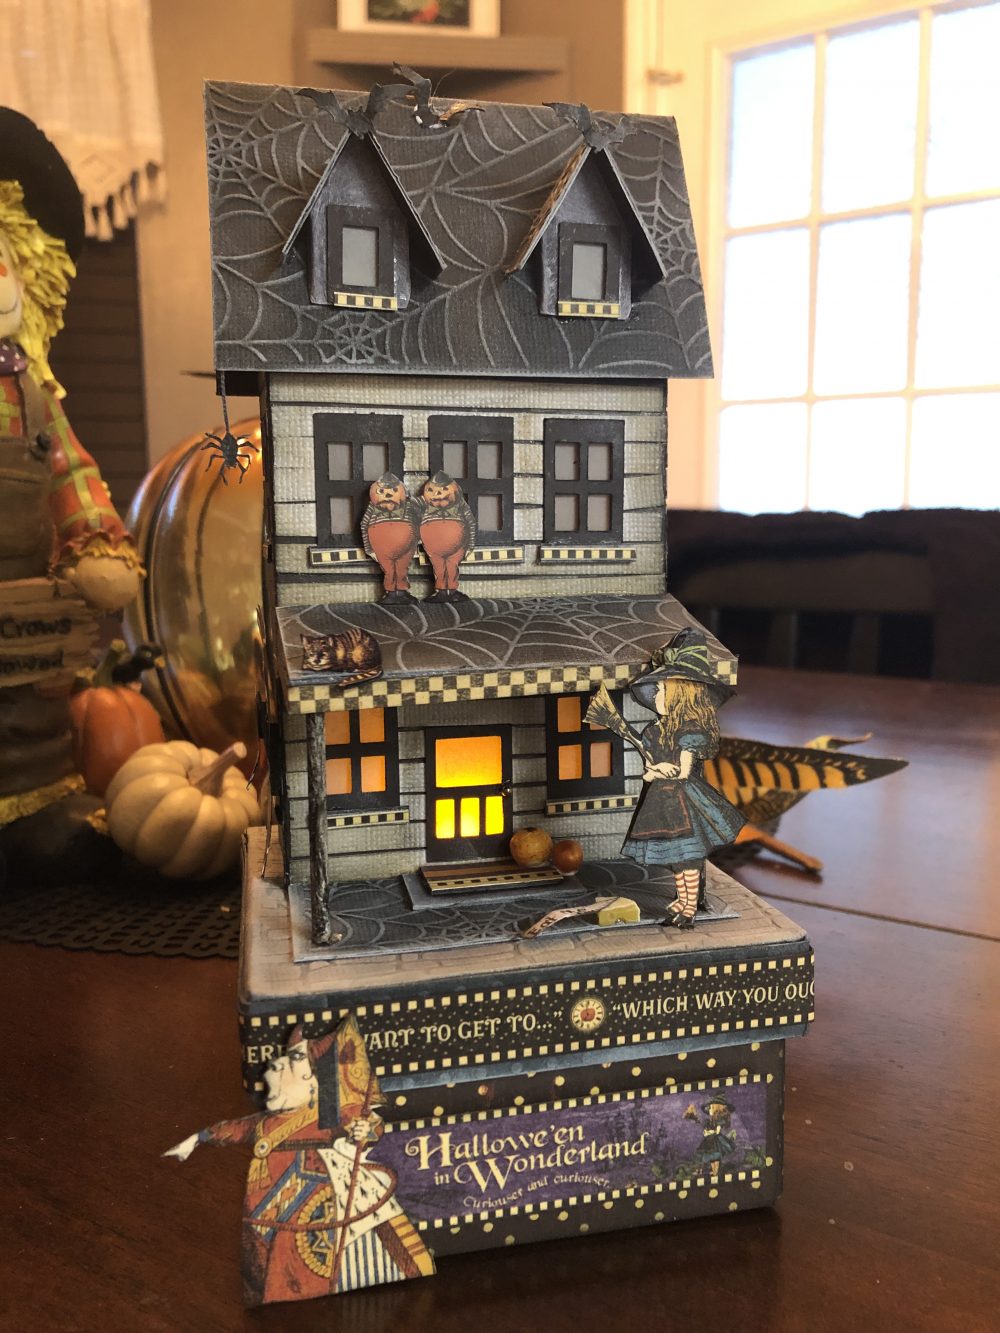
Here’s a little twist to Alice in Wonderland and a fun Halloween project! I’ve listed all the materials with links to find them below.
The house was created using the Sea-Worn Beach House from paperglitterglue.com. I’ve just converted it to a haunted house. The pattern is free to grab and she does give some instructions. It’s pretty easy to see how it goes together so you should have no problems.
The boxes are simply covered with the scrapbook papers after holes were cut for the windows – you can see how I did those on down the page.
Materials . . .
- Haunted House – mini paper Sea-Worn Beach House from paperglitterglue.com
- Cricut Black Kraft Board
- Spider web embossing folder
- Stone embossing folder (this is different than the one I’ve used but it’s not longer available and this will work fine)
- White Chalk ink pad
- Vellum paper
- Scotch quick dry tacky glue
- AC Black cardstock
- AC White cardstock
- tiny wood dowl (about 1/8″ in diam)
- Tea light
- Darice paper mache 3pc square box set
- Graphic 45 Halloween Wonderland scrapbook set – this may be hard to find but there are other wonderland scrapbook kits on amazon and Etsy. If you cant find any you like, any other halloween themed papers will work or you can print papers from the digital set I’ve listed above.
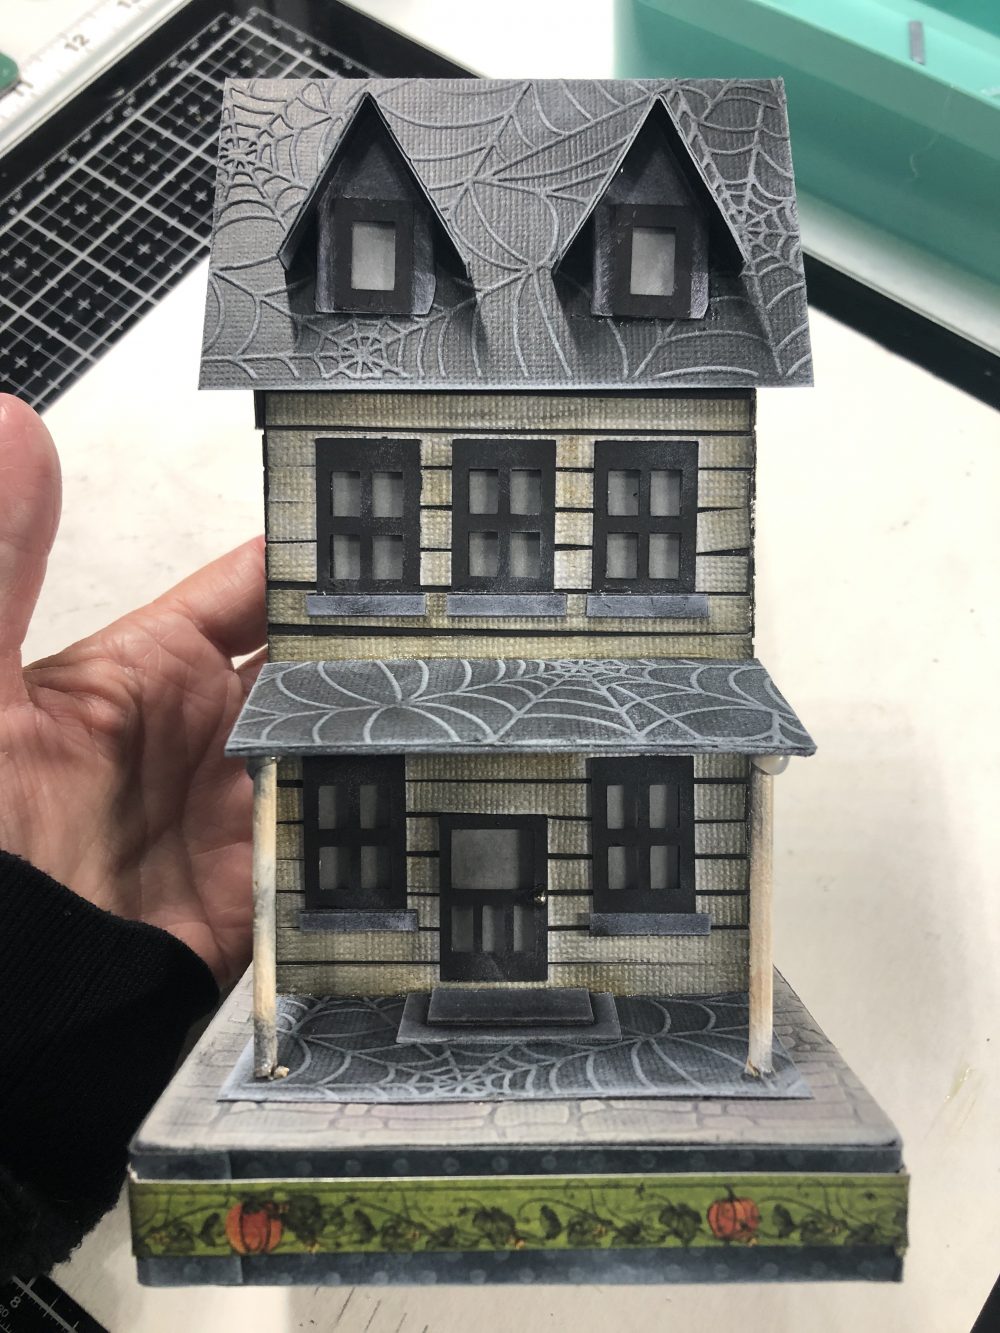
The House . . .
The house, front door, porch steps and windows are all cut from the black kraft board. The base is the lid from the smallest box in the set.
House with top base: 4″ by 4″ by 8.5″
- Cut a square of black cardstock 1/2″ larger than the lid for the smallest box. Emboss it with the stone folder then paint it or use distressing ink to color it. Attach to the box lid, clipping the four corners at an angle, then fold the excess down onto the lid sides.
- Cut strips of cardstock or patterned paper to cover the lid sides then add whatever trim you like.
- VIP: You will need to punch a hole in the lid that will be large enough for the light to go through – based upon the type of lights you are using. Do this before glueing the house to the lid!
Now cut the house parts out, fold on score lines but do not build it yet. You want to attach all siding, windows, door and vellum before you glue the tab to hold the house together.
- As you can see, I’ve embossed cardstock pieces with the spider web folder for the main roof, dormer roof, porch roof and front porch. Once embossed, use a white pigment ink to highlight the webs.
- I did not use the porch that comes with the house files. My porch is a rectangle 1.5″ by 3.25″ in embossed cardstock. The steps are cut in kraft board: 3/4″ by 1.25″ and 1/2″ by 1.1/8″. Dust these with the white pigment ink.
- Window ledges are two strips of kraft board glued together then cut to length and dusted with white pigment ink. Size: 3/16″ by 6/8″.
- Cut strips from the white cardstock for siding. My strips are about 2/8″ high.
- Apply all siding then add the windows, door and vellum to house inside.
- Glue the tab to finish the house build.
- Add the main roof, then dormers, dormer roof and porch roof.
- Glue the house to the base, then the bottom porch with steps.
- Add the two dowel rods to the porch then paint them black
- Lastly, add a few bats and a spider, maybe some tiny pumpkins and the tea light inside the box.
Now you can use images from the digital or physical scrapbook kits to decorate the house further.
I’m using the Graphic 45 kit and have cut several images out, glued to black kraft board, inked the edges with black ink and then attached them to the house with foam tape or glue. You can also see that I’ve trimmed the window ledges and porch roof with checked paper from the kit.
Here’s the first or top box finished.
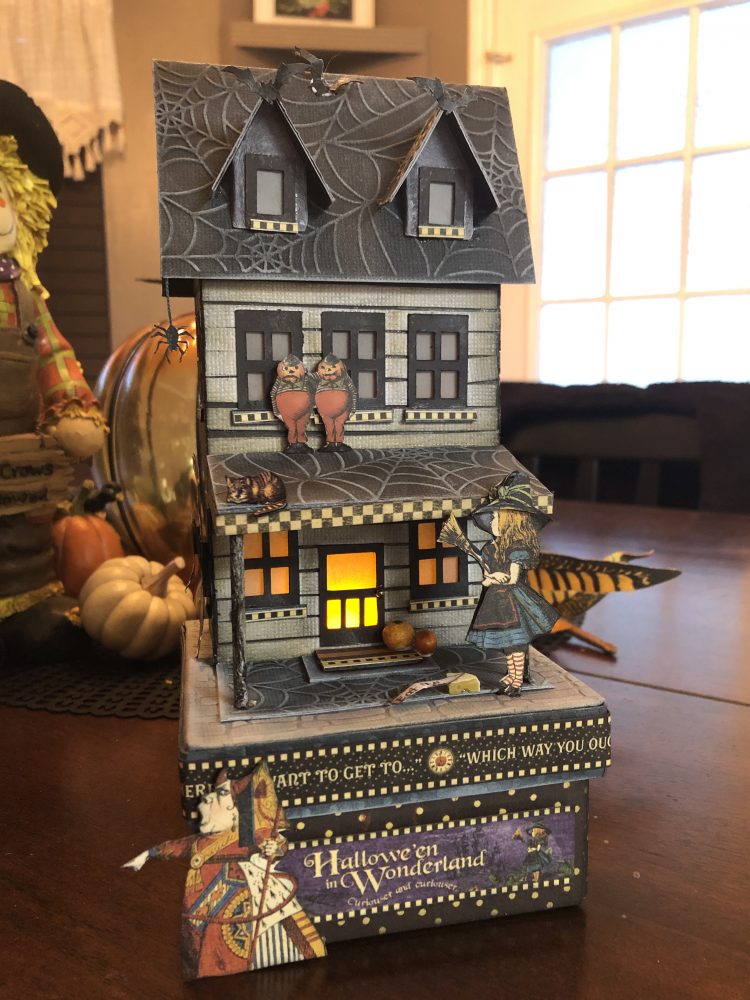
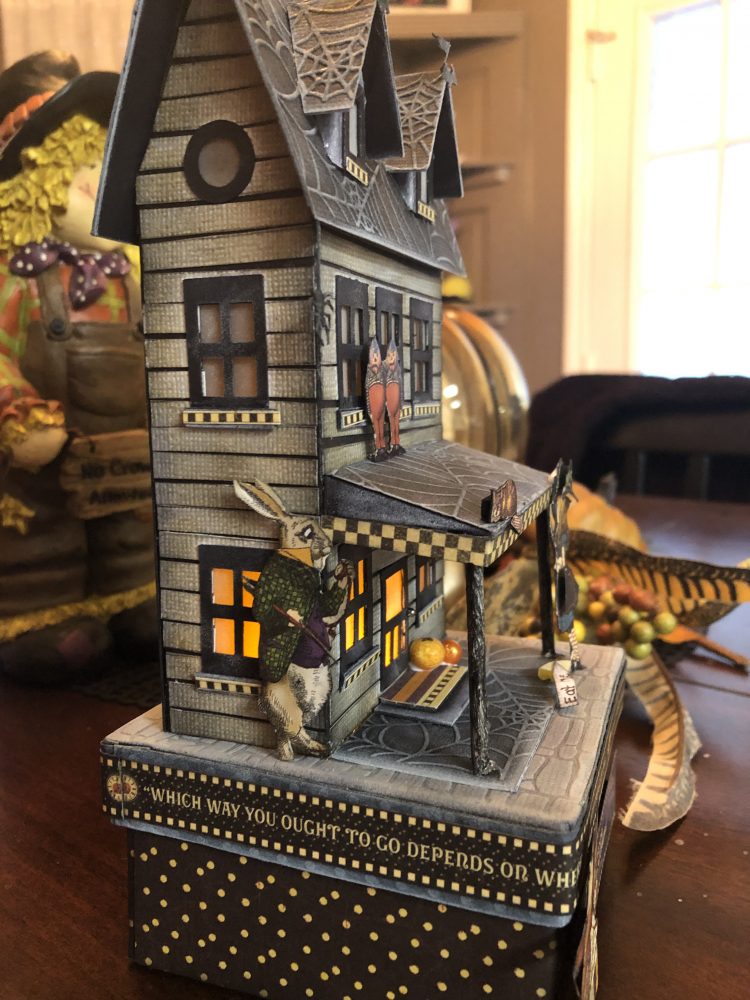
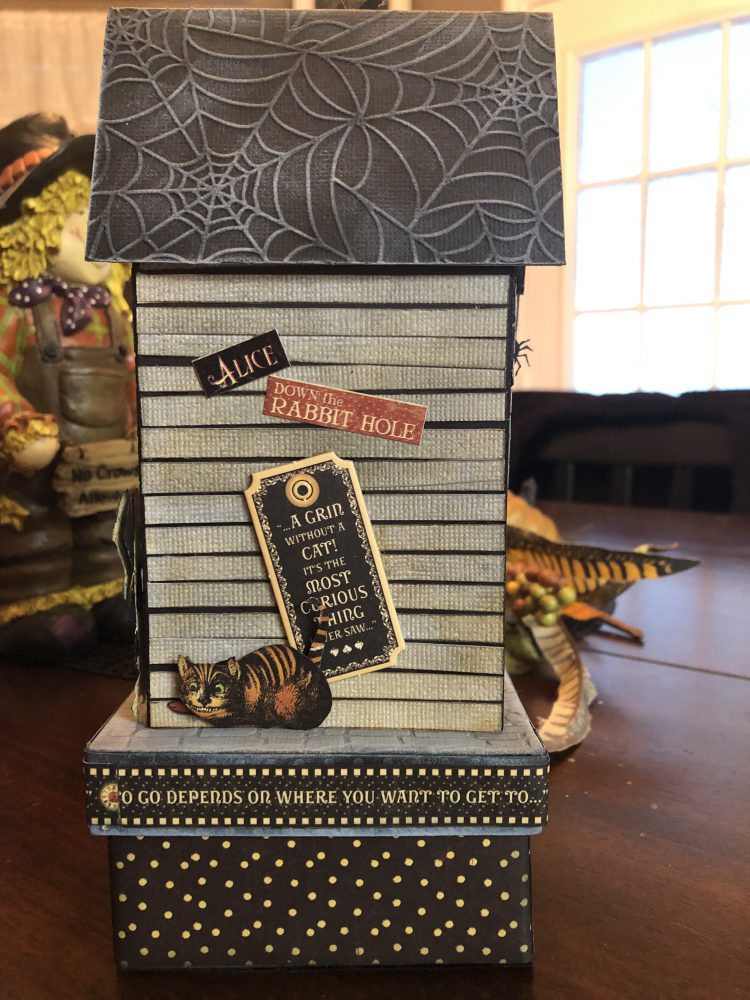
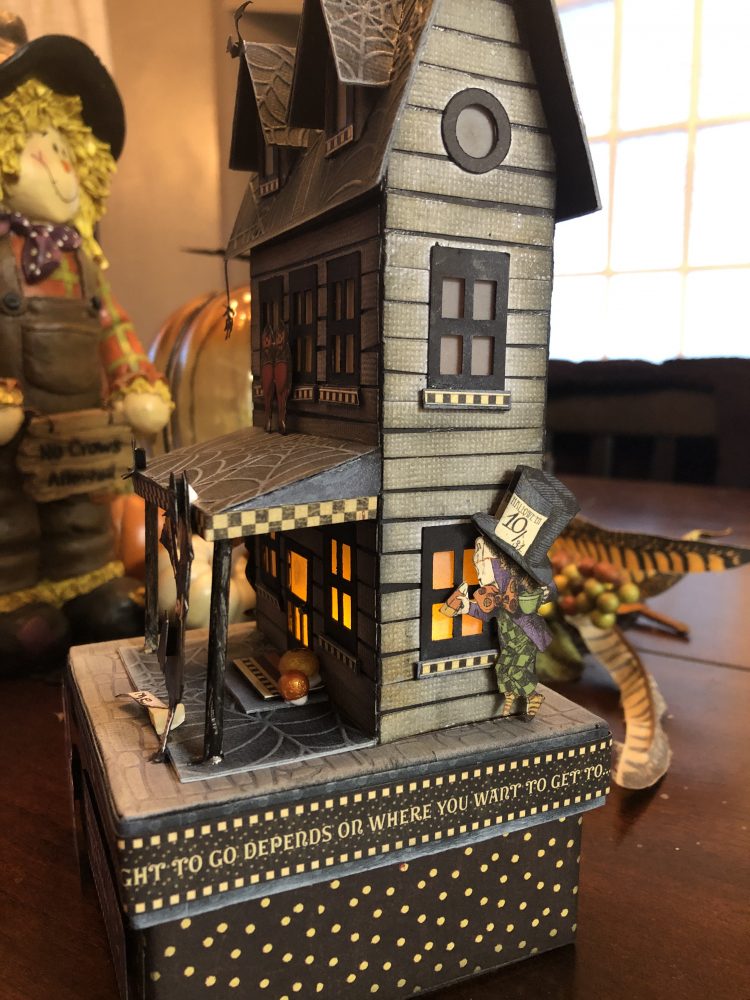
So that’s it if you want to just make the house and a single base. One final note if so . . . you might add some type of feet to the bottom of the box. Wood beads painted black or maybe some of the Tim Holtz metal feet.
If you want to continue with the remaining two boxes in the set, stay tuned as I work on those then update this post tomorrow!
UPDATE . . .
Just a pic to show you the second box I’ve added. I’m sure there will be some accents added to it as well.
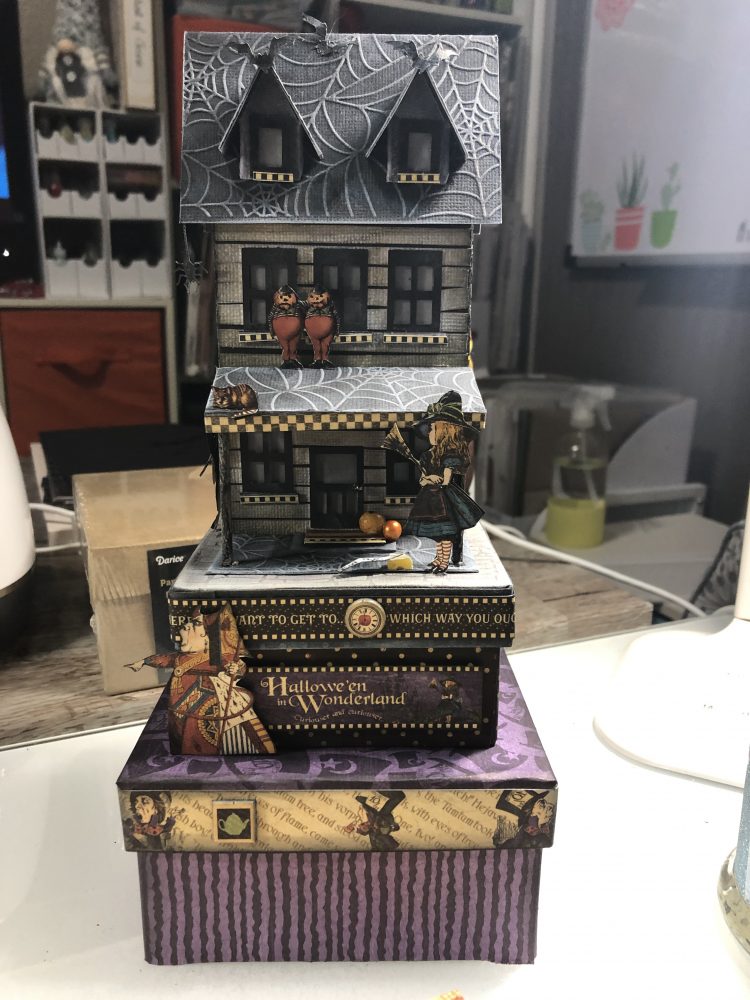
And here’s the final project . . .
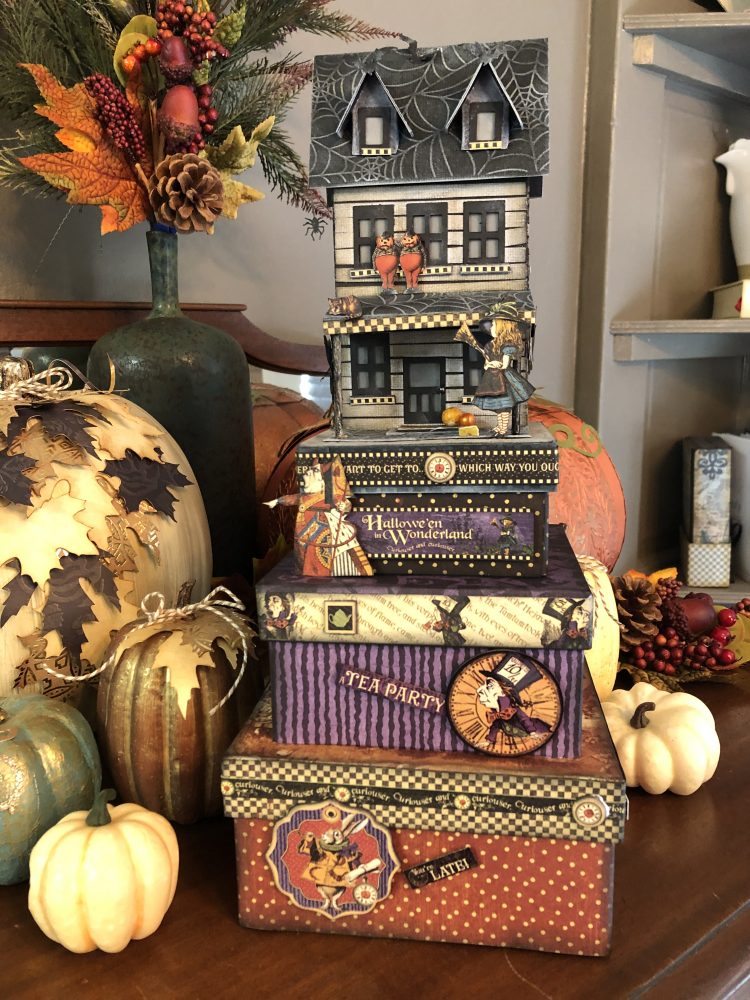
Happy Halloween!!!



Leave a Reply
You must be logged in to post a comment.