One of the best “free with purchase” finds I ran across this year was the Heirloom Christmas Tree by SVGCuts. I’m not sure if it’s still available as a free with purchase or not but if not, it’s still well worth the few dollars it costs! If it looks intimidating, don’t fret! Just hop on over to SVGCuts.com and watch the assembly video for the project. Your cutting machine does all the work and from there it’s a simple matter of folding and glueing. I promise …. it’s not hard at all.
The tree was designed so that you place one of the plug-in style candle lights in the center. You know …. the ones you set in your windows. However, if you have had any of these lights, even the expensive ones, you know they never last very long. With the original design, you can’t remove the light without taking the base apart and that’s almost impossible to do without ruining the base. I wanted a way to one, be able to replace the candle light easily, without ruining the base as well as being able to use a string of christmas lights inside the tree as alternate lighting. So I set about altering the original files to allow this.
Below you can see the first tree I made, with original base. Unfortunately the candle light I was trying to use had an auto sensor in it and every time I put the tree on top (tree simply sits on top of the base) the light would go out!
Heirloom Christmas Tree by SVGCuts
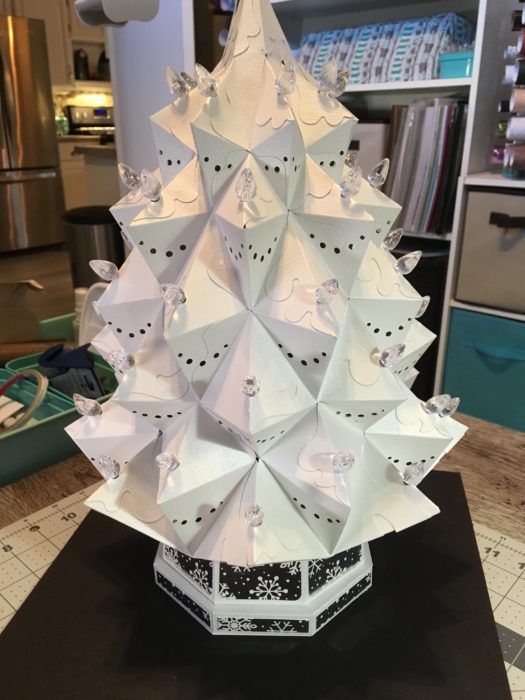
For this tree, I remade the original base with a larger hole so the string light plug would go through it. The lights are simply pushed up inside the tree. You can use the same method shown in my video to make the hole larger as needed for the plug. NOTE: make sure that your string of lights are LED lights!!! These will not get hot and be an issue when used with paper.
That said, it’s never a good idea to leave something like this turned on indefinately or go off and leave your house with it on!
Here you can see where I’ve used the string lights on my first tree.
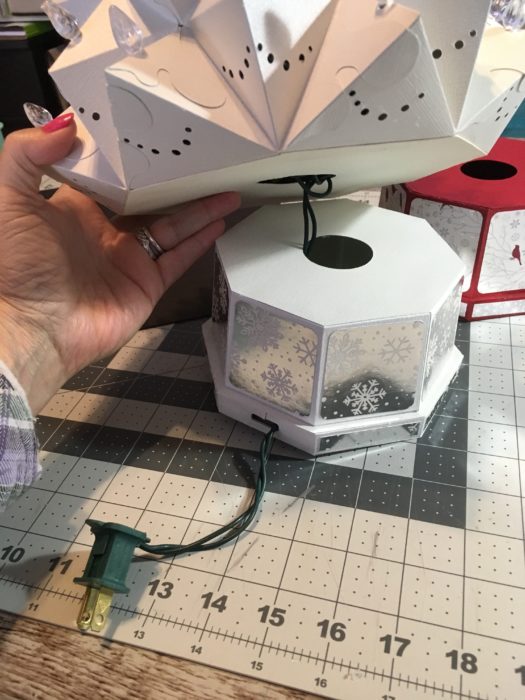
Now ….. what I came up with to alter the base, for candle light use, was to replace the pinhole on two pieces with a larger hole, as well as a channel for the light cord, as seen below.
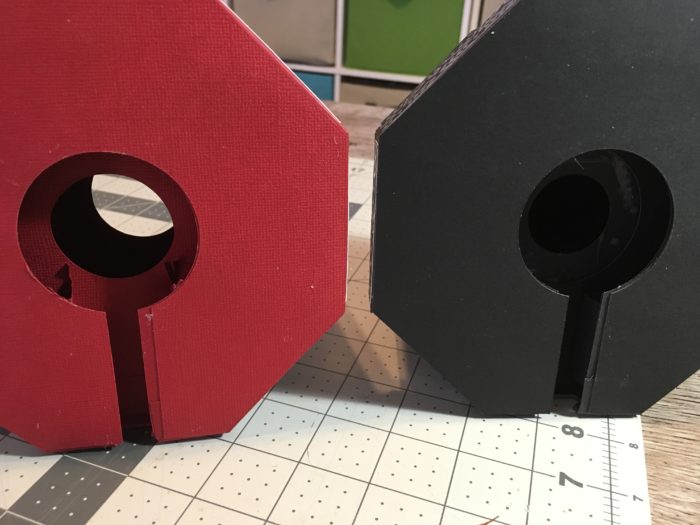
You can see below how the candle can easily be removed.

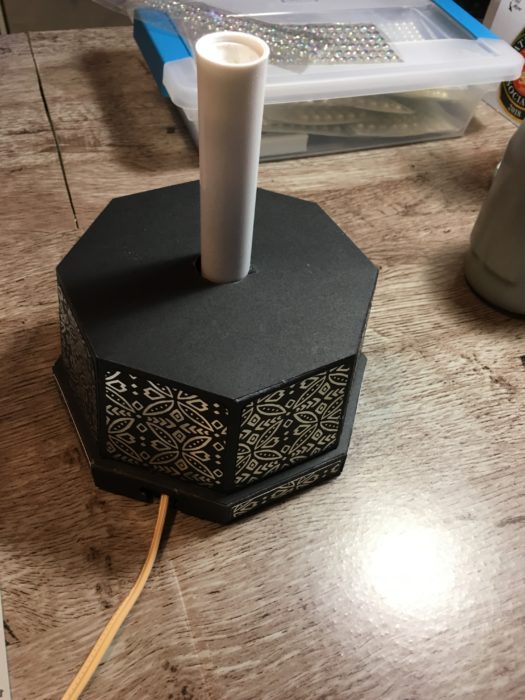
Not shown in the example or video below …. you will need to alter the cut for the cord area to look like mine below. This will leave the channel open for the cord and will not affect the stability of the base.
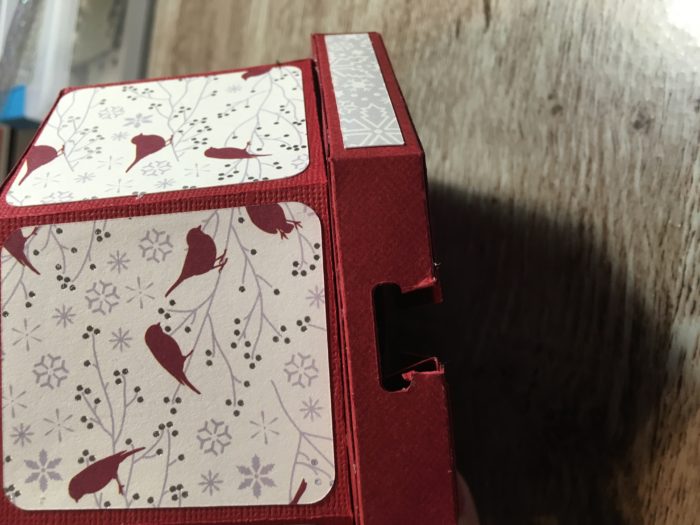
Below is a view of how I altered the base. Watch the following video for “how to” in Cricut Design Space.

How to Alter the Base in Cricut Design Space
So if you are looking for a unique handmade gift, or just want something for yourself, I do hope you’ll give this project a shot! It truly is beautiful when finished.
Happy Holidays!




Leave a Reply
You must be logged in to post a comment.