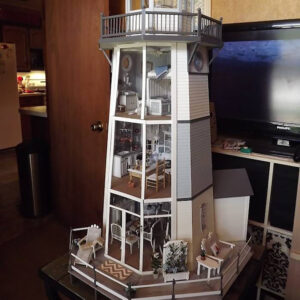
Welcome back to my Lighthouse Project Build! When I last left off, I had completed the outside or structure of the lighthouse and was ready to start work on the inside. Once I decided what rooms would be on what floors, I was left with a question of adding a bathroom or not. Well I just couldn’t have Ms Shellmarker going outside to do her business, especially in bad weather, so decided to put the bathroom in with the bedroom. After all, it is a cottage as well as a lighthouse!
So to solve the problem of putting both on the top floor, as well as the smallest room, I built a loft bed into one side of the room, with a reading nook/guest room underneath the loft, leaving the opposite side of the room for the bathroom. The entire loft is built from medium weight chipboard and there’s a lot that goes into this little build so this post will cover only the loft section.
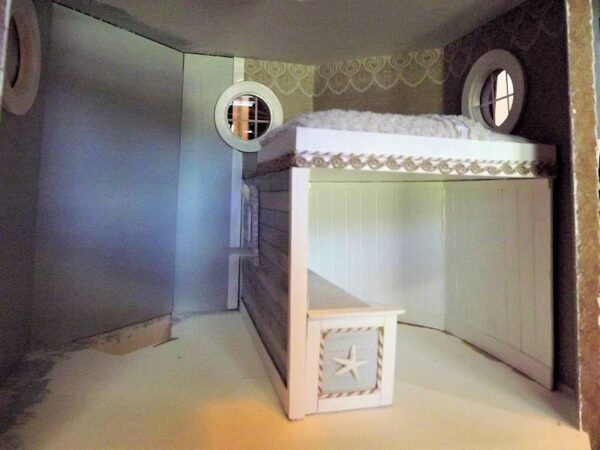
Here’s a look at the finished loft, installed into the Lighthouse . . . keep in mind that I still need to decorate the walls, add the ceiling with light, and add a tub and sink still. When the walls are finished, the loft will be glued into place against the lighthouse walls.

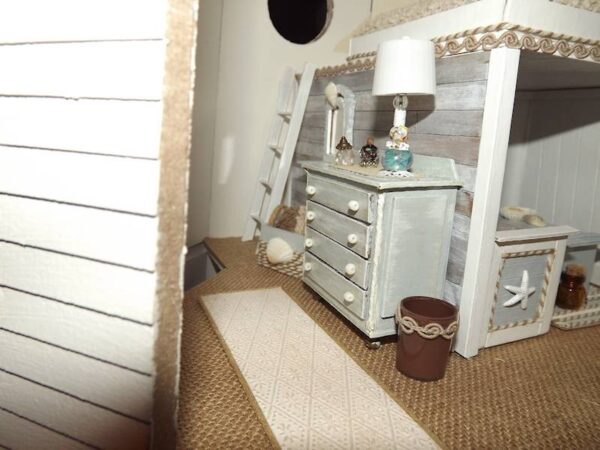
The flooring is a sheet of paper backed burlap (scrapbook paper – think it’s Die Cuts With A View brand), the off white rug is embossed white cardstock with bakers twine on the edges and a wash of coffee latte acrylic paint over top. The rug in the nook is canvas with painted stripes and bakers twine accents.
All of the furniture was also made of medium weight chipboard. The cushion on day bed and bed are foam core with quilters batting on top and fabric. I’ve added bakers twine and other trim here and there for accents. Starfish was a silver charm painted white. Other small shells were used as accents here and there. The trash can is the clear cap off a spray bottle, painted brown inside and trim glued to the outside. I love how that trim looks like rolling waves! Beads and a coffee creamer were used to create the lamp. An old washcloth was used, with trim, to make the bedspread and the little pillow on the day bed/couch in the nook.
Now for more details . . .
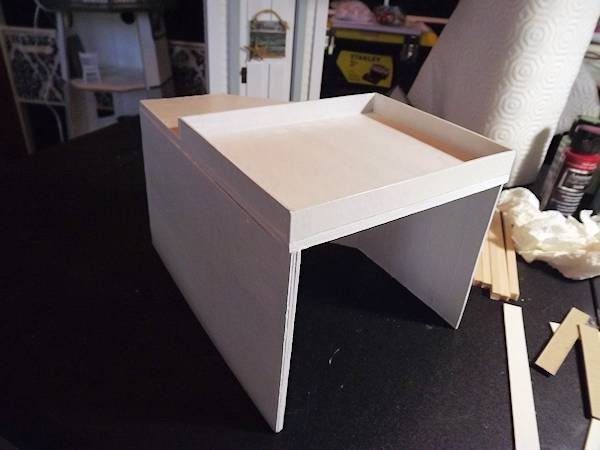
Single thickness of chipboard was used to build the loft shell. It measures: 8″ deep by 5-7/8″ wide and 5″ tall (not including the bed/frame). Once the shell was built I added the frame sides on top to hold the bed which measures: 4-1/2″ by 5-3/4″. The frame strips are 1/2″ tall.
You can see the bed and bedspread added below.
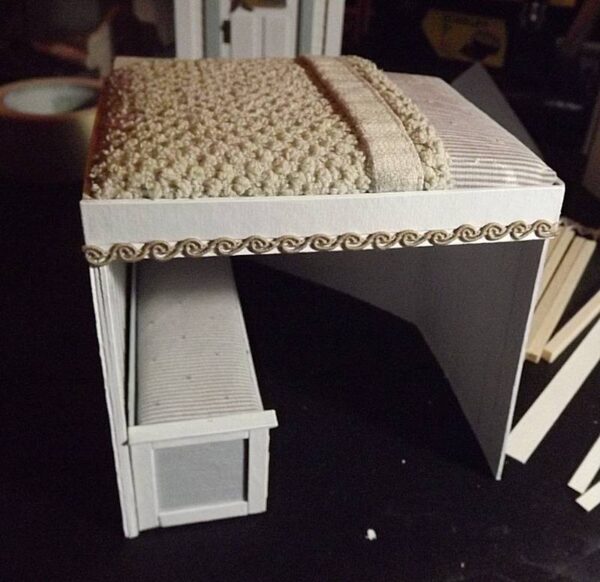
Inside the nook I made bead board to cover all of the walls, from floor to ceiling then added trim at top and bottom of the walls. Next I created the day bed to use for relaxing with a good book. I’ll have a reading light installed in there at some point.
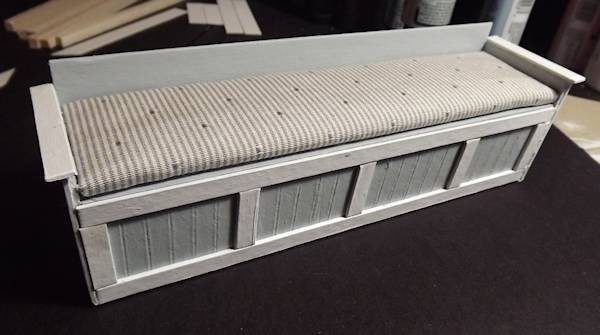
The daybed measures 7-3/4″ long by 2-3/8″ high at the back and 1-7/8″ deep. I used my bead board from chipboard technique for the front and sides then added 1/4″ wide trim as seen above.
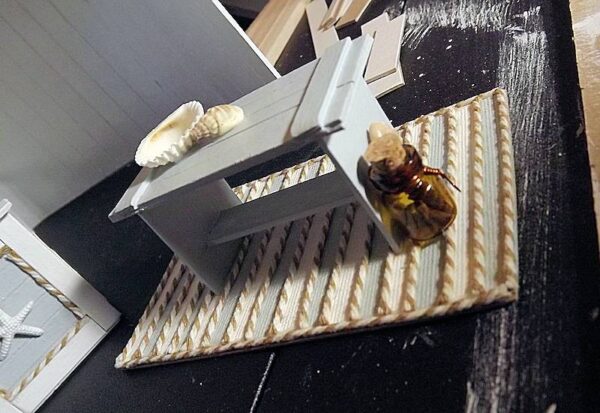
The little coffee table sits on the handmade rug and measures: 2-3/4″ long by 1-3/8″ wide by 1-1/2″ tall.
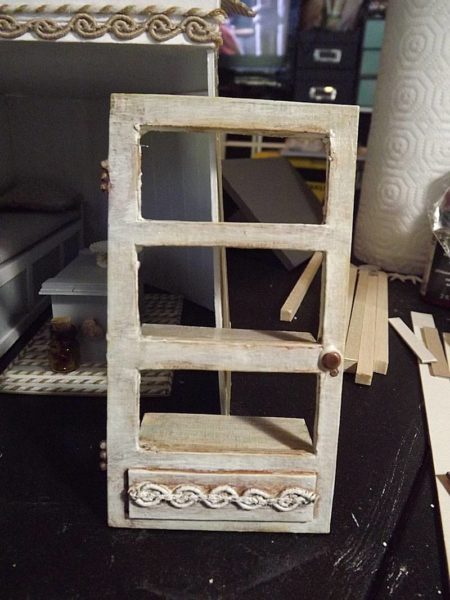
The bookshelf I wanted to look as if it were made from an old door. Trim added at the bottom before I painted, bead chain used for the hinges and a brad with the prongs cut off became the doorknob. I’ll eventually add lots of books and nick-nacks to the shelves.
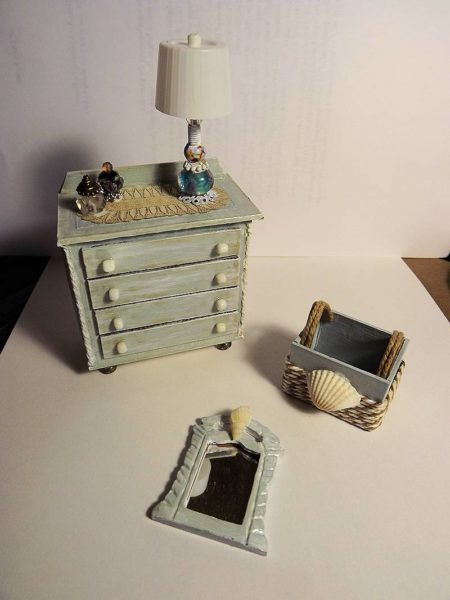
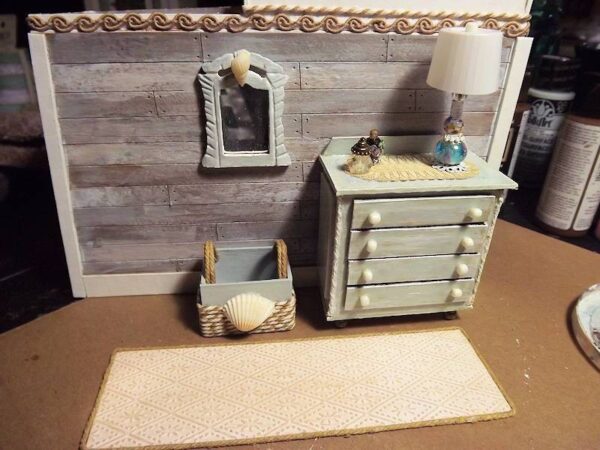
If you follow my blog, you might recognize the dresser as one I created in a free tutorial! I’ve just reclaimed it with a new paint job for the lighthouse. The little box will hold rolled up towels and was inspired by another box created by Julie Warren. Her’s had fabric added to it and no handles but I thought it would interfere with the towels. The mirror is reclaimed from an old dresser. From the first image, you can see a simple ladder I created from strips of chipboard. Ms Shellmarker is just a little to old to be jumping into a loft!
And my favorite part of the loft . . . the reclaimed wood wall!!!
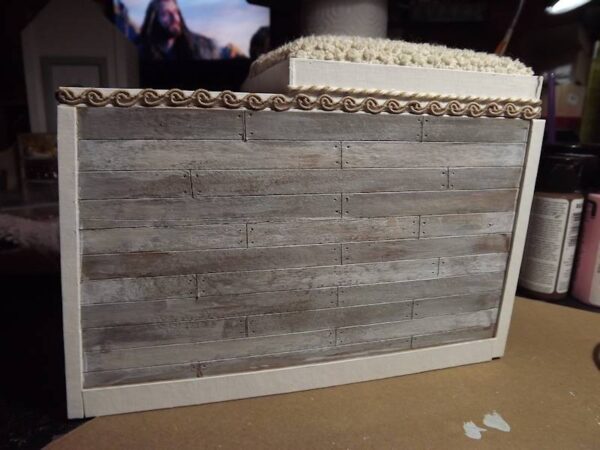
I just love how this turned out! It’s just 3/8″ wide strips of thin chipboard that have been painted in various colors. Strips were glued to the wall then painted. After painting, I’ve used a craft knife to score between each strip and to create the look of pieced boards. A sharp pointed tool was used to create the look of nails.
Tomorrow I’ll paint and paper the walls then start work on the tub and sink.
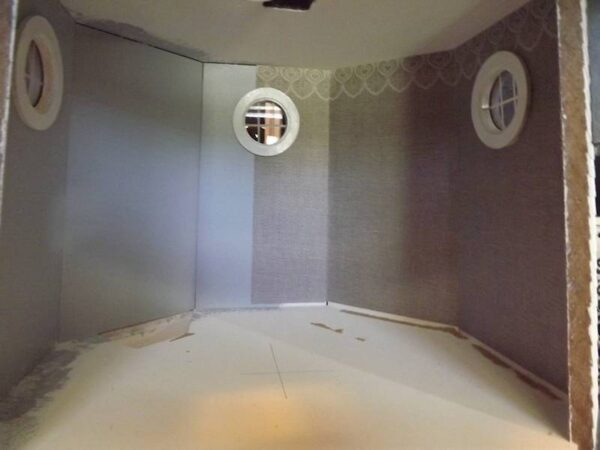
Here’s the upper floor walls after painting and papering them. There will be trim at the top and bottom of the walls after the flooring has been put back in.
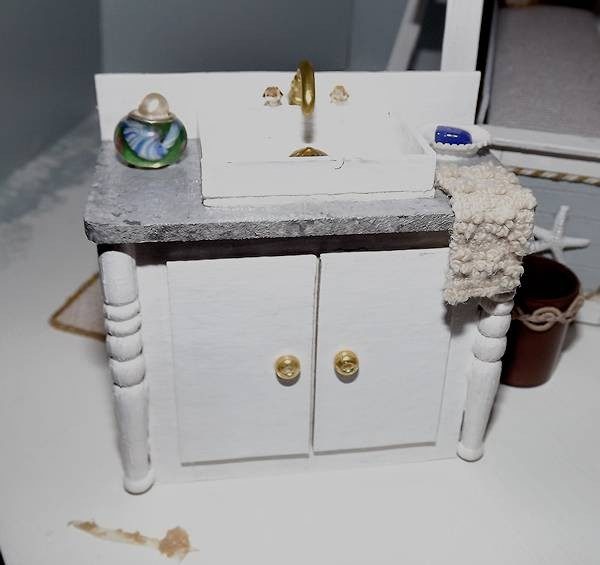
Next I made a sink with balsa wood, spindles and chipboard. The faucet was taken off a random scrap piece, the knobs are austrian crystal beads and glass beads are the knobs on the doors. A shell and bead were used for a soap dish with soap, old washcloth for a face cloth and beads for the jar on the left side.
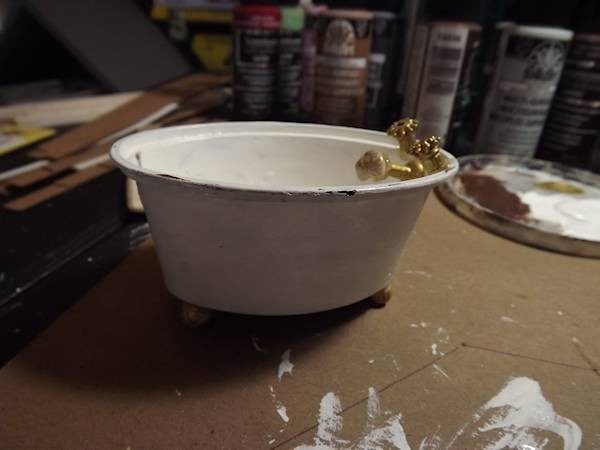
Next I built a temporary tub, till I find one I truly want, from a sauce container and beads.
I’ve drilled a hole in the middle of the floor, to allow for lighting on the second level ceiling and laid my upper flooring in, unattached for now. A few pieces of art for the walls, a little bit of re-arranging and finally . . .

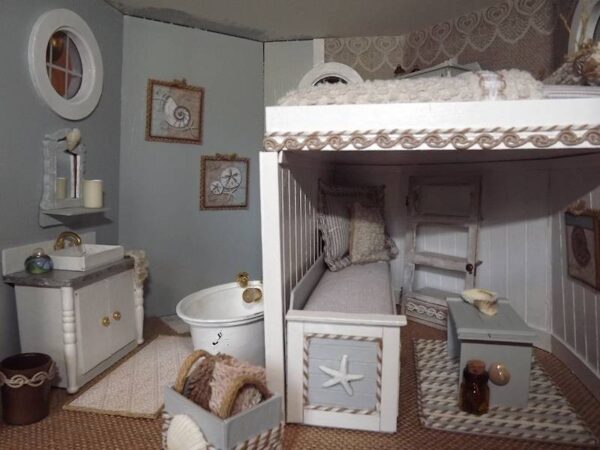
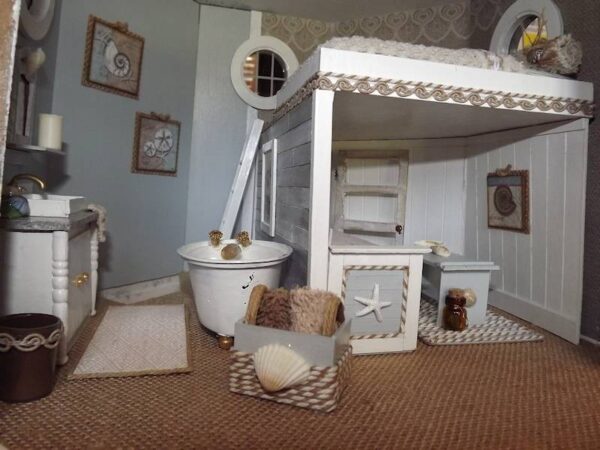
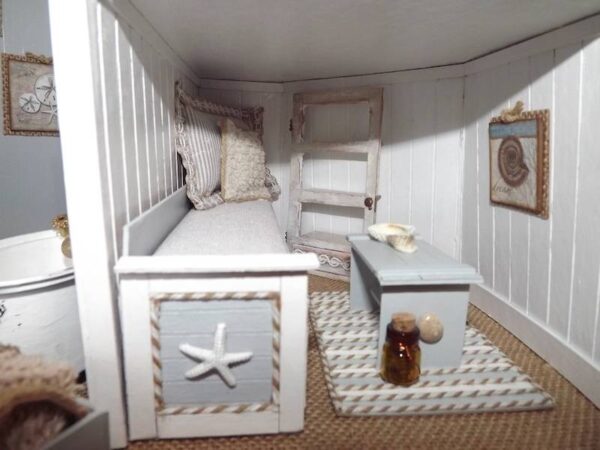
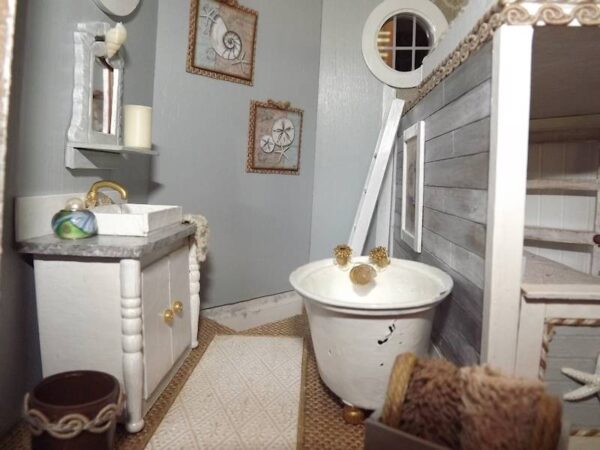
So now I’m just waiting for the lights to arrive so I can add the ceiling and fix the flooring down, as well as add a reading light or sconce to the nook area.
I’ll be sure and post a final update when the room is finished.


Leave a Reply
You must be logged in to post a comment.