Halloweenie Town Series
© 2024 Teri Hanson / The Covered Chipboard
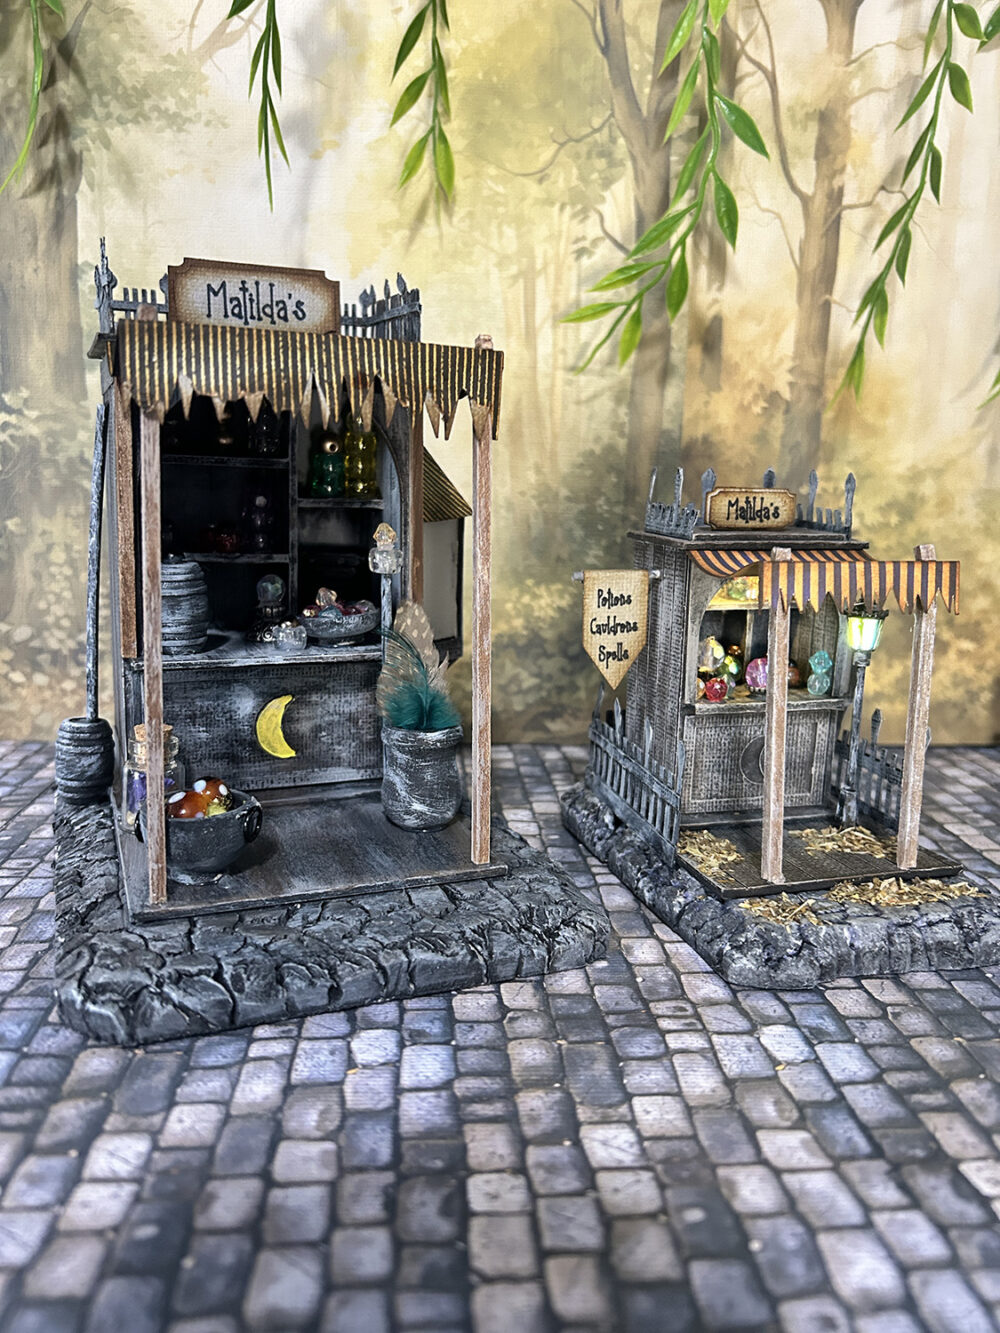
Matilda’s Potions is the fourth shop in my Halloweenie Town series and is different than the previous structures. Unlike the other closed-up shops, the potion shop is an open stand-like structure. You will want to create some fun items to fill the shop and because of this, I’ve used Cricut 1.5mm Chipboard for added strength on the main structure. I will add more images and information to my online post as I decorate the shop so be sure to check back now and then to get some ideas!
FILES UPDATED 8/8/2024 TO INCLUDE BOTH HALF SCALE AND QUARTER SCALE VERSIONS
Materials list . . .
- Cricut 1.5mm Chipboard (1 sheet and small scrap piece for final base)
- Aleenes Quick Dry Tacky Glue
- 1/8″ square dowel sticks – min 6″ long – (2)
- Plastic coffee stir straw – for lamp
- Mini LED lighting kit from Evans Designs – if you want to light your project
- Your color choice of 80lb cardstock for boards, window, accents (2)
- 1/4 to 1/2 piece of a striped cardstock for awning and side window roof – or you could use cardstock and a thin patterned paper cover
- Vellum or clear acetate for side window
- Folk Art Matte acrylic paint: Black, Coffee Bean, Medium Grey, Pale Grey
Cutting Key . . .
Use the following cutting keys to size the uploaded files if needed and identify the pieces. Files are numbered for easy identification to the sizes noted below.
Half Scale Version
- Main structure (1b) – 10.42 x 9.28
- Flooring & boards (2) – 10.59 x 11.18
- Side window (3) – 7.26 x 5.58
- Awning (4) – 3.21 x 3.25
- Sign & fence (5) – 9.35 x 4
- Final base (1bc) – 3.25 x 4.50
Quarter Scale Version
- Main structure (1) – 5.55 x 9.81
- Flooring boards, signs (2) – 5.38 x 8.83
- Side Window (5) – 3.68 x 2.98
- Awning (4) – 1.98 x 2.94
- Fence (3) – 8.96 x 4.97
Construction . . .
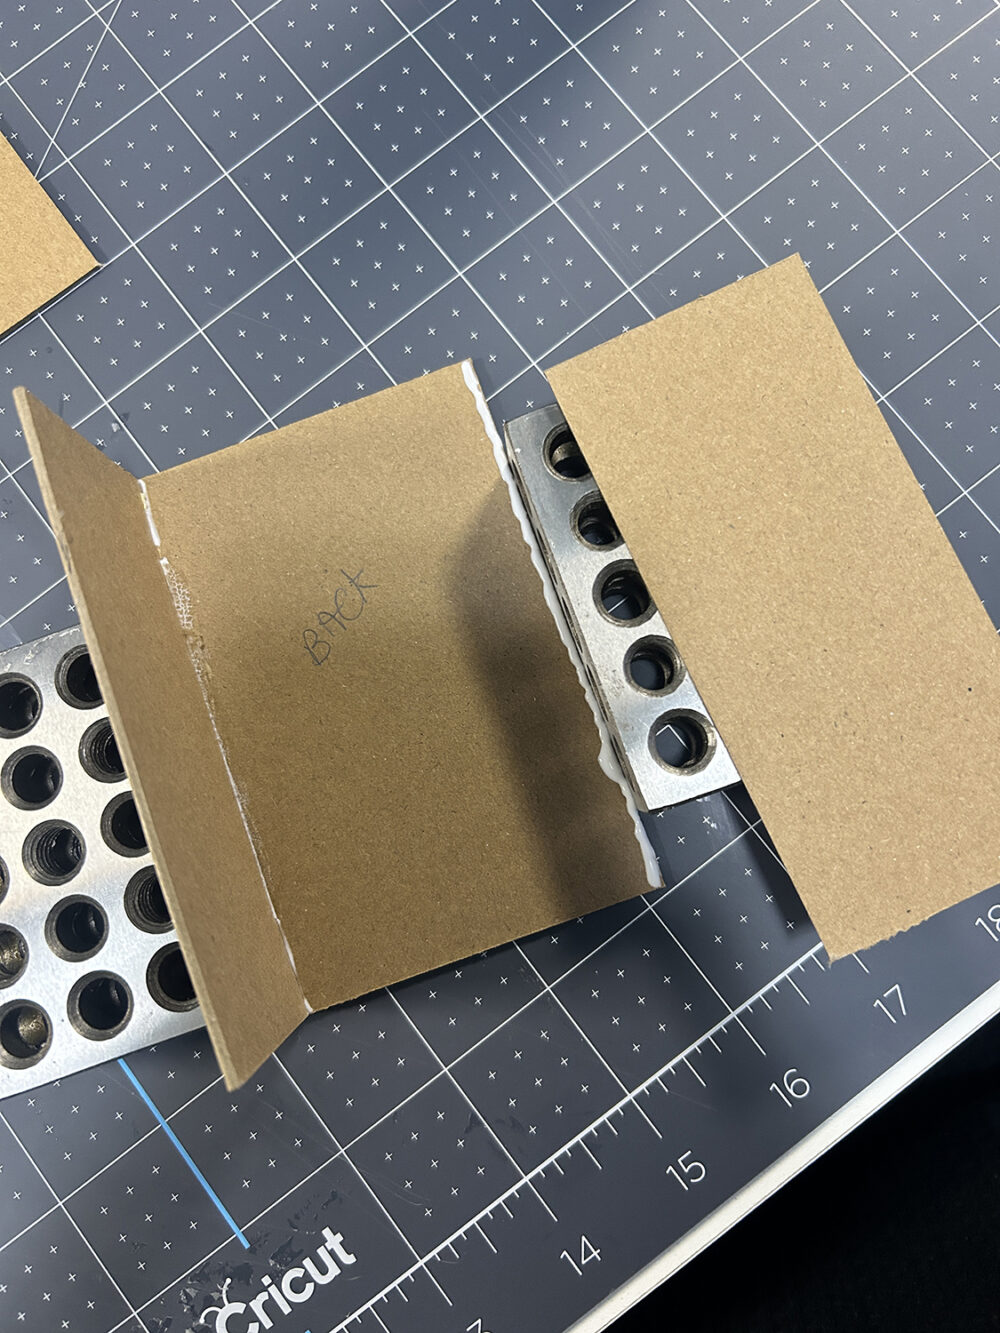
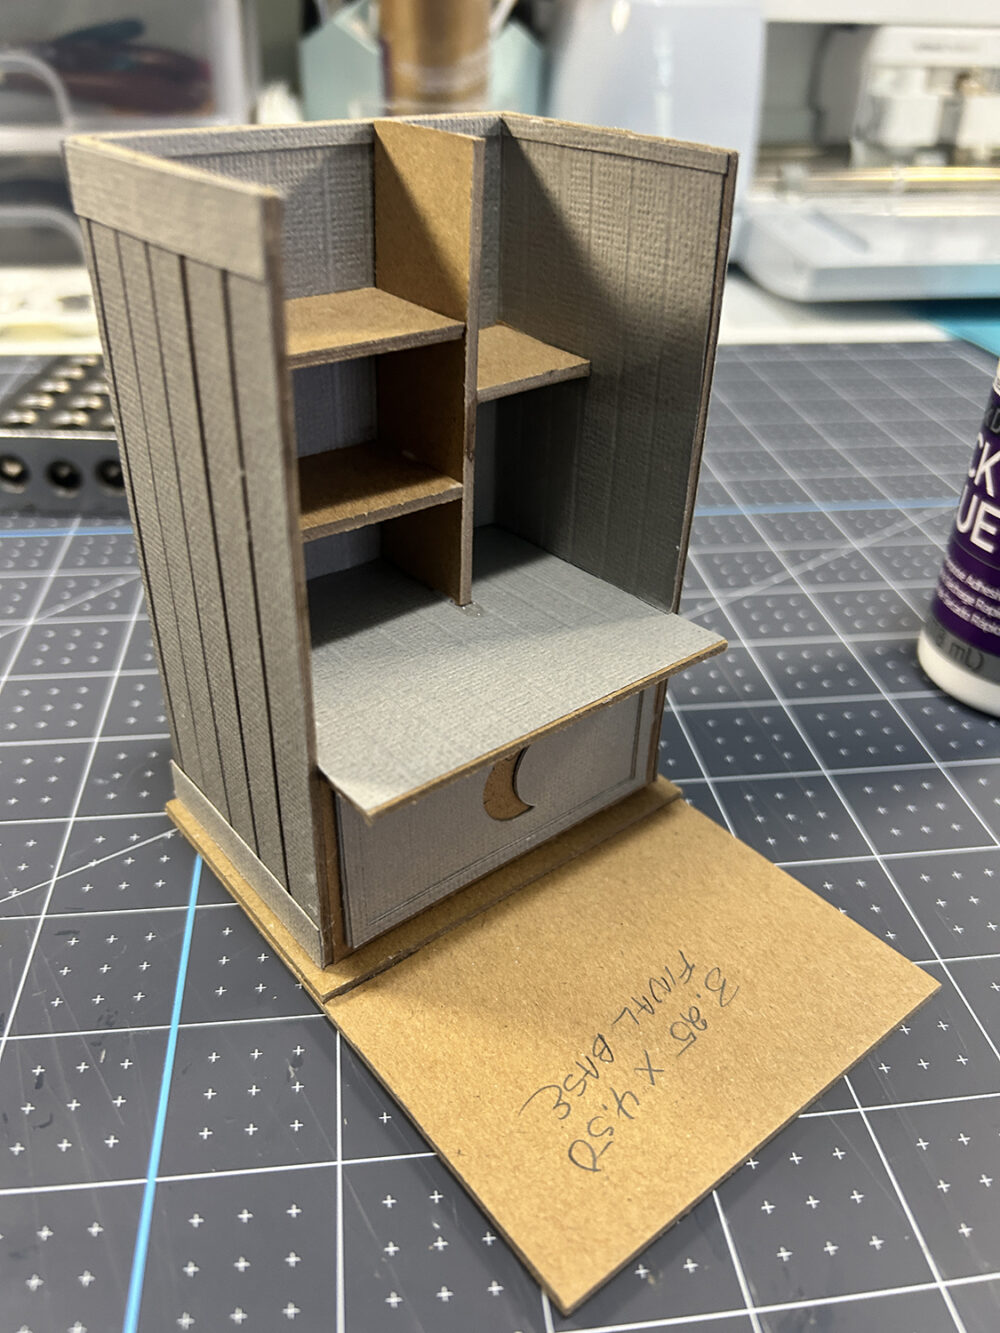
- Glue the left and right side pieces to the back. Pieces should be glued on top of the back and flush with left and right back edge.
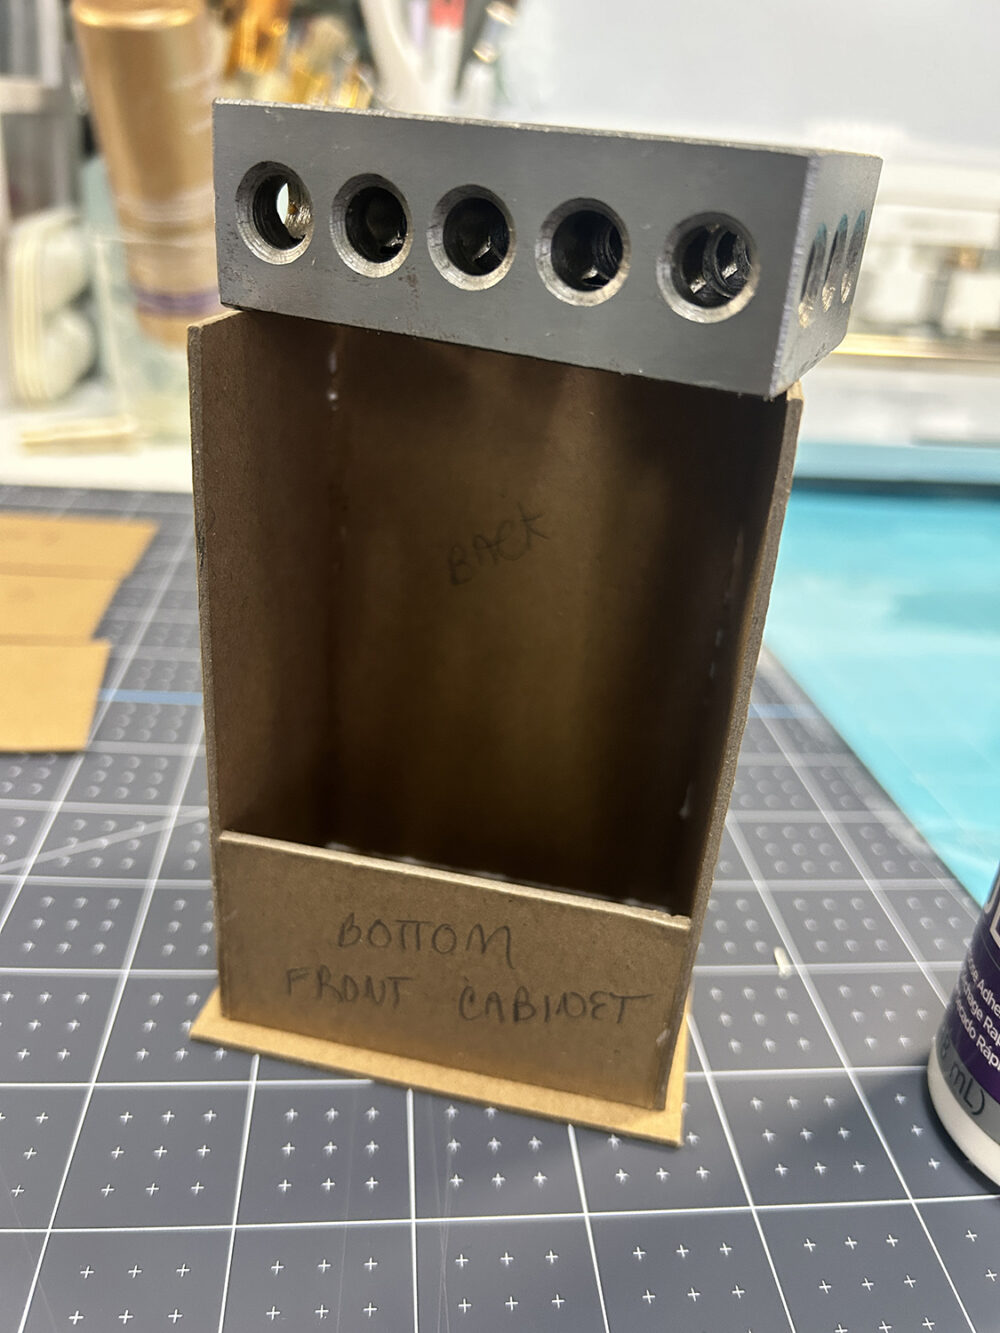
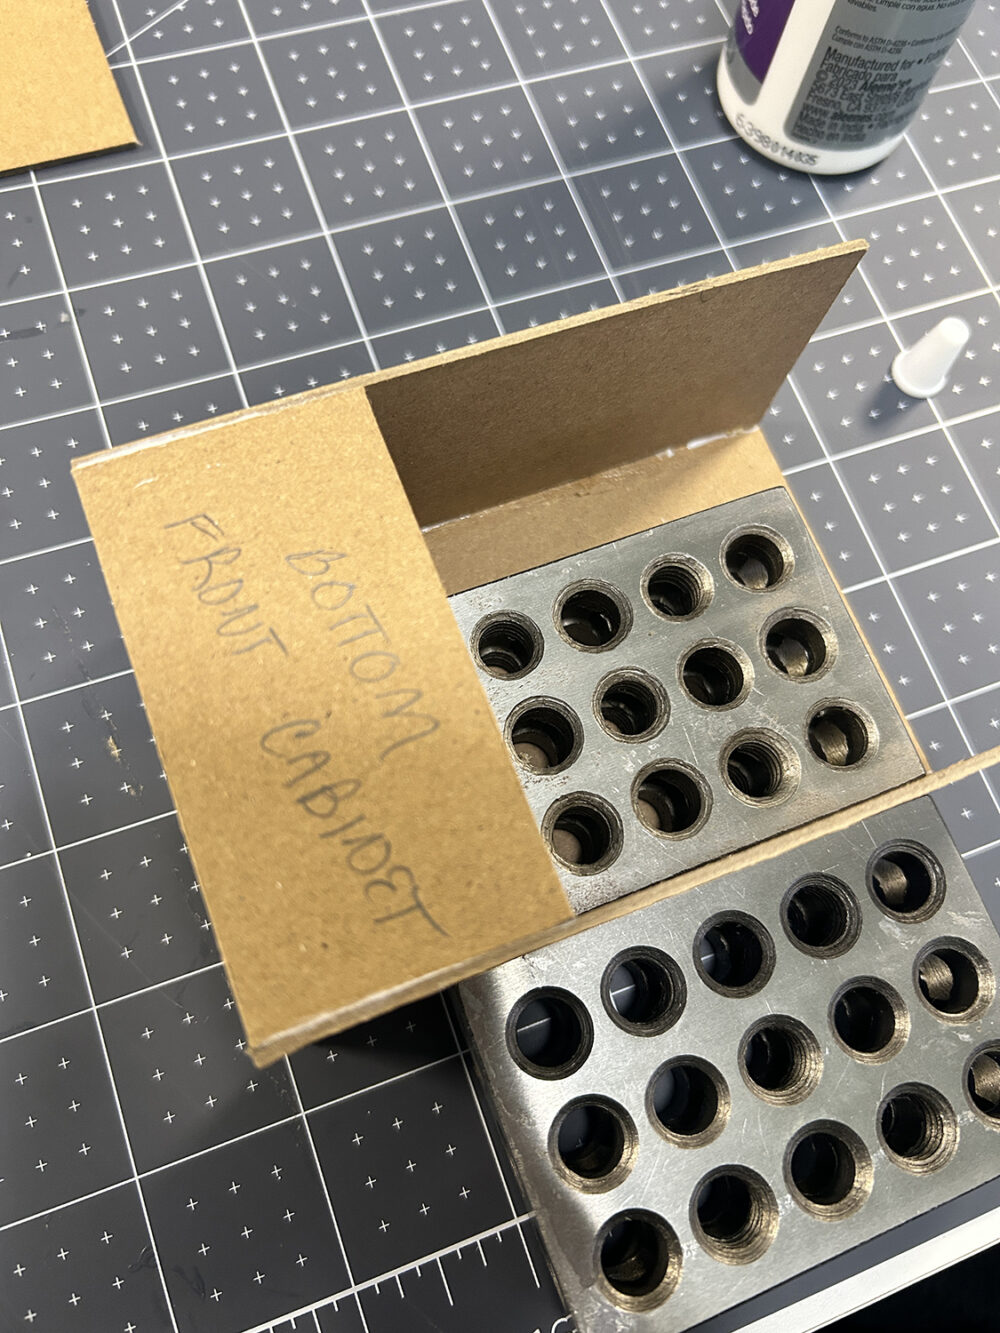
- Glue the bottom front cabinet piece to the front inside edge keeping sides flush with the front of the left and right side and bottom.
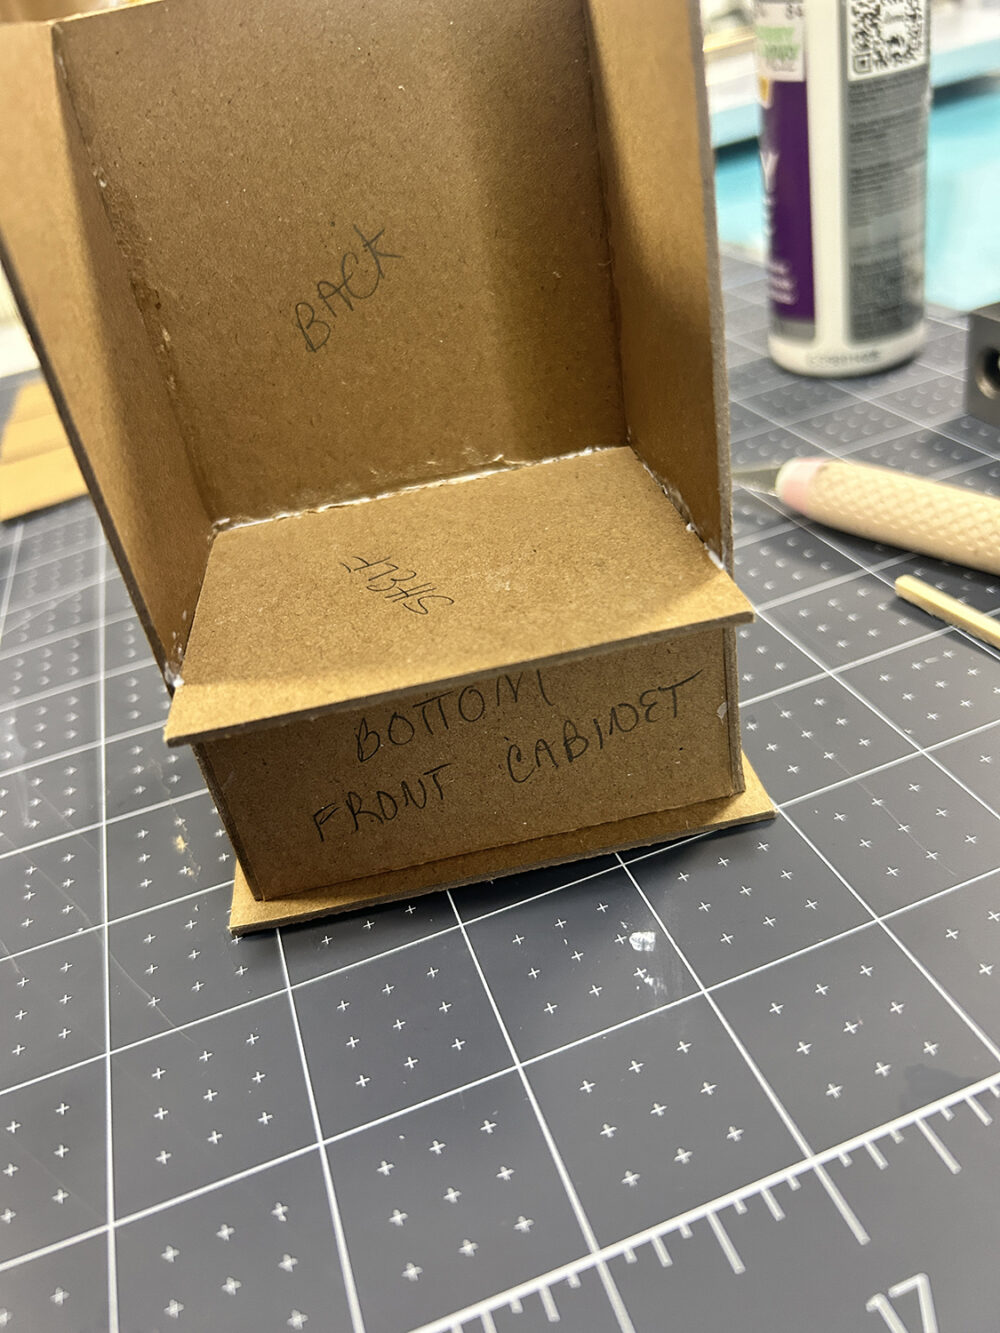
- Glue the structure to the base. Keep the back piece flush with the back edge of the base leaving equal amounts around the other three sides as seen at left bottom.
- Glue two square dowels together, trim to the inside height of the front cabinet height, and let dry. This will brace the middle of the bottom shelf offering support when you glue in the shelf.
- Glue the shelf in place keeping it level. It will extend beyond the front of the cabinet.
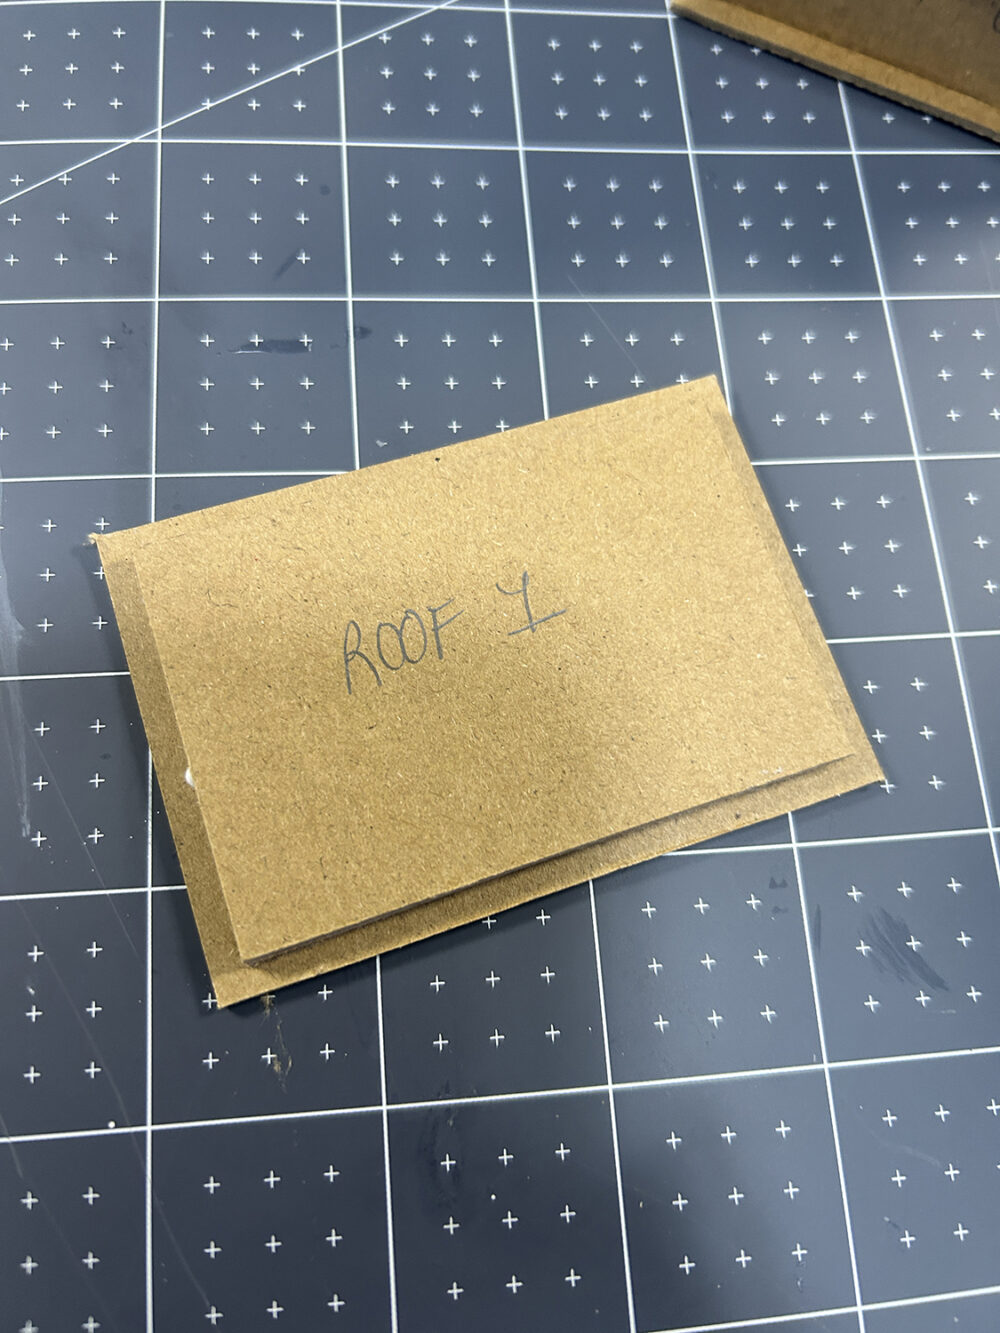
- Glue roof 1 to roof 2 then glue these to roof 3. Set aside for later use.
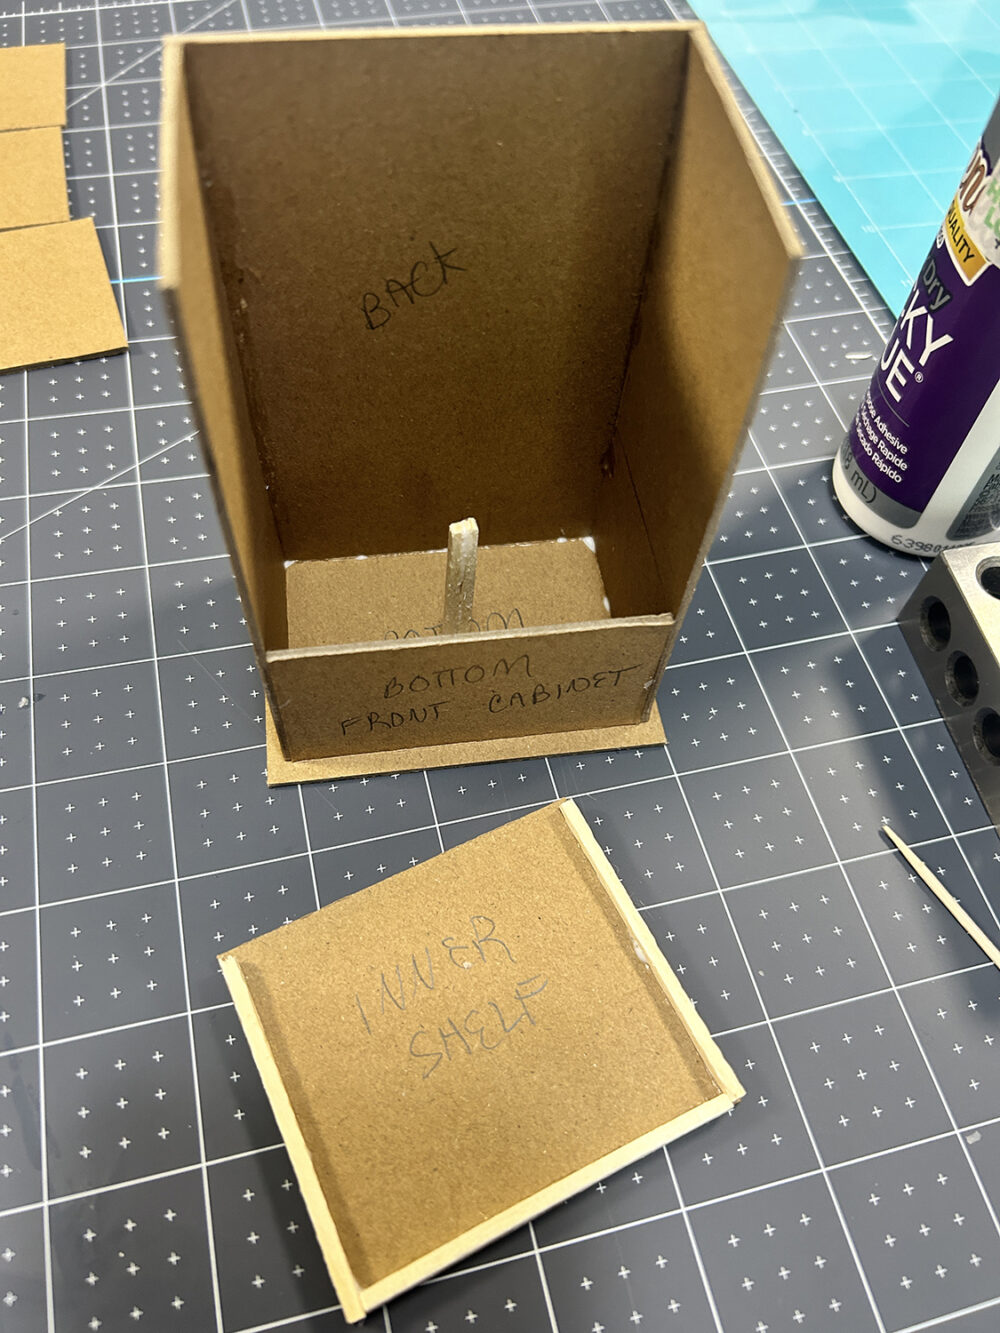
7. Now it’s time for you to decide how to proceed from this point. You can cut a piece of cardstock that will line the inside of the upper cabinet and the bottom shelf. – OR – you can cut strips of cardstock in the files then glue the strips to the inside walls. Just be aware that if you cut your own boards, you may need to adjust the width of the chipboard shelves that will be installed next. You may also choose to paint the inside walls.
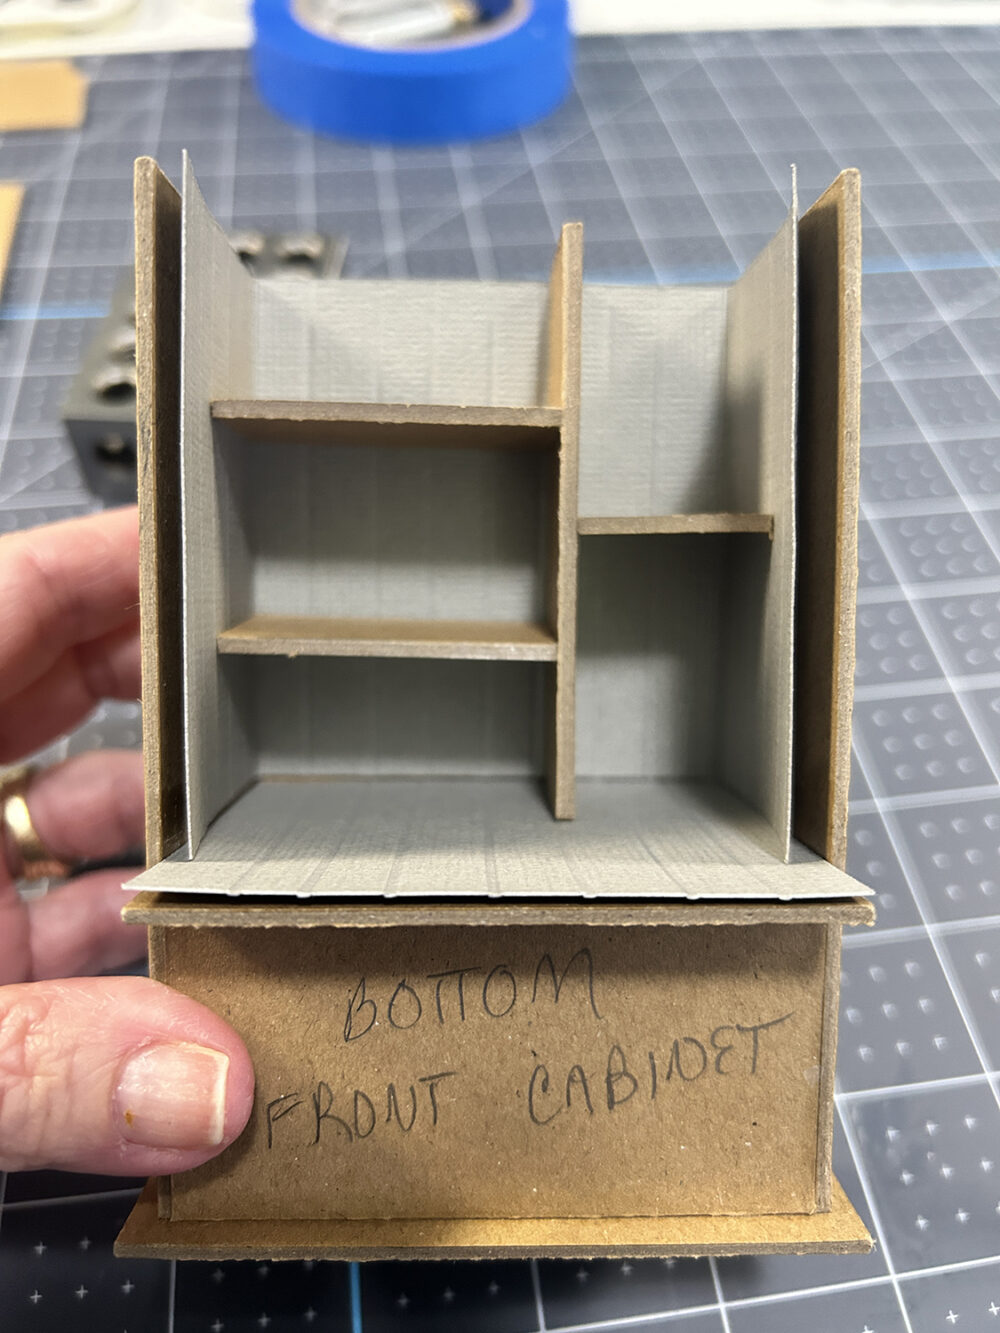
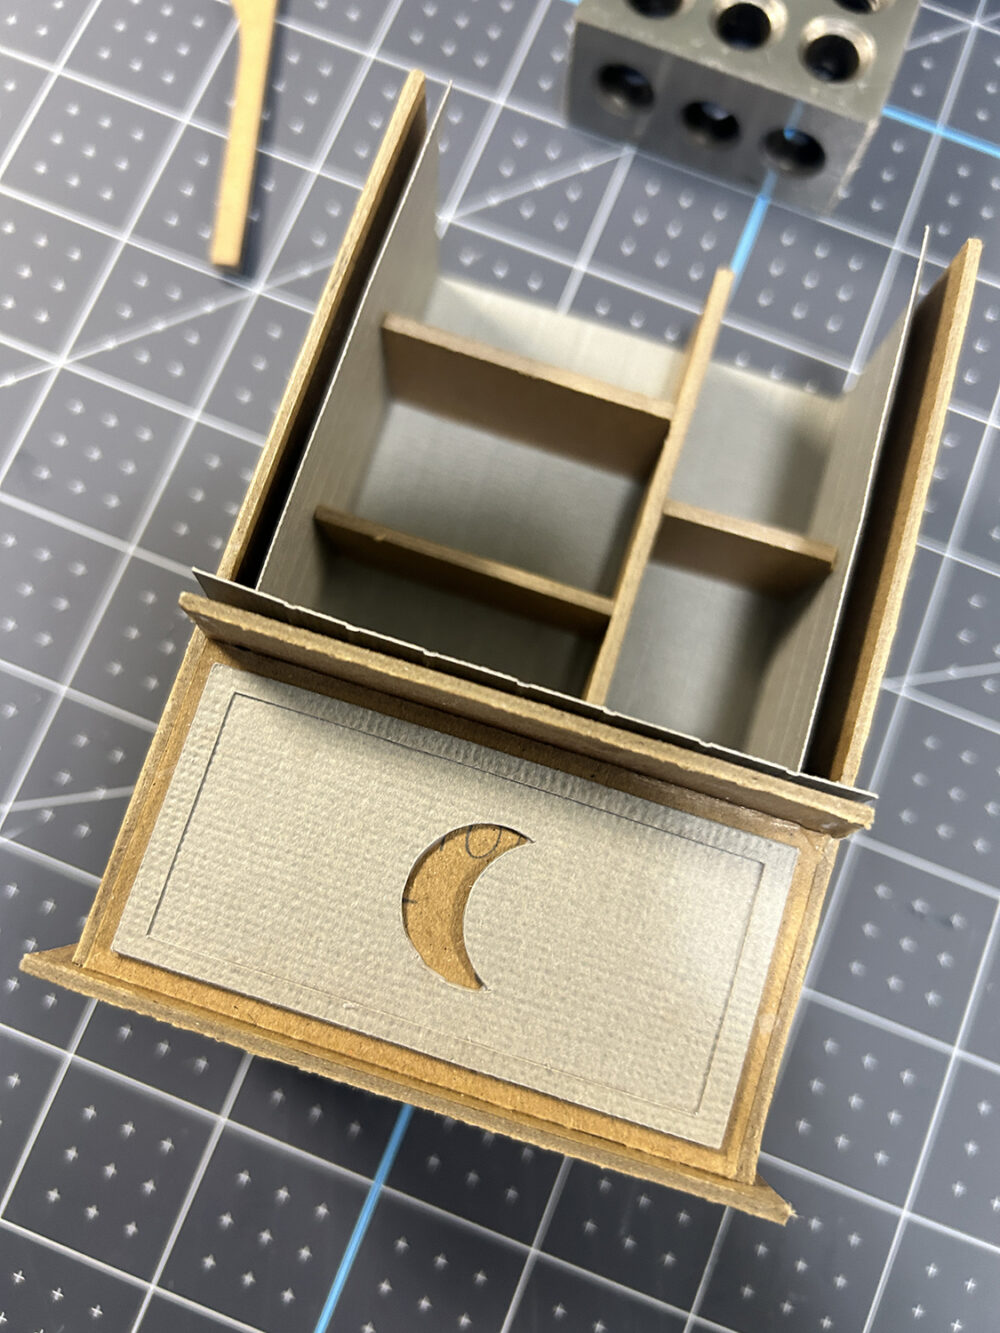
8. Gue the two rectangles with the cut-out moon together then glue to the front lower cabinet. Do the same with the moon rectangle trim pieces.
9. You can either go ahead and glue on the front cabinet piece seen at right, or wait until you have decorated the inside of the cabinet if you like.
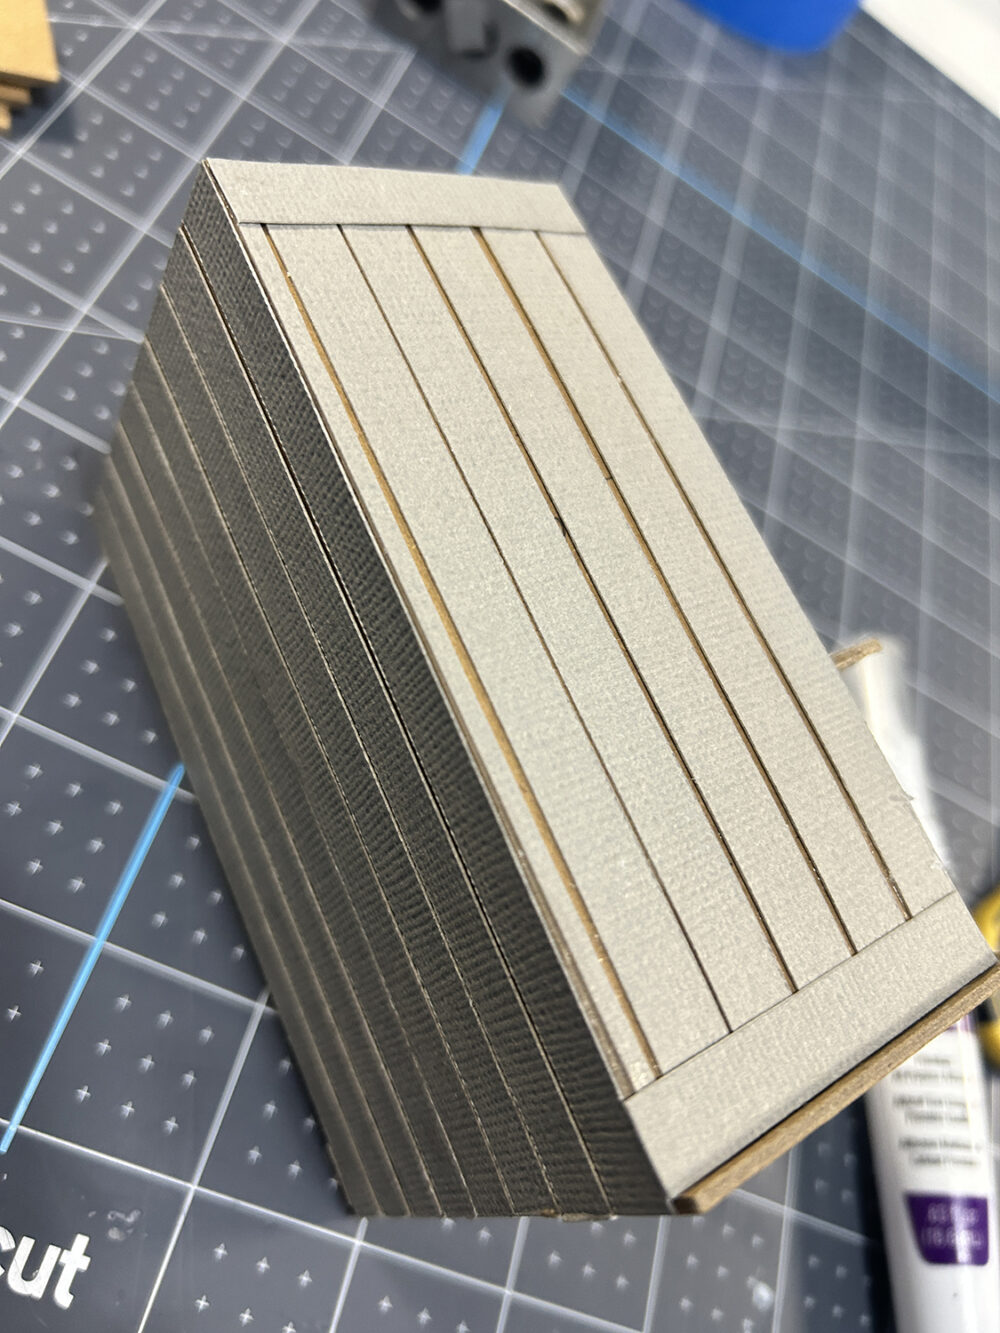
10. Apply the cardstock boards to both the left and right sides, as well as the backside, of the cabinet. Apply the boards leaving a slight gap between each board. You should have enough strips to add a small trim at the inside top and a wider trim at the top and bottom of each side. At this point you should do any painting on at least the outside of the cabinet. It needs to be finished before you add the window unit on the left side.
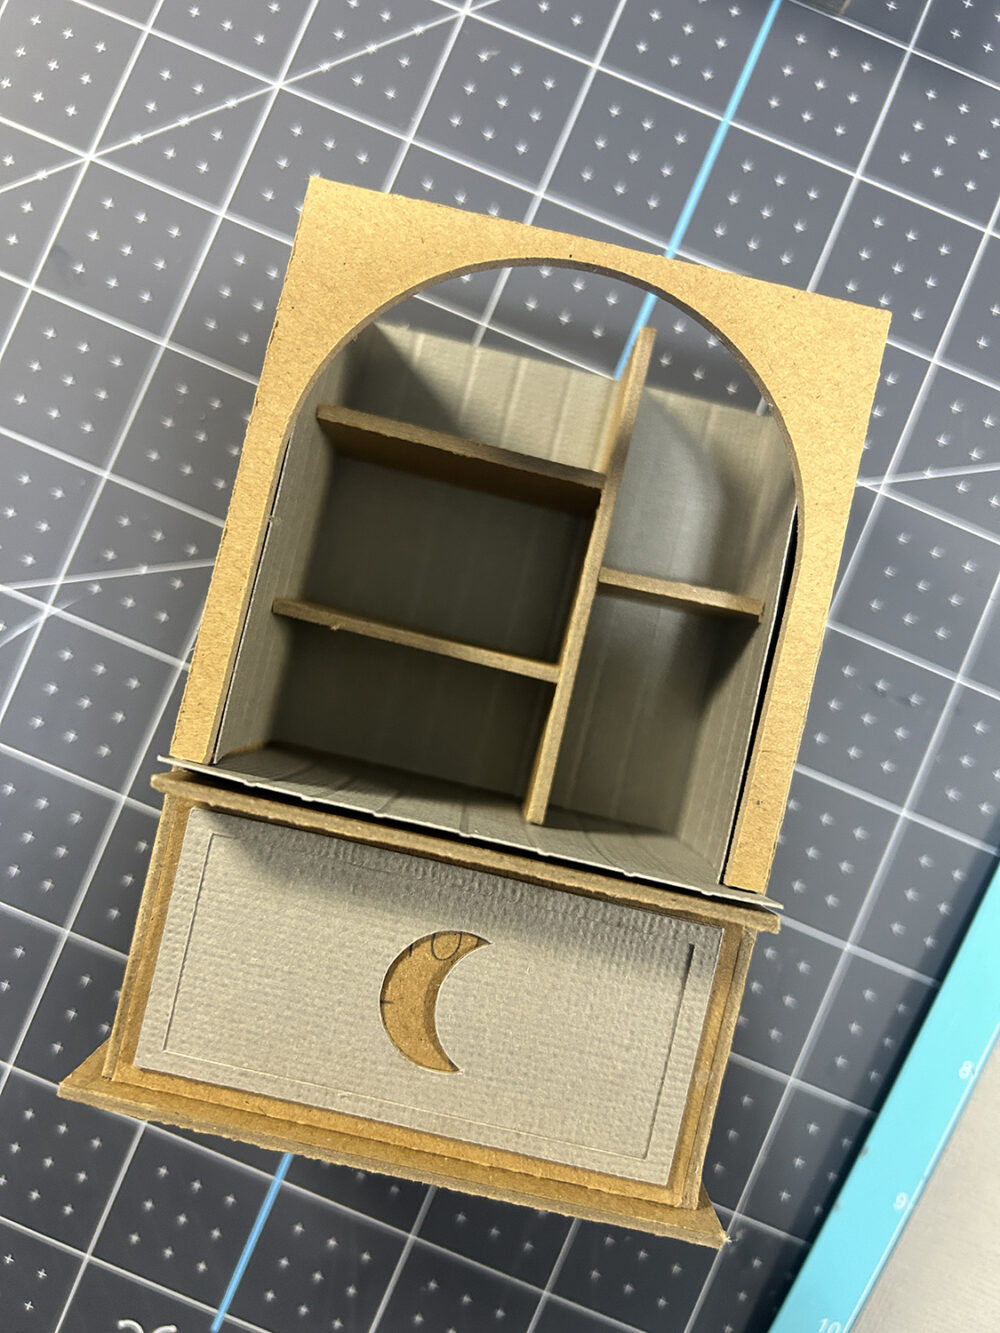
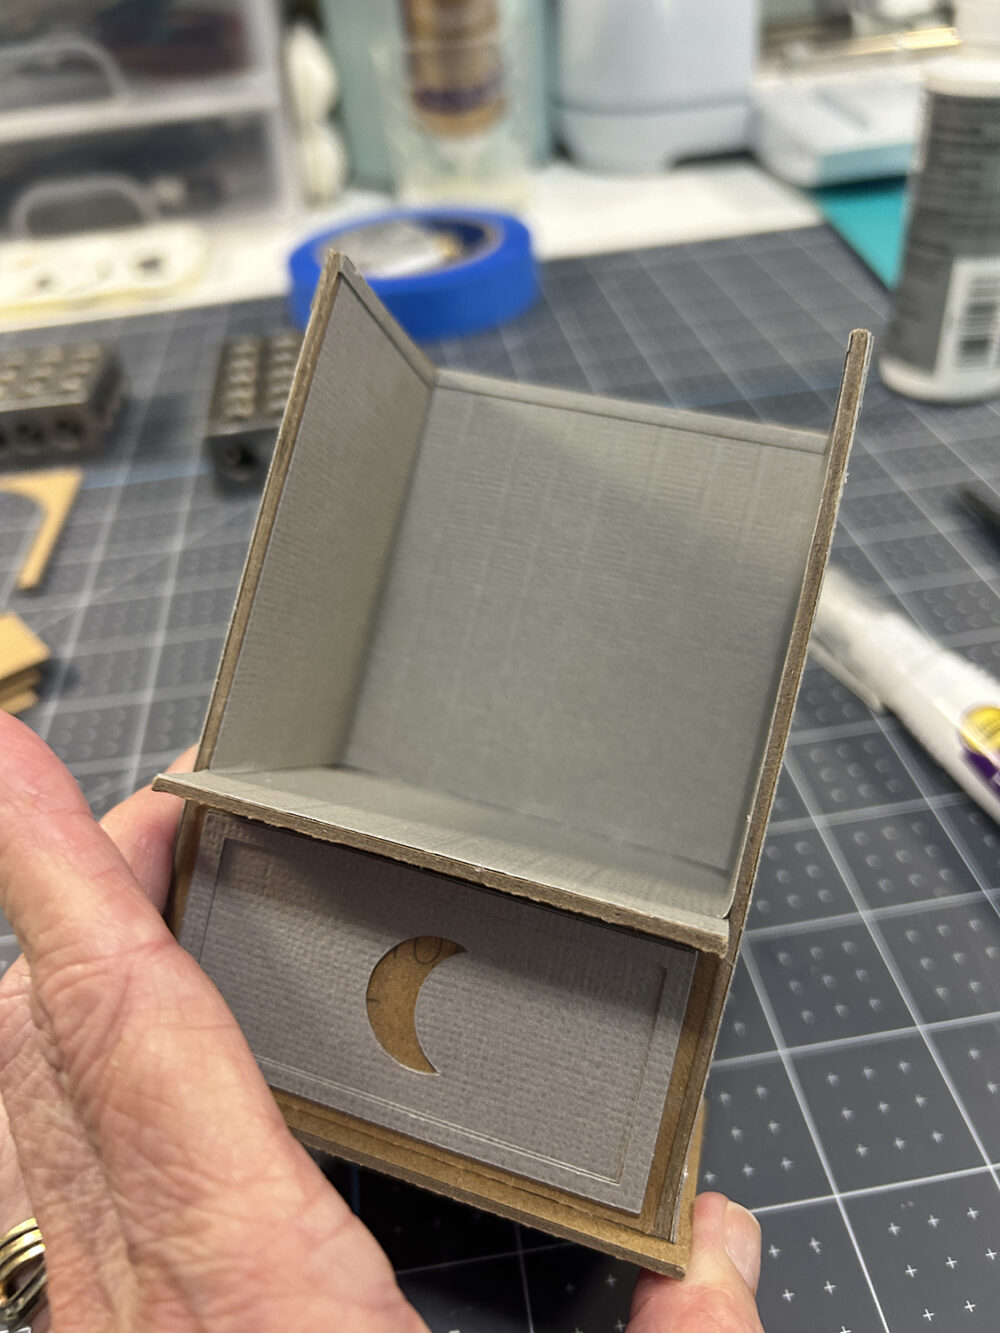
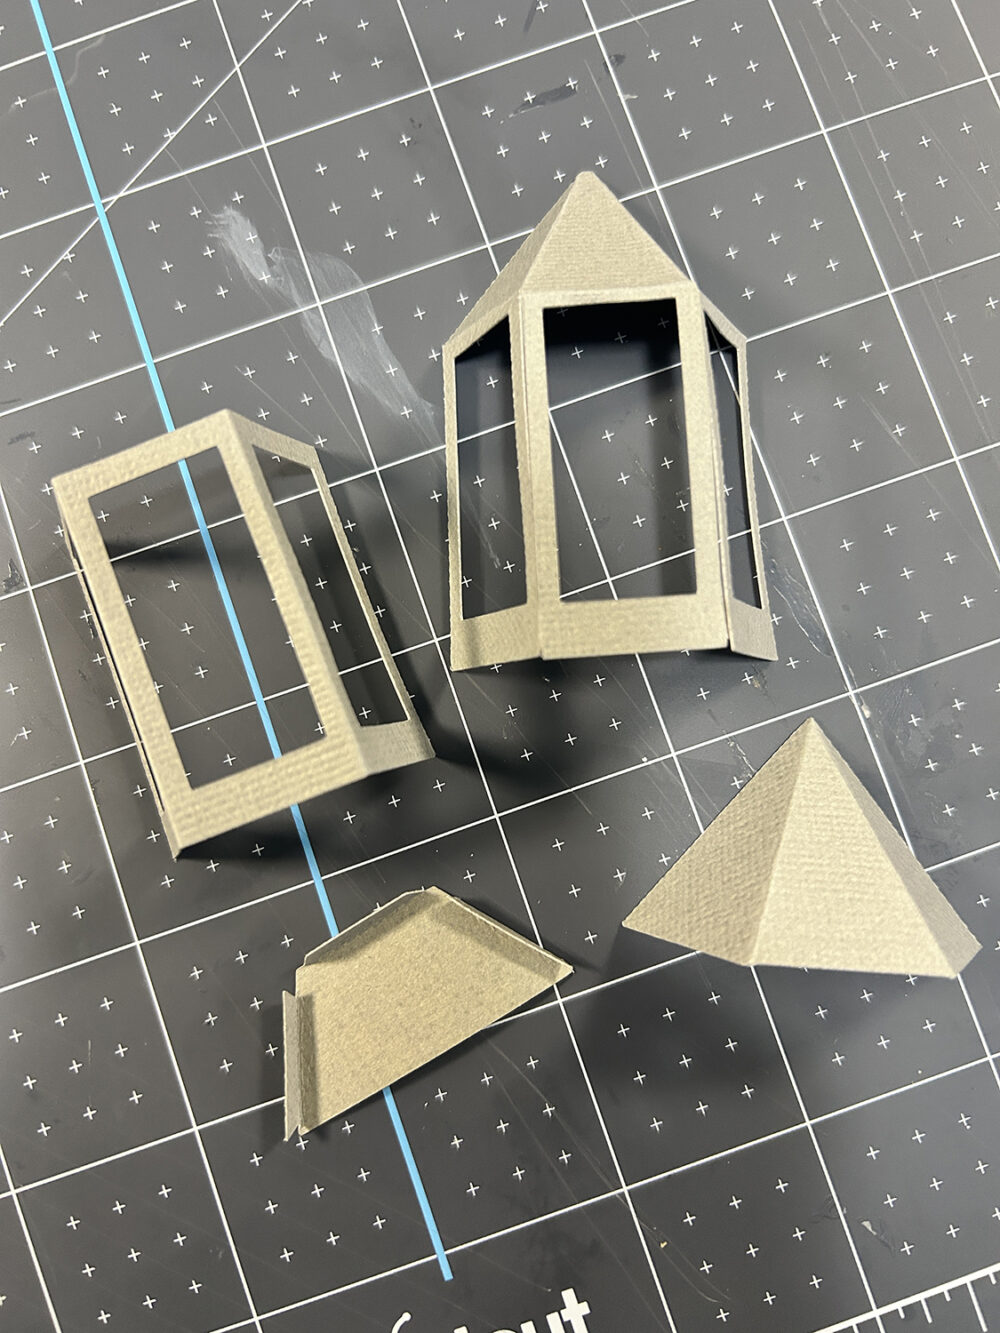
13. Fold all of the pieces shown at right. Use vellum or clear acetate inside the windows. Glue tabs on main piece. Glue the three window piece on top of main windows. Glue the bottom three pieces together with the fold piece on the top then glue into window structure bottom.
NOTE: Use a credit card or other sharp edge to help with the folds on these pieces. You want to be as exact as possible and have crisp folds for best results.
11. You can cut the final base out of any material you like. I just happened to have an extra piece of the chipboard so I used that. While this is the final base of the structure, you will may want to add the entire piece to a larger base with some landscaping around it. This base is where the awning poles will be attached when you get to that section.
12. Now would be a great time to paint the entire structure if you have not done so. Once painted you can take a craft knife and make some cuts on the board strips to make them look a bit older.
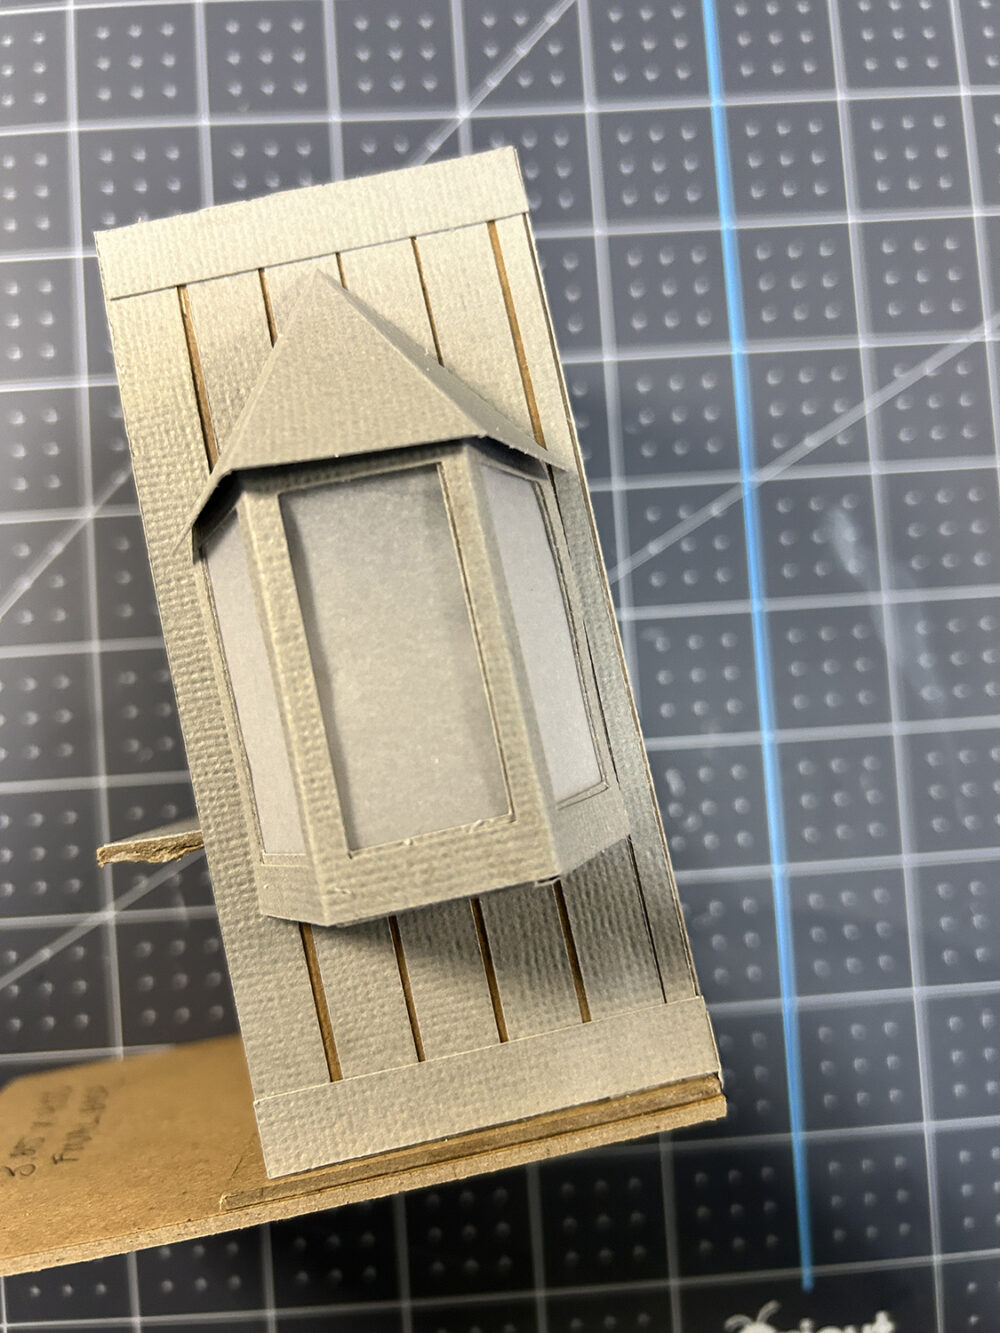
14. Glue the entire window unit to the main structure. Now glue the roof in place.
NOTE: If you will be lighting the inside of the cabinet you might want to poke a hole in the right side of the cabinet so that light can flow into the window unit.
Optional: Cut two square dowels to 1″ in length. Miter both ends and glue them under the window as structure supports.
Painting . . .
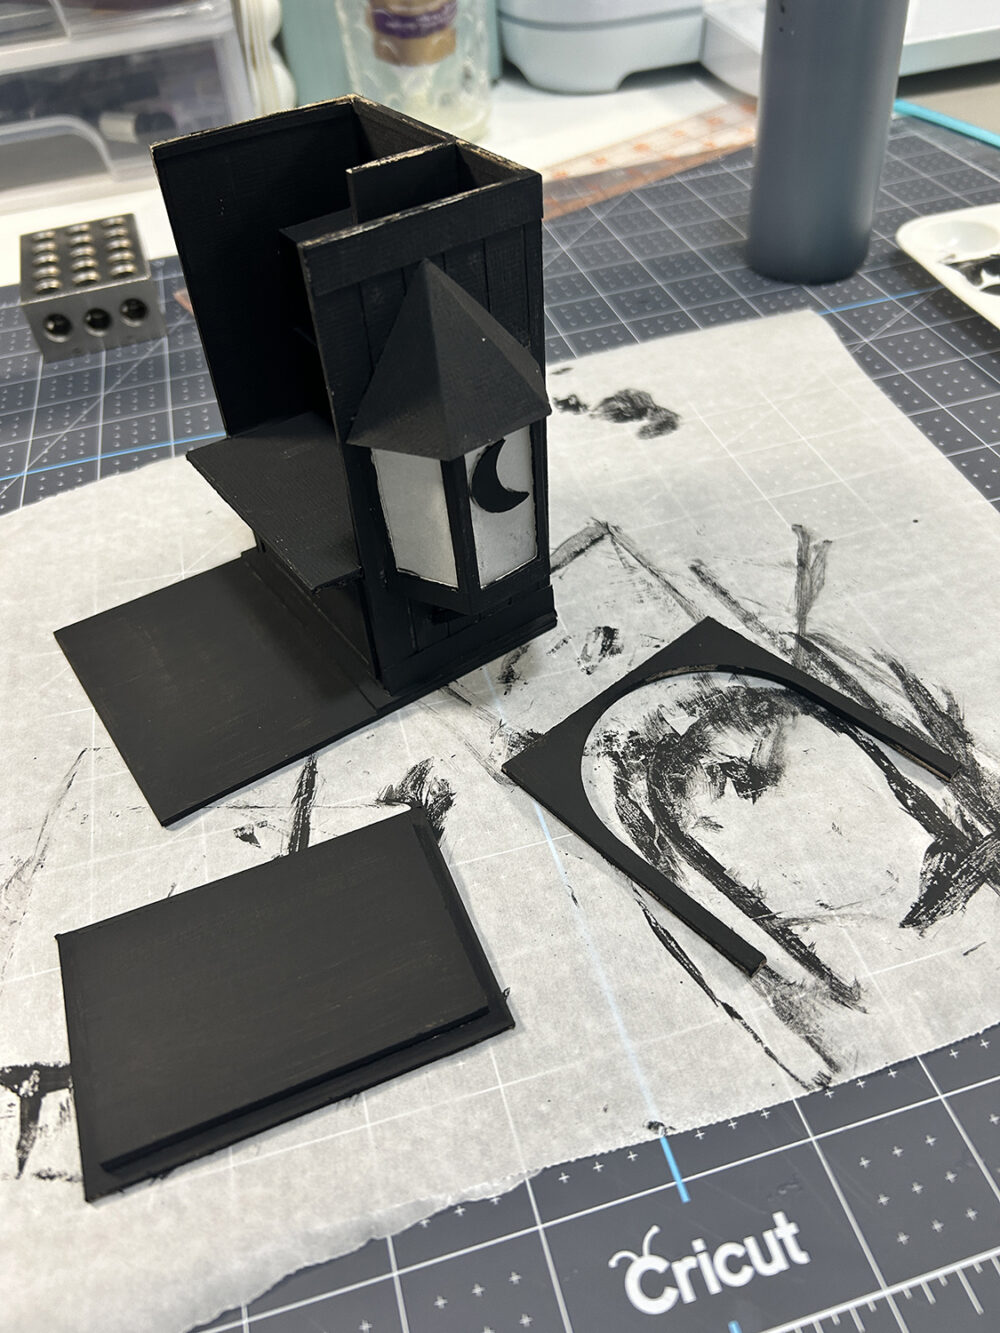
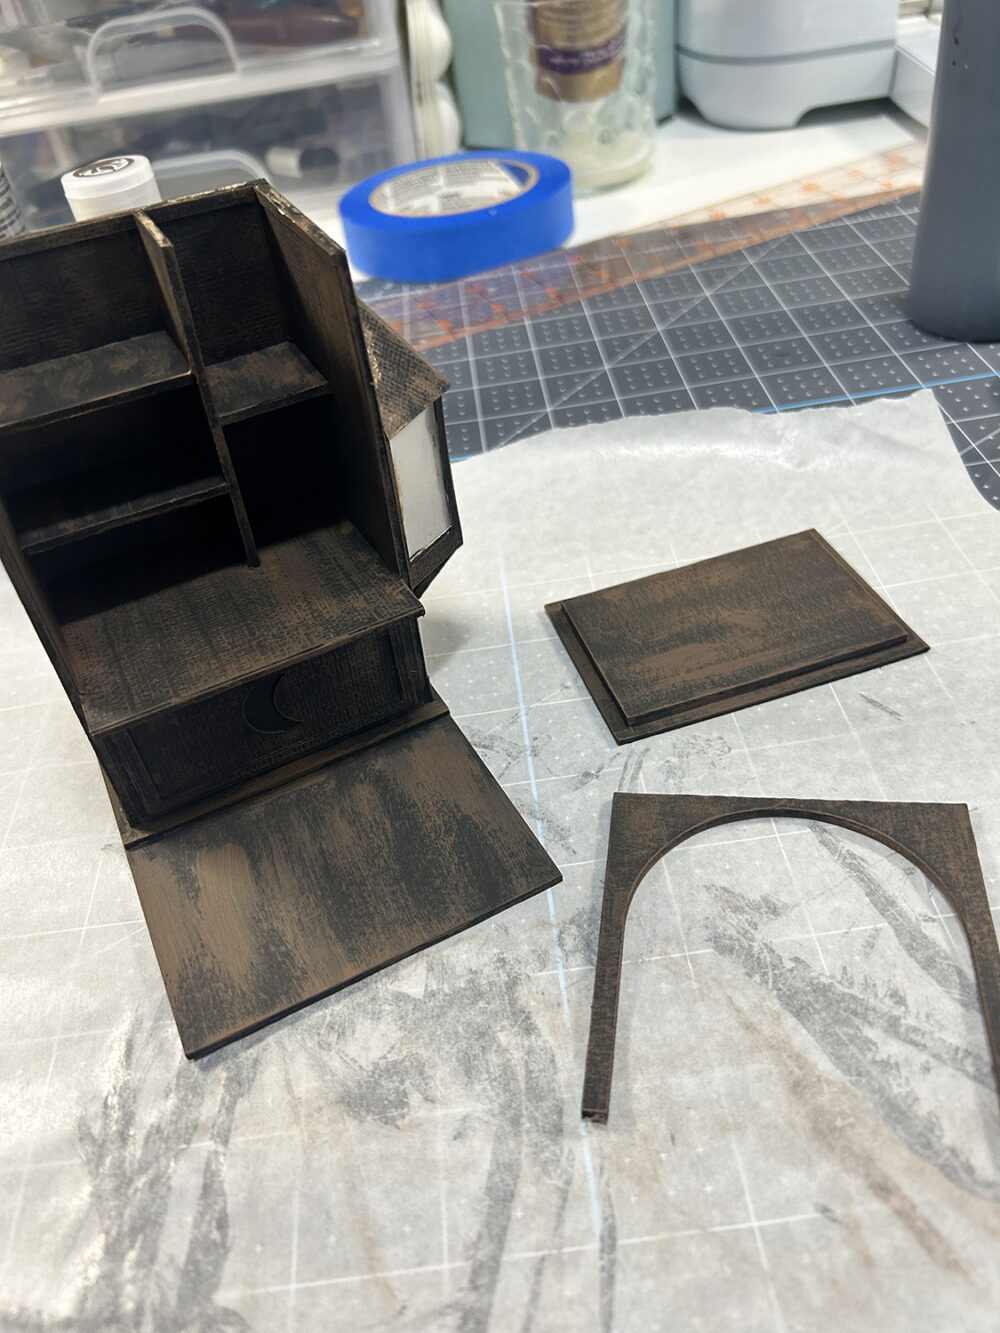
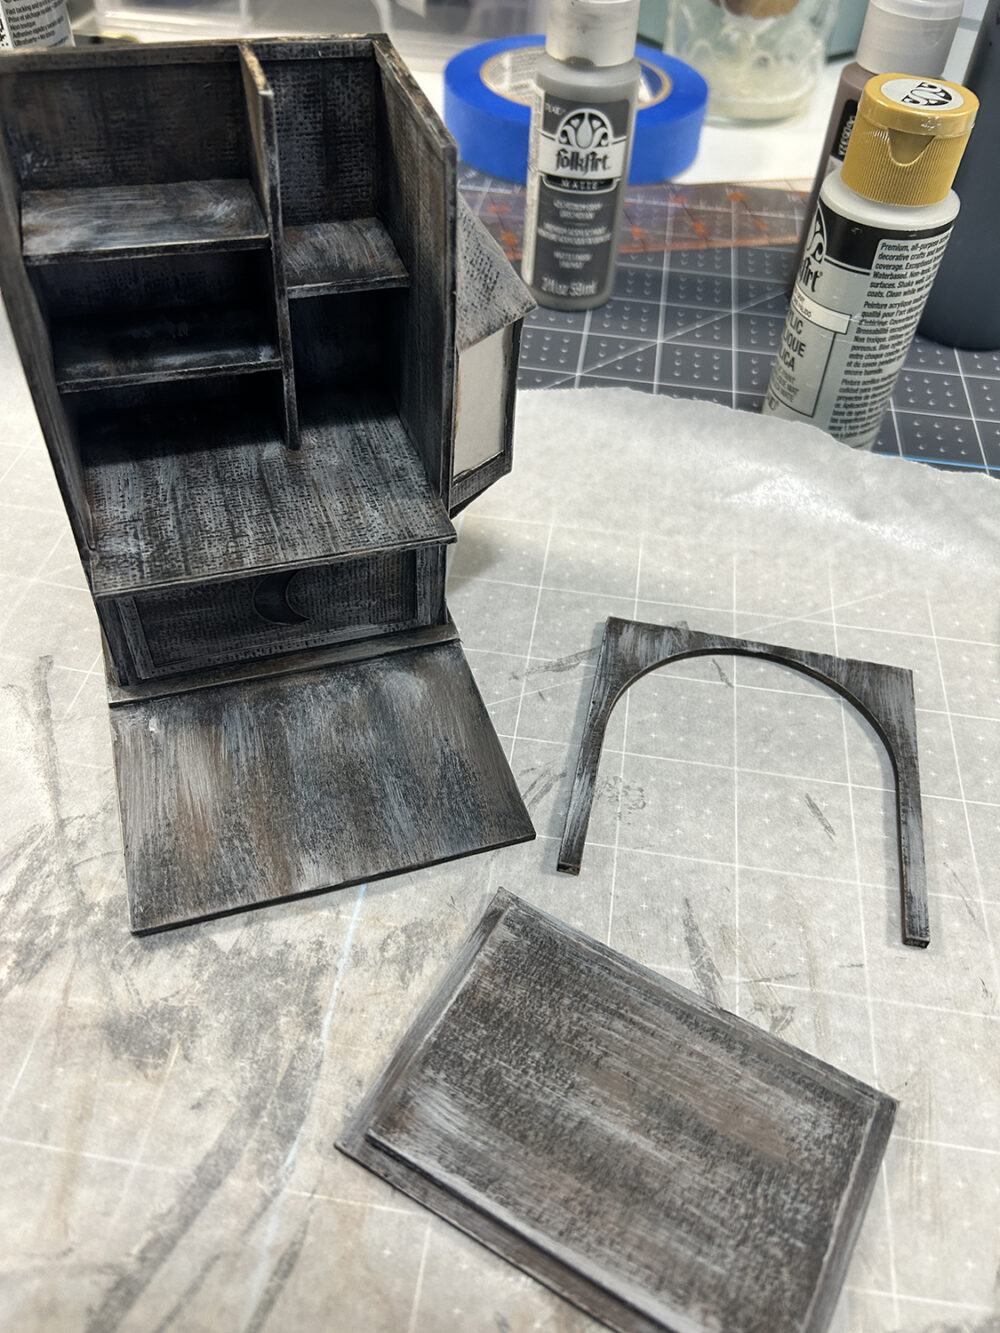
At this point I’m going to paint the entire structure including the cabinet front and roof. Here is my painting process. I’m using Folk Art Matte paints. Spray seal the entire piece when you have finished painting it.
- Paint the entire structure black. Let dry.
- Dry-brush with brown paint. (Coffee Bean)
- Dry-brush with grey paint. (Medium Grey)
- Dry-brush with light grey – very lightly (Pale Grey)
Finishing . . .
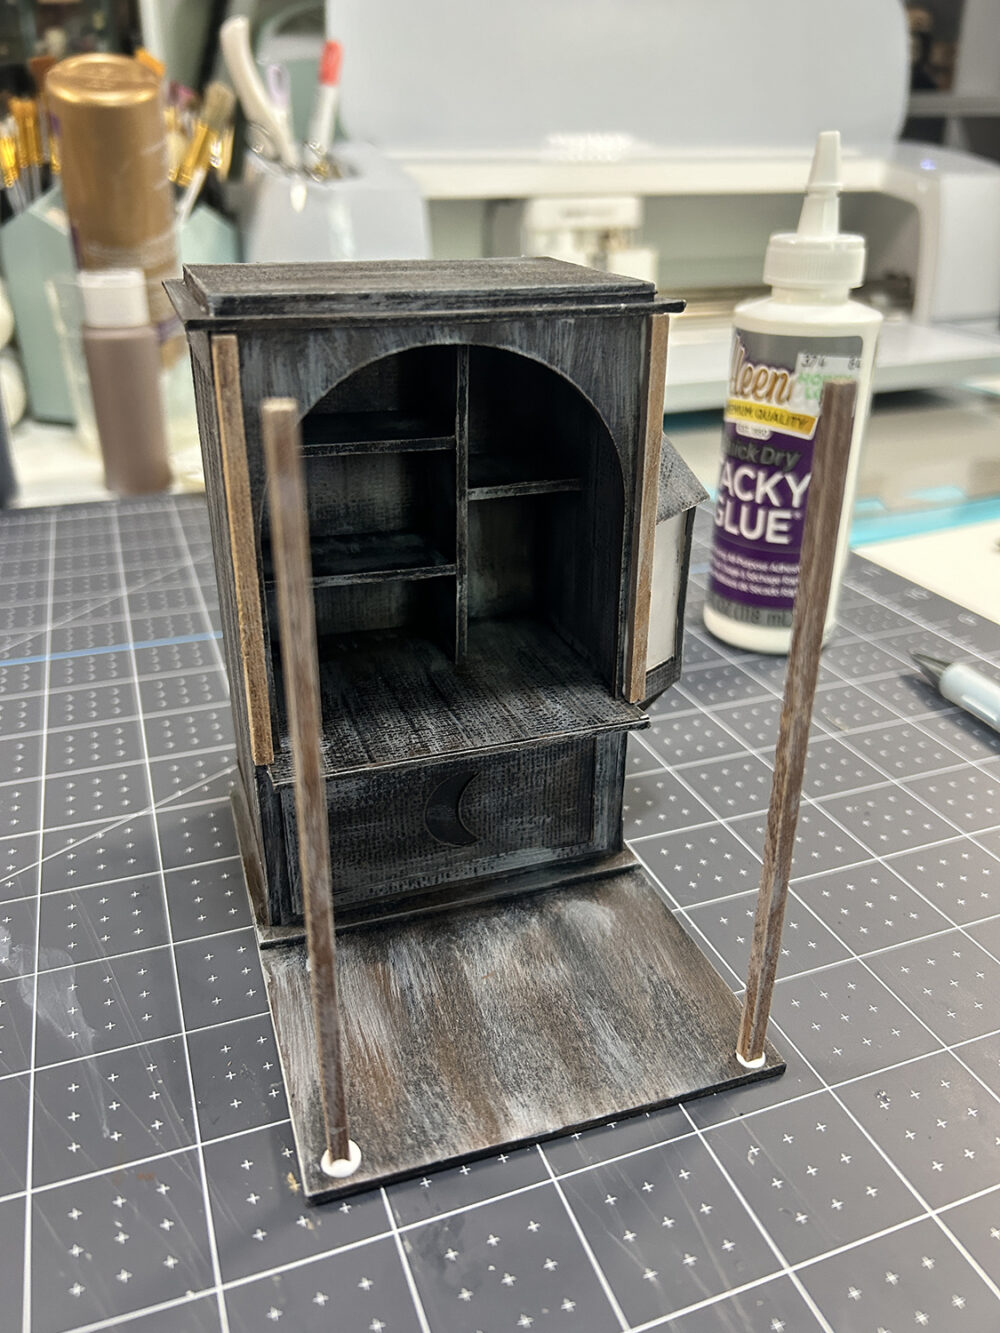
- Cut two 1/8″ square dowels to 4.5″ long. Then cut two small squares about 1/8″ long. Paint them brown then dry-brush with light grey. Glue as seen at left.
- Create the awning, making adjustments to the length as needed. Glue in place with the two small wood pieces on top as seen at right.
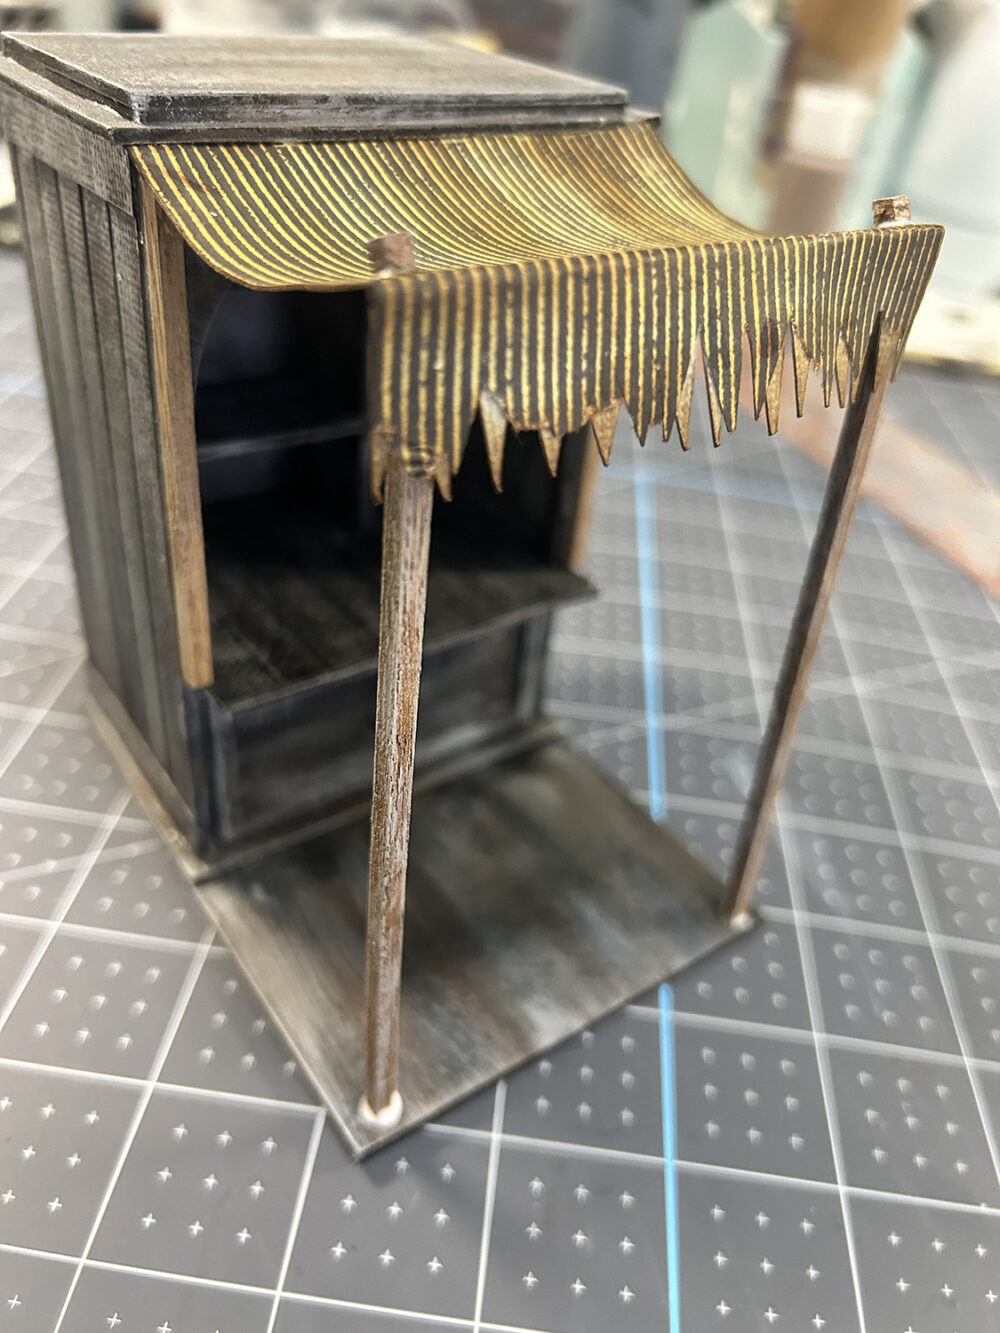
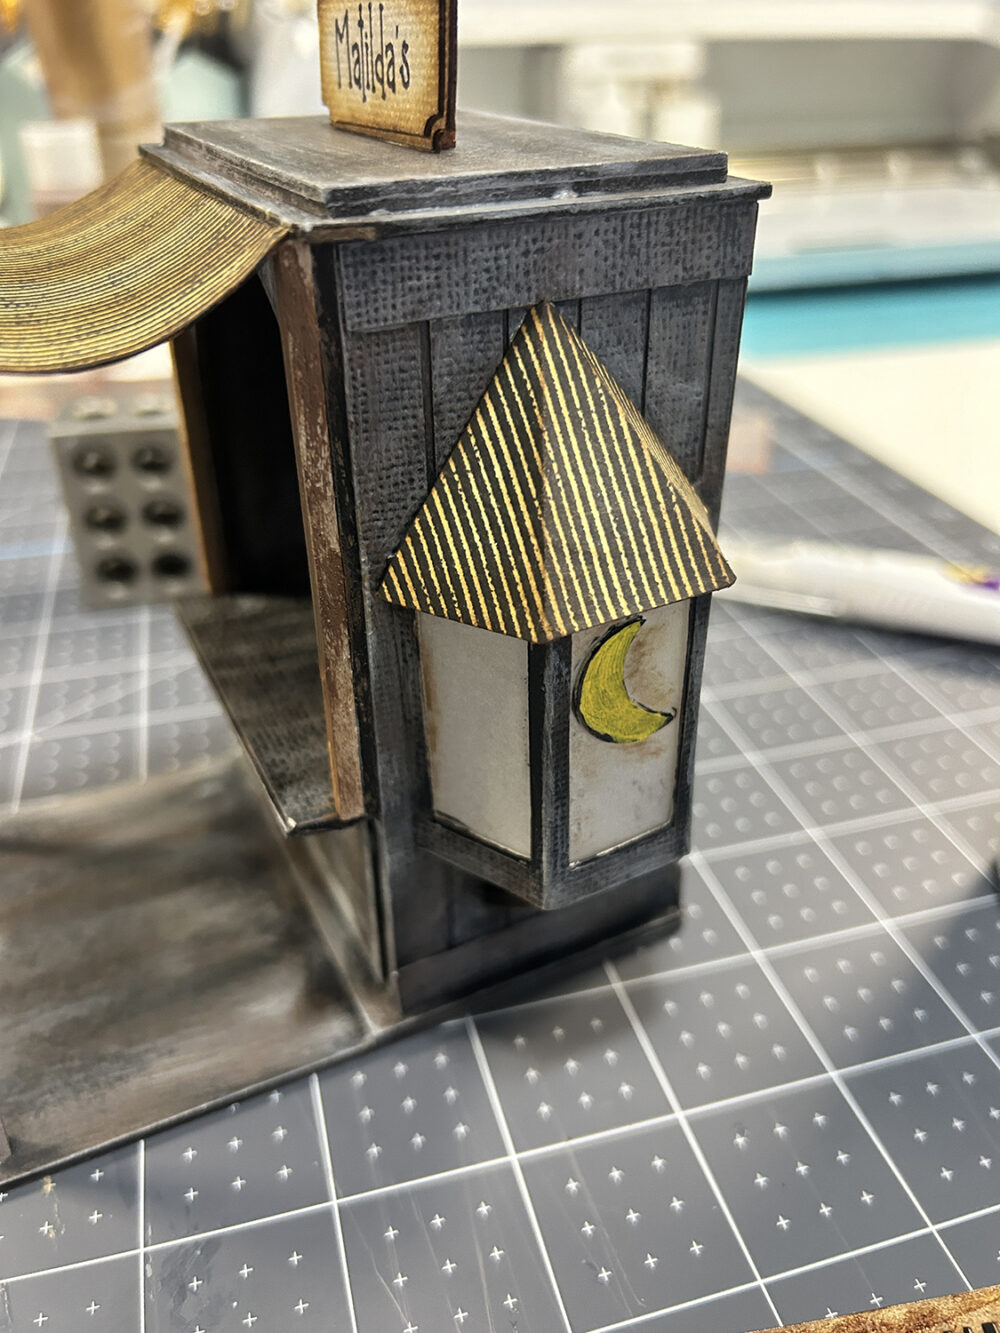
3. I’ve used the same awning paper to cover the roof on the window at right.
4. Color in the moon shapes in yellow or orange and then brush a tiny bit of brown paint on top to tone the yellow or orange down.
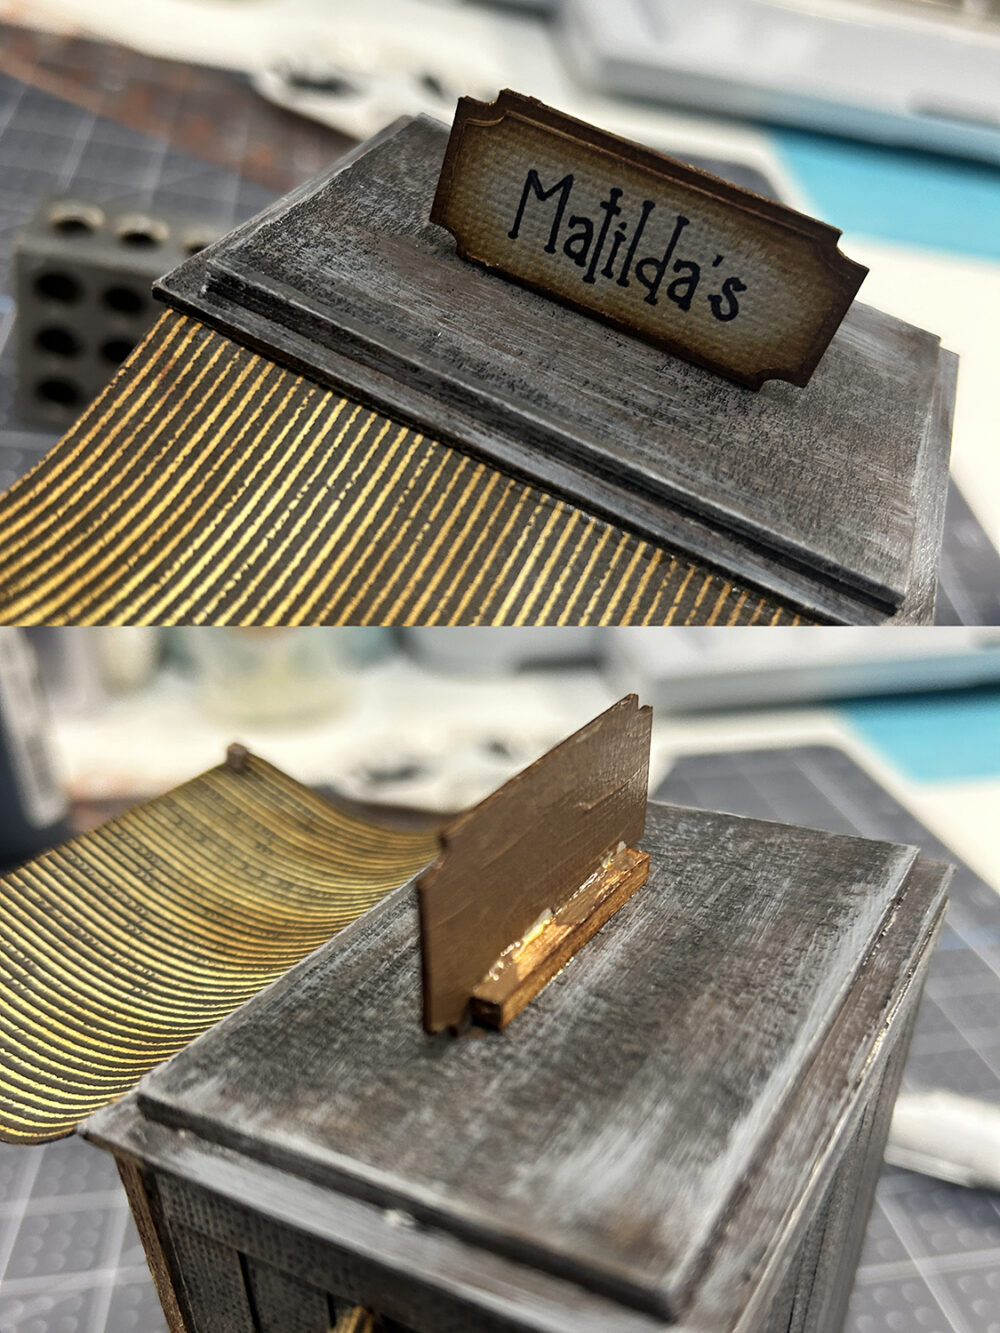
5. Make the sign by adding your own name in design space to one of the smaller sign blanks. Glue both small signs together, glue the two larger sign blanks together, then glue the smaller one in the center of the larger one. Cut a small piece of the 1/8″ square dowel and attach it to the back of the larger sign at the bottom. This will work as a base to attach the sign to the roof of the structure.
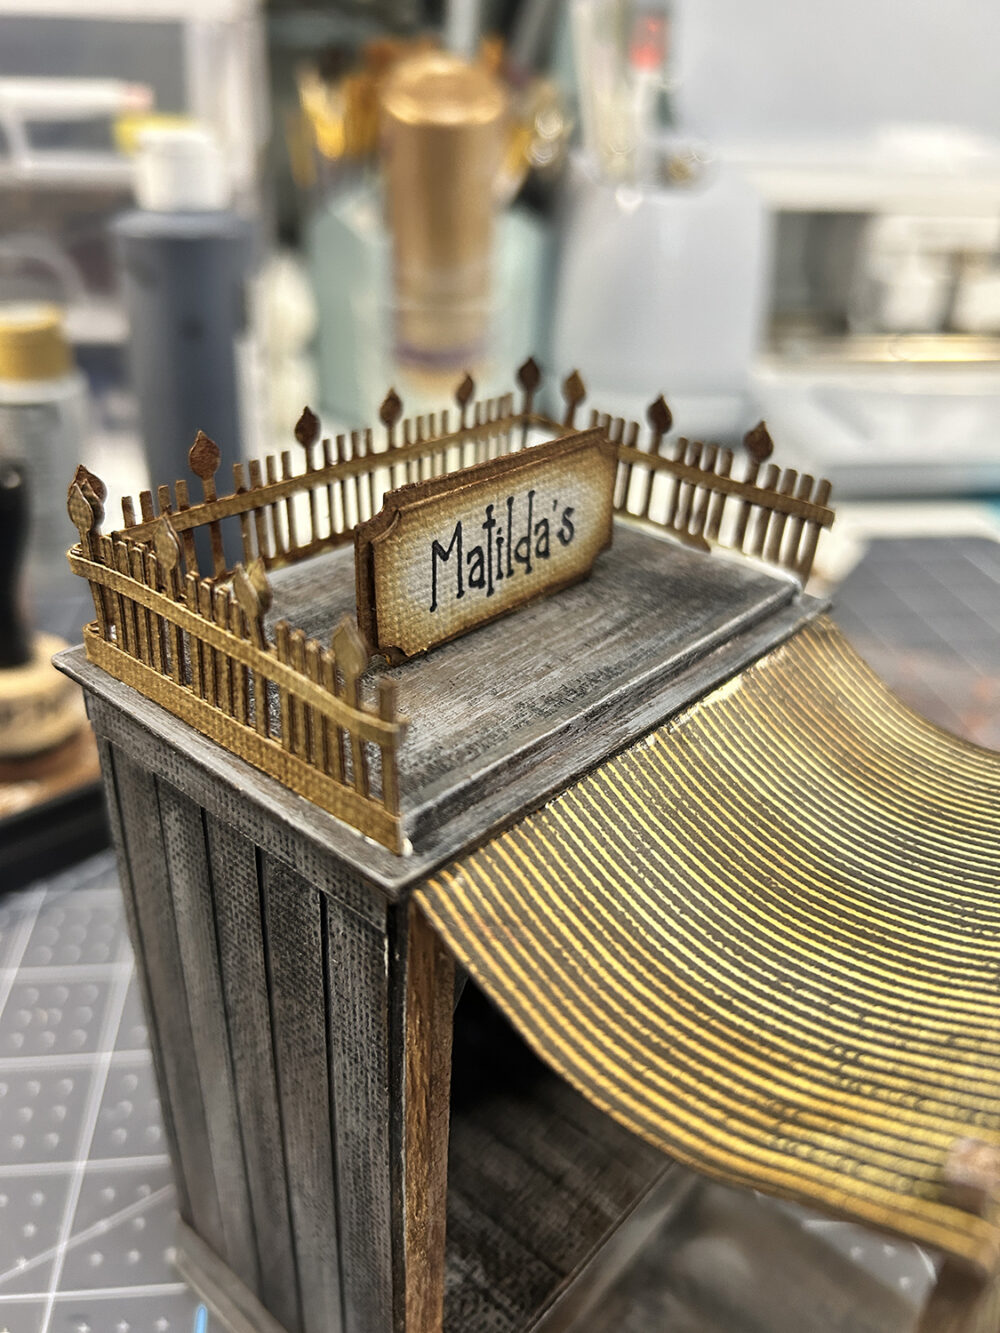
6. Glue two fence pieces together (if cut from cardstock – one layer if cut from kraft board). Glue the thinner strips to both sides of the fence. Glue the wider strip to the bottom of one side of the fence.
Paint or stain the fence as you like. I’ve used Vintage Photo Distress Ink on mine and sealed it.
Wrap the fence around the edge of the smaller rectangle on the roof. Start at the backside and wrap it around to both left and right sides then glue in place. The fence should not wrap around the front side of the structure.
NOTE: The side of the fence without the extra wide strip at the bottom is the side that should be glued to the rectangle.
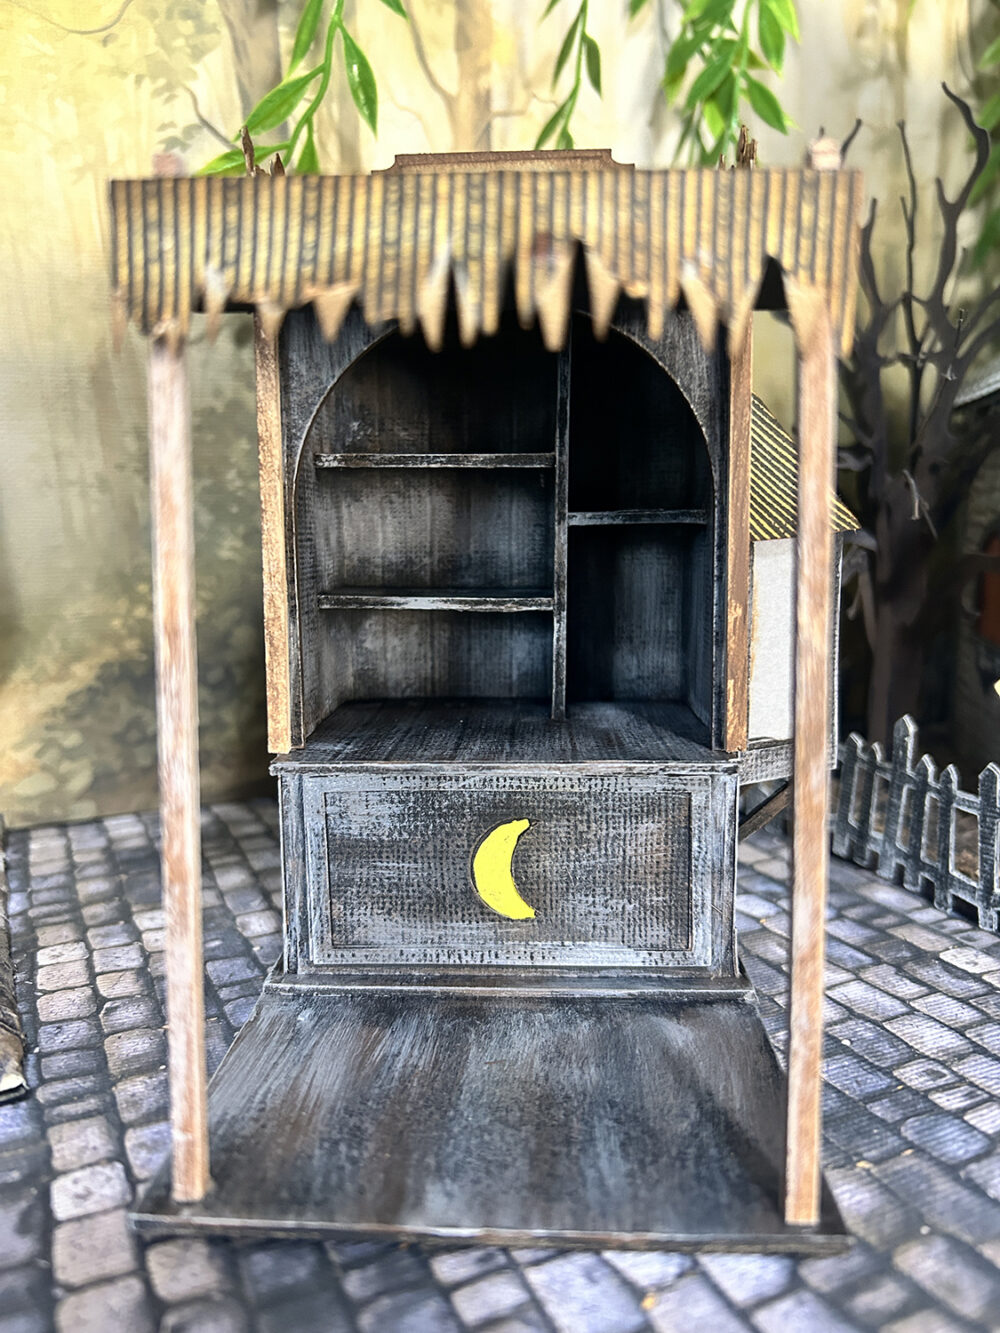
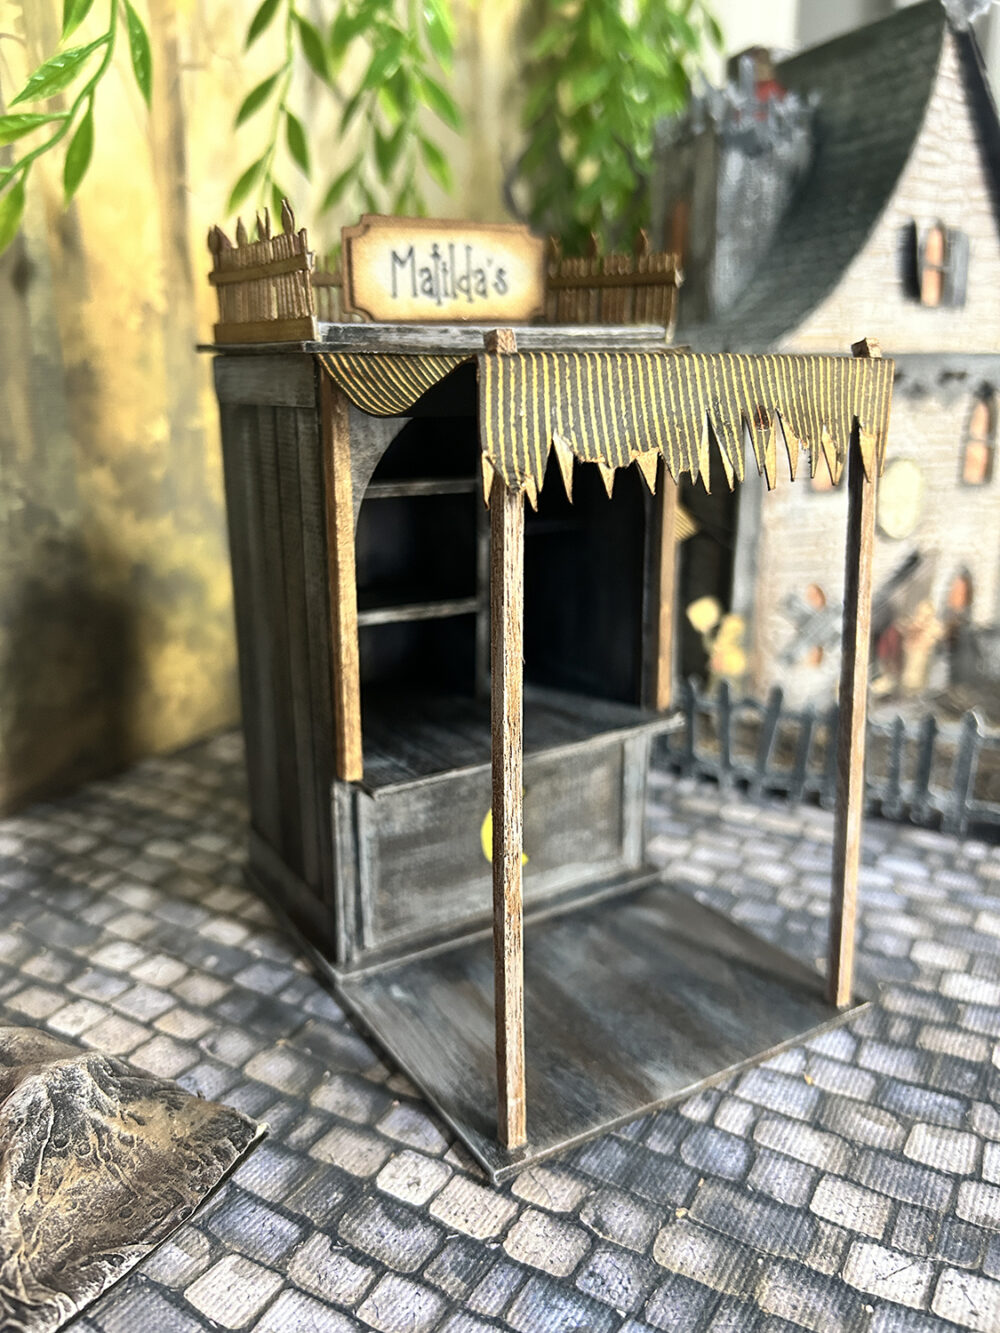
So pat yourself on the back if you have made it this far! What you choose to name, put on the shelves, and the type of stall you want is totally up to you! When you have finished your project I would love to see it so be sure to visit my FaceBook Group: The Covered Chipboard and TCC Quarter Scale Miniatures to post your pictures. I look forward to seeing everyone’s ideas.
Till next time . . . happy crafting!!!!
Teri


Leave a Reply
You must be logged in to post a comment.