Tutorial for Personal Use Only ©2016 Teri Hanson
VIDEO TUTORIAL
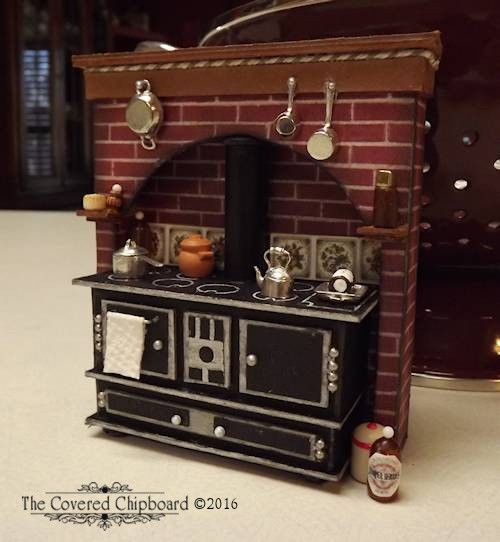
Finished and decorated example (tutorial is only for the stove & surround)
This Vintage Cook Stove is a super alternative for those who want the look but don’t want to pay the high prices of this type of ready-made product. It would look well in any type of vintage-themed or farmhouse-themed dollhouse and could easily be created with a natural color chipboard and painted like an enamel stove.
NOTE: The cook stove was created for a 1:24 (half-scale) house. If you have a different size house you will have to double or half the measurements I have given in the tutorial. If you want to size the files up for a larger version you will likely need to use the “Contour” button to separate the file parts out as they may get to large to fit on a 12×12 cutting mat when all grouped together.
NOTE: Cricut software updates often can mess up the file sizes when uploaded into design space. If files should happen to upload in a huge size please use the size chart below and size each file as you upload it. Save this project as your working file in design space.
Sizes for Uploaded files (use in case they happen to upload as huge files)
- tccVintStove1C – 9.37 x 6.32
- tccVintStove2C – 9.85 x 11.38
- tccVintStove3C – 10.07 x 5.36
- tccVintStove4C – 9.15 x 9.03
- tccVintStove5C – 9.14 x 1.62
- tccVintStove6C – 6 x 1.51
- tccVintStove7C – 6.86 x 3.25
Materials . . .
- Graffix Medium Weight Chipboard in natural or black (as I’ve used)
- Black Soot Distressing Ink
- Aleene’s Fast Grab Tacky Glue
- small thin piece of chipboard or heavy cardstock
- scraps of black heavy cardstock (for stove drawer facings)
- white ink pen
- silver metallic sharpie pen
- tiny ball chain or tiny scale appropriate hinges
- tiny beads or bead head pins
- small length of thick silver wire (easily cut and bendable – for towel rod)
- brick sheet or my brick printable paper (paper is inside the download you got when you ordered the tutorial)
- (4) flat round beads for stove feet
Starting with the Stove section . . . Cut the following pieces from the med weight chipboard
- (2) 3″ x 1-5/16″ – bottom and middle plates
- 3-1/4″ x 1-5/16″ – top plate
- (2) 1/2″ x 2-3/4″ – bottom front and back
- (2) 1/2″ x 1-3/16″ – bottom left and right sides
- (2) 1″ x 2-3/4″ – top front and back
- (2) 1″ x 1-3/16″ – top left and right sides
- 1-1/2″ high by . . . (stovepipe created by rolling a piece of thin chipboard or heavy cardstock around the base of a craft knife – about 1/2″ in diameter)
- 1/4″ x 2-1/2″ – bottom facing drawer front
- (2) 1″ x 3/4″ – top facing drawer fronts
- 1/2″ x 3/4″ – top middle facing drawer front
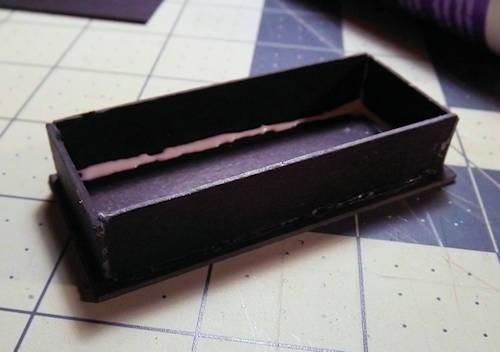
Begin by laying the bottom plate flat on the table. Glue the front, back then sides to the bottom plate, they go just a tad inside the outside edge of the bottom plate. The sides will lay on top of the front and back edges. As seen below, I added extra glue on the inside for support. This won’t show when finished.
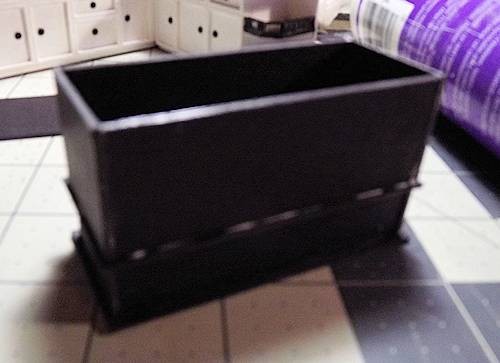
Glue the middle plate on next so that it extends evenly over the sides just a tad. Then glue the top front, back and side pieces onto the middle base just as you did the lower sides, a tad inward from the outside edges of the middle plate.
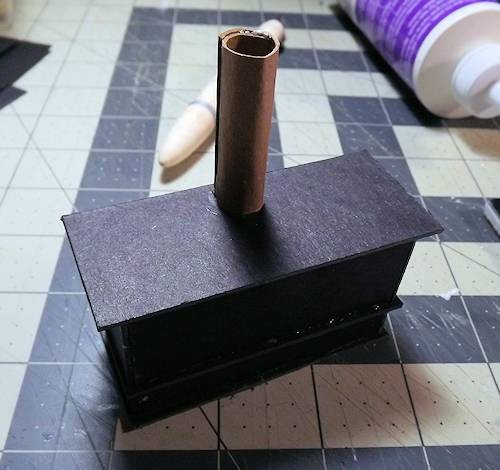
Glue the top plate on, it will extend over the sides a tad. Make the stove pipe and glue, as seen below, to the top plate. You can paint the stovepipe now or wait till later.
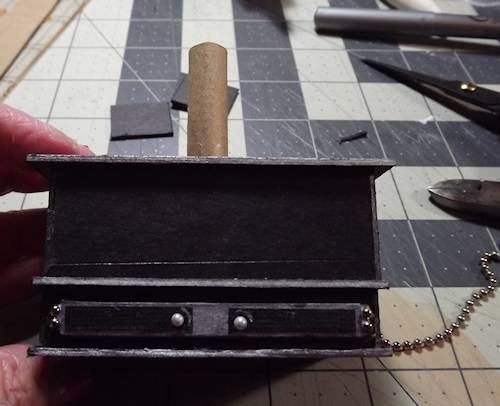
Use the silver metallic pen on the edges of all the flat plates as seen below. Color one entire side of the bottom facing, including the edges, with the silver sharpie marker then glue on to the bottom front as seen below. Cut 2 pieces of black cardstock to: 3/16″ x 1″ and glue to the drawer facing as seen below. Attach ball chain / hinges to the sides and ball head pins as shown below. Color with the silver metallic marker.
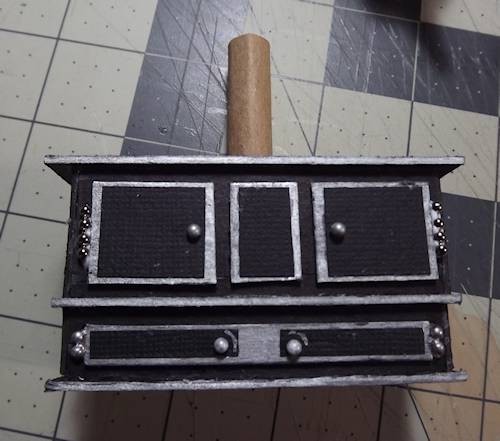
Repeat the steps above for the top drawer facings as shown below. Cardstock was cut to: (2) 3/4″ x 11/16″ and (1) 6/16″ x 11/16″. Add the hinges and knobs. If you have not done so . . . paint the stovepipe now and let dry.
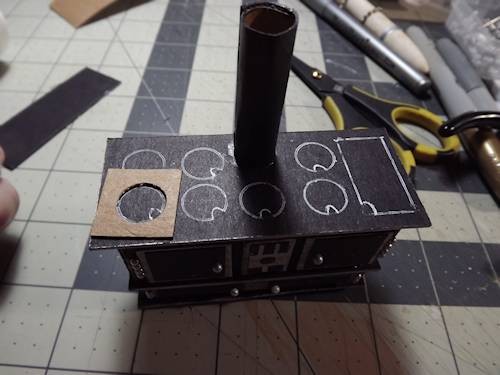
Use the white ink pen to draw the burner plates on top of the stove as seen below. Find something to trace around or as I’ve done, punch a 1/2″ circle in thin chipboard or heavy cardstock to help you draw the circles.
NOTE: these kind of stoves had lift out heavy cast iron burner plates. There was always a finger hole area so you could reach in and pull the plate out for cleaning. When you draw your circles, don’t complete them and add the finger hole as seen below. They also had a warming plate on one or both sides as shown by the drawn rectangle.
Now on to the Stove Surround! Here’s a look at the pieces used to create the surround.
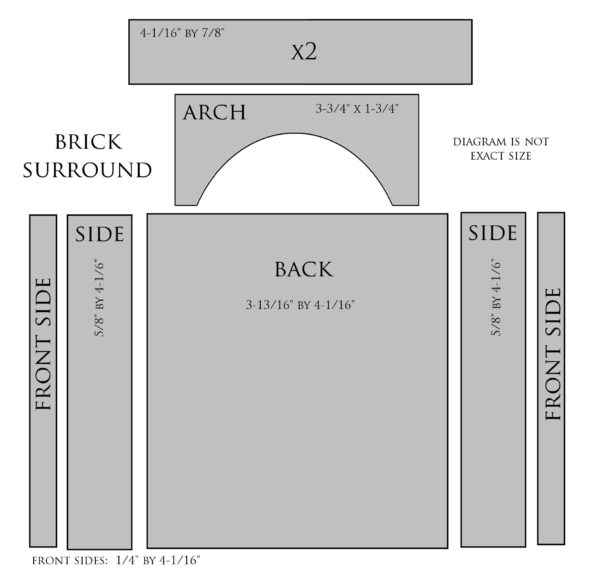
Cut from the medium weight chipboard . . .
- (2) 4-1/16″ x 7/8″ – mantle top
- (2) 1/4″ x 4-1/16″ – front sides
- (2) 5/8″ x 4-1/16″ – left and right sides
- 3-3/16″ x 4-1/16″ – back
- 3-3/4″ x 1-3/4″ – arch
Glue the left and right sides on TOP of the back piece. Before they dry completely, glue the front sides on TOP of the back piece and underneath the left and right sides, creating closed off areas on the left and right sides of the back piece.
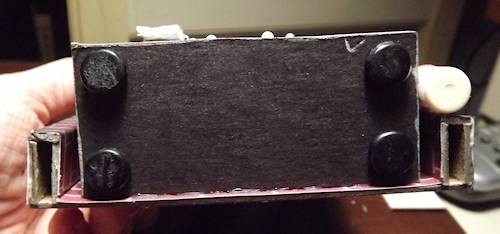
Print off the brick paper and glue it to the left and right sides, wrapping it around the entire side section, from the outside edges to the inside edges stopping at the back section. Now cut a piece of the paper the size of the back area and glue it in place, covering the entire back section (inside/front view). You can also cover the entire back of the piece if you want, or leave it plain.
You can see how the sides were covered with paper in the very top first image.
**To cut the half circle in the arch chipboard piece, locate a circular object the correct size in your home, lay it on top of the arch chipboard piece and trace around it.
Cover the arch piece with the brick paper, being careful to match up the brick paper with the left and right sides! Don’t fret if the paper doesn’t match exactly as you can cover it with the two shelves on the left and right sides.
For the arch, cut a rectangle piece of paper, glue to the arch, then cut slits in the paper from the bottom of the paper up to the arch, all around the half circle area. Fold these pieces of paper under and to the back of the arch and glue them down. This will leave a nice covered edge up under the arch. Glue your stove into the recessed area of the surround. Glue the arch into place by connecting it to the left and right sides.
NOTE: If you want, you can wrap the arch brick paper around the entire front and sides of the surround and not worry about matching the brick pattern.
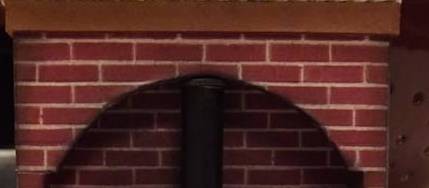
Glue the two mantle pieces of chipboard together, one on top of the other. Paint the mantle with brown paint or color it with a brown Alcohol Ink marker or stain it. Glue to the very top of the brick surround leaving a tab hanging over on the sides and the front of the surround.

Now cut a strip of chipboard 1/4″ by 6″, stain/paint it brown, then wrap it around the surround and glue into place, just under the mantle as seen in the image above. Cut off excess chipboard.
And that’s it! You’r all done and ready to dress it up!
I hope you enjoyed this tutorial and that you’ll watch for others to show up soon. You can also find some FREE tuts for dollhouses and furniture on my Blog under The Dollhouse Project top drop down menu!
Have a great day and thank you for your purchase!
Teri

