Featuring: Wizarding World The Burrow 3D Puzzle
‘Touchdown!’ said Fred as, with a slight bump, they hit the ground. They had landed next to a tumbledown garage in a small yard and Harry looked out for the first time at Ron’s house.It looked as though it had once been a large stone pigsty, but extra rooms had been added here and there until it was several storeys high and so crooked it looked as though it was held up by magic (which, Harry reminded himself, it probably was). Four or five chimneys were perched on top of the red roof. A lop-sided sign stuck in the ground near the entrance read ‘The Burrow’. Round the front door lay a jumble of wellington boots and a very rusty cauldron. Several fat brown chickens were pecking their way around the yard.”It’s not much, but it’s home,” said Ron. “It’s brilliant,” said Harry happily, thinking of Privet Drive.
- Finished size: a bit smaller than 1:48 scale. 10″ Square by 17″ high.
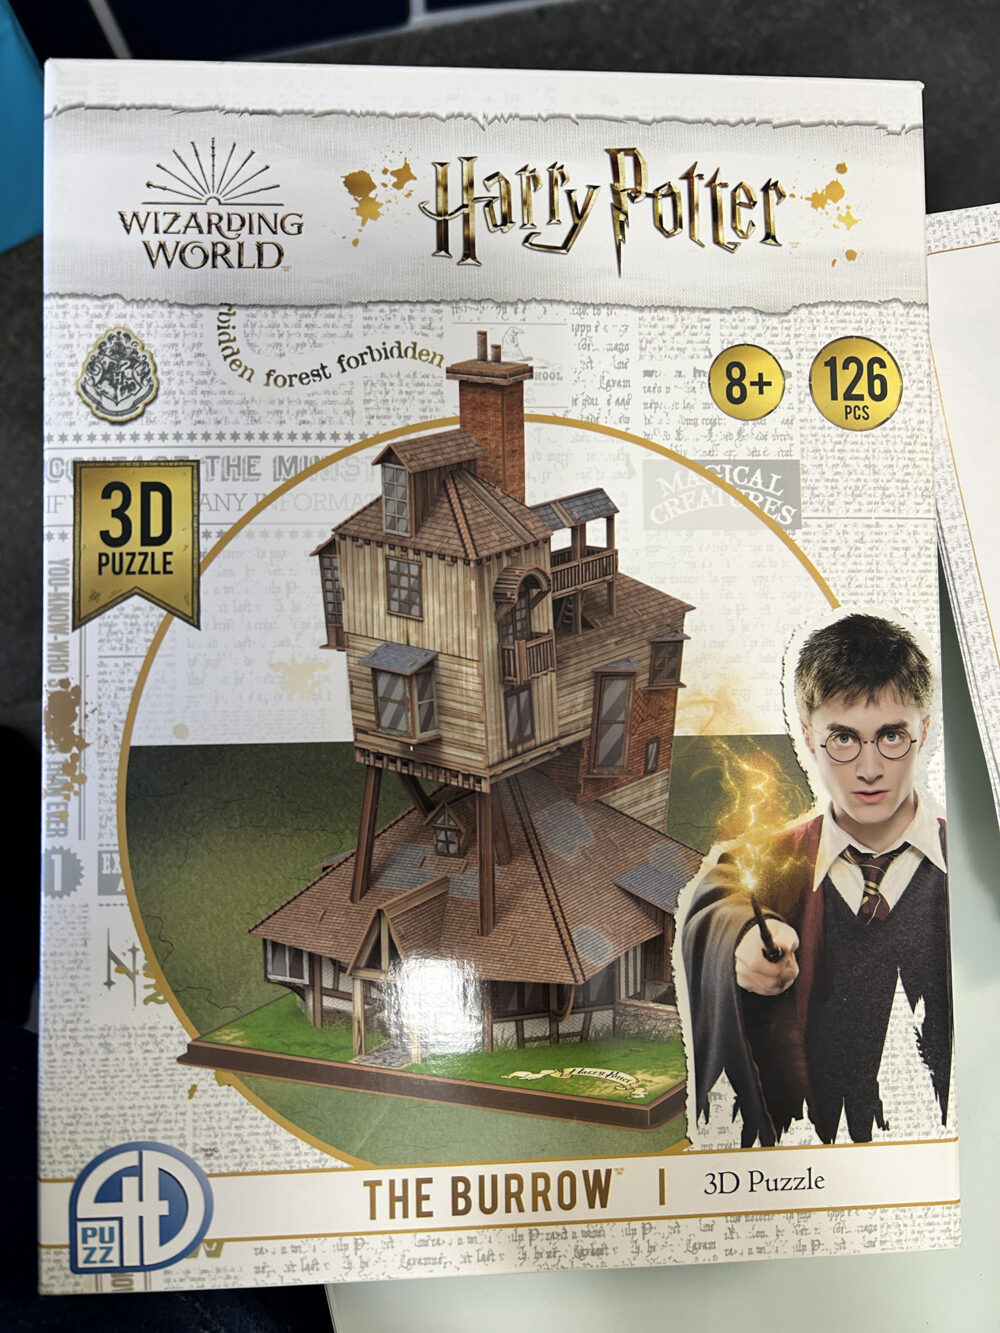
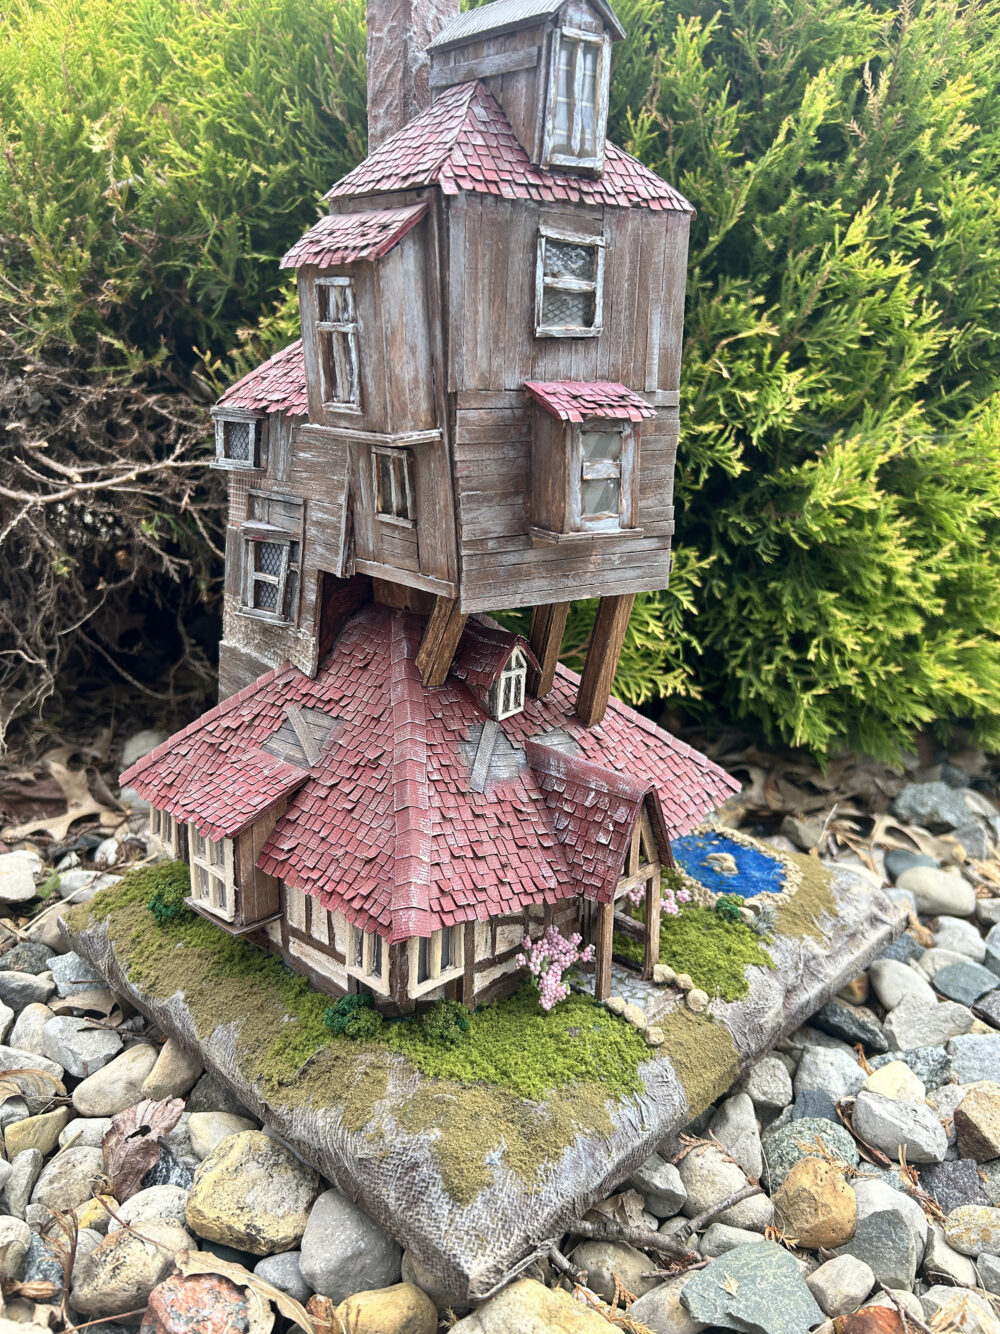
From the moment I saw the Burrow I was in love with it and wanted to live there. All the quirkiness, lopsided walls, and rooms just called to me making me want to view the inside. I knew one day I would build a miniature of it but was just lazy about it until I ran across a video on YouTube.
Zest Visions has a video on YouTube featuring a fantastic modification for this kind of kit. I believe she has done four kits from the series using this same method. Her video inspired me enough that I purchased the kit and have started modifying it. I can’t wait to see the finished project!
Building The Burrow was a bit of a slow process because you must decide what tabs to cut off or trim depending on your finishing ideas but it’s truly a very fun time and you don’t need expensive materials. I found a Miter Shear tool convenient for cutting popsicle sticks, which can be found on Amazon for under $20 if you don’t have one.
As you can see from the image below, I’ve attached the base to a piece of foam core and have started finishing the main floor walls.
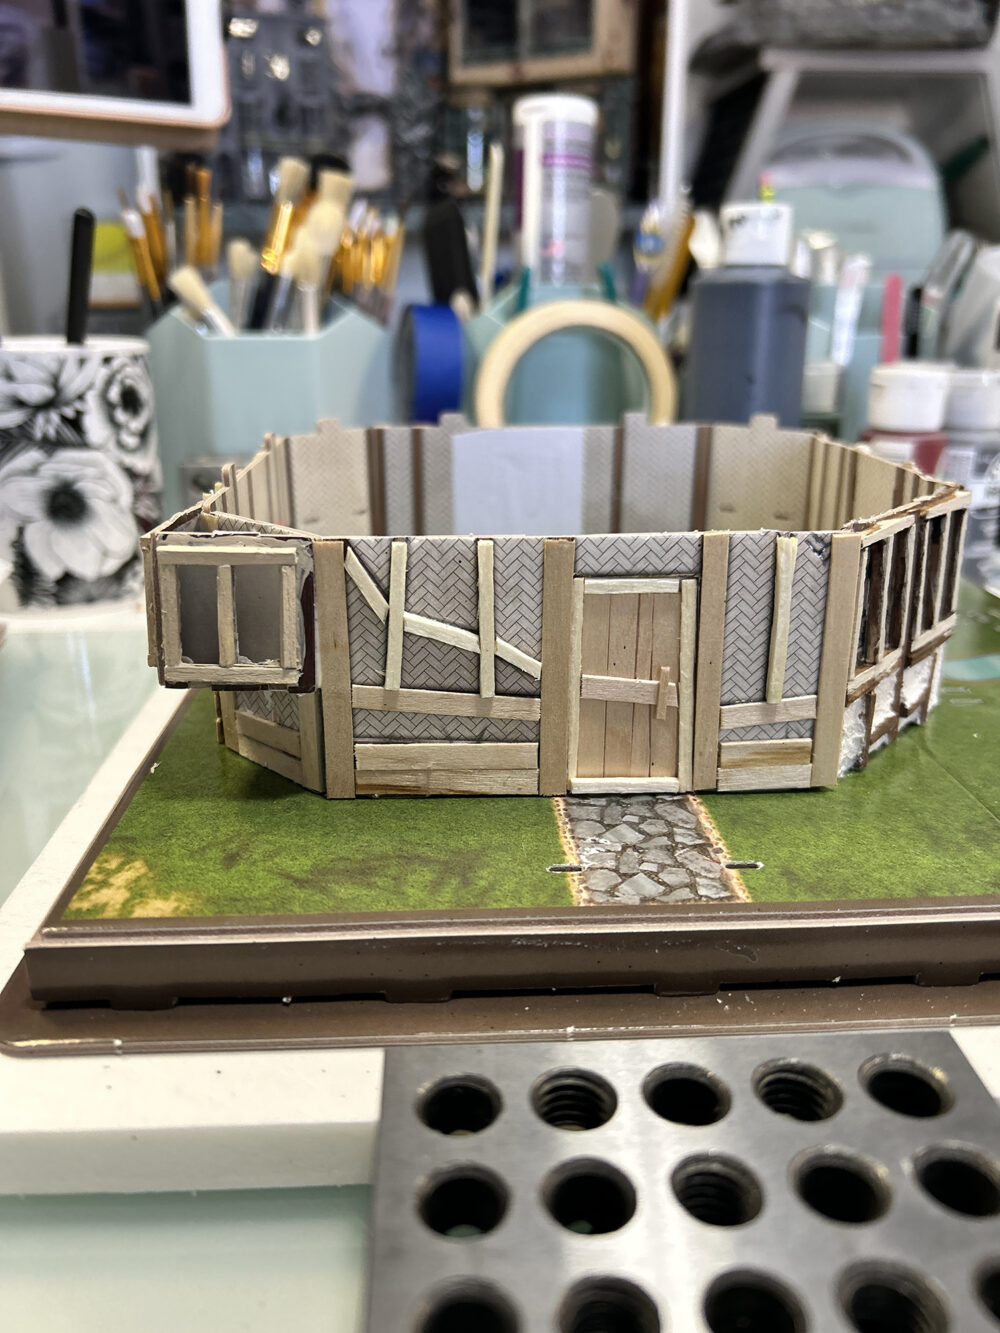
I’m using popsicle sticks and square wood dowels to add all wood accents to the walls and around the windows. I’ll attach larger square wood dowels for supports that rest under the window and in other parts of the structure.
*Coffee Bean acrylic paint by Folk Art for wood stain and Ranger Grit Paste for wall texture.
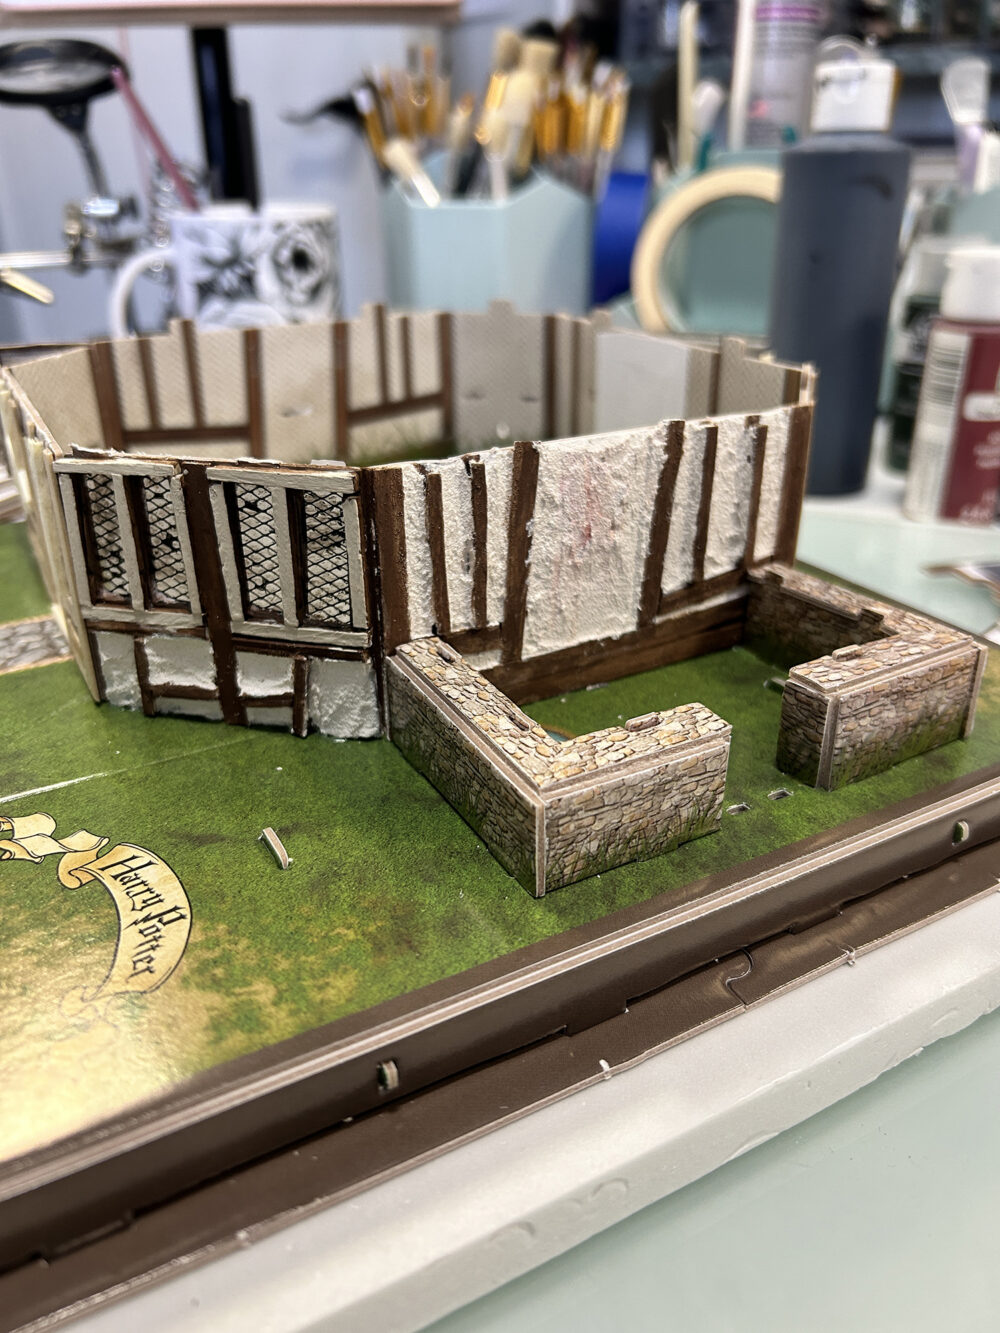
Looking closely at the second image above, you can see that I have added mesh to the windows. Many of the windows in this build will be different styles created with mesh, plastic, and vellum. I’ve used a wire form mesh in a 1/8″ pattern material on most windows. You can easily paint the mesh with an acrylic paint and finish it with a matte spray sealer.
Because I want the structure to be permanent and in many places, To hide the tabs, I’ve cut them off and glued some parts together. Both bases are glued to each other as well as the foam base. I’m also gluing all the walls to the base and each other. I left the bottom tabs on the walls but removed all top tabs except those on the very back wall and the one by the set of double windows where the beam has been added to support the roof. Leaving the back wall top tabs gives you something to help align the roof properly when you attach it.
I built both the chimney and roof at the same time. Once in place, I’ve glued the roof onto the inner parts where each roof section meets the other section. Once glued, you need to use a craft knife and remove as many tabs that stick out on the chimney and roof so they do not interfere with shingles and brickwork.
At this time it’s best to go ahead and build the remaining parts of the structure but don’t glue the pieces. This will help you to see where things go and what parts touch or hide other areas.
You can see in the image below right that I have marked off where other pieces go that attach to the roof. This keeps me from placing shingles on those areas and preventing the pieces from fitting correctly.
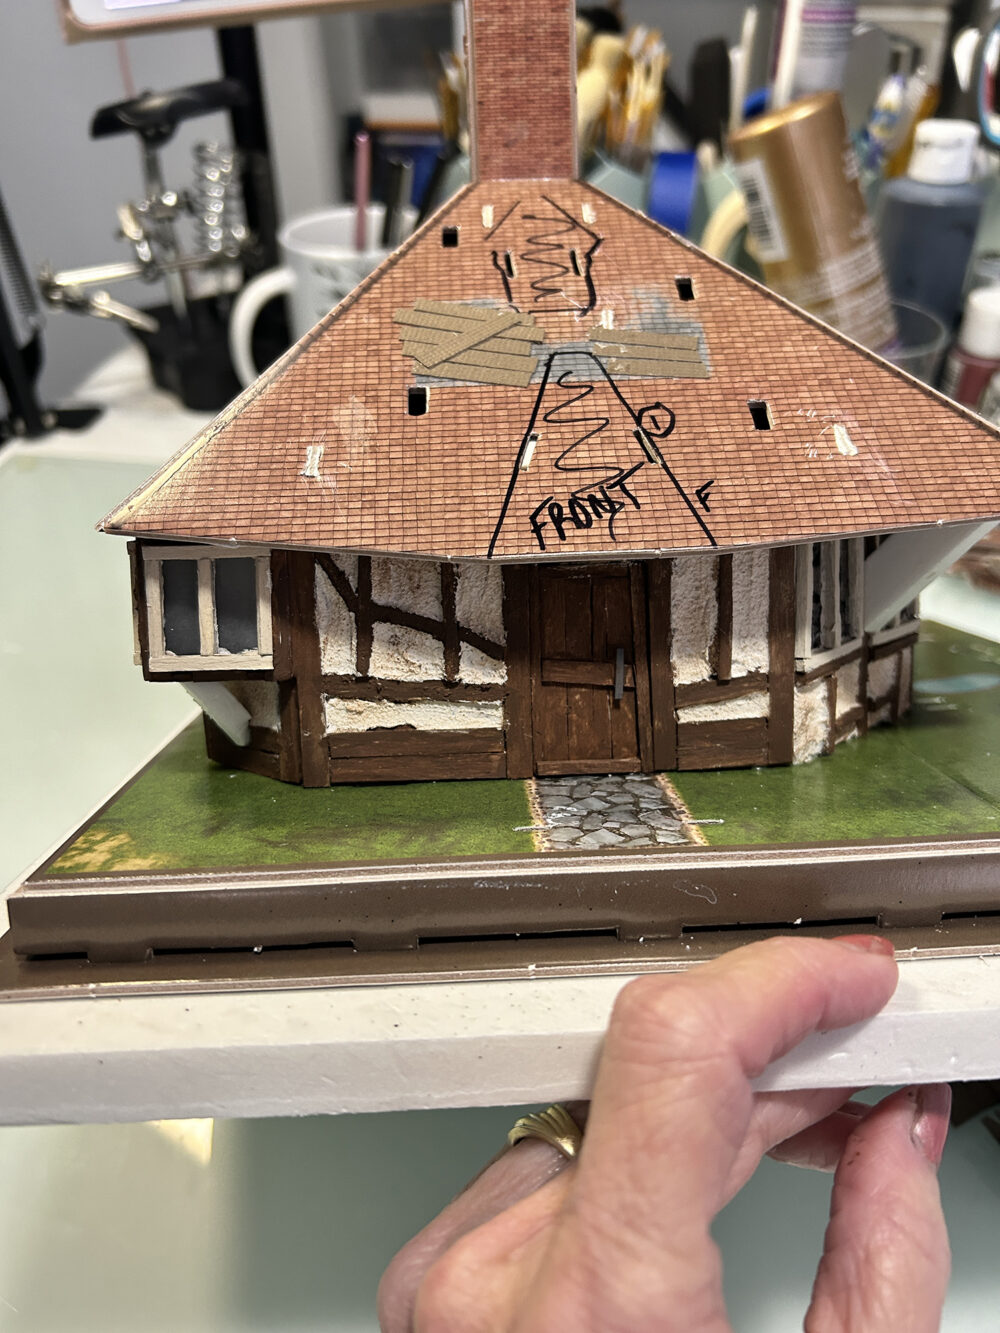
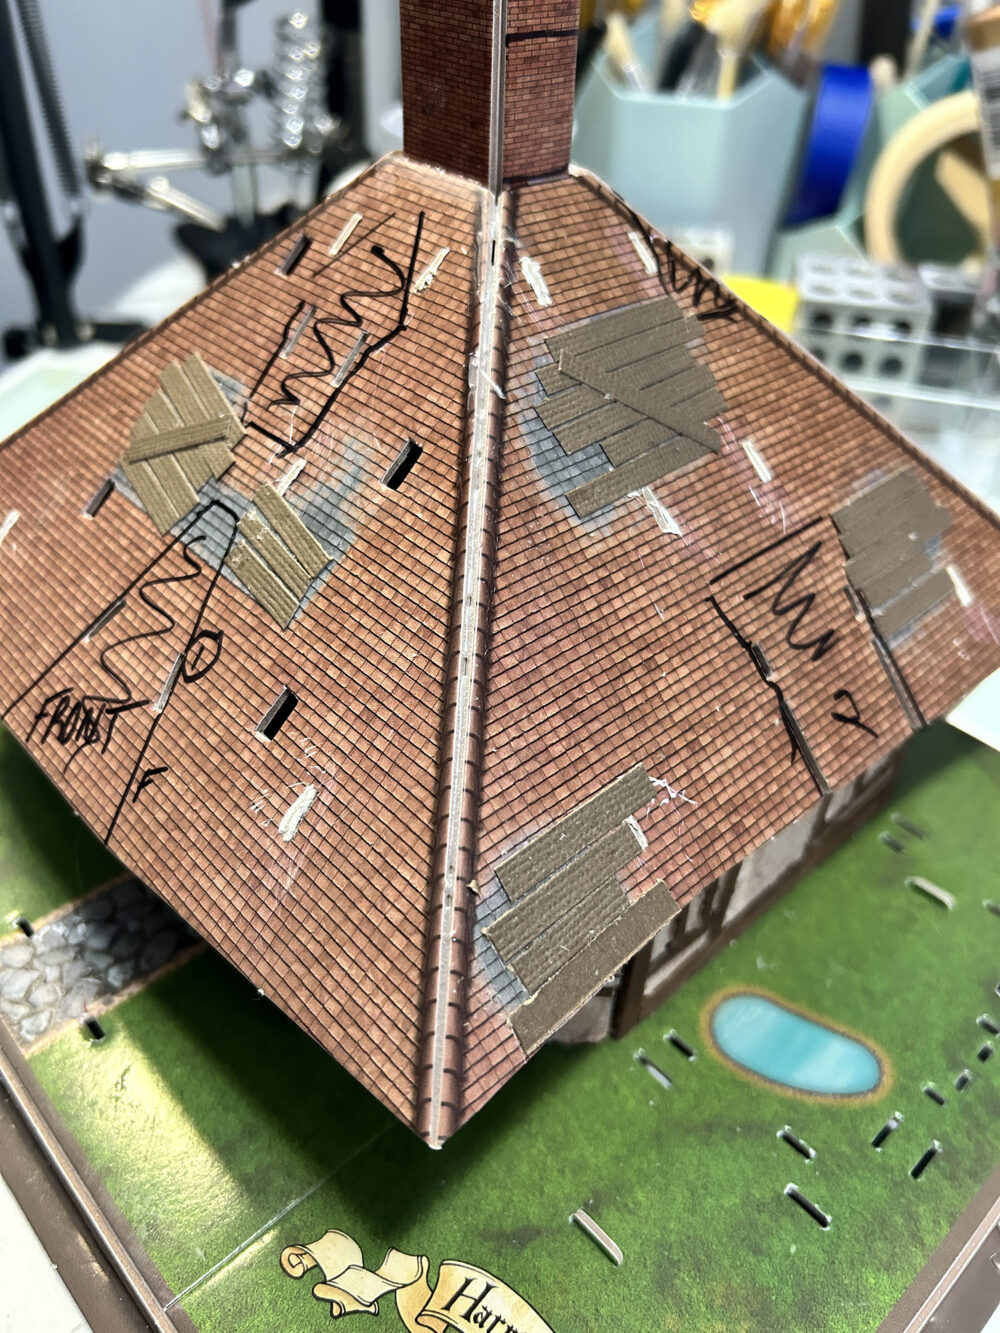
The roof pieces have gray colored areas which I’m covering with strips of cardstock that will be painted to look like wood boards as patches to the roof. The remainder of the roof will be covered in my wonky-style shingles cut from cardstock on the Cricut machine.
Using a dark and light brown cardstock for the shingles with one thinner coat of red paint allows some of the cardstock’s brown color to show through adding depth to the shingles.
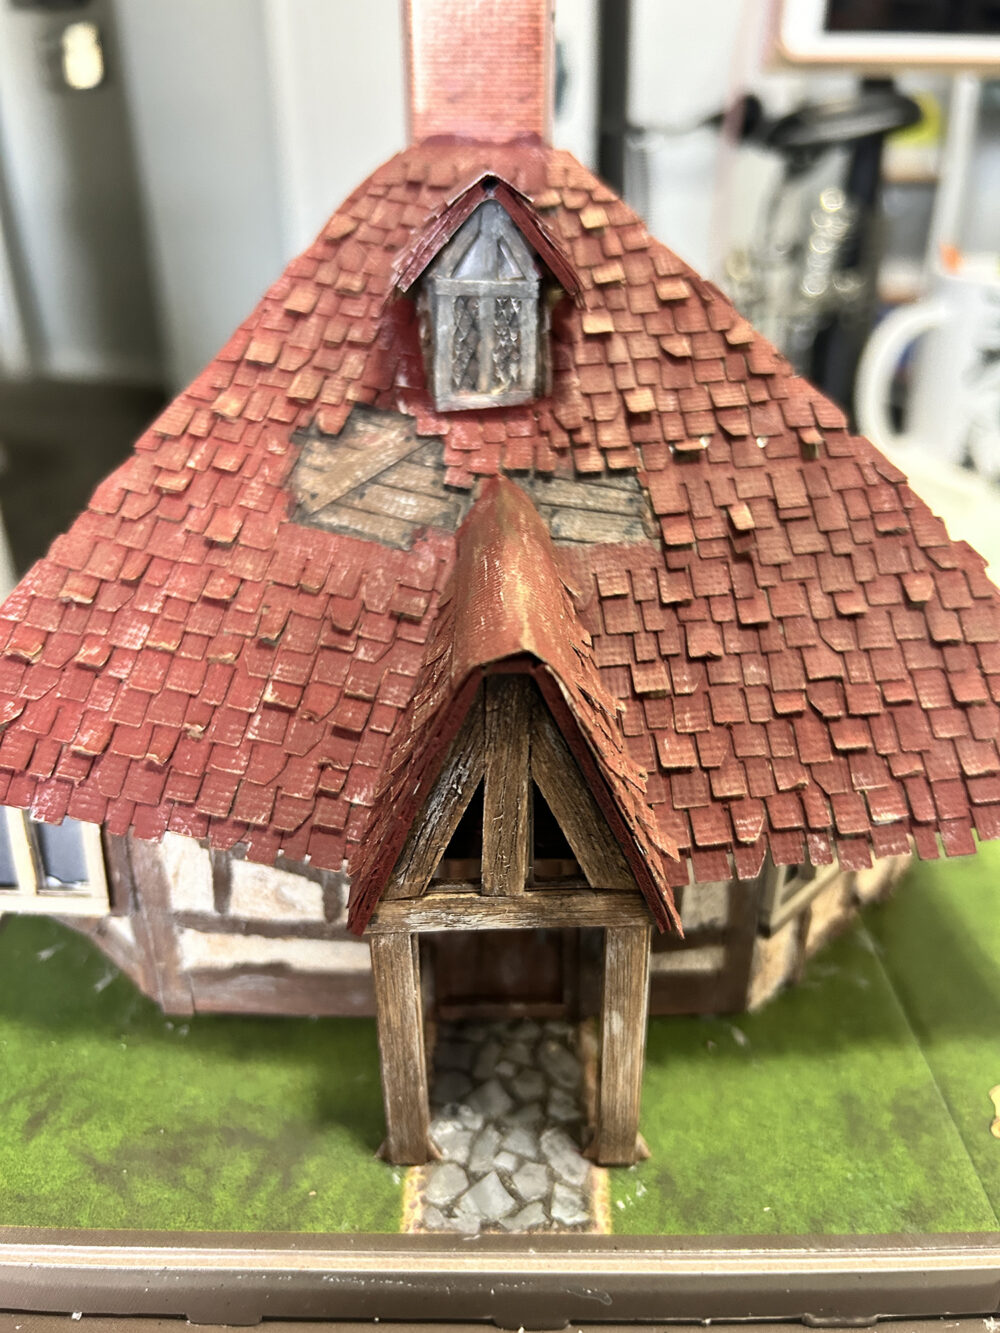
Once the red has dried I’ve dry-brushed the shingles with a bit of cream and brown paint.
Where darker shadows or definition is needed – the wood boards – I’ve added diluted black paint with a very tiny brush.
Vellum and wire mesh painted black were added to the window at the top.
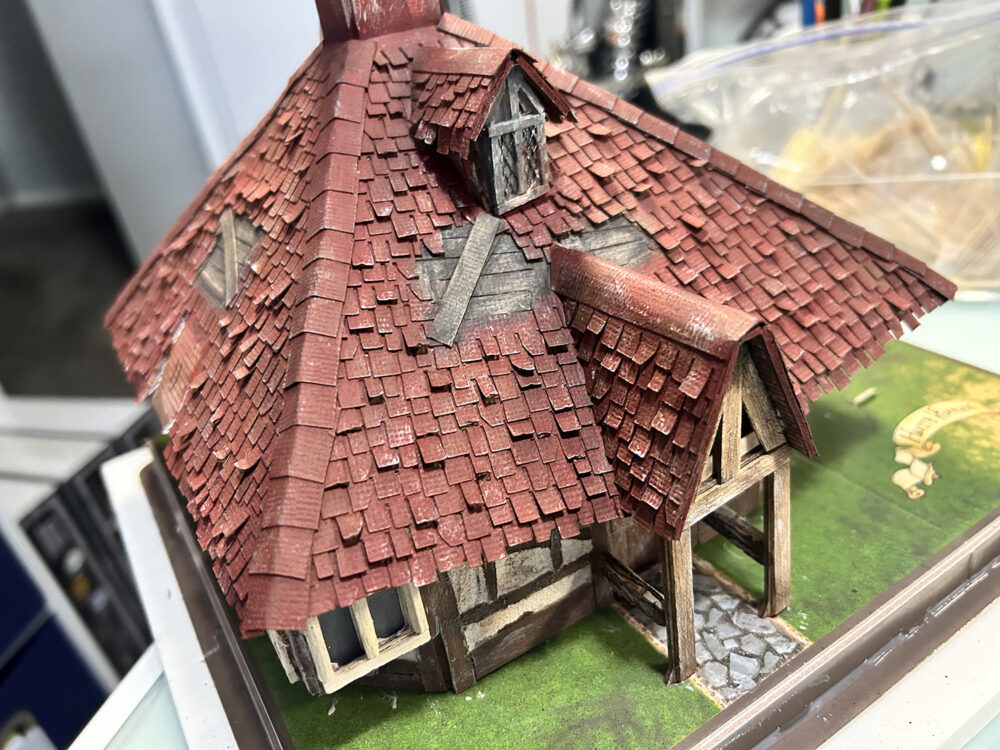
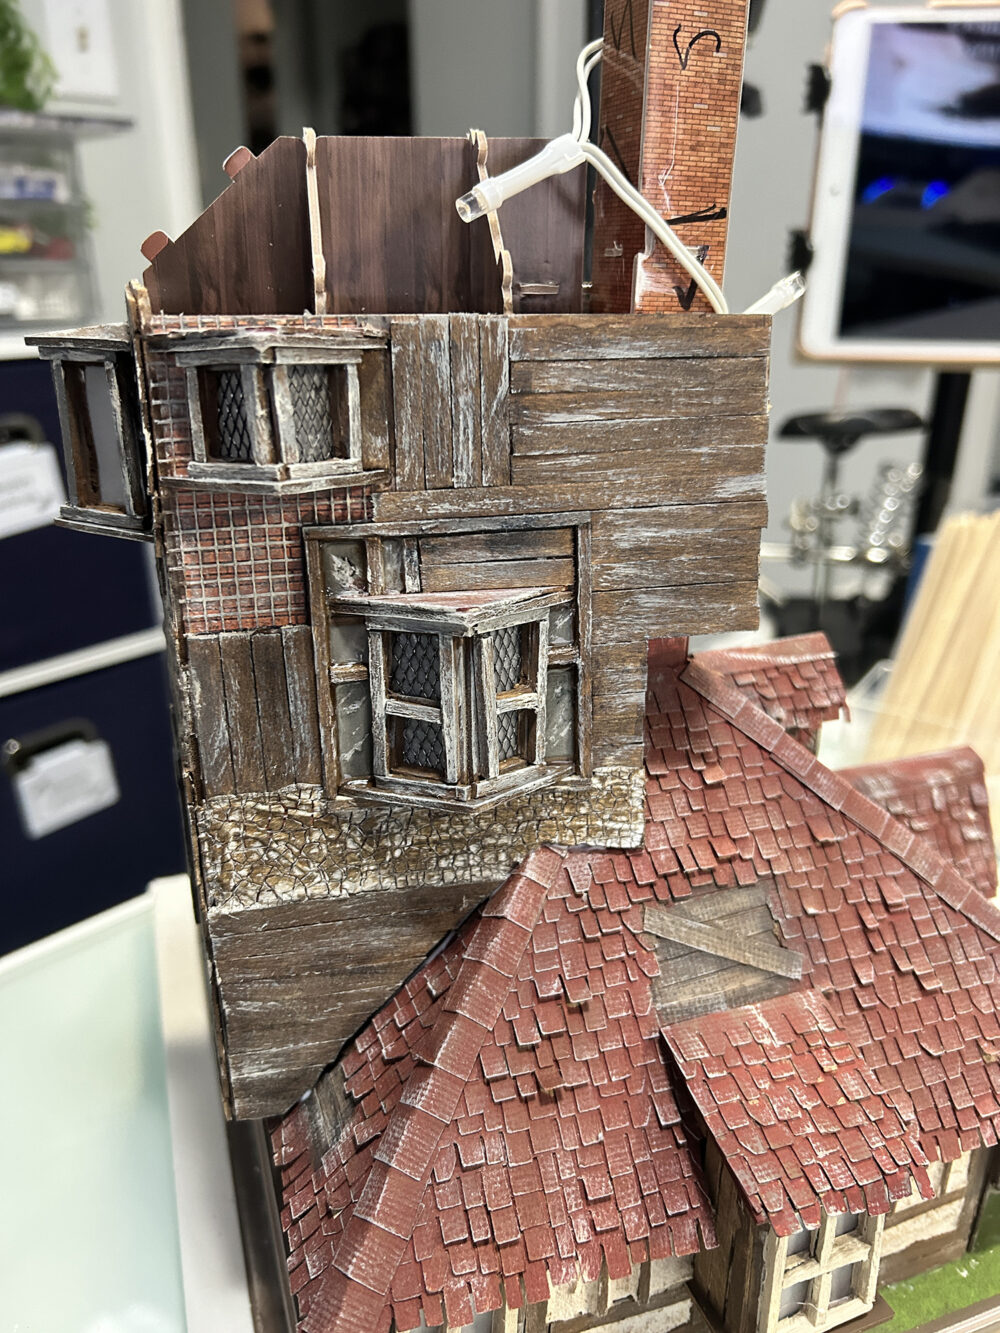
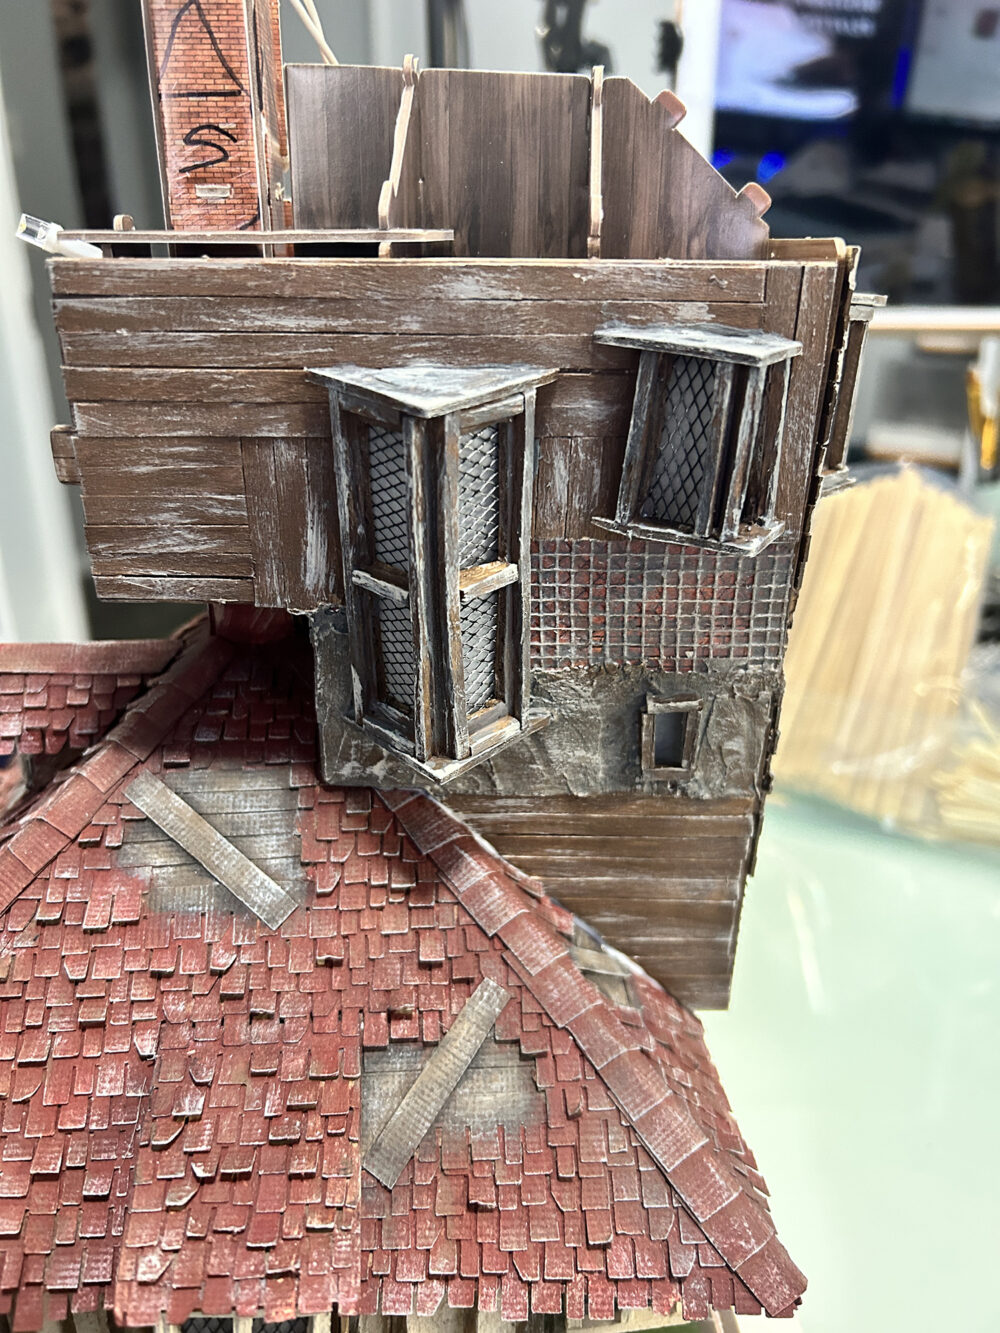
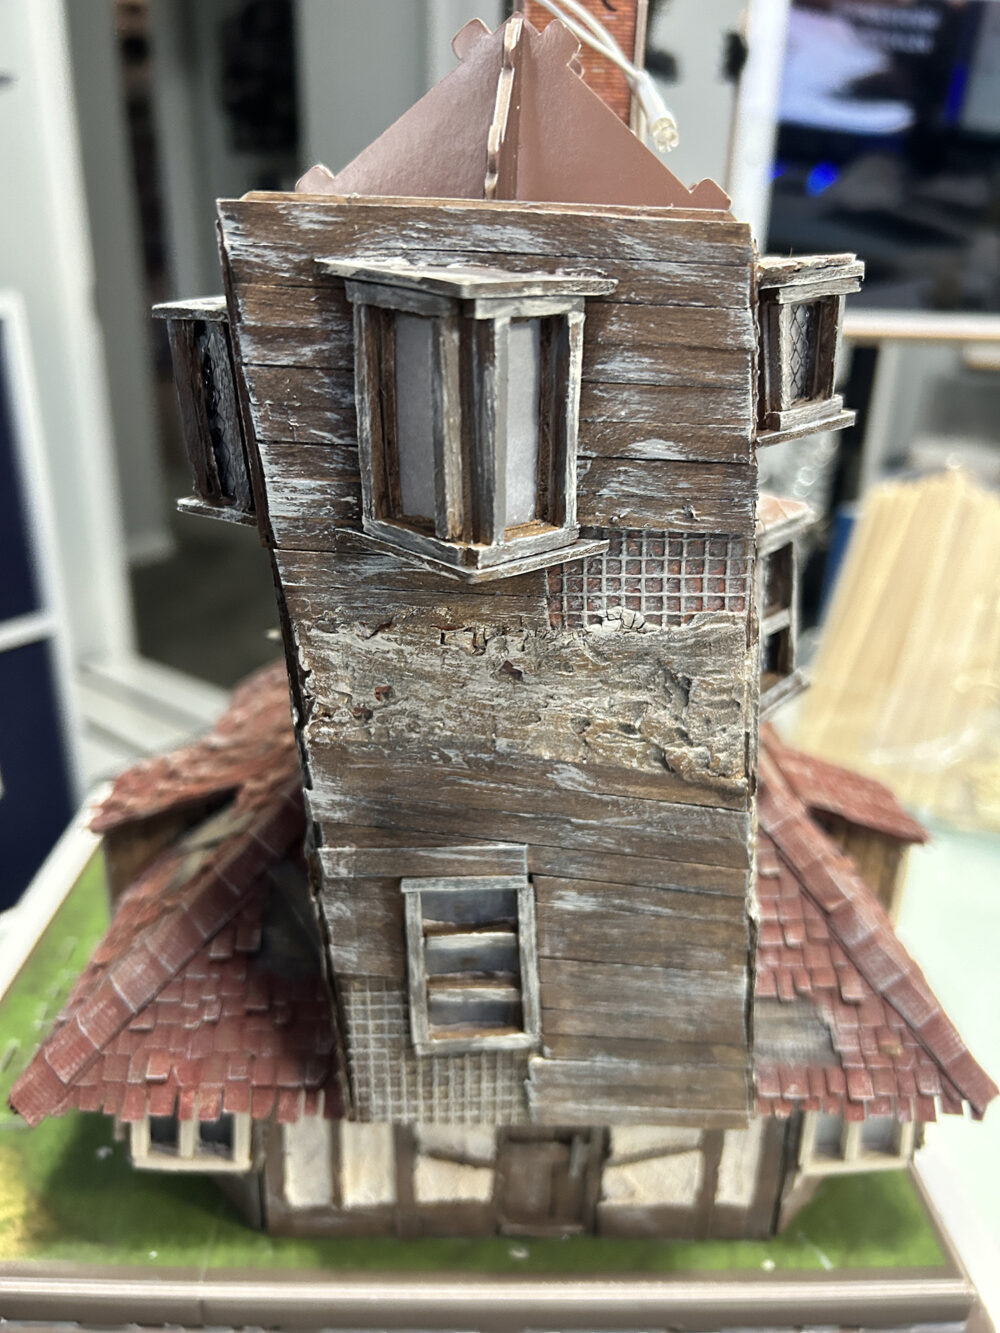
Now that the shingles are completed, I will move on to the next part which is the upper structures. There are two parts/sections to the upper structure and they need to be completed separately. I have used the same methods as I previously did for the first floor and roof.
Looking at the images below you can see that I’ve varied the window styles, added some texture paste in some areas, then used some drywall tape in other places, and added popsicle sticks for wood in different directions in the remaining places. To represent glass in many of the windows I’ve used UV Resin.
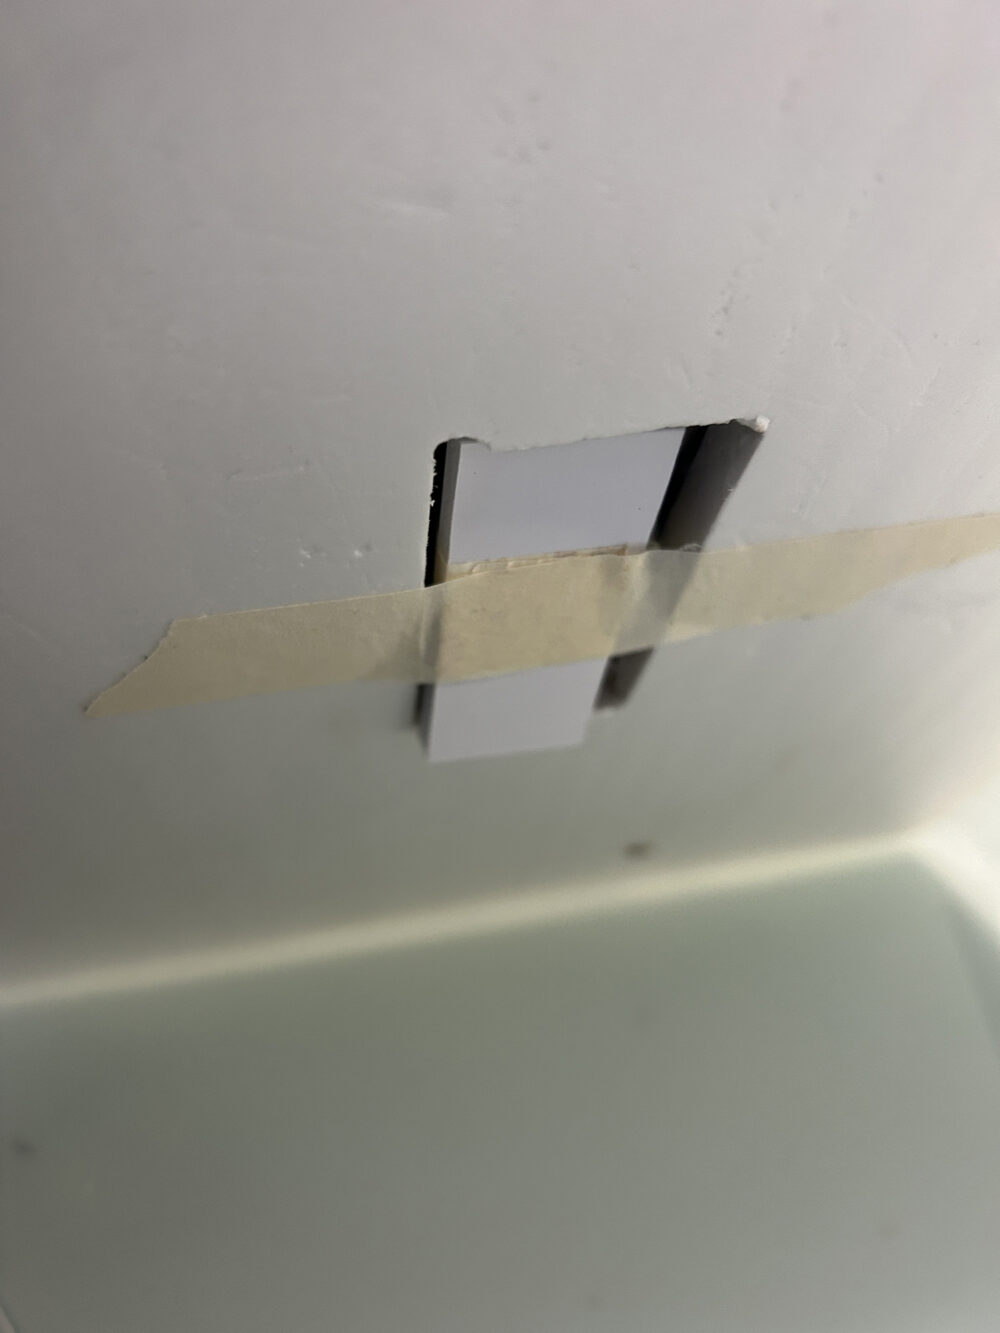
I’ve decided to use battery-operated string lights in this build. At left you can see where I’ve cut a hole in the base, taped the battery pack to a piece of foam board, and fed the lights up through the structure as I build each section. When finished, I will add a foam board that can easily be removed and replaced in the cut-out area to gain access to the lights.
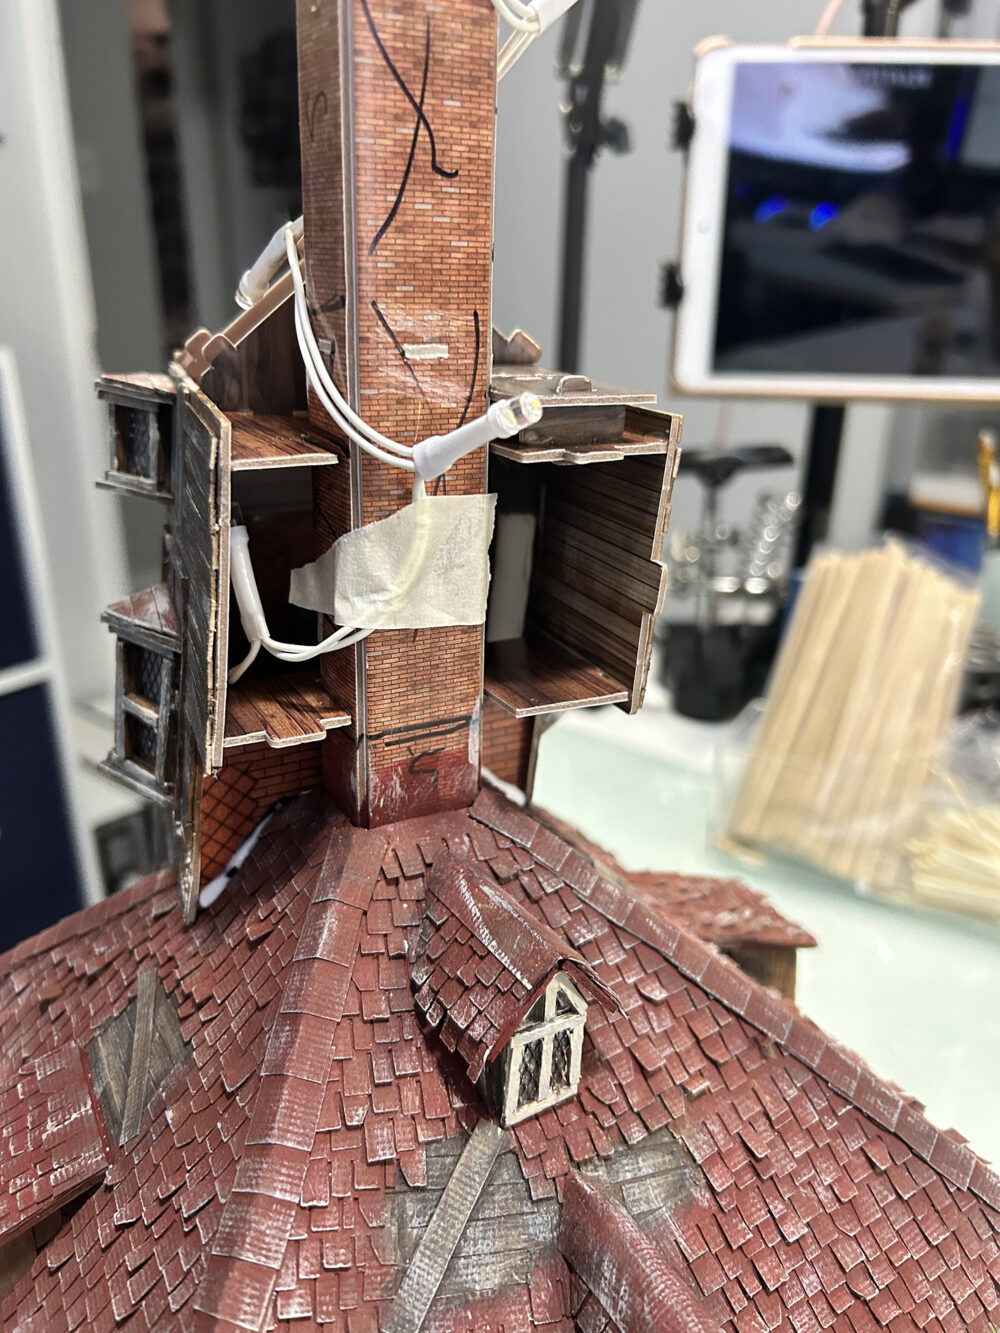
Now I will add the shingles to the roof and then begin working on the second section. Because making extremely tiny bricks on the chimney would be tedious, I’ve covered it with tinted texture paste to represent a stone chimney. The remainder of the build is repetitive of what you have seen above so here are some pics of the final build!
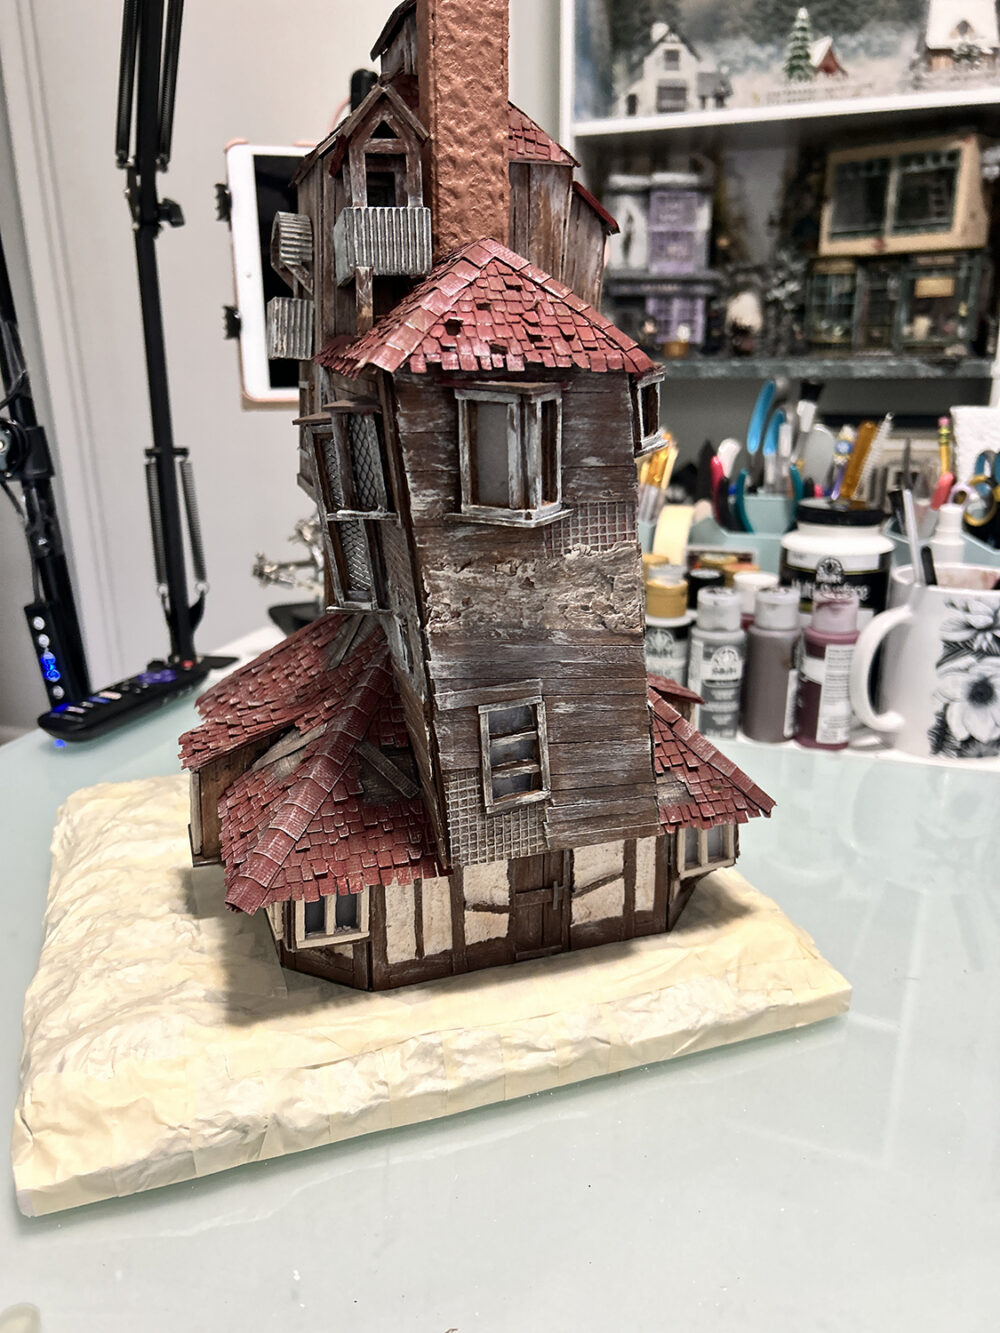
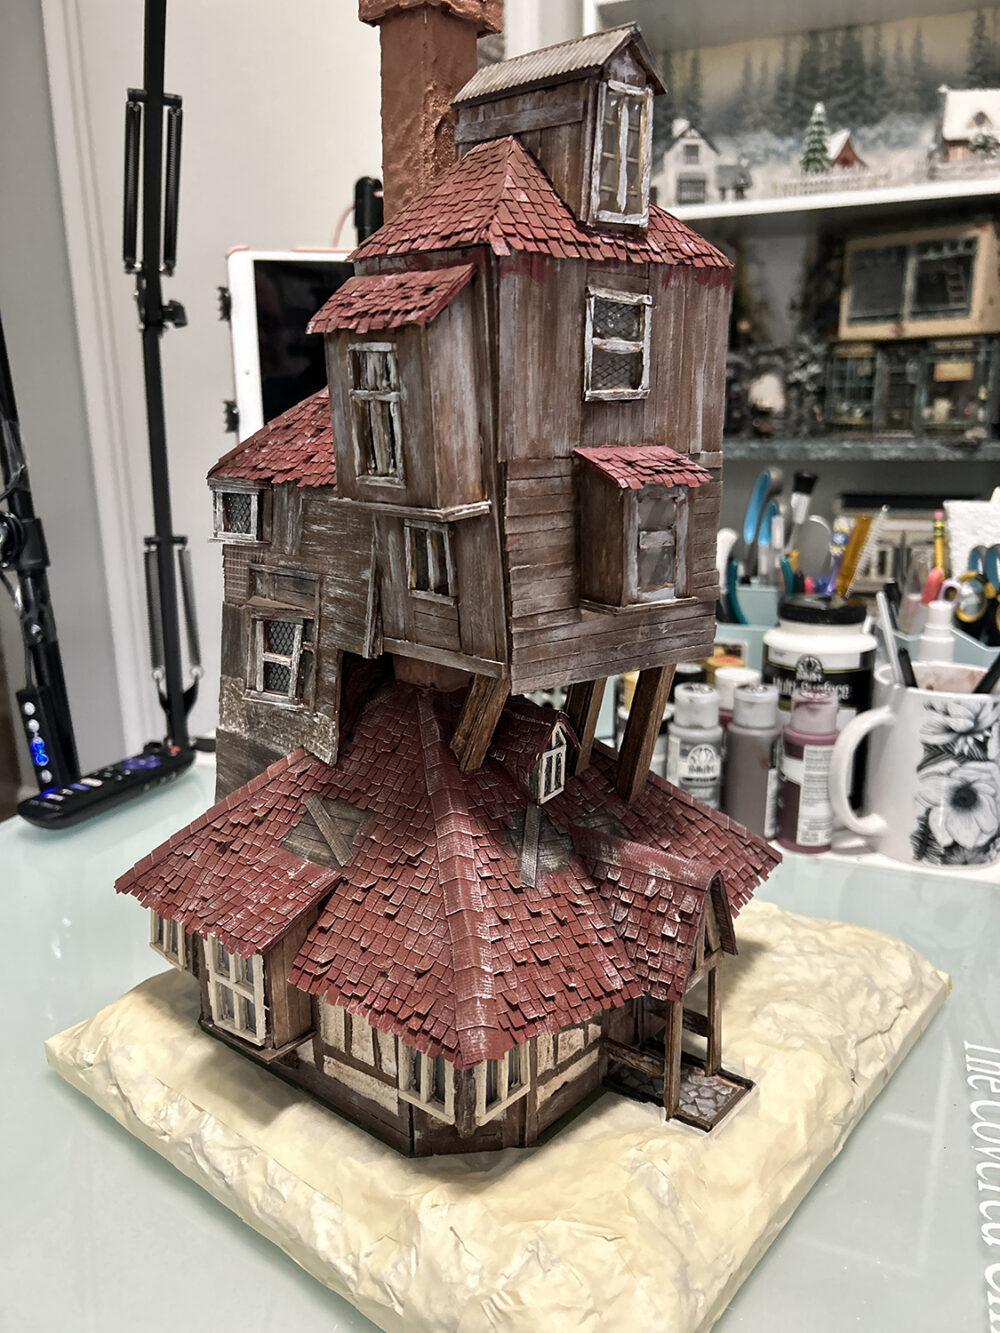
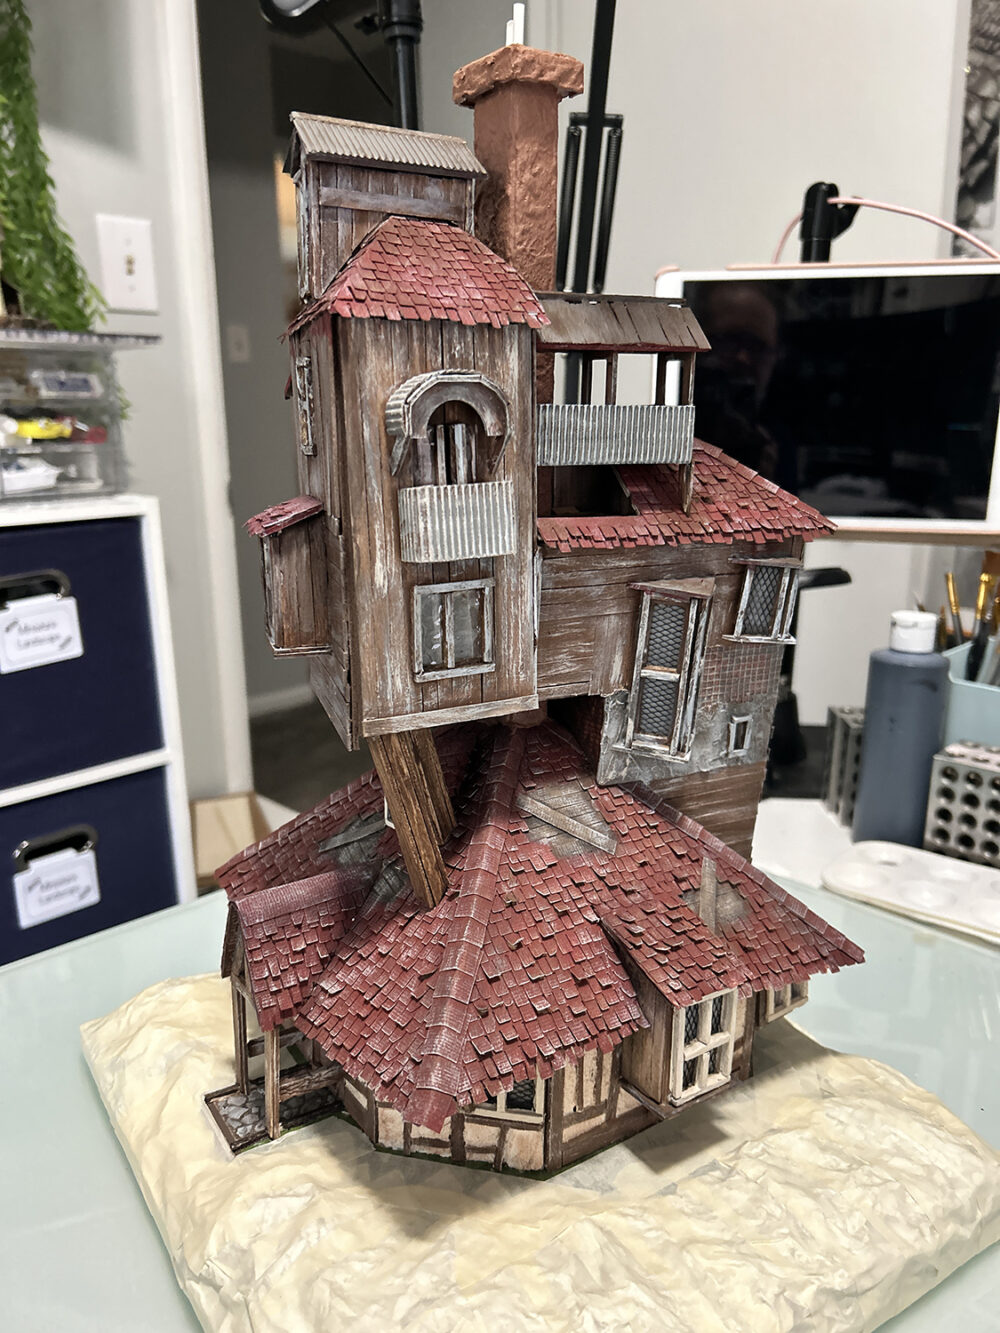
The final part of the build will be to add the landscape which will be fairly plain. Mainly grass and a few rocks here and there will be used as the Burrow was built in a rural setting. I’ve used a method I’ve come to love when creating ground.

Crumple up strips of cheap aluminum foil and glue to the base. Next cover the entire base with masking tape completely covering all of the foil.
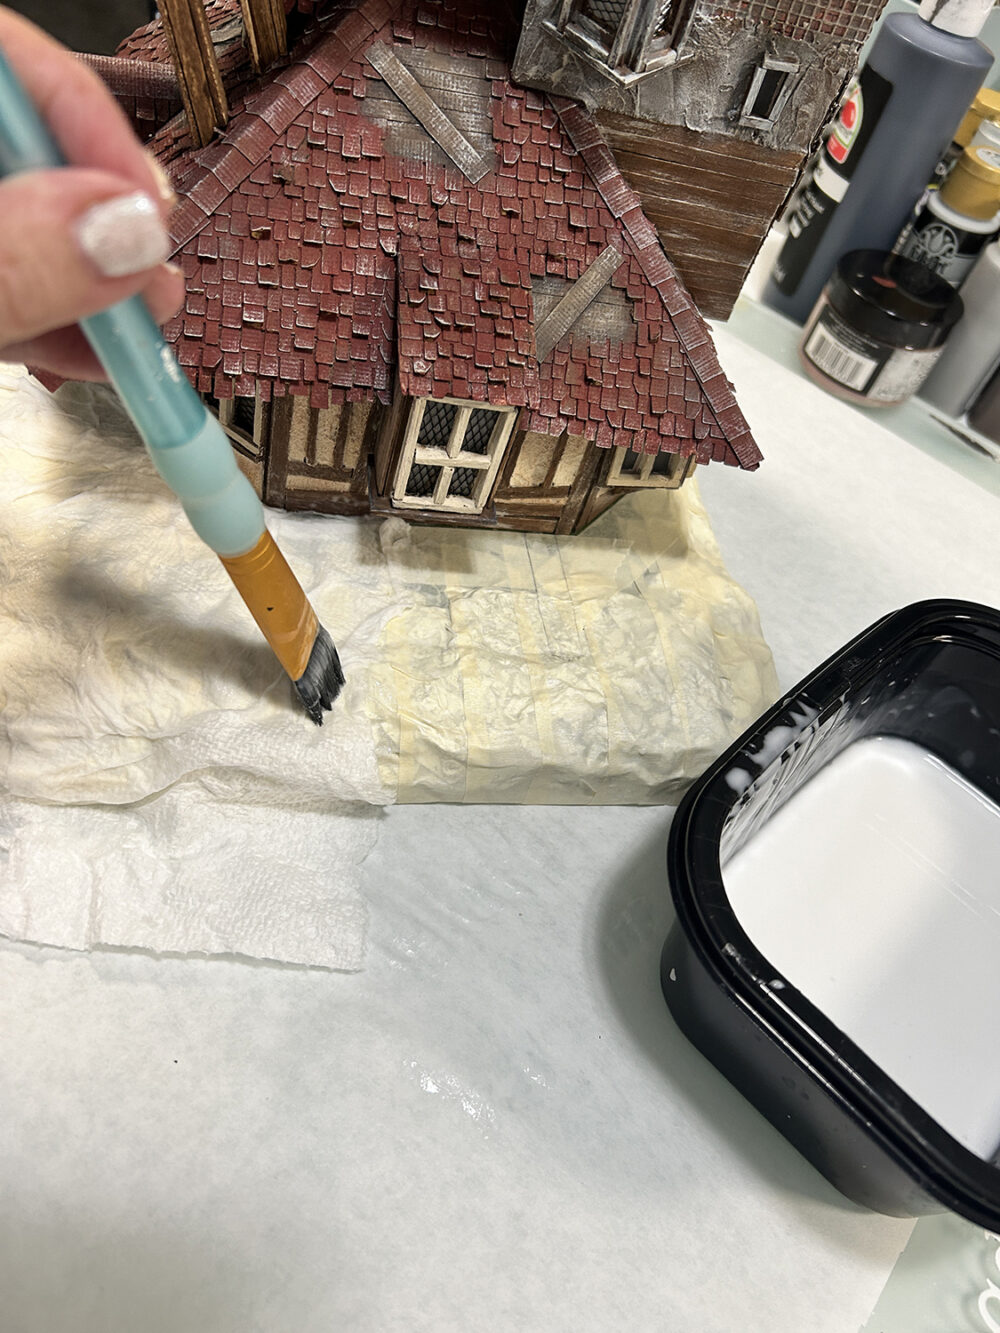
Mix cheap Elmers glue with water so that it’s runny. Tear paper towels into small strips or squares. Apply glue to the base in small areas then glue the paper towel to the base applying a good bit of glue on top. Pounce the brush and smush the paper towel around to create creases and help remove any pattern on the paper towel. Let dry overnight.
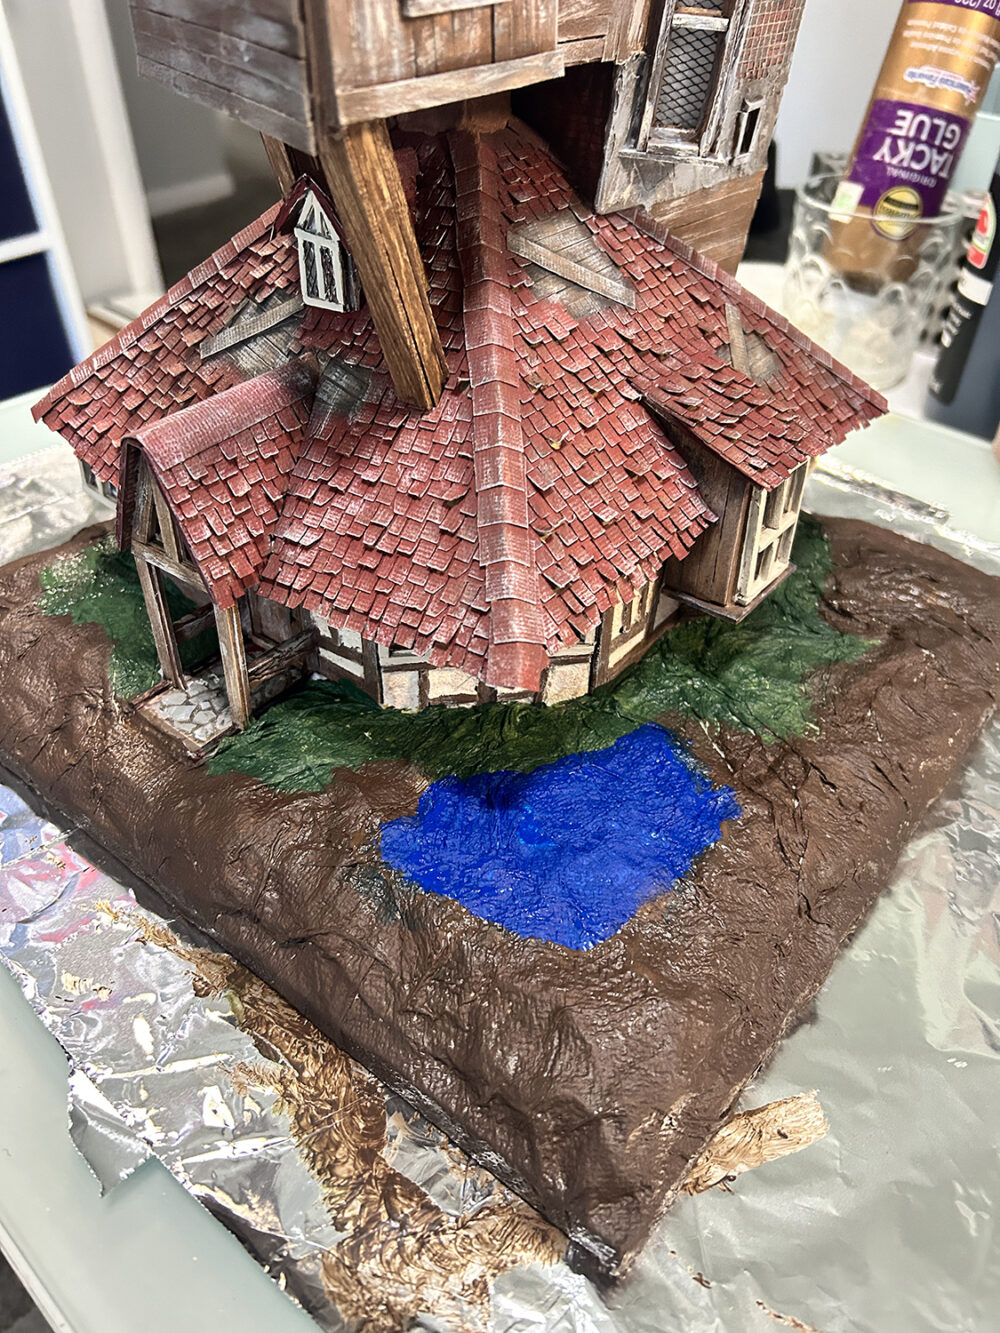
Paint the base with grass, ground, and lake colors with a good full coverage of paint. The colors I’ve used in the above image are the darkest base colors. Once dry I will add landscaping materials and some dry-brushed areas with more paint.
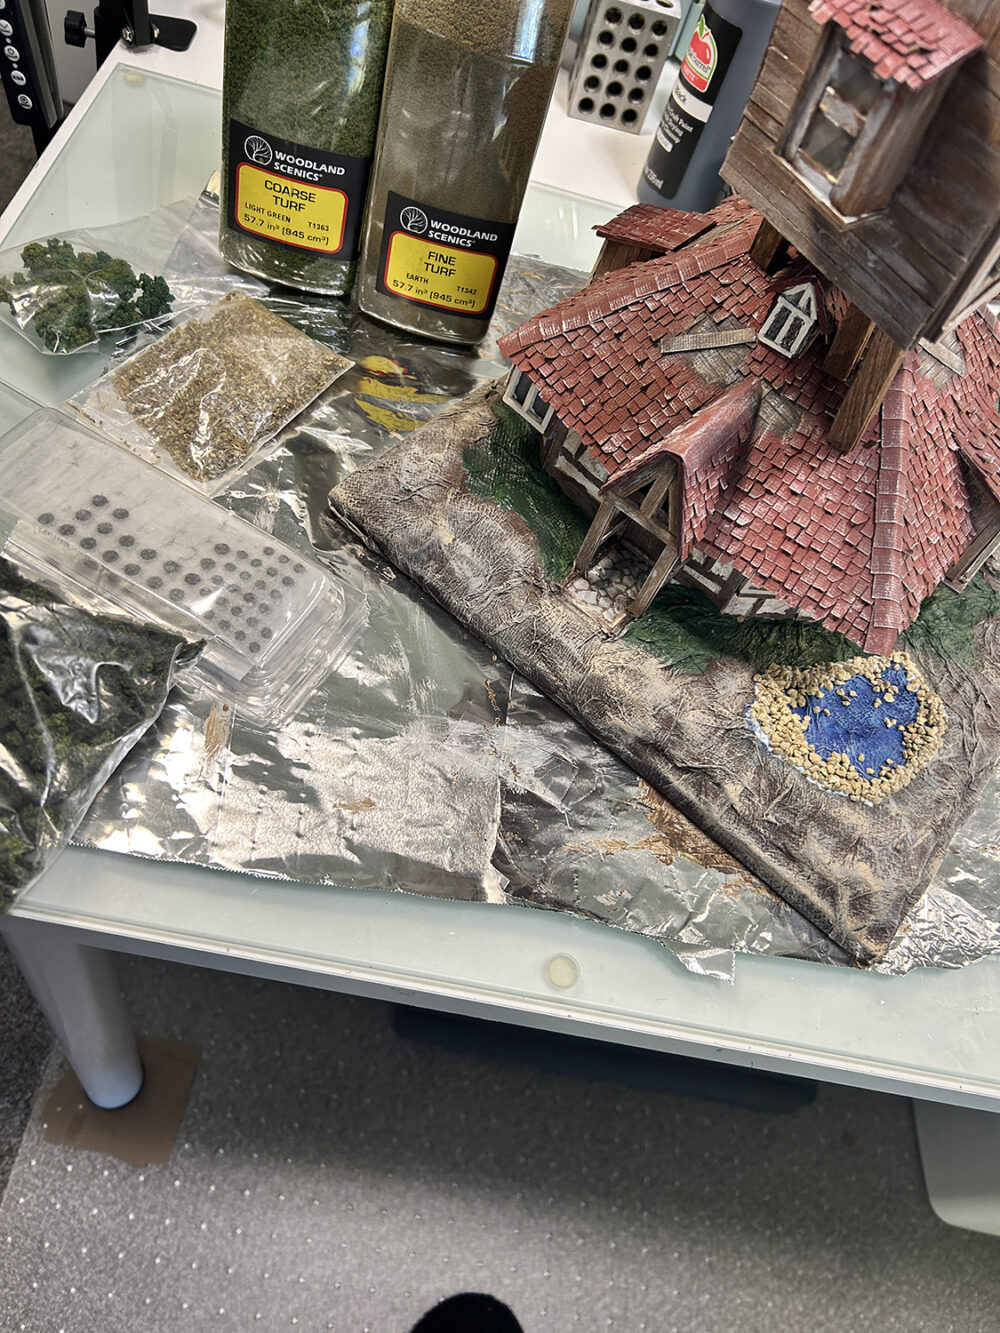
Here you can see how I’ve dry-brushed the base, added rocks around the lake, and some of the landscape materials I’ll be adding next.
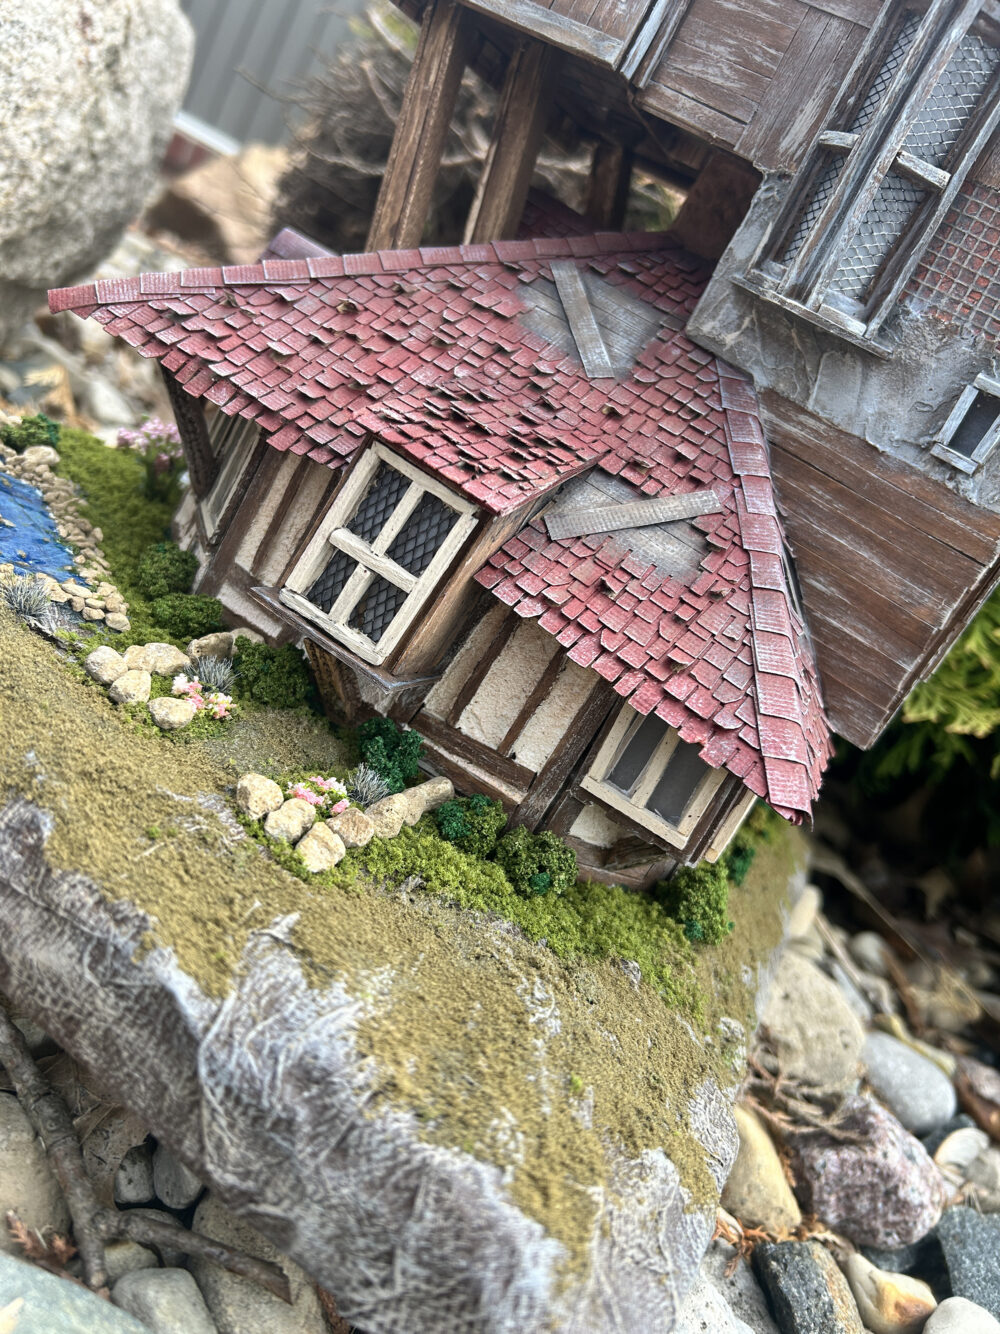
After adding all the landscaping materials I sprayed the entire piece with a matte spray sealer. Next, I’ve added the resin for the pond.

All finished . . .
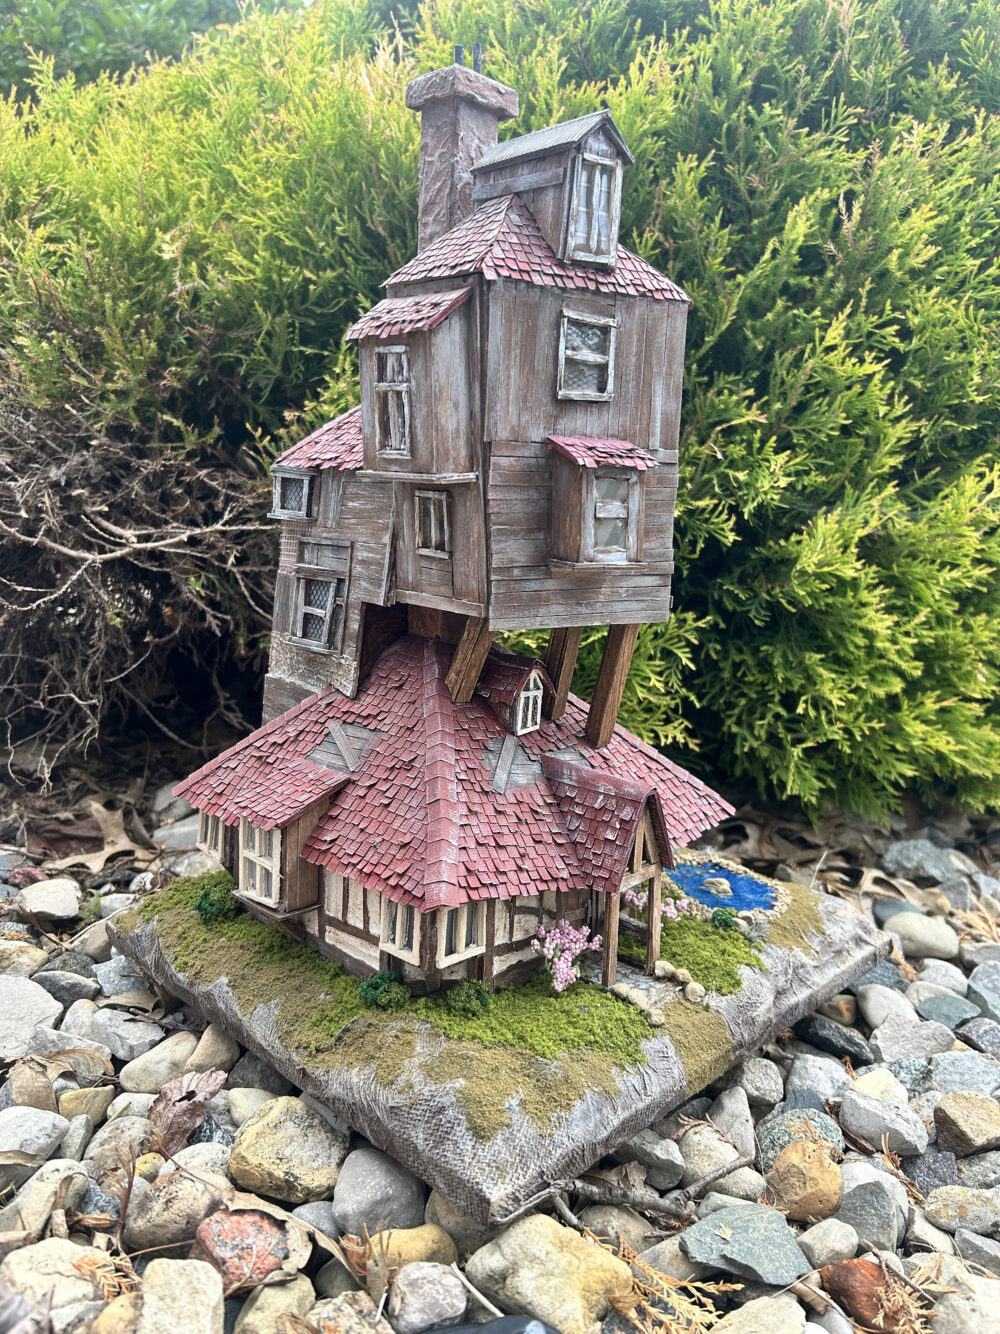
All finished . . .
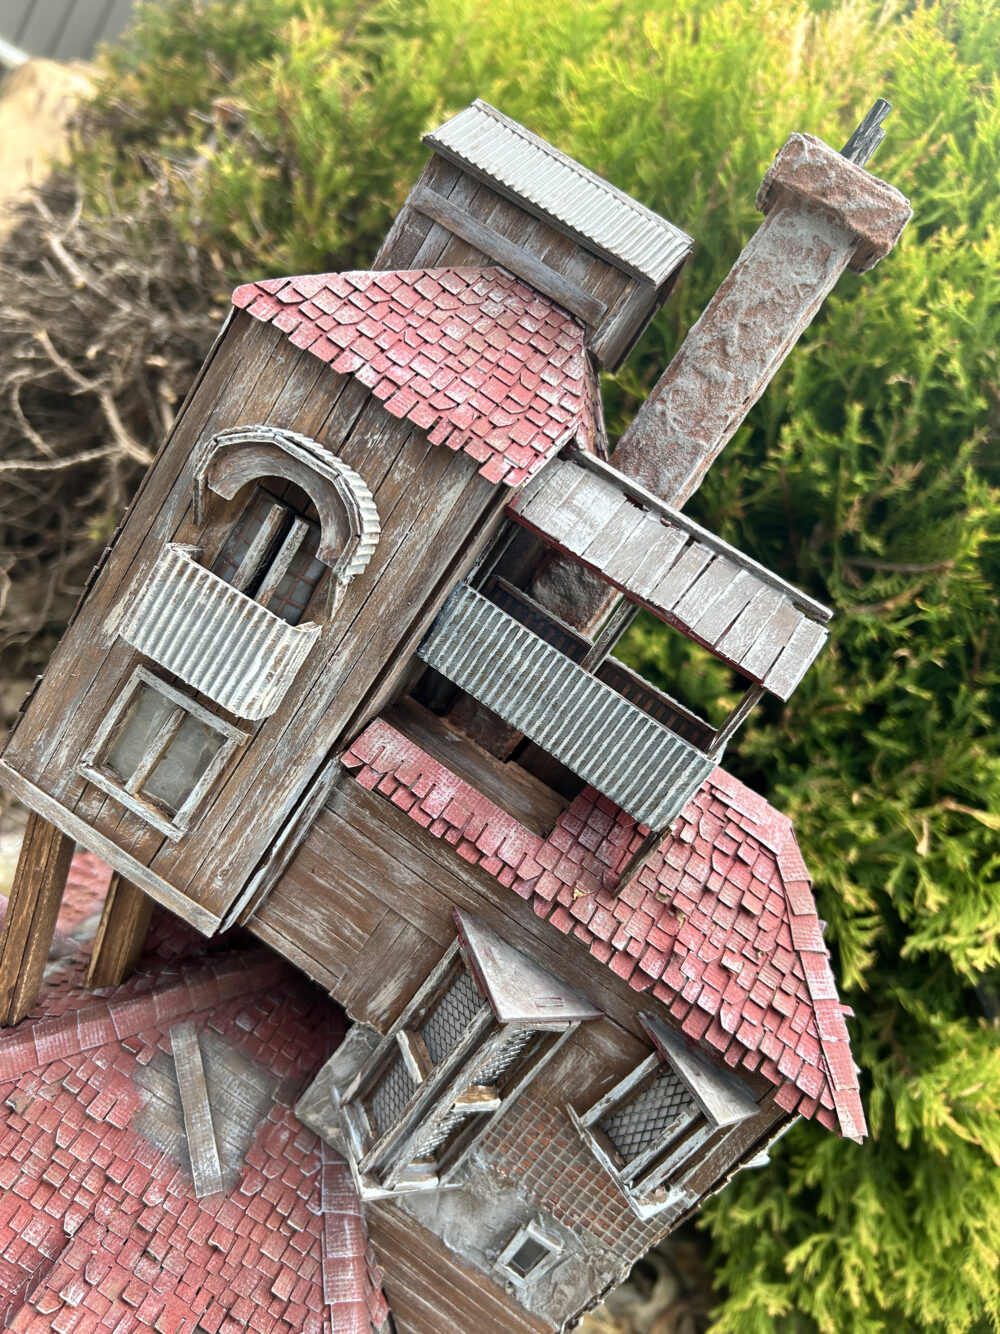
All finished . . .
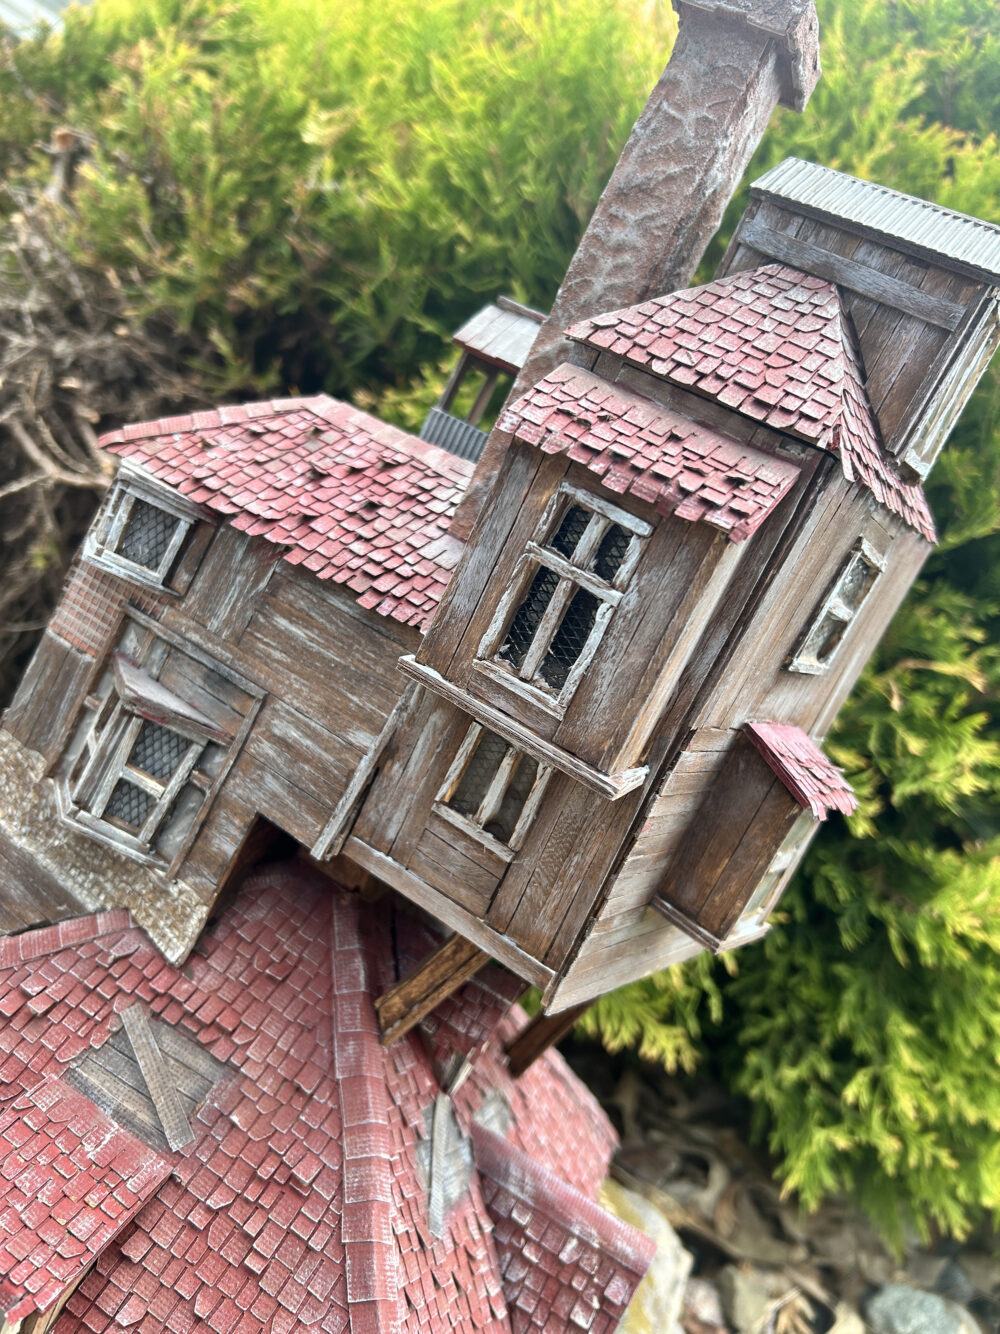
All finished . . .
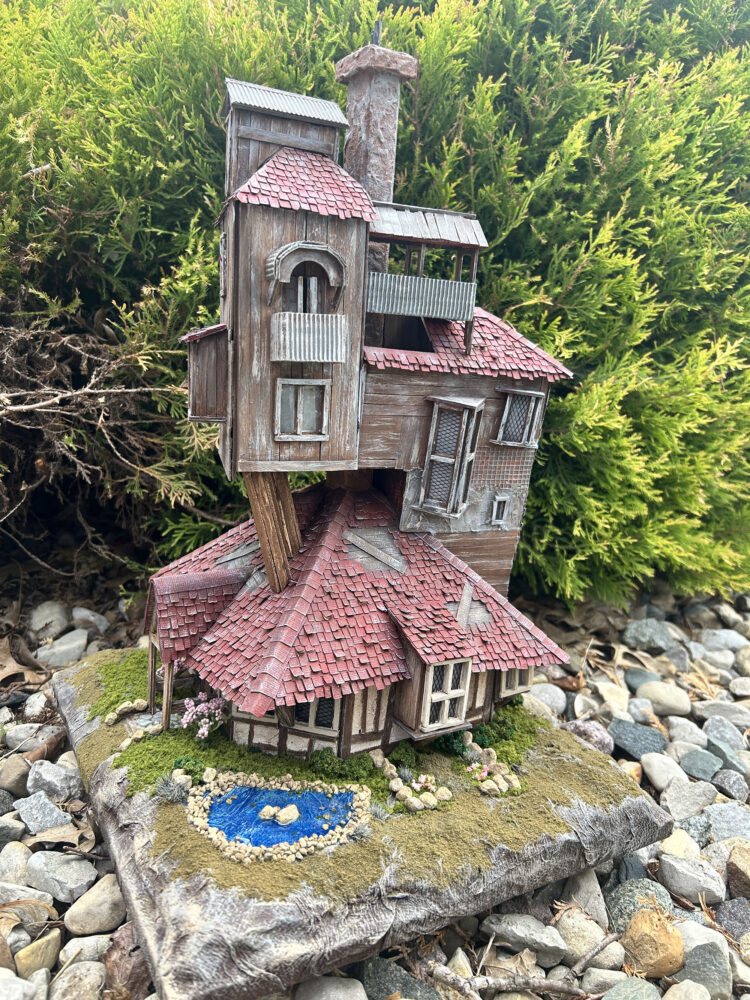
Till next time . . .



Leave a Reply
You must be logged in to post a comment.