Welcome everyone! Today starts the beginning of the build for The Magic Shop, our first project in the 2024 Craft Along series. I hope you all were able to get your kits in time to follow along. If not, no worries as you can work on the project at your own pace.
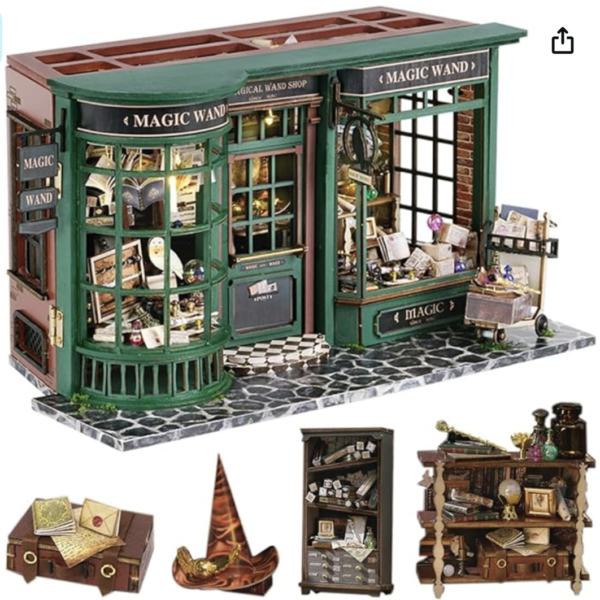
NOTE: The shop is pretty close to half-scale (1:24) in size should you want to purchase additional items to go inside the shop.
YOU CAN WATCH THE VIDEO HERE
Extra supplies – for those who want to go beyond the materials used in the kit (optional). These will be used on just about every project for the entire series.
- Aleene’s Quick Dry Tacky Glue
- Thin Cardboard Sheets (cereal box will do as well)
- Tim Holtz: Ranger Grit Paste Opaque
- Ranger Black Soot Distress Ink
- Palette Knife
- Brick Embossing Folder
- Clear Matte Spray Sealer
- Gold Metallic Marker
- Clear plastic for window glass
- Black Sharpie
- Brown/Mahogany Alchohol Ink Marker or any redish brown marker
- Scissors
- Craft Knife
- Ruler
The first thing you want to do is to read over the entire instruction booklet. I know, it may be boring but … you will have a better understanding of how the main structure comes together and help you to identify pieces. I plan to start with the structure first and then move on to all furnishings and fiddly bits.
*Locate page 12 – bottom right corner – for the instructions on building the floor and walls.
Here are the pieces for the main structure: inside back, inside flooring, left and right walls, and sidewalk base. For the beginners, both the brick papers and flooring look nice so we will use those as is. For the more experienced, you could create your flooring and brick if you like. You will also find that not a lot of the brick or flooring shows once everything has been placed inside. We are, however, going to age it all up a bit because no magic shop would be this clean!
As for the outside cobblestone area . . . we will not be using the paper that came with the kit. We will be creating a new base using either texture paste, embossing folders, or egg carton pieces. We will get to that later on so set the base aside for now.
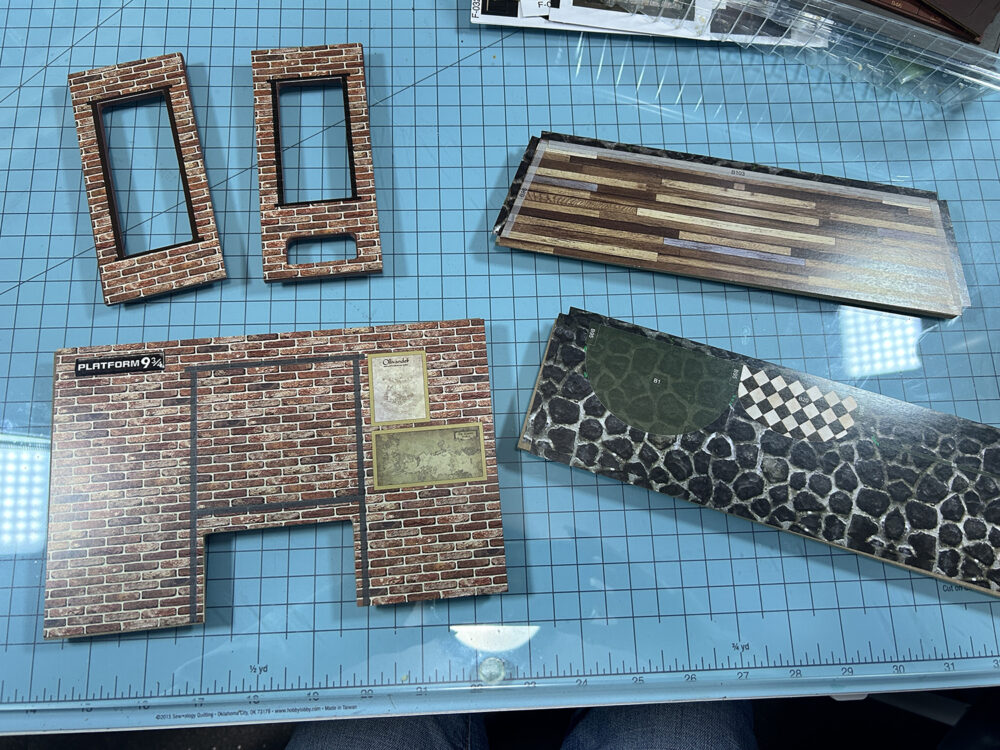
If you are using the printed kit papers as is – For the flooring, I would score and fold those edges before gluing it down. The same with the base paper if you want to keep it simple. For the window areas, I would use a black marker or Sharpie and go around the cut areas to cover any white edges showing. Also, check the fit on everything after the glue has dried, and remove any overhanging paper with a craft knife.
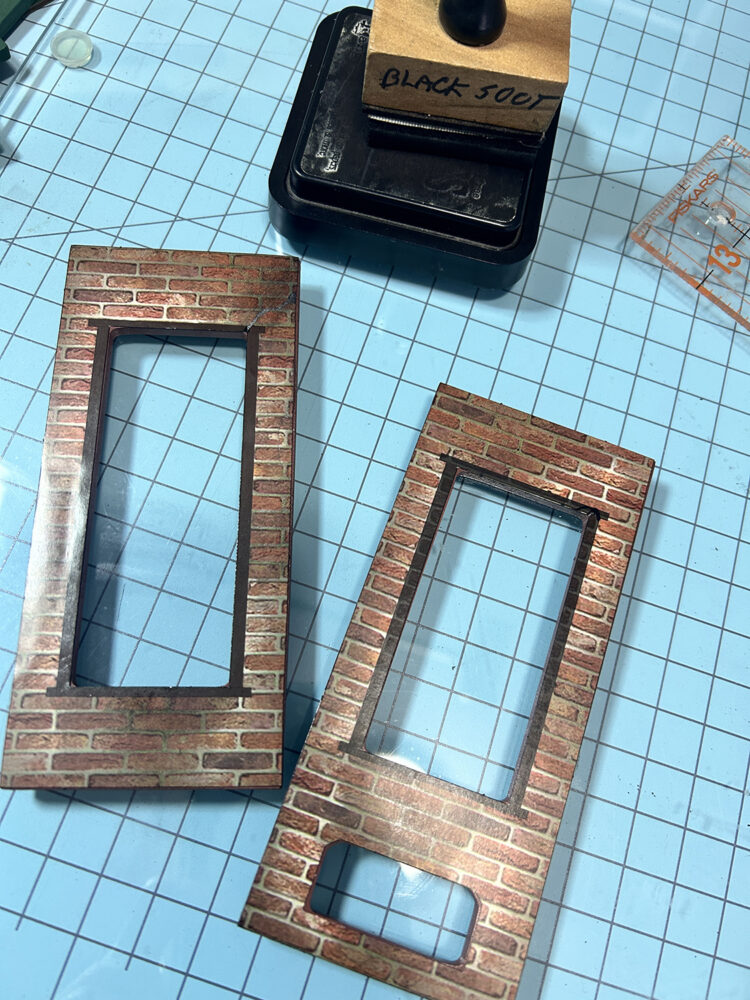
Next, let’s enhance the printed paper walls and flooring a bit with some of the Black Soot Distress Ink. Note that this paper has a shiny finish so it might take a couple of coats for the ink to sink into the paper. Just dab on the ink with a sponge applicator, wait a few seconds, and dab on more ink till you get it as dark as you want. Dab the ink around the edges, under the window openings, and in random areas.
TIP: you might want to keep a wet paper towel or baby wipes handy to wipe the ink off your fingers as you work!
Now finish all of the brick wall sections, except for the outside back wall, in this manner.
You will need to spray seal the paper-covered sides of all pieces so that the ink will not rub off.
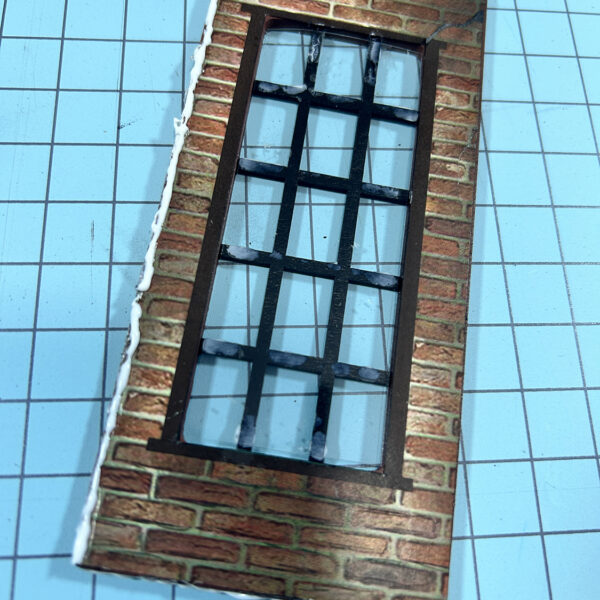
Next, we need to add the center bars to the windows and the grate on the left side window. Glue the grids on the edges and place them inside the window area from the inside to the back. I noticed that the kit did not include acrylic for the windows so I will be making those from a thin sheet of clear acrylic. You can use any clear bakery packaging or container plastic for this as well. Simply cut the plastic to fit inside the window and then glue it to the grid using a small amount of glue in various spots.
Now that the walls and floor are finished, we will glue the walls to the flooring section. Note the grey areas on the floor showing where the walls are to be glued. You will see that the side walls should be glued to the edges of the back wall so we will attach the back wall first then the sides. If you have some 1 2 3 blocks this would be a good time to use them to hold the walls straight as they dry. If not, a stack of books or a sturdy box will work. Anything you can find that will hold those walls straight for drying will help.
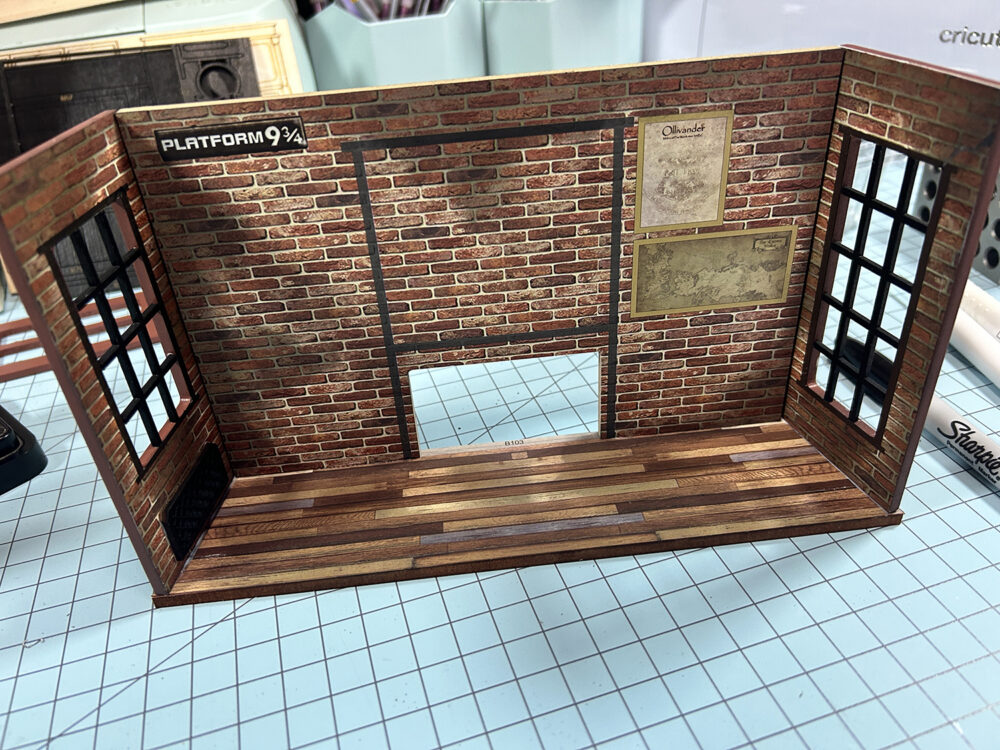
At this point, I would not add the roof to this section. I think building and adding all of the furnishings and wiring would be easier without the roof in place.
So this concludes the first part of the structure. In the next session, we will be building the front section of the structure. I hope you enjoyed yourself and that you are looking forward to next time!
Till then . . .

Teri


Leave a Reply
You must be logged in to post a comment.