Moving on with more dollhouse wiring, I’m calling this post . . . Mistakes, Alternatives, Fixes and More lol. In hindsight I can say that “planning ahead” is sooo important when working on a dollhouse of this size! Researching the project, educating yourself and planning could truly make a difference on projects like this. Lighting has been a challenge for me and I’ve discovered a lot of options and alternatives over the last few days. I’ve also tried several different approaches when working with the wallpaper and lighting together. Hopefully the following will give you some ideas and help you in some way.
First, here’s a look at the 2nd floor final layout . . .
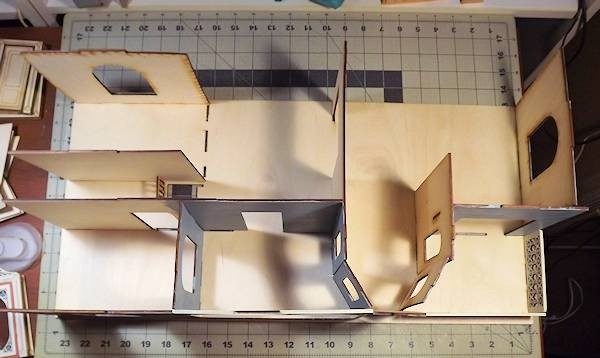
Here you can see where I’ve added the door wall for the Nursery back in, after deciding to have a sitting room in the middle and the master bedroom on the far left.
See the hole in the floor, middle right, that is where the first floor stairs come up to the second floor. I’m still not sure these will be used as they take up a lot of room in the kitchen below so I’m looking for alternatives at this time. I’ll have to get more of the kitchen furniture made up before I decide about that.
You can also see the main tape runs on the floor here. One thing about using the tape wire, you can always add to a run if needed as long as the surface has not been covered. Also . . . using the score tape to attach wallpaper and flooring does give you the option of removing them if needed to make a new tape run.
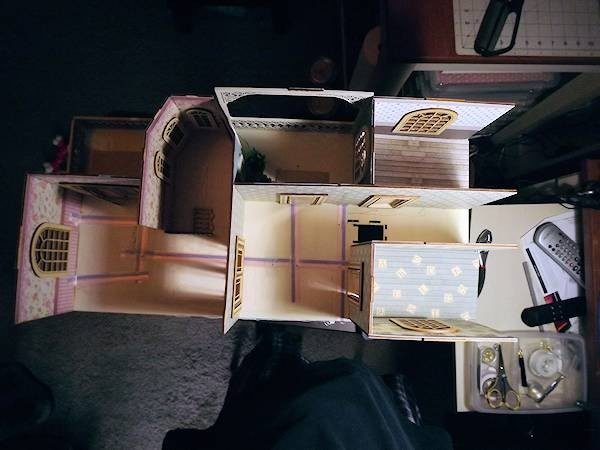
Next up . . . a mistake fix, sort of . . .
For some reason the original tape run on the back wall, between the two doors, stopped working. I’ve noticed that this can sometimes happen if a connection eyelet works it way loose and hammering it back in will fix the issue. In this case, I was unable to find the cause of the malfunction so . . . I made a cut in the wallpaper, just a tad wider than the tape wire and connected in a new tape wire run up the wall for a wall sconce I want here.
You can see where I’ve cut the paper at this time but once the flooring above is added, the sconce is added and a plant is placed below the light, you’ll never see the cut paper!
Something to mention here . . . see the tape runs going under the doors, I discovered last night that they make a special tape wire just for this purpose! My guess is that it is thicker and pads the wires so they don’t get pinched under the door or walls. Using this special tape run, you would run the tape wire on both sides of a door or wall, up to the door or wall and then use the other tape to connect the two wires.
This special tape is called a Thru Splice, check it out at the Cir-Kit website.
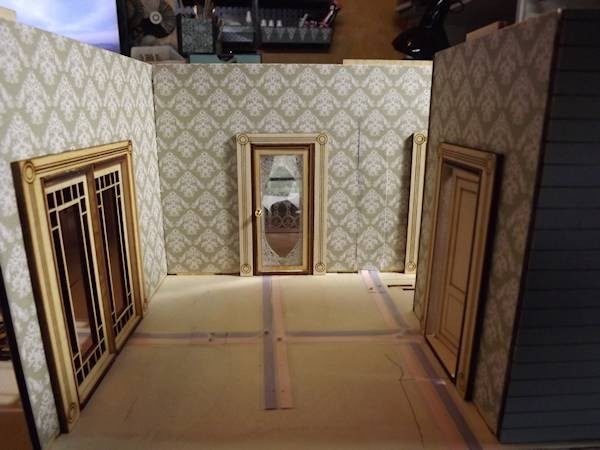
Here in the master bedroom, that was originally going to be the Nursery, I decided that the bed would be placed under the far left window and I want to have lights on nightstands here as well. Since the paper was up, I decided to go ahead and run the tape up the wall, on each side of the window, on top of the paper. I’ll simply use a wall plug, plug in lamps and hide it all with the nightstands. Since I’m making the nightstands myself, I can leave the backside hollow to hide the wire and plugs!
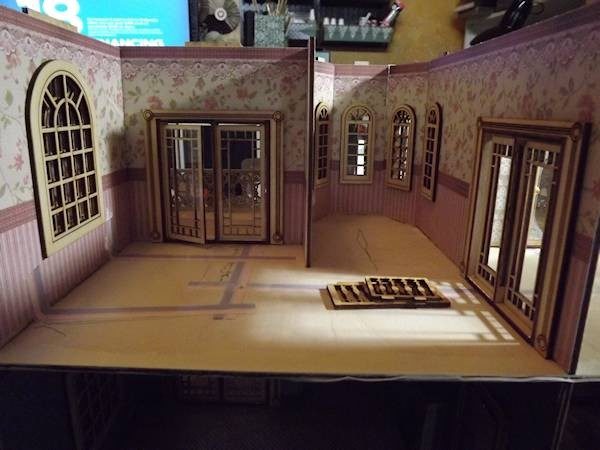
I’ve had an issue, from the beginning of the wiring project, trying to wire all the lights, before finishing, without having all the lights purchased. It seems to me that it’s easier to do the wiring if you have the lights ahead of time and can wire them in as you go along. However . . . lights are expensive and I’ve been searching for less expensive options or lights all along so have not purchased many.
Doing some more research I discovered these nifty little lights . . . Pin In Globes! To bad I didn’t know about these earlier lol. Nails on the backs of the globes, imbedded in the globes, allow for pounding of the fixture directly into a tape run with no additional wiring or electrical connections. Apply power and, presto, you have an instant working ceiling light. These could also be used where you want a wall sconce and replaced with a sconce later on. This is a GREAT idea! Use these as you work on your lighting and then get the more expensive lights little by little as you work on each room and finishings. At $5 each, it’s a very affordable solution. I’ve purchased several of them and will show those as I add them to the house.
With that said, and a trip yesterday to our local Hobby Lobby, I did pick up a few lights and installed them last night. I also had a Cir-Kit order arrive with my ceiling fan light! Here’s a look at the lights I’ve used so far . . .
Hobby Lobby Lights – these are actually for a 1:12 scale house but used on the ceilings, they simply look like large ceiling lights and to me are fine. Notice that these are plug in lights, not direct wired ones. You can make any light a direct wired or wired in light by removing the plugs (more on that down the page) but I wanted the option to change these later on so decided to use them as plug ins.
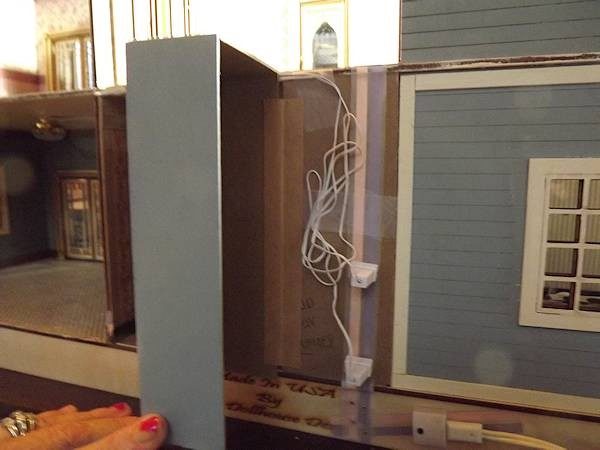
Looking where the lights are plugged in, this is an extra wall, made with chipboard, that I added to the house. You just run the tape wire, push a wall plug right into the tape wire, and then plug in the light. Easy peasy, no other wiring needed. To hide all the plugs and wires on this wall, I’ll be enclosing them in a box that will look like a tool shed when done. I long ago decided that I’ll be adding back walls to all the rooms, to help keep dust out so the tool shed will fit in just fine. It will be added with small hinges so you can swing it open for access to all the plugs. At a later date I can direct wire lights if I want to.
Ceiling decorations will hide the wires run across the ceilings and strips of painted chipboard will hide the wires run across the edges of the walls on backsides. I’ll show this all on another post near the end of the build.
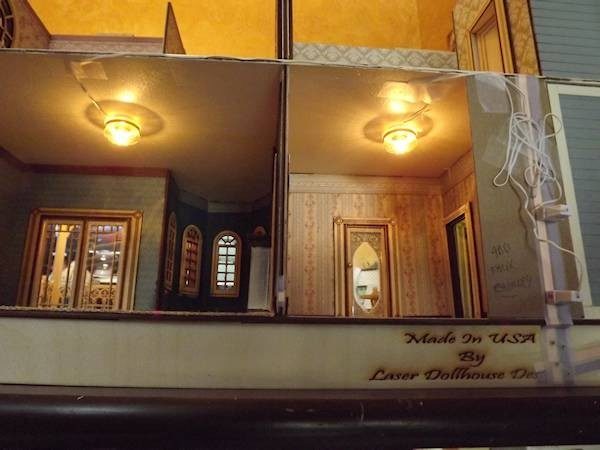
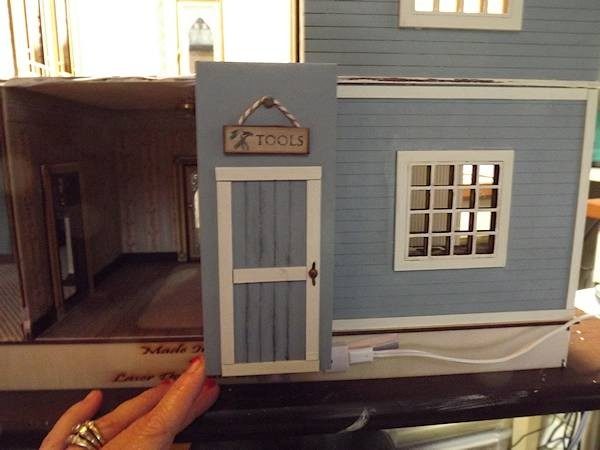
UPDATE . . . here’s a look at the tool shed I made to cover the wiring on back of the house. It’s hinged to the house with a construction strip. Nice and tidy huh.
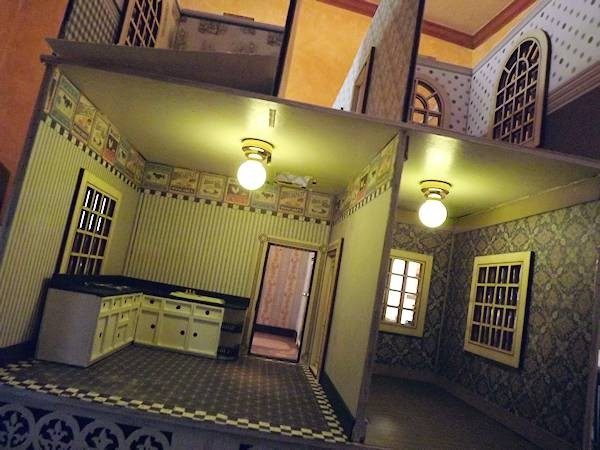
Another inexpensive lighting option . . . LED Battery operated lights! Simply glue a small magnet, included with each light, to the ceiling, switch the light on and the magnet, against the battery, will hold the light in place. One note . . . these can fall off if the house is bumped hard or moved roughly so it’s best to detach them before moving your house to it’s final place! Another note, most of these do not allow for bulb replacement but . . . they are supposed to last for thousands of hours burn time and are easily replaced if needed.
I’ve not found these for a 1:24 scale house but these, at 1:12 scale were fine for ceiling lights as far as I’m concerned. If you want to be true to scale thru your entire house, you’ll need to use a different type of light.
Here’s the front of the house showing the two porch lighting options. On the left, a wall sconce was added by the front door. On the right side porch, a true to scale ceiling fan light was added.
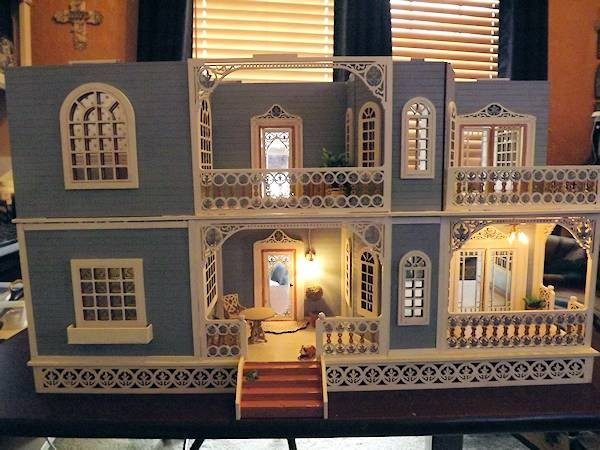
Porch light – I’ve used the wall outlet and plug in method. To run the wire for the light, I had to remove the plug, run the wire up to the second floor, attached the plug back on and then simply plugged it in. The wire and plug will all be hidden when I get to finishings but will be accessible if needed.
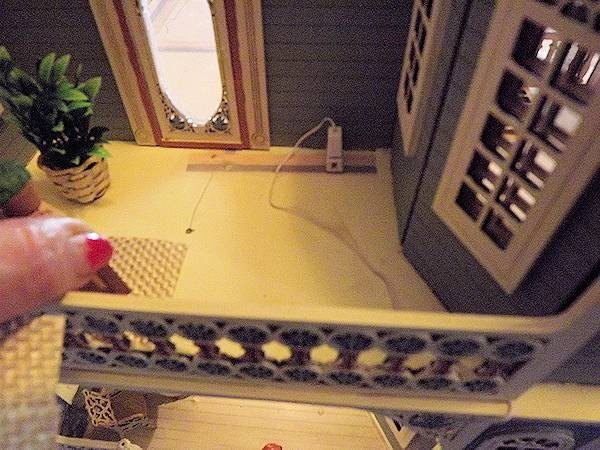
Ceiling Fan Light – here is another method of adding lights I found and like a lot. It’s shown in the wiring video in another post and was easy peasy to do. I drilled a hole in the upper porch floor, removed the plug from the light, and attached the fan light to the porch ceiling below, running the wire up thru the hole. Strip the end of both wires, removing the covering and leaving about 1/4″ of exposed wire. Twist the wires, place them in drilled holes at the tape wire then add an eyelet to secure the wires in the holes and make the connection to the tape wire. This will be easily covered with a rug or other flooring during the finishing step.
NOTE: I would only use this method for lights that have replaceable bulbs!!!
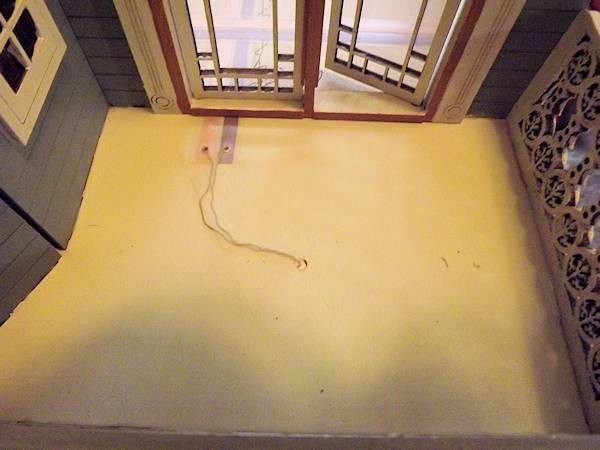
So as you can see, there are a lot of options out there for adding lights, even if you mess up and forget to run tape wire where you need/want a light later on! Just remember, this is a learning process and there isn’t much you can do that can’t be changed, altered or fixed along the way or later on. So don’t stress out lol.
Finally, here’s a look at the papers and flooring I’ll be using on each of these rooms . . .
2nd Floor Master Bedroom & Bath
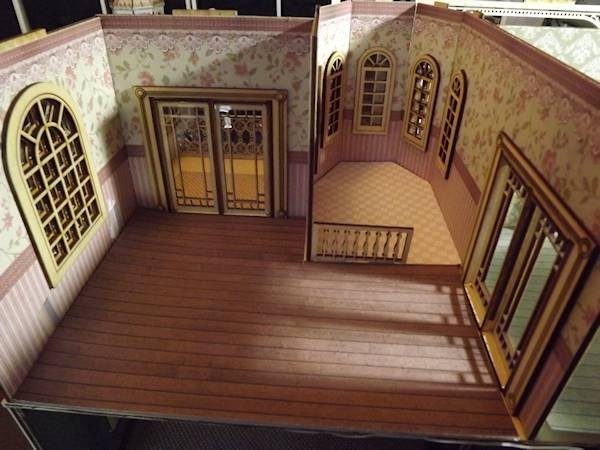
2nd Floor Nursery
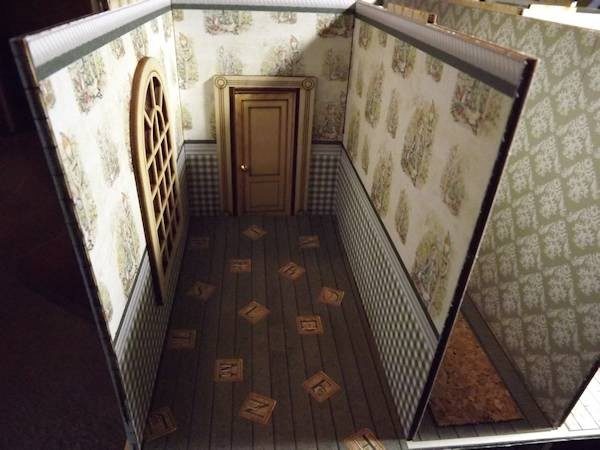
2nd Floor Boys Room
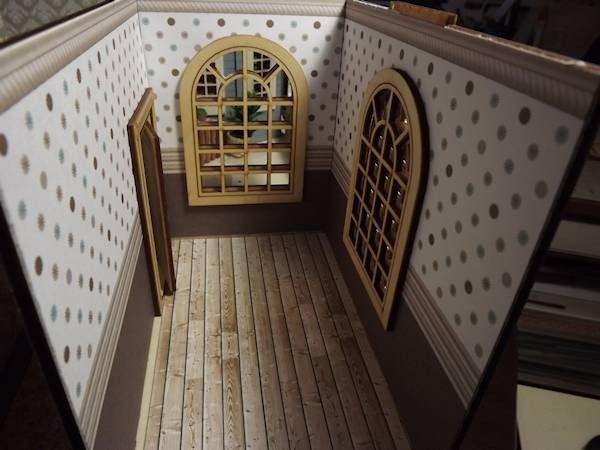
2nd Floor Sitting Room
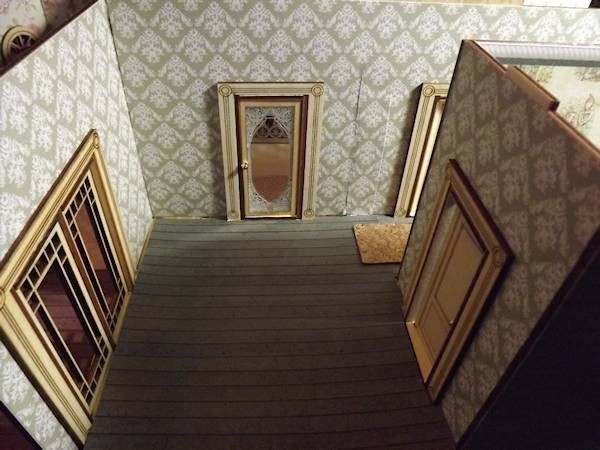
2nd Floor Hallway
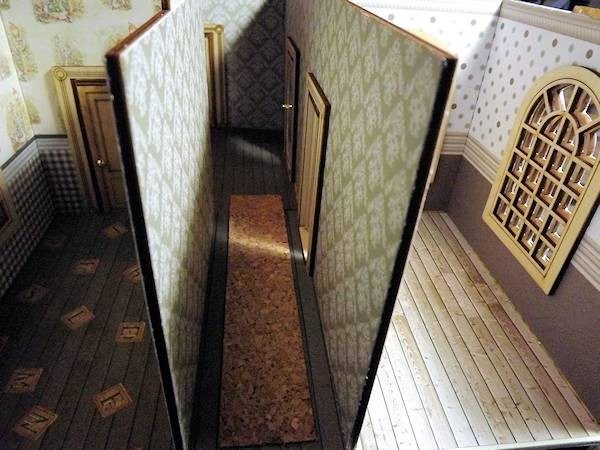
At this point I can go ahead and make my final tape wire connections then attach the flooring while I wait for the other lights to arrive. I still need to add some door knobs and finish up the upstairs porches to cover the wiring. I’ll add a new post once that has all been completed and I’m ready to move on to the third floor.
Final thoughts . . .
- It might be a good idea to start a notebook or small binder and keep notes on your house as you go along. Record the papers used and where you purchased them as well as furniture and such items.
- For lights, keep the packaging back, with the stock number on it, attaching any instructions for bulb replacement and write on the package where that light is located in the house.
As I was doing this . . . I made a discovery . . .
The clear ceiling lamps #606491 in the living room and entryway were purchased at Hobby Lobby and are made by Mayberry Street I believe. While they don’t have replaceable bulbs, you can unscrew the globe and replace the blub/socket with a kit #605709 then screw the globe back on.
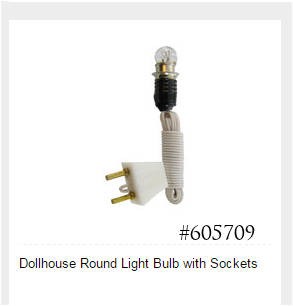
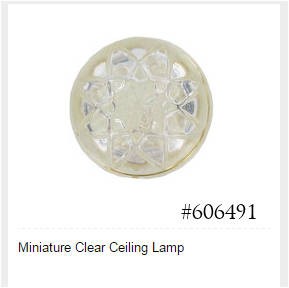
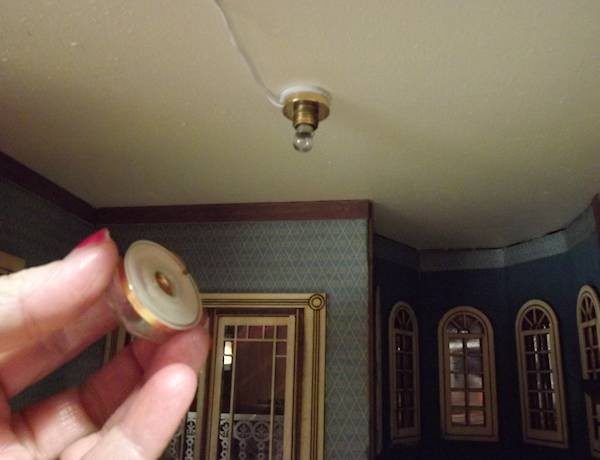
This is actually a good deal, even though you wouldn’t want to wire-in this light, because it’s cheaper to purchase the replacement bulb/socket set than an entirely new ceiling light fixture! My guess is that these lights will last a long time and you shouldn’t have to worry about replacement soon.
So be sure to find out all you can about the lights you want before you purchase them and check out all options!


Leave a Reply
You must be logged in to post a comment.