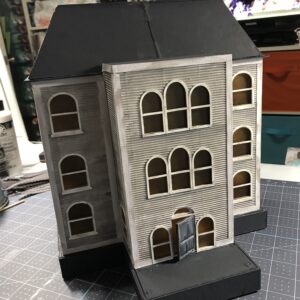
Welcome back! With this final post we should wrap up the Haunted House so that you can display it through the month of October. When we last left off the siding, windows and door had been added. Today we will work on the shingles, shutters and railings. We will also do some more finishing on the roof and base.
Let’s begin with the base .. .
You can choose to leave the base painted if you like but I prefer to fancy it up just a bit with some Bazzill Bling paper in Black Tie. Cut 1″ strips and use them to cover the outside of the base. Use this same paper to cover the top of the tallest roof. The piece for the roof is 2″ by 7 1/4″. I’ve also cut a piece to cover the front extension on the base, where the porch will be.
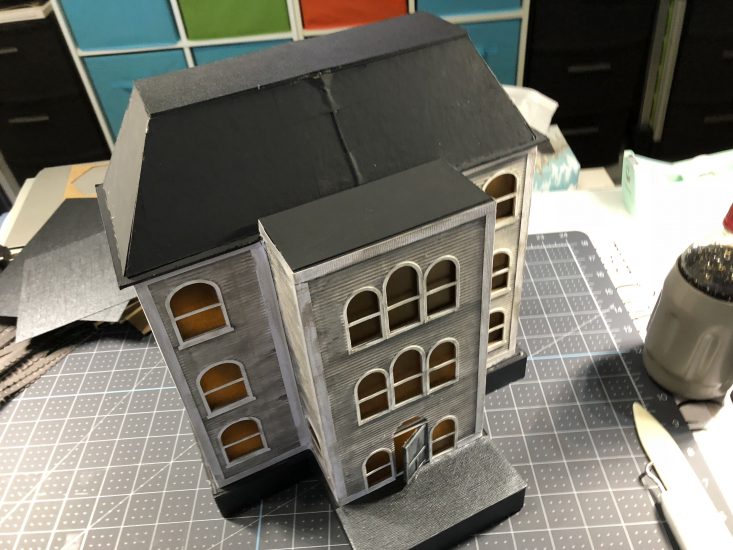
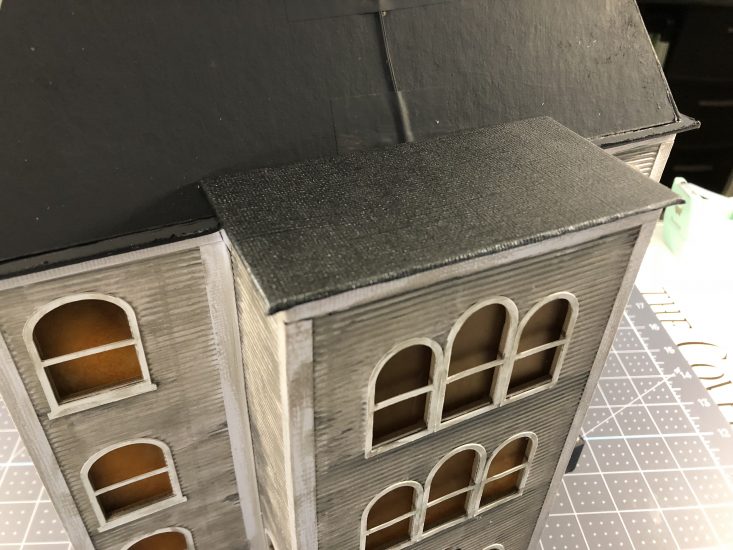
For the lower roof: cut a piece of medium weight chipboard to 4 3/4″ by 2 3/8″. Cut a piece of the cardstock that is about 3/4″ larger on all four sides. Attach the chipboard to the cardstock with score tape then trim corners and fold excess cardstock on to the raw side of chipboard. Glue this piece on top of the lower roof where it will create an overhang on three sides and butt up to the larger roof.
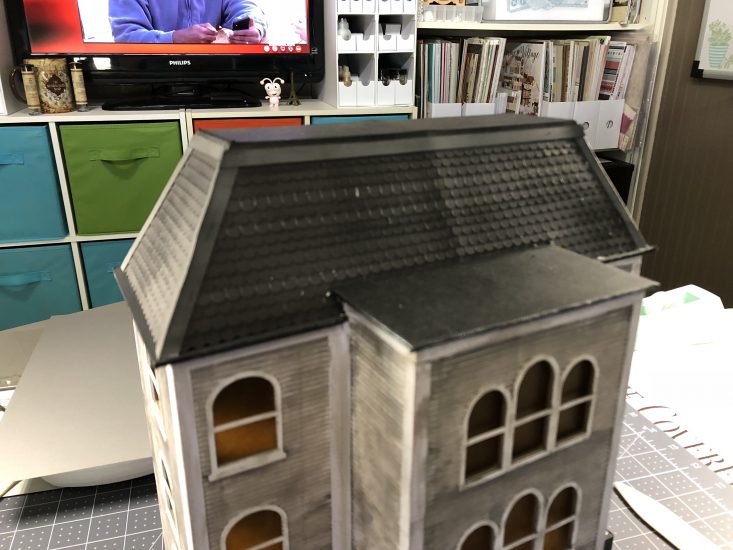
Now we are going to add the shingle strips to the larger roof. I’m adding score tape to the top portion of each strip then will attach to the house, one by one. You could use glue if you like. Place the first strip then place the next one on top so that it overlaps the first strip. The curve of the shingles should alternate between the cut areas as seen below.
NOTE: Shingle strips should be cut at the end of each roof section, not overlapped onto it.
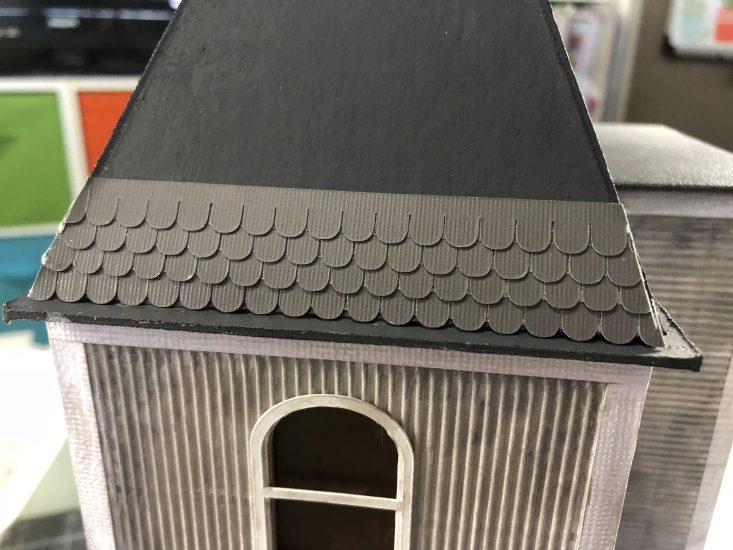
Now cut two 1/2″ strips of a lighter roof color cardstock and score them down the center. These will create the trim pieces for the roof corners and top as seen above and below.
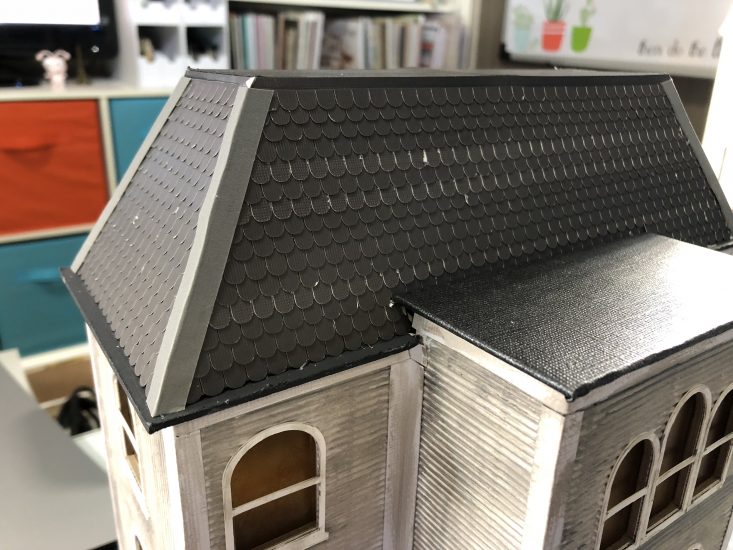
For the top trim, cut two 1/4″ strips of cardstock. Attach the trim with glue. When finished you can distress the shingles and trim both with some dark grey paint or Black Soot Distressing ink.
So now we are at the point of adding railings and shutters as well as other decorations. The really fun stuff!! Below is a list to the images I’ve used from Cricut Design Space. Note: you will need cricut access to use these images. There are other alternative images you could use as well. In Cricut Design Space search for “fence” to see a variety of options you could use.
Haunted House Railings
NOTE: Because these are Cricut Design Space images I’m not allowed to make SVG files for them. You will have to get these in design space or find other alternatives.
- Gray – Fence, corner post, porch “alternate” posts
- Dk Gray/Black – roof railings
- Turquoise – porch rails and corner pieces
- Beige – front steps
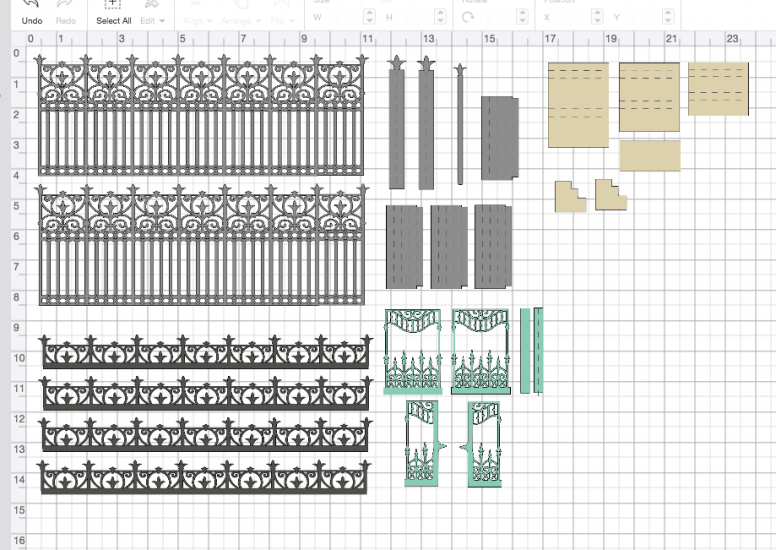
I’ll be adding railings to both roofs as well as an iron fence around the house base. For the house fence you will need to add an additional base at the bottom.
Additional base for fence use measures: 6 1/4″ by 12″. You will need to either add the front porch section to the base dimensions or cut it seperately. Simply glue the new base to the existing house base.
I’ve used some black medium weight chipboard for the fence base. You can find this on amazon but if you have brown medium weight chipboard you can always use that and just paint it black or cover it with black paper.
Upper railings – Cut the railings out then fit and fold them to stand on top of the roofs. Cut a couple strips of the black chipboard to 1/4″ by 12″ and add score tape to the back of each. Measure and cut pieces of the chipboard strips to fit on the bottom backside of the rails. This will give you a larger surface to glue to the roof base.
Attach both upper railings to both roofs with glue and let dry.
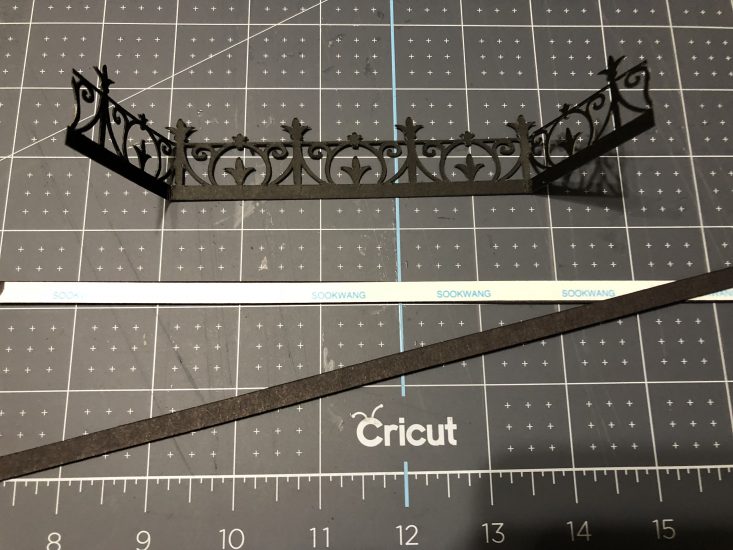
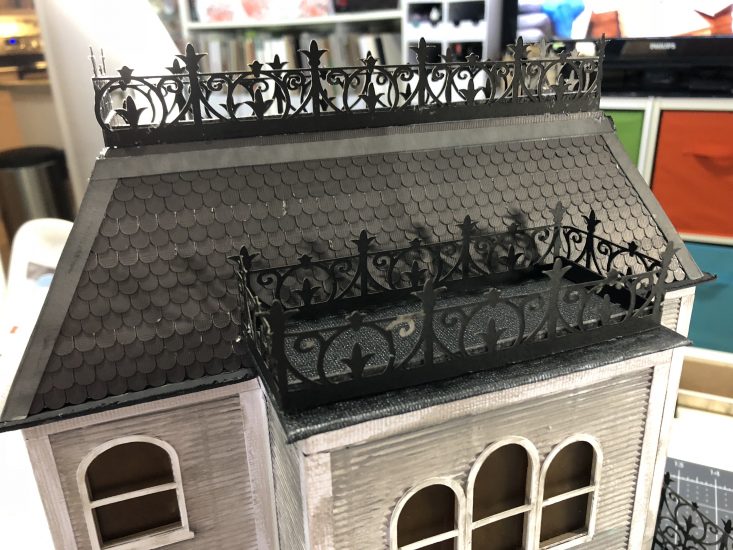
Railings and the fence are all created with Cricut Kraft Board in black. It’s optional but . . . to make the bottom fence sturdy and stand up well, I’ve used a piece of clear plastic behind the iron fence cut outs.
Graffix Clear Plastic .020 for fence
For both the upper railings and the fence you will need some 1/4″ x 12″ chipboard strips. I’ve cut these from the black chipboard.
Here’s a little video on how to create the fence and porch railings.
Up close look at the porch . . .
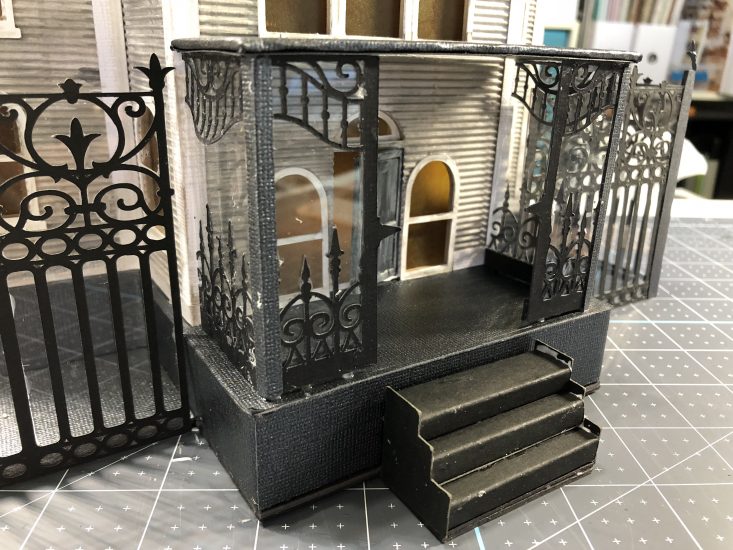
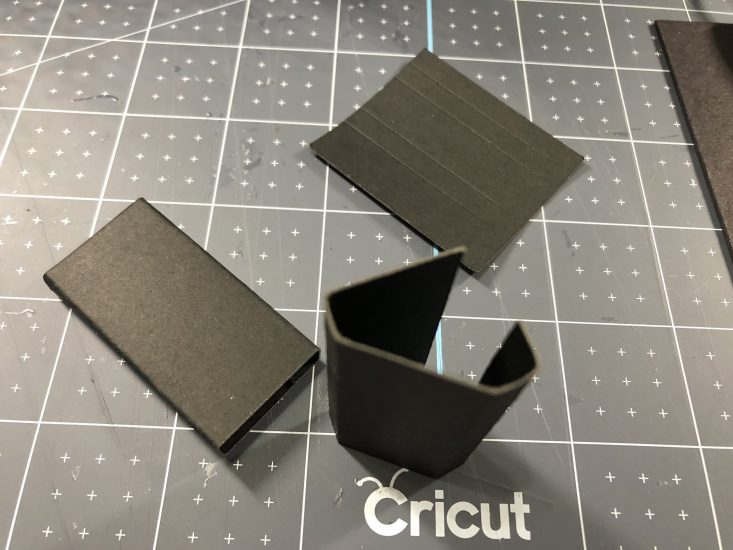
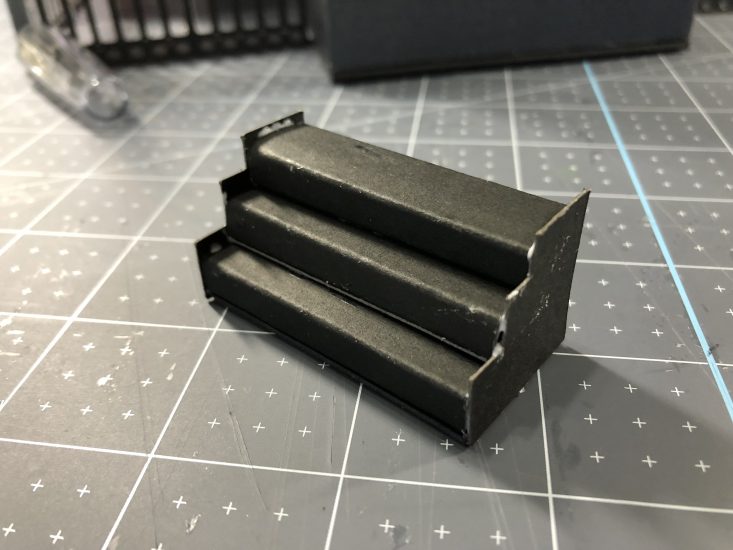
Next create the steps … simply fold on the score lines and glue the tab inside. Construct all three box/step shapes then glue them together one on top of the other with the backsides flush to each other. Next cut two pieces of the black chipboard to 1″ by 2″ and glue these to the bottom of the steps. Lastly glue the step side pieces on each side and glue steps to the house.
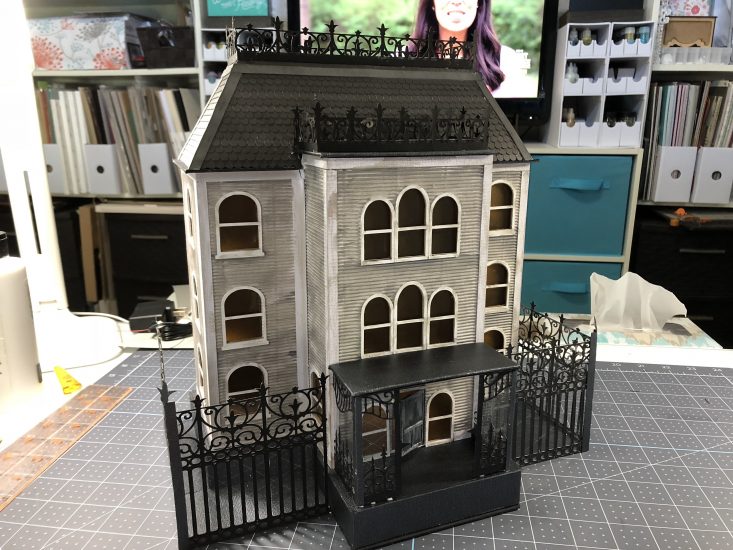
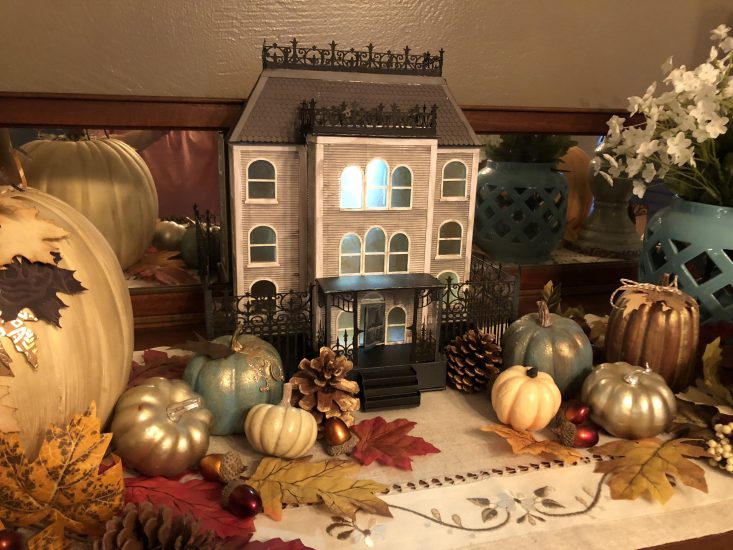
Last but not least . . . here’s the finished house!!!
And just one more little video …. how to finish up the light wiring!
And here’s a look at the finished house . . .
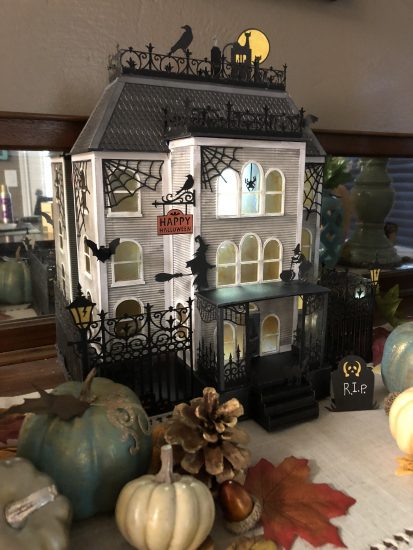
Here’s a view after I’ve added some spookyness to the house!
I hope you love your own Haunted House and that you’ll check back in a few weeks when I start on Christmas decorations!
Thanks for crafting along!



Leave a Reply
You must be logged in to post a comment.