Making a Haunted House with the Cricut Maker
2018 Haunted House Event
WELCOME !!!!
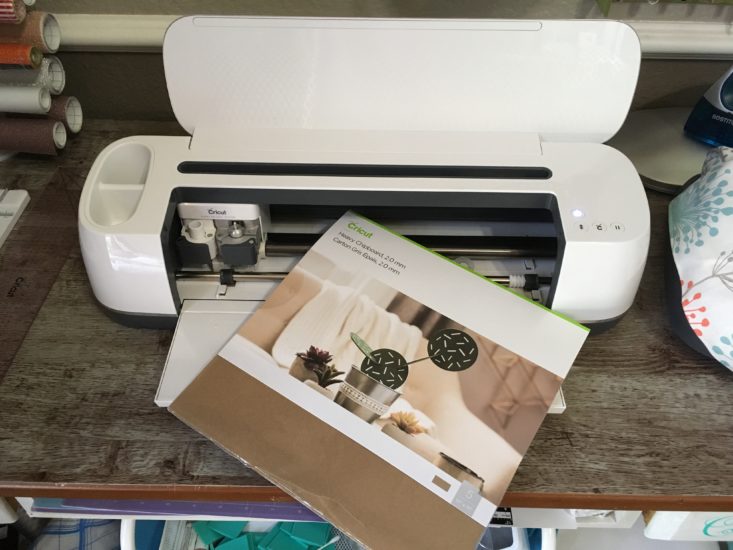
To kick off my new “Craft Along” series I’ve created a fun Haunted House miniature project using the new Cricut Maker machine with Cricut Heavy Chipboard and other materials. With the recent release of the Knife Blade for the Cricut Maker and their own Chipboard material, I knew this would be the focus of my new crafting series.
Let me start by saying that this project is adaptable to the end user and can be as simple or involved as you want it to be. For a simple project just cut, construct and decorate only the exterior of the house. For a more involved project, as a miniaturist would, decorate both the inside and outside. You will find instructions for both options below. These will be shown as “simple” or “full” construction in directions.
CUTTING files available in my Home Shop
Finished size: 11.75″ high, 9″ deep, 12.5″ wide
So let’s get started with some pre-building information! Please read through all directions before starting the project!
Materials needed . . . (additional materials will be listed in future posts as needed)
- Cricut Maker machine with knife blade – NOTE: you can use an earlier Cricut machine with a medium weight chipboard but understand that you might have to make some slight adjustments along the way due to the thinner material. You will also need to watch my first video on Part 2 to learn about creating a special cut setting for the medium weight chipboard.
- Cricut Heavy Chipboard (7 sheets)
- Cricut Pen – any size or color is fine
- Aleene’s Fast Grab or Quick Dry Tacky Glue
- Score Tape – or – double sided tape (1/4″ wide)
- Grafix .007 Clear Plastic – optional (black cardstock can be used instead)
- Grafix 0.20 Clear Plastic for those creating the miniaturist version where the inside is to be finished
- Cricut Corrugated Cardboard for optional siding use (3 sheets white)
- Cricut Kraft Board – grey, black or white
- Black medium weight chipboard
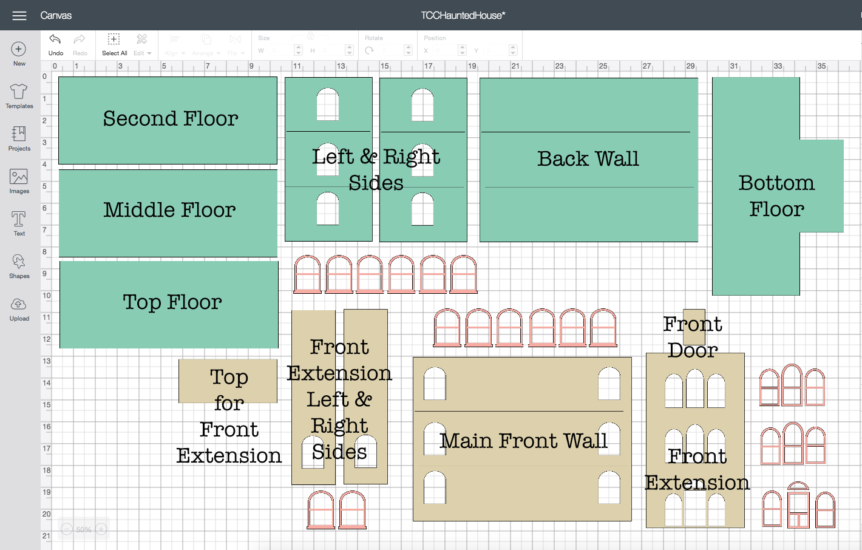
Here’s a CDS screenshot to show you what all of the base chipboard pieces are. Note that roof sections are not included here. There are other files as well for fence and railings.
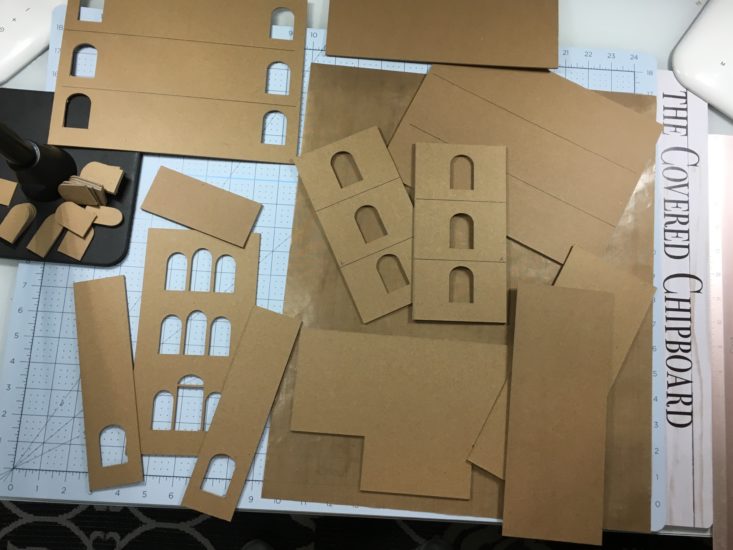
Here’s a look at the main pieces cut.
Machine Cutting Size Guide
Once uploaded/imported to your machine software, use the guide below to size each file! To resize the entire project be sure to select ALL files at once and size all at the same time. Also remember that you will need to change the fold lines from “cut” to “score” lines!! If you are unsure how to do this, look on my blog for a video on using SVG files!
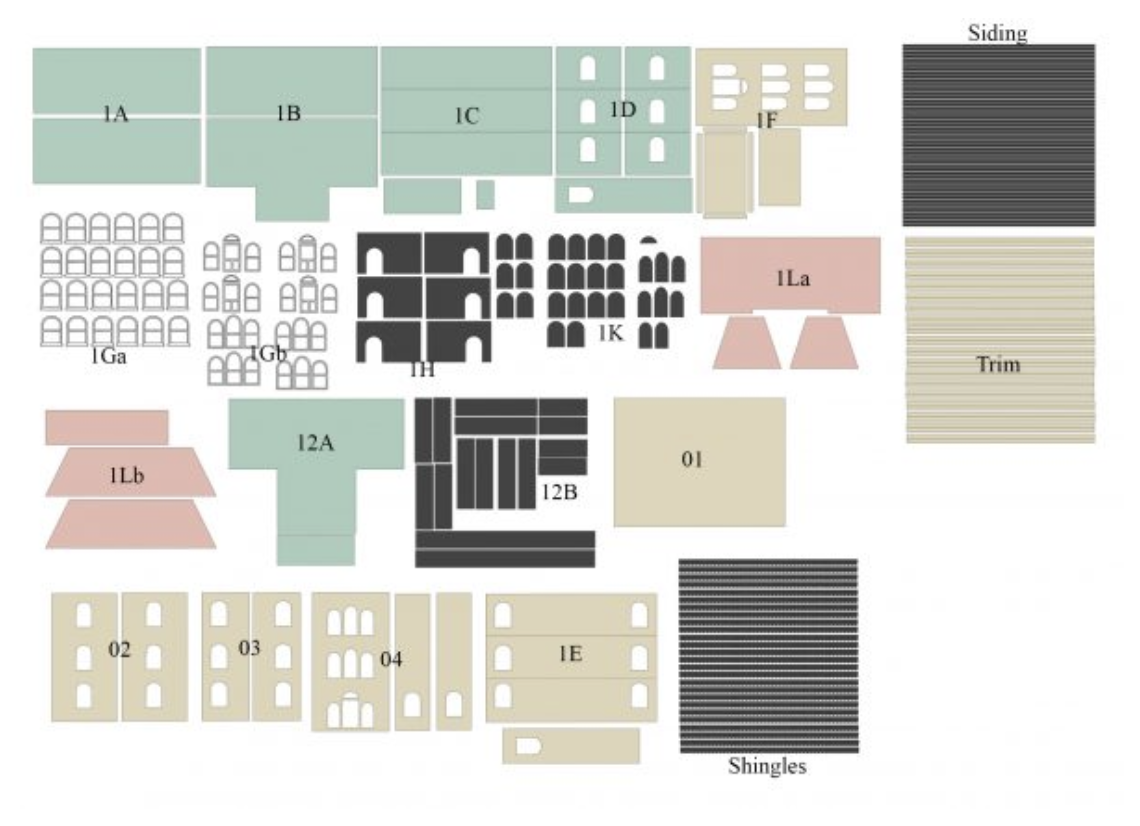
- Set each file to the dimensions listed below as you upload them into the canvas/project.
- 1A – 9.76 x 7.917
- 1B – 10 x 10.201
- 1C – 10 x 9.759
- 1D – 8 x 9.681
- 1F – 8.847 x 9.956
- 1Ga – 8.764 x 7.787
- 1Gb – 7.838 x 9.057
- 1H – 10.341 x 7.588
- 1K – 8.062 x 6.694
- 1La – 10.506 x 7.669
- 1Lb – 10 x 8.061
- 12a – 10.25 x 9.72
- 12b – 10.556 x 9.917
- 01 – 10 x 7.5
- 02 – 7.912 x 7.532
- 03 – 5.788 x 7.508
- 04 – 9.306 x 8.123
- 1E – 10.008 x 9.918
- Shingles – 10.545 x 11.345
- Trim – 11.083 x 12.028
- Siding – 11.25 x 10.626
Now, please watch this little video for some tips on working with the chipboard material . . . before you begin cutting! Note: I did not link to a single canvas below, as mentioned in the video but instead included a link for each seperate canvas.
Simple construction . . .
(if you are not decorating the inside)
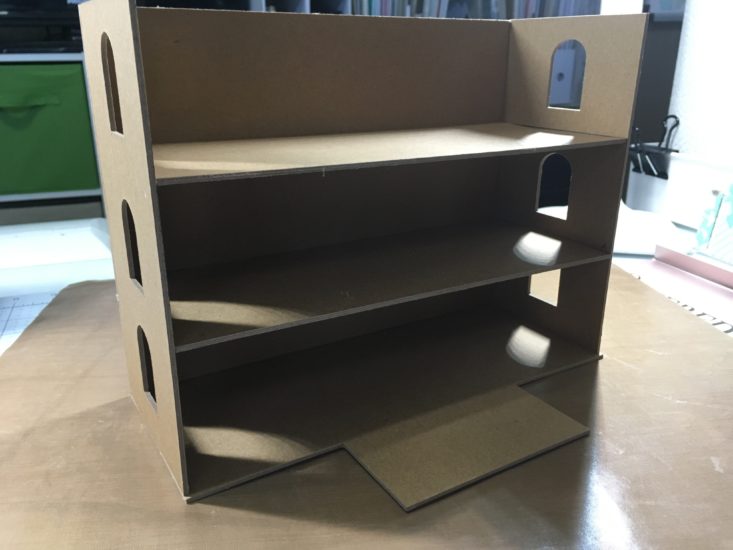
- Glue back wall to the main base making sure it is sitting on top of the base and flush with the back edge of the base.
- Glue left side wall to main base and back wall making sure it is sitting on top of the base and flush with the edge of the back wall.
- Glue in lower and middle floors. Glue the floor so that the edges rest just on top of the drawn lines on the side and back walls.
- Glue right side wall to main base, back wall, and both floors, keeping the floors in line so the edge rests just on top of the drawn lines.
Watch the video below for a visual tutorial.
A few notes before we continue . . .
I’ve created the house so that the front section is not attached and can be removed to show the inside. For those who are not concerned with inside decorations, you can go ahead and glue the remaining sections to the base structure. But before you do that, you need to finish the inside of the windows based upon the following.
- Do you want light to shine thru the windows? If so, then you need to cut rectangle shapes from plastic and glue them to the inside so they cover the windows. Before attaching the plastic to the inside, rub them with fine grit sandpaper to give them a frosted look so they are no longer clear.
- Do you want simple blacked out windows? If so, you need to cut rectangle shapes from black cardstock and glue them to the inside so they cover the windows.
- Don’t forget the windows on the remaining sections as well!
- 1.5 x 2 inch rectangles should cover any size window.
Once your windows are done, you can continue with construction of the extended front section and front wall as shown in the video below.
Remember . . . these instructions are still for those who will not be finishing the inside.
- Gue the extended front sides to the extended front.
- Glue the top onto the extended front section.
- Glue the extended front section to the center of the front wall.
- Glue the front wall to the rest of the structure.
- Glue the top floor onto the main structure.
This completes Part 1 of the project. If you have any questions please leave them below in the comments area and I’ll get back to you as quickly as possible. If your question is urgent …. you can always contact me on Facebook or Messenger.
Note: I will be creating a short video about the windows and will add it to this post soon.
Have a great day and thanks for joining the project!!



I tried to open canvas 1e for the haunted house. DS said it was private and I couldn’t open it. I really wanted to make this. Please help!
Yes I’m not sure what the issue is with that file and DS but …. I’ve emailed you the SVG file for that one. Let me know if you run into any problems using the SVG.