Not long after starting my larger dollhouse, I decided to purchase both a Gazebo and guest house to go with it. The smaller house is also a laser cut house from laserdollhouses.com and is called the Little Anne Cottage. It’s also 1:24 (half scale). I thought I had posted about this one previously but it must have slipped by me. So here’s a look at how this build progressed.

As you can see, it’s a two room house with a pretty front porch and fenced in area. It’s come a long way since being unpacked as you can see below.


Here’s a look at what came in the kit . . . I just love how these kits include all the fancy trims, doors and windows.


Build 1 – the bases and main walls. Everything is tab and slot with the tabs being flush in the slots. Pieces go together easily and no sanding is required!

Build 2 – the front porch railings are added. I always love how the laser leaves burn marks on the wood with these kits. The look always makes me debate if I should paint or just use clear varnish.

Build 3 – the base and inside walls, along with the doors and windows are painted. The front part of the door and windows have been installed on the outside of the house, after it was painted, leaving the inner parts to be attached after wallpaper is added.

The outside and all trim has been painted.

Build 4 – added the second floor and one roof section.

Next I added the flooring and wall coverings. Walpaper and flooring were all printed at home on 110lb white matte cardstock and attached with score tape. 1/4″ wide chipboard strips were used as trim on and around the ceiling with 1/2″ wide strips used on the bottom. The strips on the top help to hide the light wiring.
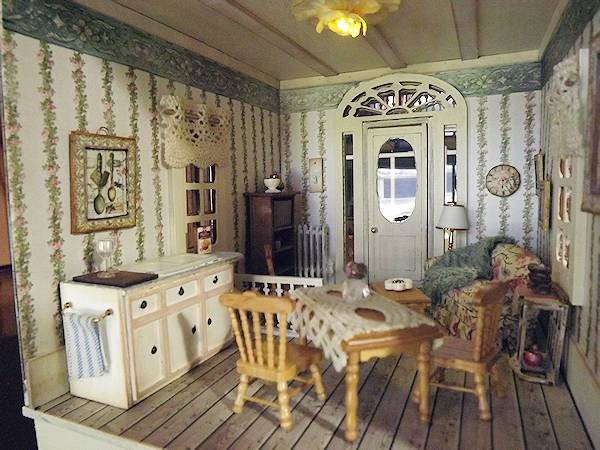
Framed art work was found online. I printed two of each piece, cutting the center out of one piece, then adding the frame on top of the other piece to add dimension. All were applied to chipboard and the edges were painted gold.

The bookshelf was created with chipboard, books and clock were also printables. Beads were used for a candy dish, jar and candle. A strip of an old dishcloth, folded, makes a blanket in the bookshelf.

Small dowel rods painted gold and lace trim were used for the curtains on both floors. I also added a strip of lace to the kitchen table. The coffee table was a very simple on I created from wood scraps and square strips.

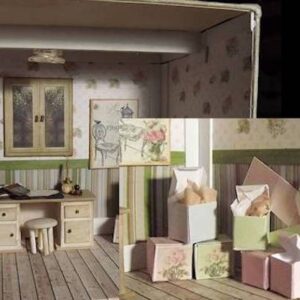
Upstairs you can see several of the furniture kits I’ve purchased from a site: Petite Properties. They have some lovely kits that are inexpensive and easily glued together. The bed, blanket chest and oval mirror are PP kits. The lamp I made from larger beads, paper lampshade, lace and a button for the base. I ran across these lovely pearl flower jewelry pieces I’ve had forever and it turned out to be just perfect for a bedside table! Little beads create various bottles. There’s a purse and little shoes in the room that were silver charms I added some paint to. The little hat box was created with a paper quilling method – just a full strip quilled then left flat. Make two, glue one on top of the other and you have a bottom and a lid. Decorate and add a tiny piece of twine for the handle.

Here’s a close up of the bed. It’s the first sort of fancy bedding I’ve created.

And here’s a close up of the chipboard cabinet in the corner . . .

Last but not least, one of my favorite things in the house is the ceiling light downstairs. This was a 2″ size Petalloo flower for scrapbooking. I cut the petals into the center so I could place and glue the led light to the center. Then I glued the petals back together and added two coats of a clear gloss varnish on the flower.

Once the flower was glued into place and most of the way dry, I bent the center petals downward around the light. Placed the wires alongside the trim and glue them in place then painted them.

And now I’m back to the front of the house where I still need to do some work.

Once I placed all of the fence and posts in place I decided it was just to much and took away from the front of the house. I’ve used only the side fences and corner posts as you can see above. Sticky backed grass paper, made for dollhouses was used on the lawn. The brick walkway is a leftover scrap from the roof of the big dollhouse, painted to look like brick.
The planters were created using a wood square strip, for the bricks, glued onto a piece of chipboard, with moss and faux grasses glued in the center. I’ll be making some plants and flowers to go in each of the planters soon.

For a touch of whimsy, I added a little birds nest/house into the side of the post as seen above. The post had a hole in it where another piece of fence was supposed to go.
So that’s it for now. Still have the front yard to finish, the porch and then the roof. I’ll update this post when I get those done. All in all, this has been one little FUN house to build! It would make a GREAT first house project for anyone wanting to try 1:24 scale!
At last but almost on a sad note, the Little Anne Cottage has been finished! The roof has been attached and the front porch finished.
Hope you enjoyed the build . . .



Leave a Reply
You must be logged in to post a comment.