Since delving into the world of miniatures, December 2015, I’ve challenged myself to try different projects in various sizes as well as using found items for pieces and decoration. It’s been such a fun ride and has turned into a love of anything of small size as well as a journey I see lasting for a long long time.
I’ve created a Dollhouse from scratch, made my own furniture, a cabin in a suitcase and most recently, challenged myself to complete a tiny 1:48 (quarter scale) project. Surprisingly, at least to me, this small scale was not as difficult as I thought it would be. I’ve not attempted the furniture or accessories yet but as far as the structure, it was just challenging enough and yet easy enough to be a lot of fun. I hope you enjoy viewing the process and that you’ll be inspired to attempt something on a smaller scale yourself!
The outside is now finished!
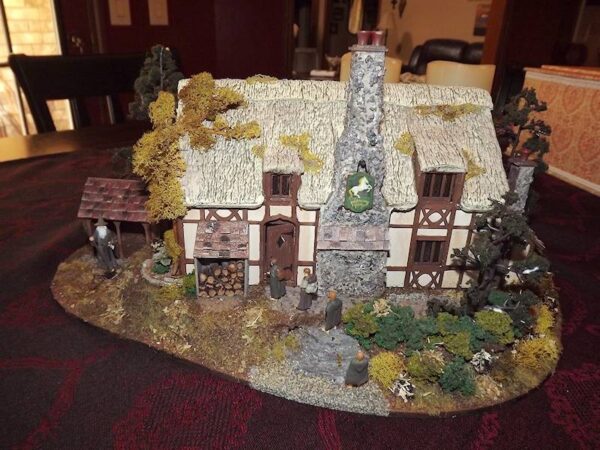
Project: Woodnook Cottage Kit by Petite Properties with the Large Display Base and Woodshed kit
When finished, I’ll be turning the cottage into The Inn of the Prancing Pony from Lord of the Rings.
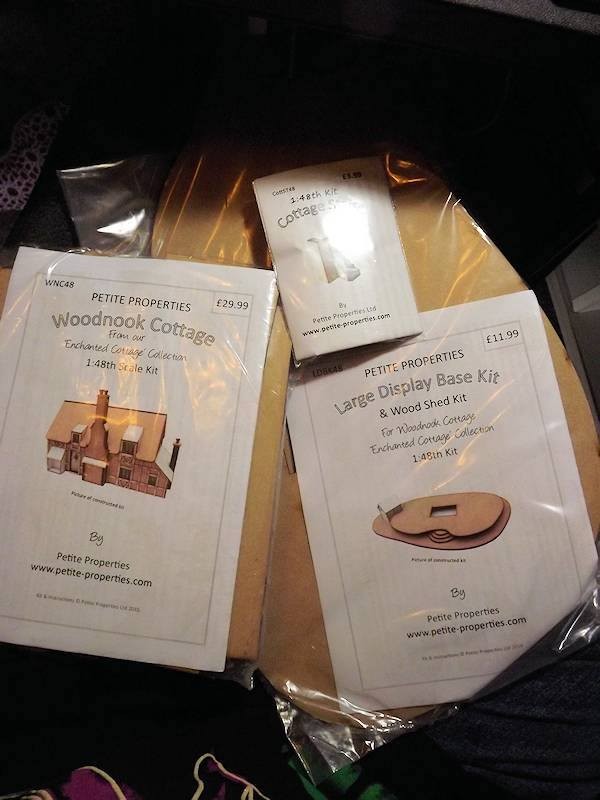
Petite Properties has a lot of different kits in the 1:48 scale as well as many furniture kits for their houses. Stop by their shop and check them out!
To begin any project, open the package and spread out all the pieces. Read the instructions all the way through and get familar with all the different pieces and how they go together. Some like to do a dry build, putting the pieces together with painters tape, ahead of time but I’m not one of them. I prefer to just jump right in and get started.
One note with this scale, you will most likely need to do your painting and finishing as you move from step to step so that you can reach everything. You will also either want to have all your furniture to install as you complete a floor – or – make removable flooring so you can attach the furniture to the floor then slide it into the finished house. If not, you will find it very difficult to add your furniture later.
Materials I used for finishing . . .
- DecoArt Texture Thick – applied with plastic knife
- Folk Art Acrylic Paint: Antique White, Barn Wood, Coffee Latte, Parchment
- Americana Acrylic Paint: Fawn, Coffee Bean, Dark Scarlet
- White and Black Acrylic paint
- Sea Sponges
- Vintage Photo Distressing Ink
So here’s a look at the building process . . .

Paint all the trim, door, windows, stairs and stair enclosure. TIP: as I worked I discovered it was easier to color the fine wall trim pieces and windows with Minwax Furniture Stain Pens instead of paint. I used these mostly on the outside wall trim.

To create the wall texture, on the house inside walls, I applied a coat of the the texture thick, let dry and then sanded it down to remove all the larger bumps. Afterwards the walls were painted with Parchment.

It’s hard to see in the photo below but once the wall paint was dry, I brushed on some of the distressing ink here and there.
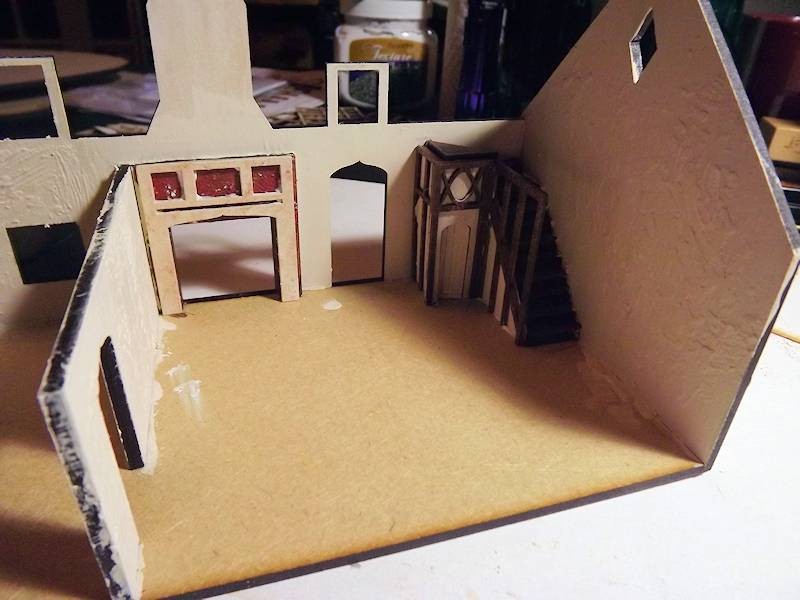
Dark Scarlet paint was used on the fireplace back section. The fireplace surround was completely painted with Coffee Bean then I sponged it heavily with Coffee Latte and Fawn.
Below you can see the entire first floor with all the trim in place.
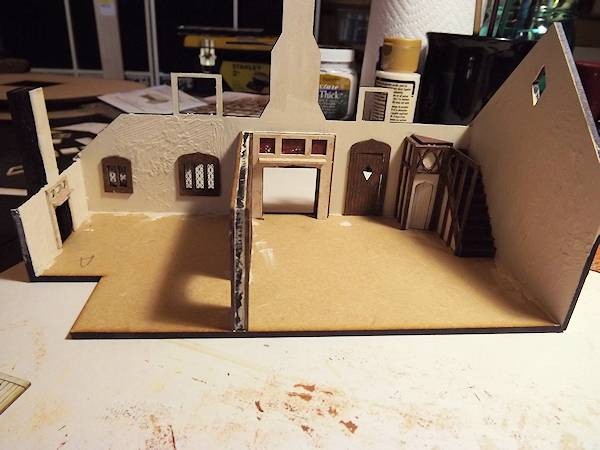
TIP: spray seal the entire interior of the house before you add the acrylic windows unless you want an old glass look, which is foggy and can’t be seen through well.
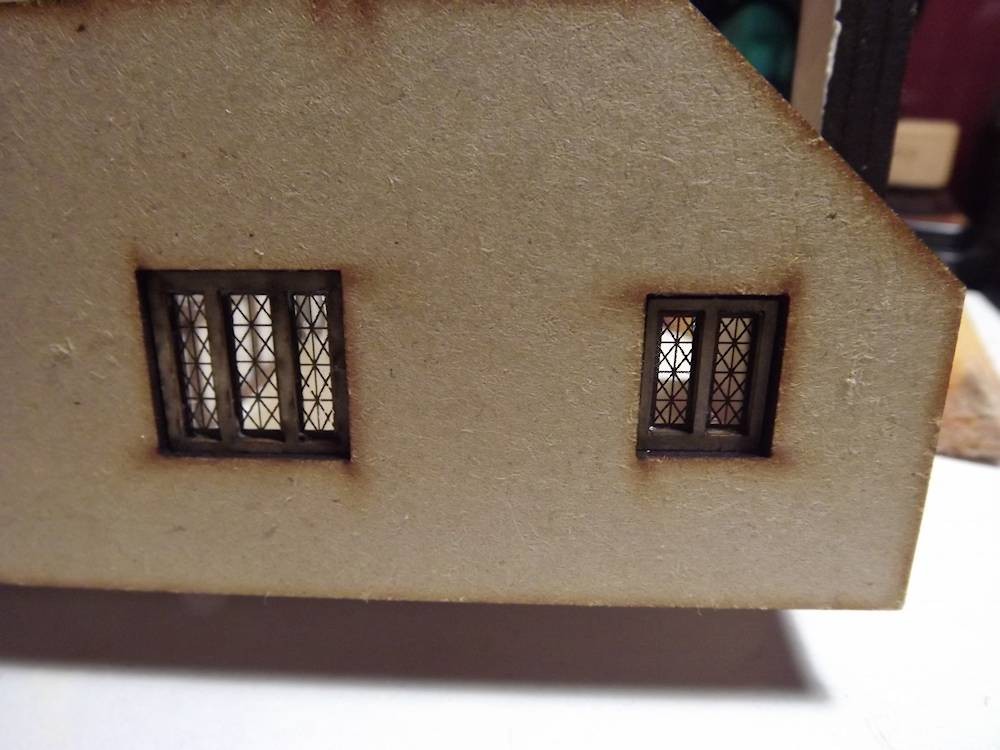
Next I added the windows with the acrylic and wood inserts. I loved how they did the windows! First you add the window frames on the inside then you attach the acrylic pieces to and insert wood piece which gets placed inside the walls, holding the acrylic between the insert and the inner window frame. Makes for a very nice look!
The outside wall trim actually becomes the outside window framing.
I’ve used a printed flooring paper, printed on 110 lb white matte cardstock for all the flooring. The printed floor paper was then applied to a thin chipboard piece and fit to each area.
TIP: If at all possible, make templates for your flooring before you start assemply. You can then cut and trim the template as needed to fit each area and use this to cut your actual floors.
I painted all the floors with Coffee Bean and before I add furniture to the floors, I’ll seal it with a clear spray sealer, either matte or semi-gloss.
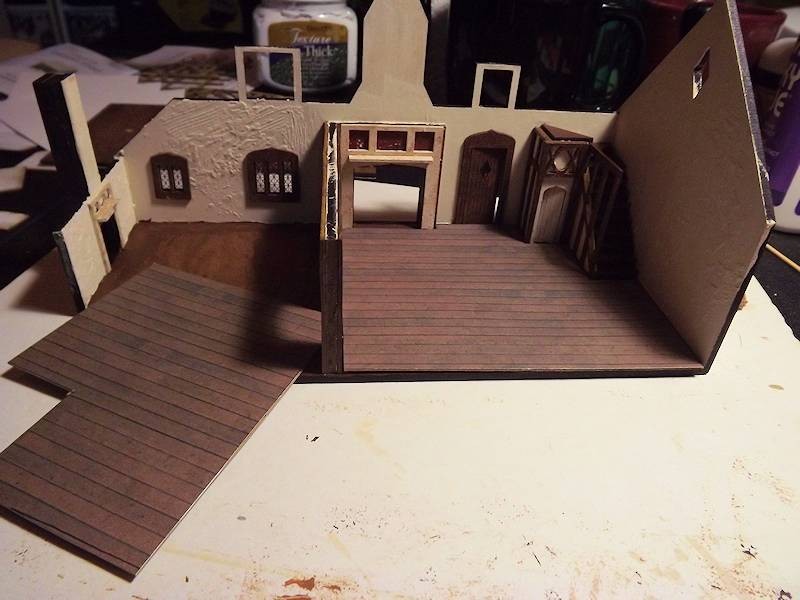
With this type of flooring, I can attach all furniture to the floor then just slide the floor into the house. This also makes it easy to clean in the future!
Add the second floor, creating the removable floors at this time.
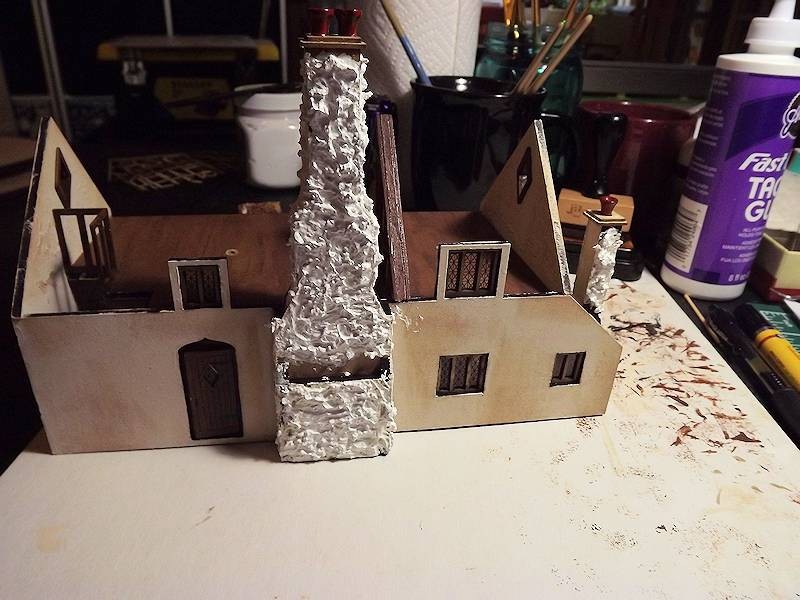
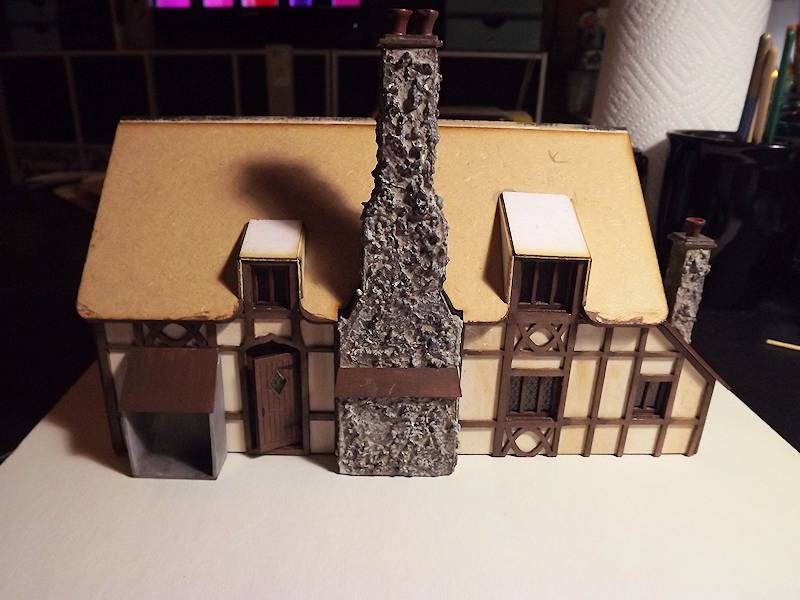
Above you can see where I’ve added the DecoArt texture to both of the chimneys. Just spread it around with the plastic knife and let it dry. Try to keep the texture even around all the sides.
Paint the entire chimney with Barn Wood paint then sponge over the top with some black and a little bit of white. Paint the top part with the Barn Wood and lightly brush on some thinned down black paint. I also brushed some Coffee Bean on top of the red chimney stacks.
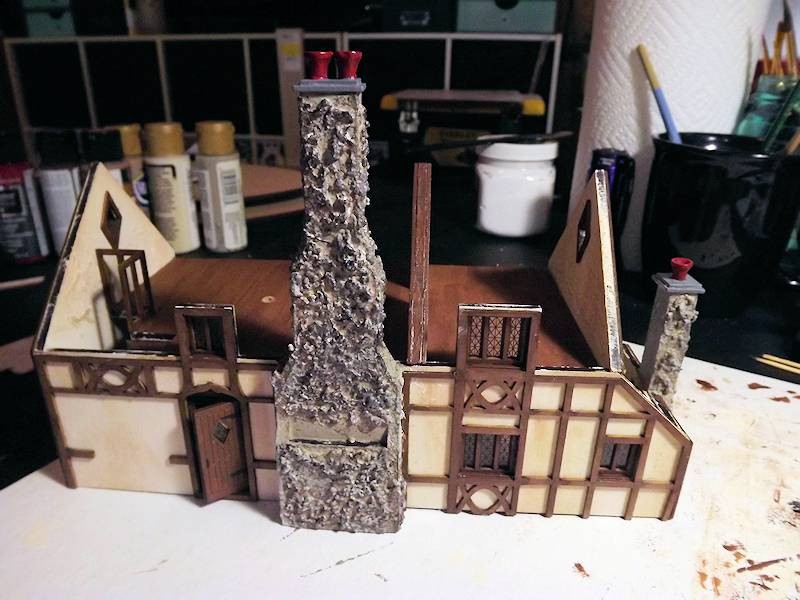
Paint the entire outside of the house with Parchment then brush on some Vintage Photo Distressing ink in various spots. Make the ink heavy in a few spots and light in others. Now add all the outside trim.
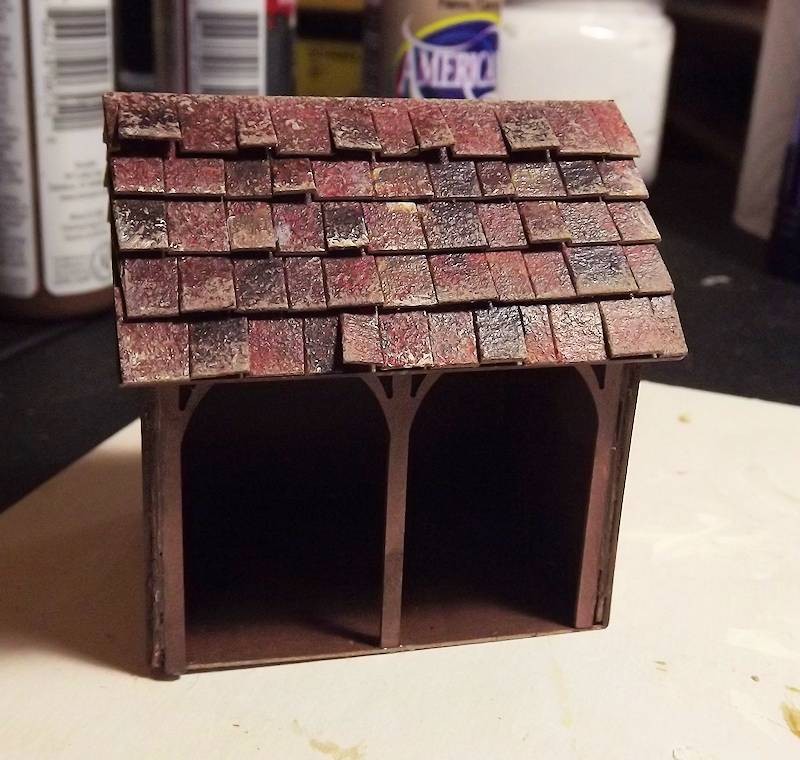
Finish the wood shed and attach it to the outside. I’ve painted mine with the Barn Wood then brushed on some coffee bean. All the little roof pieces, shed and on chimney areas, were painted in Coffee Bean.
Add the roof sections then the dormers. Paint the dormers with Coffee Bean and the roof with Fawn.
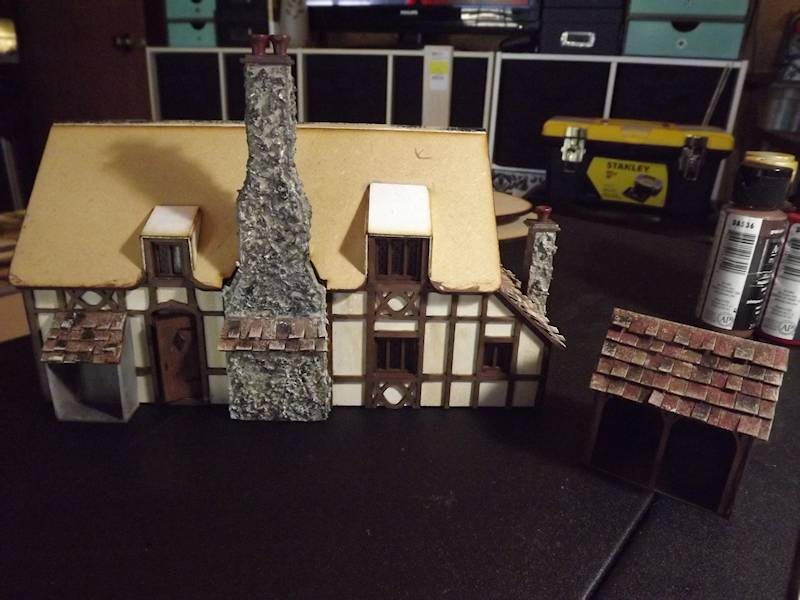
Now it’s time to add the roof shingles! Here’s a close up of the shingles on the little wood shed.
Sponge paint about half of a 12×12 sheet of thin chipboard or a thick cardstock with the following colors, in order listed, and just keep adding paint till you get the look you want. (see note on shingle touch up below)
- Dark Scarlet
- Coffee Bean
- Fawn
- Coffee Latte
- Parchment – very little
Cut strips of the painted chipboard about 1/4″ wide and length of the chipboard. Now cut upwards into the strip almost all the way to the top, along the entire length of the strip. Cut at random spots, creating shingles in different widths.
Measure the width needed for the spot you are covering, cut the strip to length and apply by adding a thick line of glue to the top, uncut area of the strip. You will most likely need to hold the strip in place for a few minutes, allowing the glue to grab onto the surface. Keep adding strips of shingles till the surface is covered. Let dry completely!
NOTE: Touch up the shingles by either painting on wattered down paint (blacker shingles seen below) or sponging on some thinned down paint (parchement colored areas seen below), till you get the finish you like.
Once all your outside painting is finished, spray seal the entire piece.
Next up is the roof! Here’s where I ran into a big challenge, one because I was determined to have the thatched roof look and two because I didn’t have the materials most use for this look, onhand. One of my problems is that I hate waiting on things. When I’m in the mood to work on something and want to keep working, but don’t have materials, I get determined to find something in the house that I can use as a substitute. Bad habit I know (grin).
Sooooooo, I went around the house in search of something that might work for the roof and ran across a box of old washcloths and t-shirts. One glance at a thick pile moss green washcloth and I thought . . . hmmm why not? I’ll give it a go and see what happens.
And this is what happened . . .
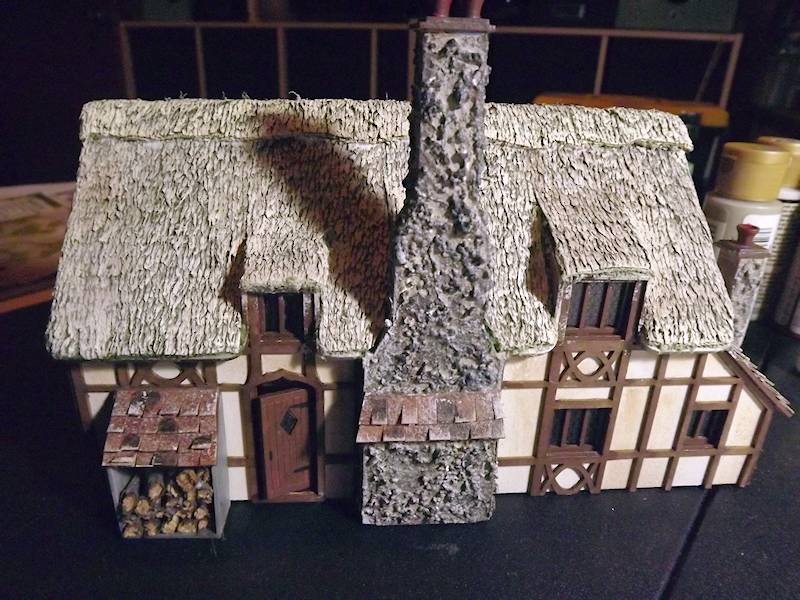
I started by rough cutting the height and width, plus some, of the entire roof size. Next I used a sponge to apply paint in a downward motion, from top to bottom, on the entire piece. Paint was applied in the following manner . . .
- Barn Wood
- Coffee Latte
- wattered down Coffee Bean (not to much)
- Parchment (lots of this color)
I let the paint dry completely then spray sealed both the front and back of the cloth. I then fitted the cloth to the front roof section, glued it down and trimmed away the excess carefully. For the edges, I used a sponge to apply more of the Parchment colored paint. When that was dry I used my finger to apply glue onto all the edges, mushing it down onto the roof surface and let it dry.
Next I added the cloth to the backside roof in the same manner and let it dry.
Lastly, I cut a strip of the cloth in a wavy manner and applied it to the top of the roof, overlapping onto both the front and back sides of the roof.
Let the roof dry completely then spray seal it with two coats of matte sealer, letting it dry between each coat.
Turned out pretty good huh!
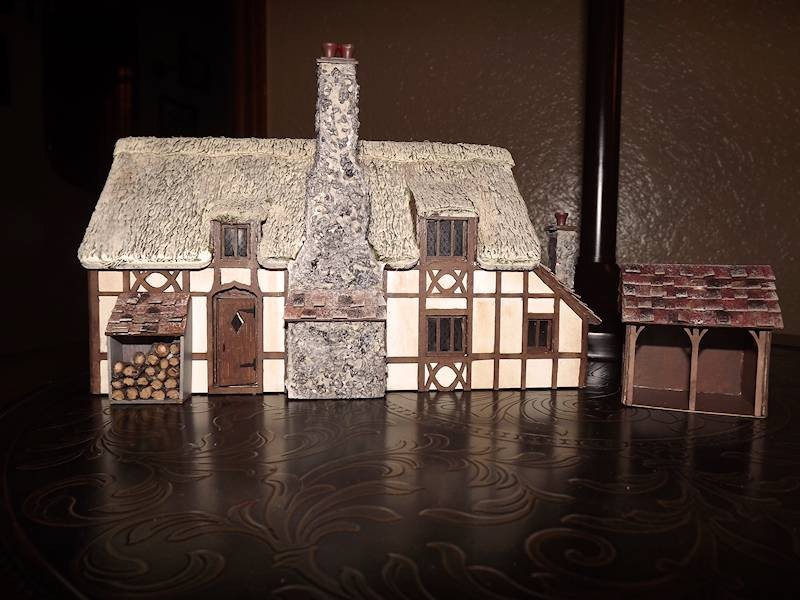
You will most likely need to do some touch up to the brown trim around the roof lines at this point and then give the entire house, inside and out a good once over spray with the sealer.
Landscaping . . .
I was soooo intimidated to start the landscaping since I’ve never done anything like it before. Let me say . . . don’t hesitate!!! It’s not as hard as it looks and if you mess something up, just cover it up with more material lol.
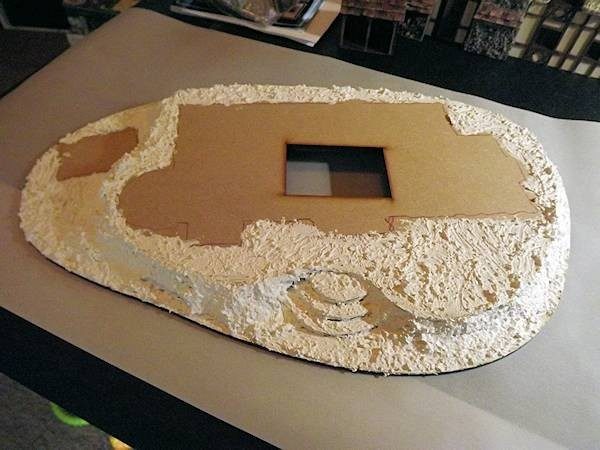
I’m sure this is not how most would do this part but . . . paper towels were stuffed into the base between the top and bottom layers to help form a mound from one to the other. I then covered the base, except for where the house and shed will go, with the DecoArt Texture Thick and let that dry overnight.
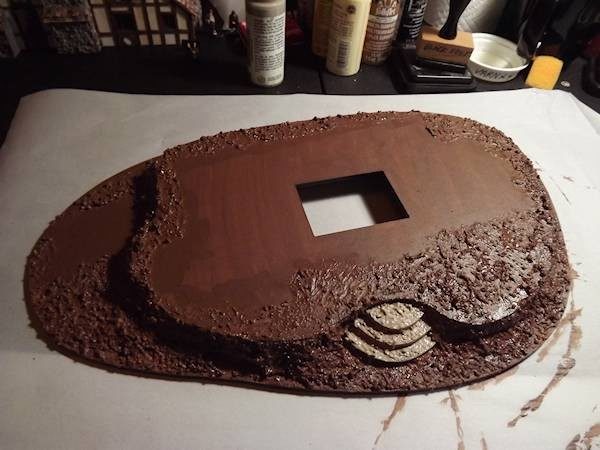
Painted the entire base in Americana Coffee Bean acrylic paint.
Used the little off cuts in the kit to create the walkway and painted the steps in a mixed grey color.
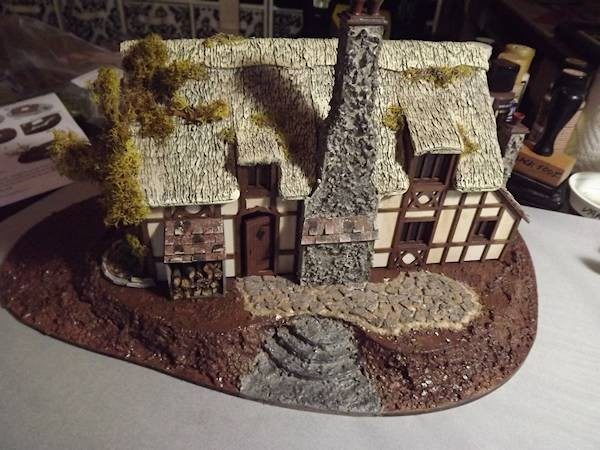
Next ground cover dirt was added over most of the base. Thicker in some spots, then thinner in others to let the texture show. I’ve applied the dirt with a watered down glue but next time I’ll use a spray glue as painting it on was a pain and pretty messy when you start applying the material. Sand was added between the walkway pieces as well as spots of the green material.
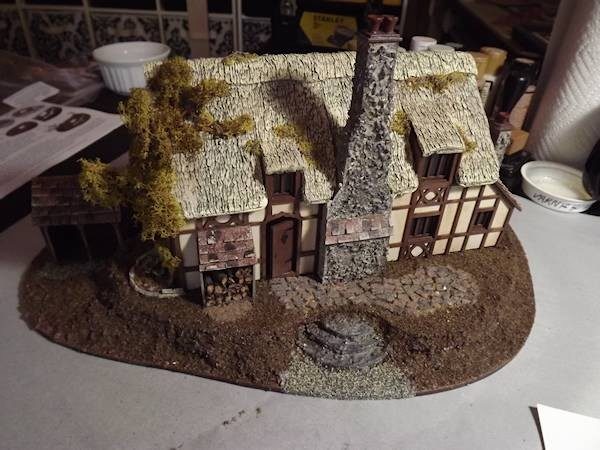
More landscaping materials are added one at a time. With each new layer I sprayed the entire base with a clear matte spray sealer. Next the bushes were added here and there. A bit of moss, a bit of this and that were added.
Lastly the little (gamer pieces O Scale) little Hobbits and Gandalf were added.
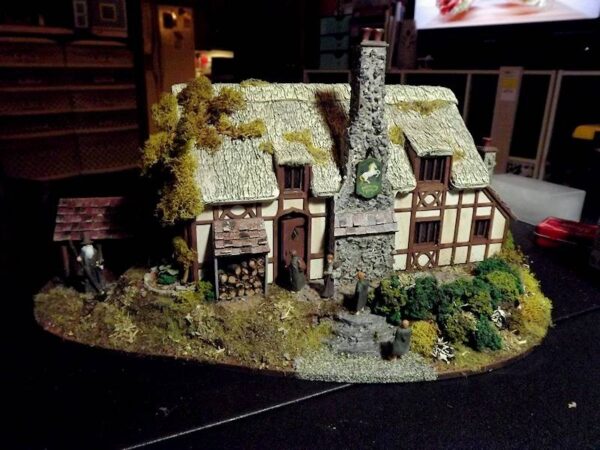
And that’s that! I hope I made this look easy and inspired you to try your hand at a 1:48 piece!!! It was truly FUN and not so hard to do.
Till next time . . .
Back to Petite Properties


Leave a Reply
You must be logged in to post a comment.