
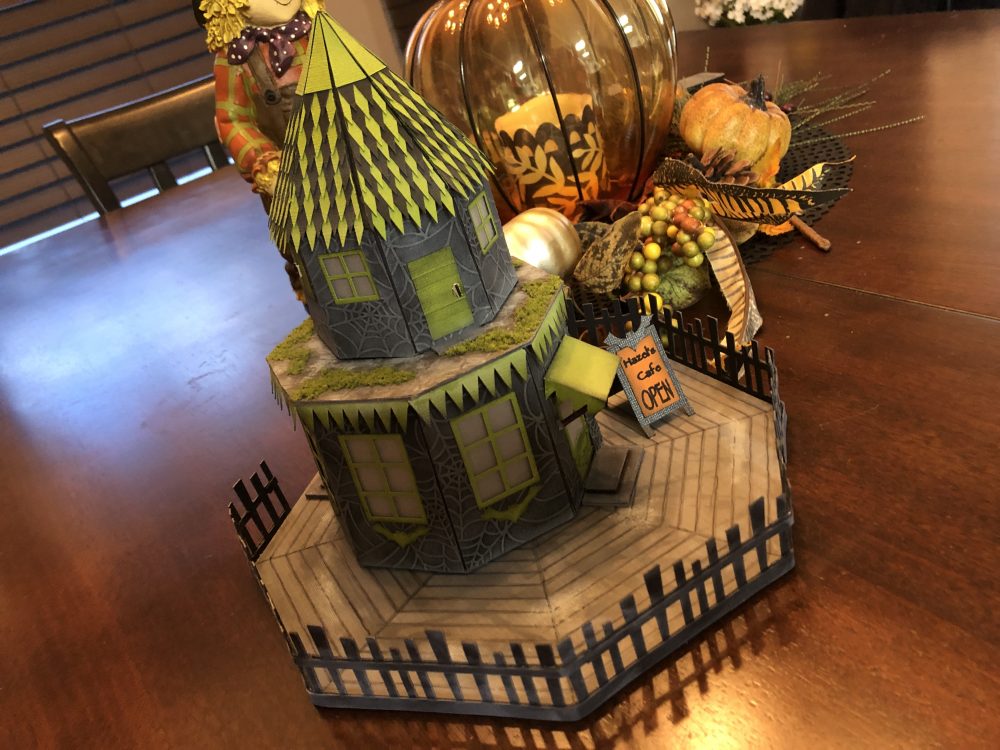
Halloweenie Town #2 by Teri Hanson © 2020
Welcome back to my second, of six, miniature house in the Halloweenie Town series. I’m not sure if this will be the last for this year or not …. will have to wait and see.
These houses can be built out of chipboard, kraft board, cardboard or even sturdy cardstock. Add your own accents to make your town unique. To get you started, here’s a list of materials used to build the house as shown above.
Finished Size . . .
- House – 5 1/2″ by 8″
- Base – 8 1/2″ diameter
Materials . . .
- Cricut Kraft Board in black – basic structure
- AC Cardstock in lime green or whatever accent color you like
- AC Cardstock in white, medium grey or black – depends on how you want to finish the outside walls – read about wall finishes below first.
- Vellum for windows
- Tim Holtz Distress Ink – Black Soot
- Scotch Quick Dry Tacky Glue
Cutting Guide Key – before cutting please double check the file sizes against the included PDF file!
Please watch the following video before starting construction . . .
Basic Structure Construction
Finishing . . .
Once you have completed the main structure it’s time to start finishing. As you know I didn’t video while finishing the house but I did add stills and explanations in the video above. Below is basically the same information (plus) for those who have not watched the video.
TRIM . . .
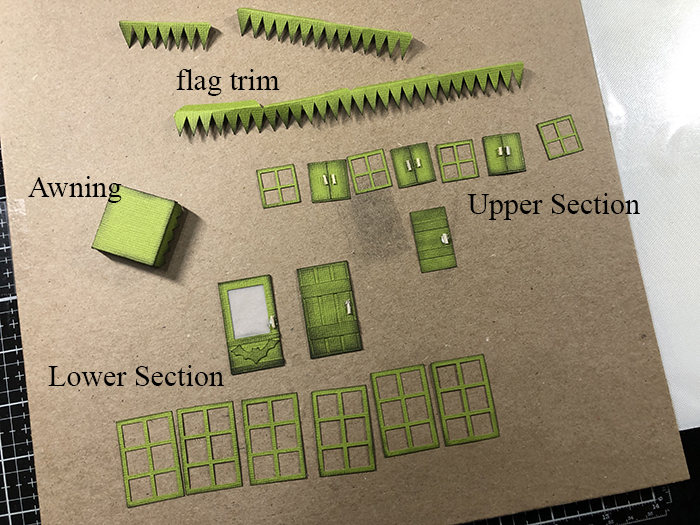
- Use distressing ink on the edges of all windows.
- The lower front door is made of the two main pieces glued with vellum between. Add the bat accent part to the bottom part and then ink all edges.
- The back door has two solid rectangles glued together then the three long strips glued on and last the two small rectangles on top. The upper door only has a single back part with the two small rectangles on top. I’ve used a twig cut into short lengths for door handles. You can see in the finished image at the top of this page that I’ve used a black marker to color the door handles.
- Shutters have a solid back piece with the two small rectangles on top and twig door handles.
- Fold the awning on score lines and ink edges.
- Fold the flag trim and ink the edges.
- Set all aside till after you have the siding on.
SIDING . . .
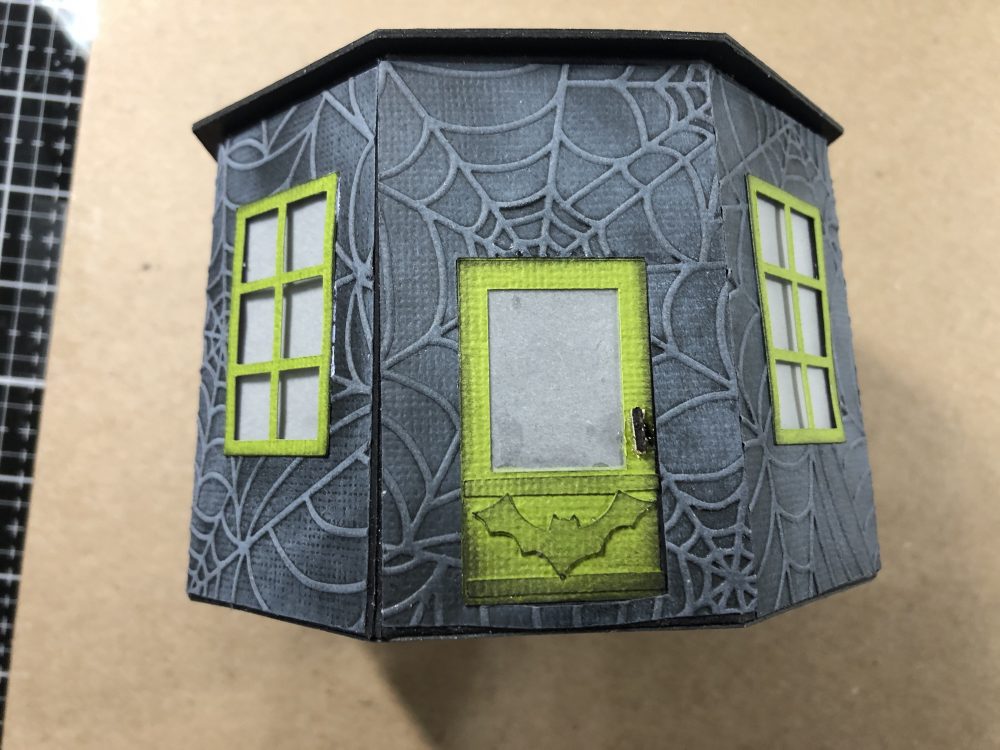
Above you can see that I’ve adding spider web siding to both the lower and upper section walls. I used black cardstock and a spider web embossing folder from Darice. White pigment ink was used on top to accent the web design.
Repeat for the upper building section.
Once you finish adding the siding, glue on your windows and doors.
Lower Section Top . . .

Use a stone embossing folder on grey cardstock for the lower section top piece. Using paint or distressing ink on the paper to get the color of stone you like. Add glue here and there then pour the coarse turf on top. Let the turf sit for a bit then lightly tap it down. After sitting to dry for a few hours use a matte spray sealer on top to secure the turf further.
Now add the flag trim to the underside of the top section and the awning. I’ve used toothpicks to hold the awning in place.

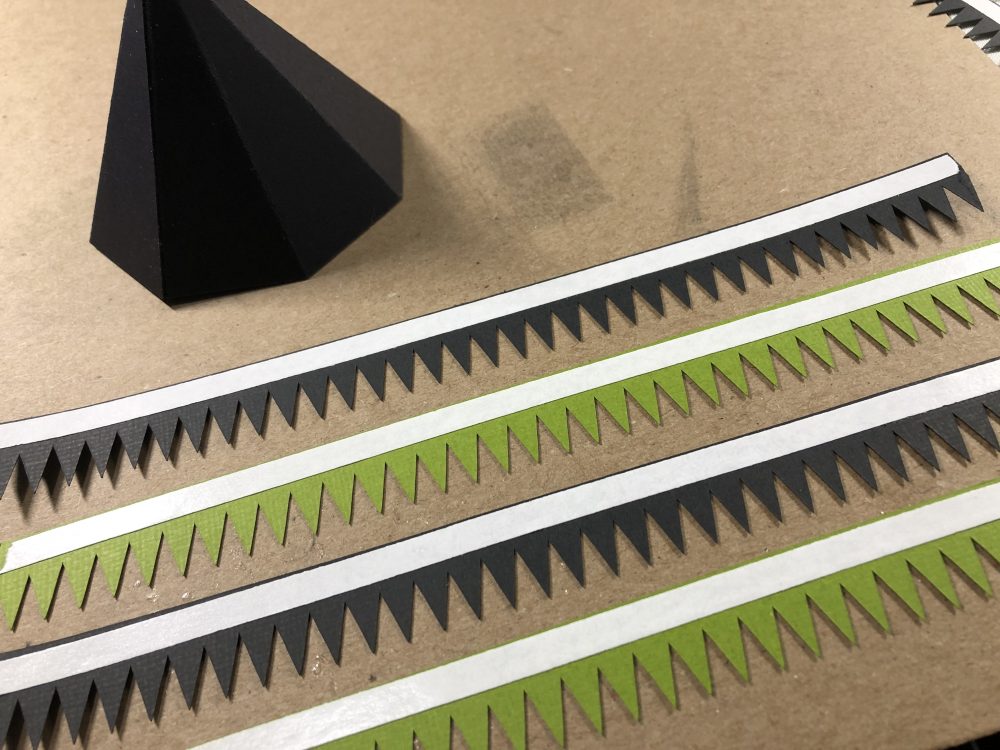
Roof & Shingles . . .
To create the roof you first need to construct the base cone shape. Next locate the group of eight black triangles as the shingles will be added to these shapes.
Apply a strip of scor-tape to the top back of each shingle strip.
Shingles are a combination of two colors: lime green and black, one stacked above the other. Lay the black triangles out in a row and apply a shingle strip across the group of triangles. Add the next strip, and the next, continuing till you are about an inch from the very top. Trim off the excess shingles from the side of each triangle shape.
Glue the completed shingle triangles to the roof cone then top them off with the smaller solid color triangles.

Here’s a look at the finished roof . . .

Main Base & Fence . . .
Now it’s time to create the main base. Using the SVG file, cut the base from a dark grey cardstock. This is the piece you will decorate. The other two main base files are to create the firm base. I’ve used black chipboard but you could use cardboard or any other stiffer material.
Cut two chipboard bases and glue them together. Now set this part aside.
Using a scoreboard, score a line on the base cardstock from each point to the point across from it.
Next score a line every 1/4″ from one point line across to the next as seen below.
Repeat this for all quadrants.

You can now paint the entire scored cardstock base or use distressing inks on it (as I did) to get the look of wood boards.
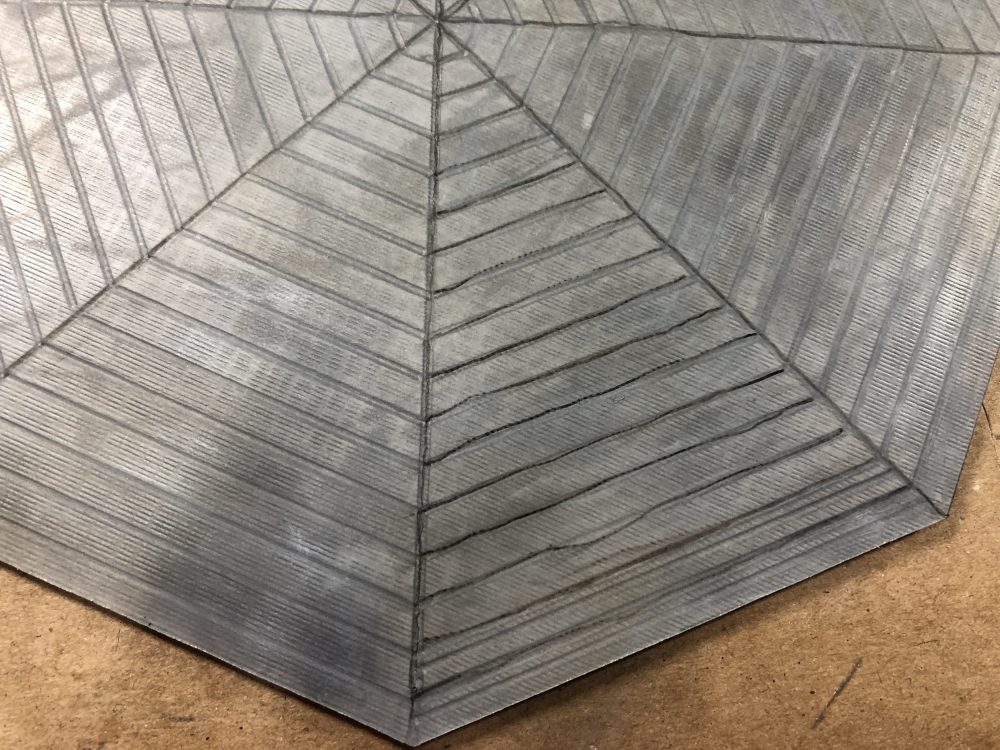
Using a black fine point marker, draw lines in all of the scored areas. Keep a rag handy to smudge these drawn lines. I drew about half of the lines in a section then smudged them then drew the rest and smudged again. Working with each section at a time.
Here’s the end results.

For the fence, you will glue each section of fence to one section of the base at a time. The fence is glued at the bottom onto the side of the base edges. There are extra fence railing that you will need to bed around the corners as you turn to the next section. When you add the next section of fence you will glue these fence ends on top of the previous fence ends.
Work your way around the entire base but be sure to leave an opening in the fence where the front and back doors are on your house. (NOTE: DO NOT glue the house onto the base yet!!!)
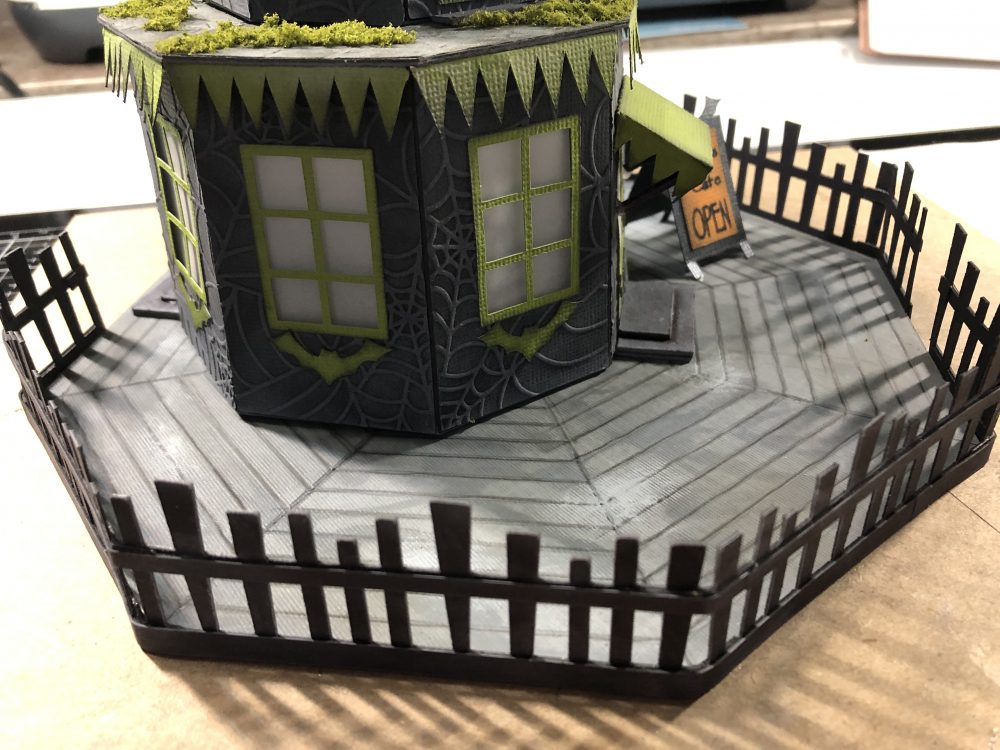
Notice the two steps I’ve added to the front and back door areas. These are black chipboard covered with white pigment ink. Simply pounce the ink on top of the steps once they are put together. Set aside for now.
Attaching the house . . .
Once finished, I found that a single tea light was not enough to light the house upper section. This is why both sections have floors with circular holes cut into them.
I’ve created hinges for both the lower and upper building parts so that they don’t just slide off the base but can be lifted up in order to add the tea lights.
Hinges are simply rectangles cut in black cardstock, folded in half then glued to both the structure and the base, at the backside of the house.
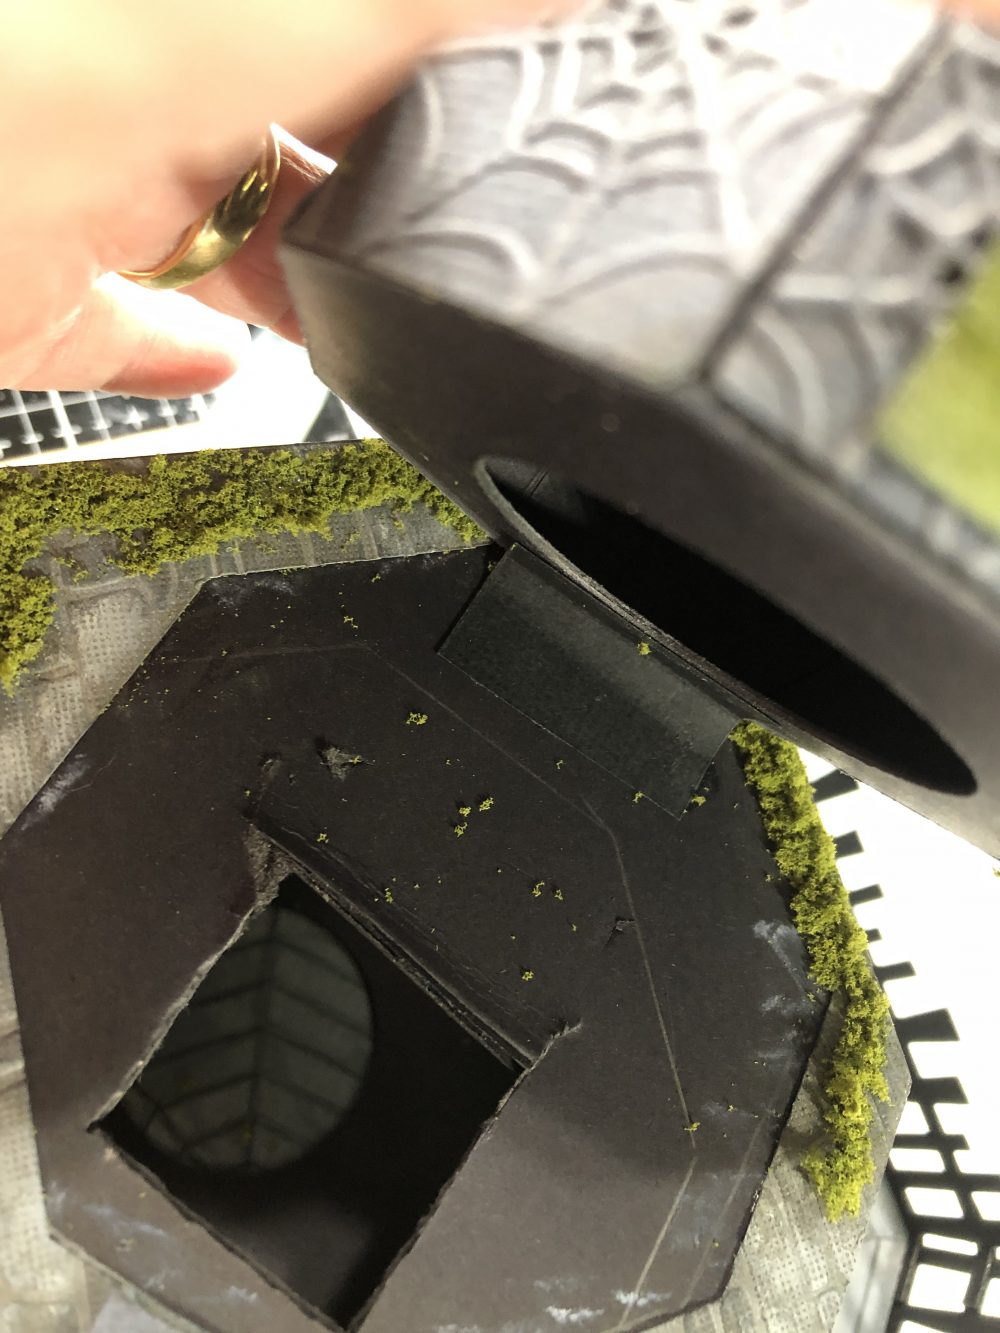
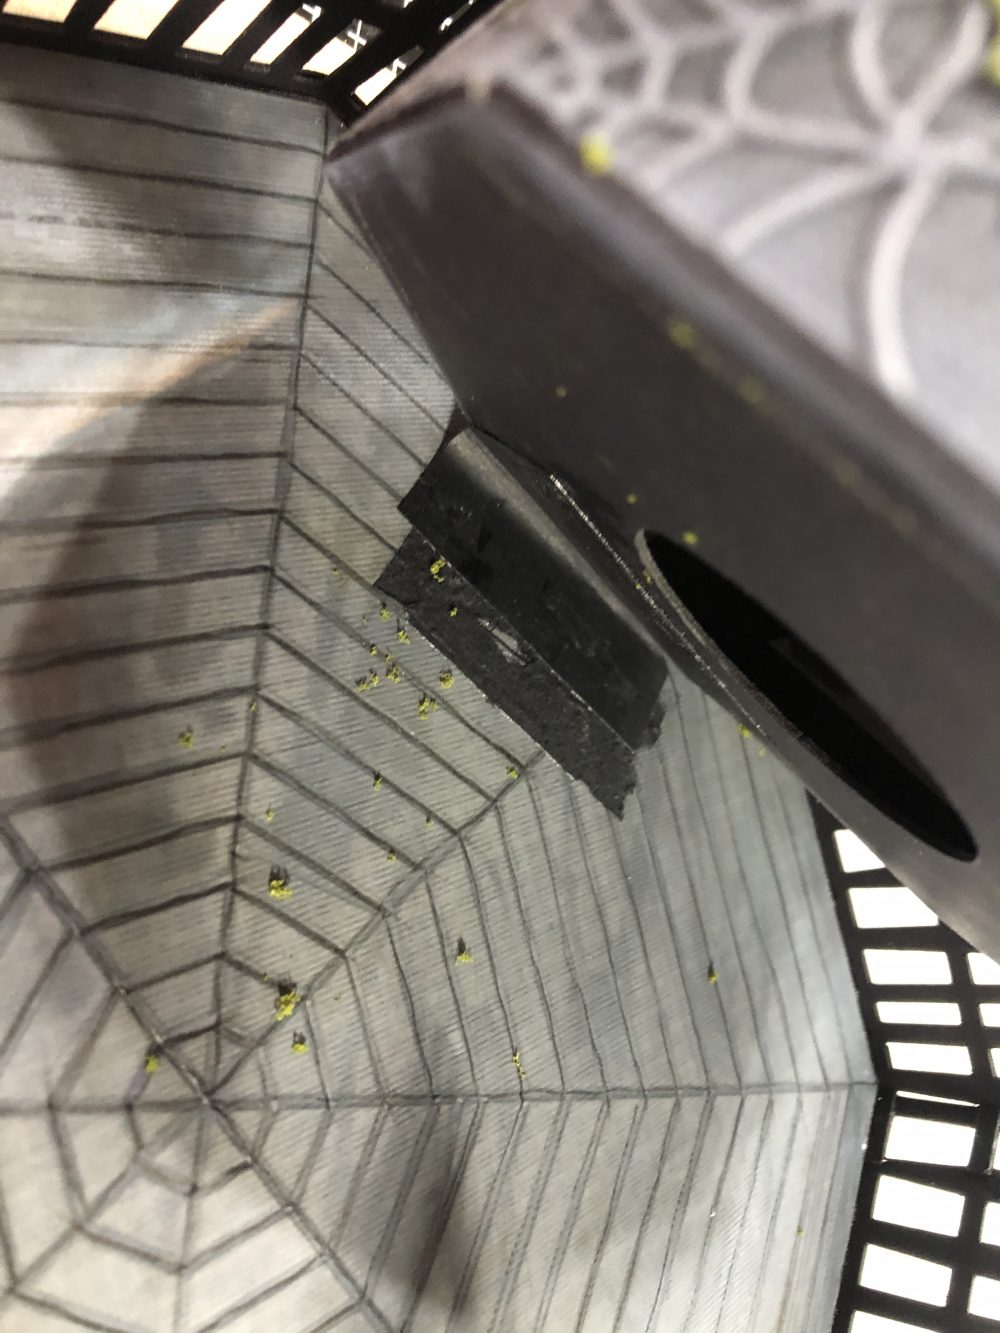
You can see above how I’ve used the hinges.
Now you can add the steps as previously shown to the front and back doors. Glue steps onto the base once your house is in place.
Lastly . . . I’ve added a little sign that you can add text to and place outside your cafe. I do have plans to create some outdoor furniture for this building but that’s for another day.

I hope you enjoyed this project and that you will check the blog for the next house in the series. I’m not sure when it will be released but I’ll be sure and post on the group when I’m close!
Happy Haunting . . .


Leave a Reply
You must be logged in to post a comment.